购物车项目实现过程
一、需求分析
前台
商品展示: 所有商品、今日团购、明日预告、热销推荐、最新上架、今日促销
展示分类: 大分类 小分类
母婴资讯: 展示母婴相关的信息
关于我们: 商城介绍
会员管理: 会员注册、会员登录、会员修改个人资料
购物车: 添加到购物车、查看购物车、清空购物车、填写订单信息、结账
订单 : 查询订单
后台: 会员管理 (注册、登录)
商品分类管理 (crud)
商品信息管理
销量排行
订单管理
新闻资讯游客(未登录): 注册、登陆、商品查看
商城注册用户 : 登录、商品查看、添加商品到购物车、购物车管理、生成订单、订单管理、在线支付
管理员 : 添加商品、商品管理、查看订单
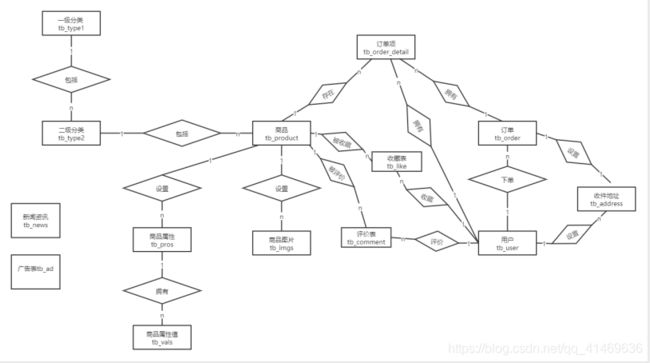
二、建表建库
-- 创建数据库
create database j2005_shop;
 -- 切换数据库
use j2005_shop;
-- 创建表
-- 1.用户表
create table tb_user(
    userId int primary key auto_increment, -- ID
    userPhone char(11) unique not null, -- 手机号
    userPwd varchar(20) not null,-- 密码
    userName varchar(20) not null, -- 昵称
    userSex varchar(2) default '男',-- 性别
    userBirthday varchar(20) not null ,-- 生日
    userImg text default '一个默认头像',-- 头像
    userGrade int default 0 , -- VIP等级
    userIntegral int default 0 ,-- 用户积分
    userFlag int default 0 -- 权限 1 管理员 0 用户
)engine=innodb default charset=utf8;
-- 2.一级分类
create table tb_type1(
    id int primary key auto_increment, -- 一级分类id
    name varchar(50) unique not null -- 一级分类名称
)engine=innodb default charset=utf8;
-- 3.二级分类
create table tb_type2(
    id int primary key auto_increment, -- 二级分类id
    name varchar(50) unique not null, -- 二级分类名称
    type1_id int -- 外键字段 所属一级分类
)engine=innodb default charset=utf8; -- 设置外键关联
alter table tb_type2 add constraint fk_type2_type1 foreign key(type1_id) references tb_type1(id);
-- 4.商品信息
create table tb_product(
    id int primary key auto_increment, -- ID
    name varchar(200) not null, -- 名称
    subTitle text, -- 商品小标题
    refPrice double, -- 参考价格
    actPrice double, -- 活动价格
    stock int,-- 库存
    salesNum int,-- 销量
    intime varchar(50),-- 录入时间
    collectionNum int,-- 收藏量
    introduce text ,-- 详细介绍
    isNew int default 0 , -- 是否新品 1是 0不是 ,默认0
    isSale int default 0, -- 是否特价 1是 0 不是 默认为0
    discount int default 0, -- 是否位打折 1是 0 不是 默认为0
    todayGroup int default 0, -- 是否为今日团购 1 是 0 不是 ,默认0
    tomorrowNotice int default 0, -- 是否为明日预告 1是 0 不是 ,默认 0
    seckill int default 0 -- 秒杀 1 是 0 不是 默认0
    type2_id int, -- 外键字段(所属分类)
);
-- 设置外键关联
alter table tb_product add constraint fk_product_type2 foreign key(type2_id) references tb_type2(id);
-- 5.商品图片表
create table tb_imgs( imgId int primary key auto_increment, -- ID imgUrl text, -- 图片地址 imgType varchar(20), -- 商品图片 商品详情图片 product_id int -- 外键 商品ID );-- 设置外键关联 alter table tb_imgs add constraint fk_imgs_product foreign key(product_id) references tb_product(id);
三、功能实现
先准备一个login界面
1.界面使用layui表单提交数据(data.field)到adminService的login.do中
2.login.do中先使用假数据(暂时没有经过数据库获取数据)
3.将假数据封装到resultModel的Data属性中,并返回到前端调用回调函数
4.前端接受到数据后,跳转到后台主界面(index.html)
登录界面:
母婴后台管理
后台主界面:
母婴后台管理
1.一级分类
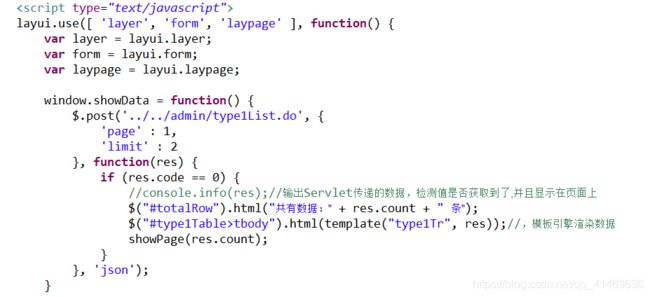
分页:
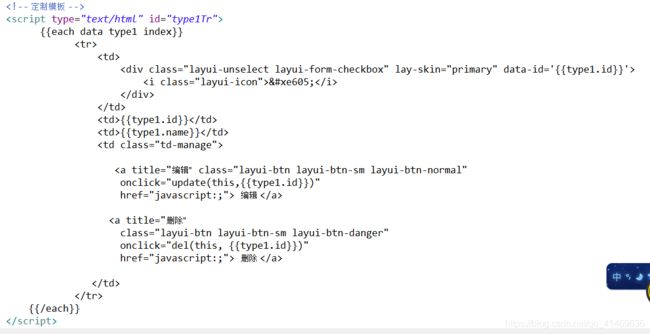
使用模板渲染数据:
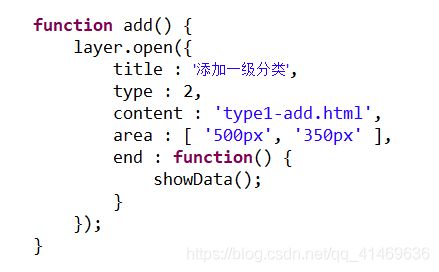
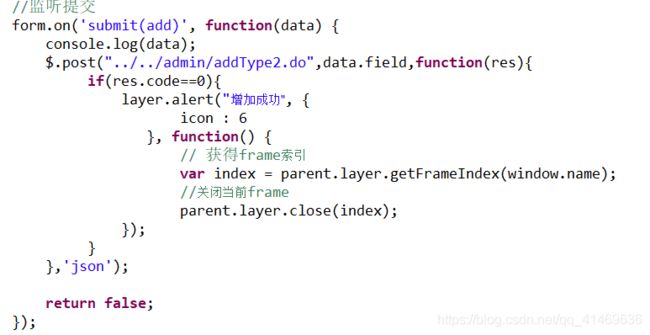
添加数据:
使用layui弹框
删除数据:
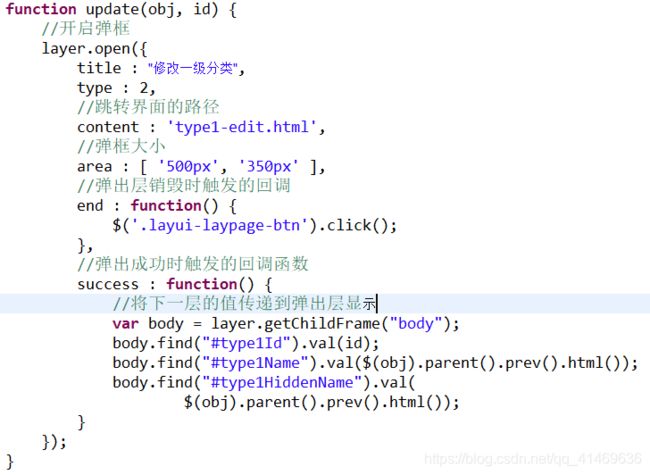
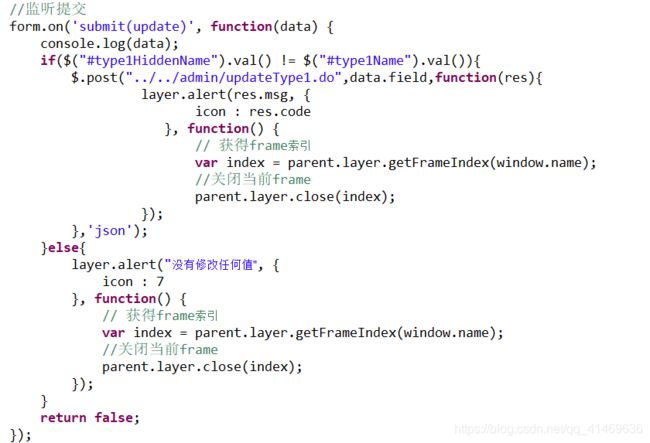
修改数据:
批量删除:
2.二级分类
使用layui数据表格渲染数据:
//显示二级分类的表格
			table.render({
				elem : '#type2Table',
				height : 350,
				url : '../../admin/type2List.do',//数据接口
				toolbar: 'default' , //开启工具栏,此处显示默认图标,可以自定义模板,详见文档
				page : {
					layout : [ 'prev', 'page', 'next', 'skip', 'count' ], //自定义分页布局
					curr : 1, //设定初始在第 1 页
					groups : 3,//只显示 3 个连续页码
					first : '首页',
					last : '尾页',
					prev : '<',
					next : '>'
				},
				limit : 2,
				cols : [ [ //表头
				{type: 'checkbox',field : 'id', fixed: 'left'},
				{
					field : 'id',
					title : 'ID',
					width : 60,
					sort : true
				}, {
					field : 'name',
					title : '名称',
					align : 'center'
				}, {
					field : 'name',
					title : '所属分类',
					align : 'center',
					templet : function(type2) {
						return type2.type1 ? type2.type1.name : '';
					}
				}, {
					field : 'operator',
					title : '操作',
					width : 180,
					fixed : 'right',
					align : 'center',
					toolbar : '#barDemo'
				} ] ]
			});
添加数据:
例如当填写“湖北”时,需要刷新“湖北”下所有省市内容,因此渲染下拉菜单,实现即时更新
删除数据:
//监听行工具事件
			table.on('tool(type2Filter)', function(obj) { //注:tool 是工具条事件名,test 是 table 原始容器的属性 lay-filter="对应的值"
				var data = obj.data //获得当前行数据
				, layEvent = obj.event; //获得 lay-event 对应的值
				 if (layEvent === 'del') {
					layer.confirm('真的删除行么', function(index) {
						//发异步删除数据
						$.post('../../admin/deleteType2.do', {
							"id" : data.id
						}, function(res) {
				            layer.msg(res.msg,{icon:res.code,time:1000});
				            if(res.code==6){
				            	obj.del(); //删除对应行(tr)的DOM结构
								layer.close(index);
								table.reload("type2Table", { //方法渲染表格里的属性 ID
									//渲染刷新完成时调用的函数
									//res为数据内容
									//curr为当前页码
									//count为数据总量
									done : function(res, curr, count) {
										if (curr > 1 && res.data.length === 0) {
											curr = curr - 1;
											table.reload('type2Table', {
												page : {
													curr : curr
												}
											}, 'data');
										}
									}
								});
				            }
						}, 'json');
					});
				}
修改数据:
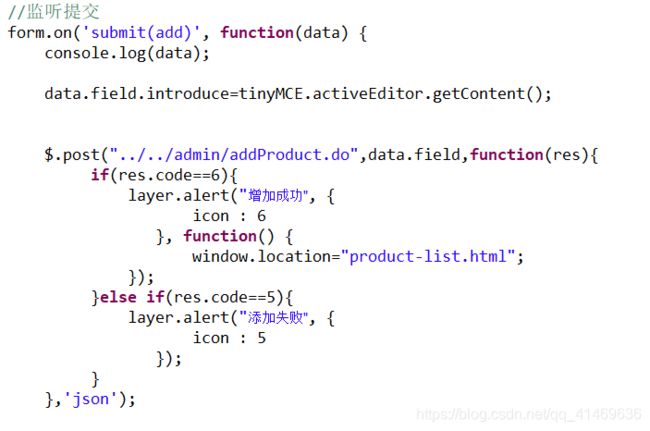
3.商品添加
添加商品信息并将图片信息上传到七牛云:
前端控制跳转的路径
//------处理文件上传 开始-------
var imgArr = [];//存储图片内容
upload.render({//开启文件上传
elem: '#uploadProductImg',//绑定按钮
url: '../../UploadServlet/uploadProductImg.do', //文件提交地址
multiple: true,//是否允许多文件上传
before: function(obj) {//文件上传前的回调
//预读本地文件,如果是多文件,则会遍历
obj.preview(function(index, file, result) {
console.log(index); //得到文件索引
console.log(file); //得到文件对象
console.log(result); //得到文件base64编码,比如图片
//' '
var productImg = $('
 ');
//单击图片时实现删除
productImg.click(function() {
//获取单击的图片的索引
var imgIndex = $("#showProductImgArea img").index(this);
this.remove(); //img自己把自己删除
imgArr.splice(imgIndex, 1); //从数组中,删除刚刚删除的图片的地址
imgArr.sort(); //数组排序
$("#productImgs").val(imgArr); //重新把数组中的值添加到输入框(隐藏框)中
});
$('#showProductImgArea').append(productImg);
});
},
done: function(res) {
//上传完毕
if (res.code == 0) {
console.info(res);
imgArr.push(res.location); //把上传成功的图片路径存入到数组中
console.info(imgArr); //输出数组中的中
$("#productImgs").val(imgArr); //把数组的值显示在输入框中
}
},
error: function() {
layer.msg('文件上传失败!');
}
});
//------处理文件上传 结束------
');
//单击图片时实现删除
productImg.click(function() {
//获取单击的图片的索引
var imgIndex = $("#showProductImgArea img").index(this);
this.remove(); //img自己把自己删除
imgArr.splice(imgIndex, 1); //从数组中,删除刚刚删除的图片的地址
imgArr.sort(); //数组排序
$("#productImgs").val(imgArr); //重新把数组中的值添加到输入框(隐藏框)中
});
$('#showProductImgArea').append(productImg);
});
},
done: function(res) {
//上传完毕
if (res.code == 0) {
console.info(res);
imgArr.push(res.location); //把上传成功的图片路径存入到数组中
console.info(imgArr); //输出数组中的中
$("#productImgs").val(imgArr); //把数组的值显示在输入框中
}
},
error: function() {
layer.msg('文件上传失败!');
}
});
//------处理文件上传 结束------UploadServlet/uploadProductImg.do内容
package com.controller;

import com.util.JsonTool;
import com.util.QiniuTool;
import com.util.ResultModel;

import javax.servlet.ServletException;
import javax.servlet.annotation.MultipartConfig;
import javax.servlet.annotation.WebServlet;
import javax.servlet.http.HttpServletRequest;
import javax.servlet.http.HttpServletResponse;
import javax.servlet.http.Part;
import java.io.File;
import java.io.IOException;
import java.util.*;

@WebServlet("/UploadServlet/*")
@MultipartConfig // 重要,非常重要(才能上传附件)
public class UploadServlet extends BaseServlet {
	private static final long serialVersionUID = 1L;
	// 用来上传商品图片
	// UploadServlet/uploadProductImg.do
	protected void uploadProductImg(HttpServletRequest request, HttpServletResponse response)
			throws ServletException, IOException {
		String basePath = "D:\\code\\upload_temp"; //本地图片存储路径
		Collection parts = request.getParts(); //获取前端的部件
		File parentDir = new File(basePath); //获取文件对象
		if (!parentDir.exists()) {parentDir.mkdirs();}//如果文件对象不存在就创建它
		if (Objects.nonNull(parts)) {//如果前端的部件不为空
			for (Part part : parts) {//遍历所有部件
				if (part.getSize() > 0) {
					String fname = part.getSubmittedFileName();//获取完整路径名
					if (Objects.nonNull(fname)) {//路径名不为空时
						String uuid = UUID.randomUUID().toString();//创建一个唯一的字符串
						String suffix = fname.substring(fname.lastIndexOf("."));//获取文件的后缀名
						fname = uuid + suffix;//拼接新的唯一的图片名
						part.write(parentDir.getAbsolutePath() + File.separator + fname);//将图片部件写入文件
						String returnPath = QiniuTool.upload(parentDir.getAbsolutePath() + File.separator + fname);//上传到七牛云
						ResultModel resultModel = new ResultModel();
						if (returnPath != null) {
							resultModel.setCode(0);
							resultModel.setLocation(returnPath);//获取上传到七牛云上图片的路径
							File distFile = new File(parentDir.getAbsolutePath() + File.separator + fname);
							distFile.delete();//删除本地文件
						} else {
							resultModel.setCode(1);//设置成功与否的状态
						}
						JsonTool.sendJsonStr(response, JsonTool.objectToJson(resultModel));//返回数据给ajax回调函数
					}
				}
			}
		}
	}
}
QiniuTool工具类中的内容
package com.util;

import com.google.gson.Gson;
import com.qiniu.common.QiniuException;
import com.qiniu.common.Zone;
import com.qiniu.http.Response;
import com.qiniu.storage.Configuration;
import com.qiniu.storage.Region;
import com.qiniu.storage.UploadManager;
import com.qiniu.storage.model.DefaultPutRet;
import com.qiniu.util.Auth;
public class QiniuTool {
	/**
	 * 上传到七牛云服务器上的图片的绝对路径
	 *
	 * @param localFilePath
	 */
	public static String upload(String localFilePath) {
		String returnPath = null;
		// 构造一个带指定 Region 对象的配置类
		@SuppressWarnings("deprecation")
		Configuration cfg = new Configuration(Zone.zone2()); // 需要改你的存储空间的位置
		// ...其他参数参考类注释
		UploadManager uploadManager = new UploadManager(cfg);
		// ...生成上传凭证,然后准备上传
		String accessKey = "vtPis4Kl0*****************************Zp"; // 写你自己的key
		String secretKey = "9DH62QUEb****************************kg-";// 写你自己的密码
		String bucket = "j2005-baby"; // 你的项目的空间名称
		// 默认不指定key的情况下,以文件内容的hash值作为文件名
		String key = null;
		Auth auth = Auth.create(accessKey, secretKey);
		String upToken = auth.uploadToken(bucket);
		try {
			Response response = uploadManager.put(localFilePath, key, upToken);
			// 解析上传成功的结果
			DefaultPutRet putRet = new Gson().fromJson(response.bodyString(), DefaultPutRet.class);
			System.out.println(putRet.key);
			System.out.println(putRet.hash);
			returnPath = "http://qh3r17ufb.hn-bkt.clouddn.com/" + putRet.key;//拼接图片访问路径
		} catch (QiniuException ex) {
			Response r = ex.response;
			System.err.println(r.toString());
			try {
				System.err.println(r.bodyString());
			} catch (QiniuException ex2) {
				// ignore
			}
		}
		return returnPath;//返回可以直接访问的拼接后的路径
	}

	public static void main(String[] args) {
		upload("D:\\code\\upload_temp\\1.jpg");
		// 图片地址
		// qh3r17ufb.hn-bkt.clouddn.com
		// http://qh3r17ufb.hn-bkt.clouddn.com/Fuc0H4xvuW8fH3tRmm2wJpM3CsWb
		// http://qh3r17ufb.hn-bkt.clouddn.com/FnpnZPAItWgGIw4_Gpj6mtbckXOb
	}

}
4.商品显示
获取分类信息并渲染出来:
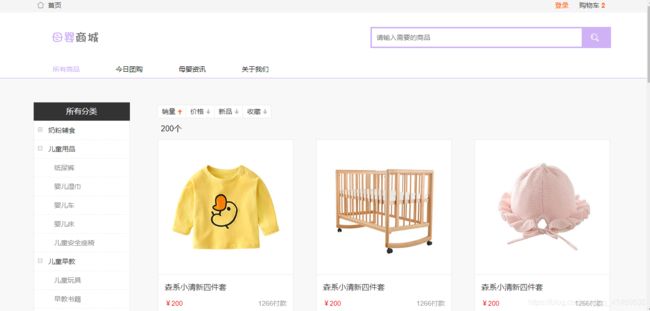
效果图
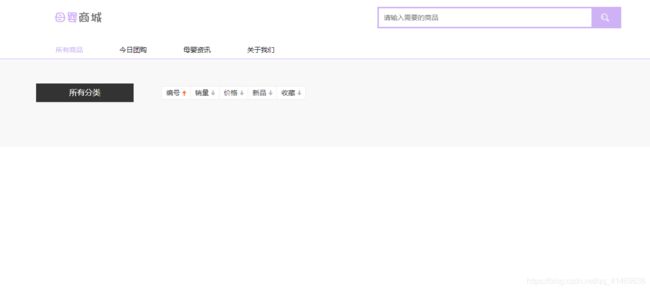
使用数据库中的数据时的前端原界面
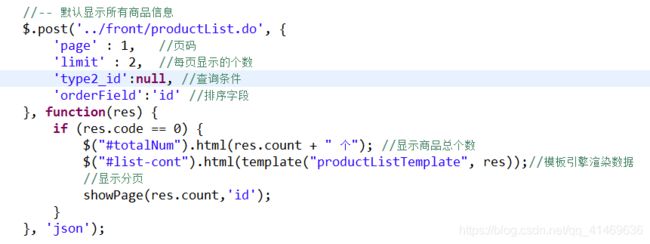
前端渲染模板(左端的下拉列表[一级分类和二级分类]
//-- 显示左边菜单
				$.post('../front/typeList.do', function(res) {
					$('#typeListBox').html(template("typeListTemplate", res));
					//为菜单的dt添加单击事件,点击 dt 显示和隐藏dd
					$('.list-box dt').on('click', function() {
						if ($(this).attr('off')) {
							$(this).removeClass('active').siblings('dd').show()
							$(this).attr('off', '')
						} else {
							$(this).addClass('active').siblings('dd').hide()
							$(this).attr('off', true)
						}
					});
					//为菜单的dd添加单击事件
					$('.list-box dd').on('click', function() {
						  //把你点击的dd的id值赋值给隐藏域
						  $('#type2_id').val(this.id);
						 //根据type2_id查询出这个分类下的所有商品信息
						  $.post('../front/productList.do', {
								'page' : 1,   //页码
								'limit' : 2,  //每页显示的个数
								'type2_id':this.id, //查询条件
								'orderField':'id' //排序字段
							}, function(res) {
								if (res.code == 0) {
									$("#totalNum").html(res.count + " 个"); //显示商品总个数
									$("#list-cont").html(template("productListTemplate", res));//模板引擎渲染数据
									//显示分页
									showPage(res.count,'id');
								}
						  }, 'json');
					});

				}, 'json');
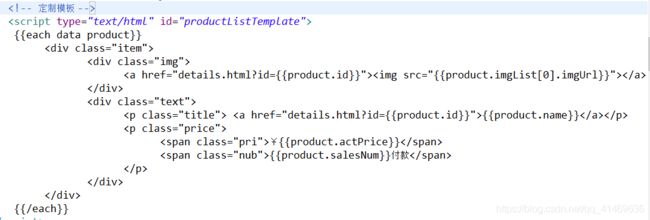
显示商品信息的模板
将商品数据渲染到前端界面:
				//-- 显示左边菜单
				$.post('../front/typeList.do', function(res) {
					//将分类信息渲染到左边的分类列表中
					$('#typeListBox').html(template("typeListTemplate", res));
					//为菜单的dt添加单击事件,点击 dt 显示和隐藏dd
					$('.list-box dt').on('click', function() {
						//如果dt的状态是off(隐藏状态)
						if ($(this).attr('off')) {
							//移除dt中的class="active",并显示所有的dd内容
							$(this).removeClass('active').siblings('dd').show();
							//同为$(this).removeClass('active');$(this).siblings('dd').show();
							//将off属性改成空值
							$(this).attr('off', '');
						} else {
							//如果状态栏的状态为展开
							//给dt添加class="active",并隐藏所有的同胞元素
							$(this).addClass('active').siblings('dd').hide();
							//同为$(this).addClass('active');
							//$(this).siblings('dd').hide();
							//将off属性设置为true
							$(this).attr('off', true);
						}
					});
					//为菜单的dd添加单击事件
					$('.list-box dd').on('click', function() {
						  //把你点击的dd的id值赋值给隐藏域
						  $('#type2_id').val(this.id);
						 //根据type2_id查询出这个分类下的所有商品信息
						  $.post('../front/productList.do', {
								'page' : 1,   //页码
								'limit' : 2,  //每页显示的个数
								'type2_id':this.id, //查询条件
								'orderField':'id' //排序字段
							}, function(res) {
								if (res.code == 0) {
									$("#totalNum").html(res.count + " 个"); //显示商品总个数
									$("#list-cont").html(template("productListTemplate", res));//模板引擎渲染数据
									//显示分页
									showPage(res.count,'id');
								}
						  }, 'json');
					});

				}, 'json');
单击显示的图片时,跳转到商品详情界面(details.html),并将内容填充到模板上
5.购物车添加
使用radis:依赖-->redis文件-->封装配置文件(JedisPoolUtils)
添加依赖
			redis.clients
			jedis
			3.2.0
redis文件(redis.properties)
redis.maxIdle=30
redis.minIdle=10
redis.maxTotal=100
redis.url=127.0.0.1
redis.port=6379
配置文件
package com.util;

import java.io.IOException;
import java.io.InputStream;
import java.util.Properties;

import redis.clients.jedis.Jedis;
import redis.clients.jedis.JedisPool;
import redis.clients.jedis.JedisPoolConfig;

public class JedisPoolUtils {

	private static JedisPool pool = null;

	static{
		//加载配置文件
		InputStream in = JedisPoolUtils.class.getClassLoader().getResourceAsStream("redis.properties");
		//空的属性列表
		Properties pro = new Properties();
		try {
			pro.load(in);
		} catch (IOException e) {
			e.printStackTrace();
		}

		//java连接redis
		//获得连接池子对象
		//获得连接池配置对象,设置配置项
		JedisPoolConfig poolConfig = new JedisPoolConfig();
		poolConfig.setMaxIdle(Integer.parseInt(pro.get("redis.maxIdle").toString()));//最大闲置个数
		poolConfig.setMinIdle(Integer.parseInt(pro.get("redis.minIdle").toString()));//最小闲置个数
		poolConfig.setMaxTotal(Integer.parseInt(pro.get("redis.maxTotal").toString()));//最大连接数
		pool = new JedisPool(poolConfig,pro.getProperty("redis.url") , Integer.parseInt(pro.get("redis.port").toString()));
	}

	//获得jedis资源的方法
	public static Jedis getJedis(){
		return pool.getResource();
	}
}
将购物车信息添加到redis中的工具类
package com.util;


import java.util.Set;
import java.util.TreeMap;

import com.pojo.Product;

import java.util.Comparator;
import java.util.Map;
import java.util.Map.Entry;


import redis.clients.jedis.Jedis;

/**
 * 购物功能,依赖的类
 * @author qiufen
 *
 */
public class ProductRedisOpration {

	/**
	 * 将用户的购物车信息存储在redis中
	 * @param userId key用户ID
	 * @param map    value购物车中的商品信息
	 */
	public static void saveProductToRedis(String userId, Map map) {
		Jedis jedis = JedisPoolUtils.getJedis(); //从连接池资源中获取redis连接
		// 1.删除原来的内容
		jedis.del("user" + userId); //根据key删除旧值

		// 2.存值
		Set> entrySet = map.entrySet();// key - value 键值对

		// key 商品信息    value 购买数量
		for (Entry entry : entrySet) {
			//参数1:key   参数2:Product键  参数3:数量 值
			jedis.hset("user" + userId, JsonTool.objectToJson(entry.getKey()), String.valueOf(entry.getValue()));
		}
	}

	/**
	 * 从redis获取购物车中的信息
	 * @param userId
	 * @return
	 */
	public static Map getProductFromRedis(String userId) {
		Map productMap = new TreeMap<>(new Comparator() {
			@Override
			public int compare(Product o1, Product o2) {
				return o1.hashCode()-o2.hashCode();
			}
		}); //为啥使用TreeMap,因为treeMap有自动排序功能

		Jedis jedis = JedisPoolUtils.getJedis();
		// 1.根据key获取值
		Map tempMap = jedis.hgetAll("user" + userId);
		if (tempMap != null && tempMap.size() > 0) {
			for (Entry entry : tempMap.entrySet()) {
				Product product = JsonTool.jsonToPojo(entry.getKey(), Product.class);
				Integer num = Integer.parseInt(entry.getValue());
				productMap.put(product, num);
			}
		}
		return productMap;
	}

}
将radis数据提取出来,渲染到购物车界面:
首页显示-->图片详情(details.html)-->单击添加购物车事件
// 将商品添加到购物车
	// front/addCart.do
	protected void addCart(HttpServletRequest request, HttpServletResponse response)
			throws ServletException, IOException {
		ResultModel resultModel = new ResultModel();
		System.out.println("添加商品到购物车");
		// 步骤1:判断当前用户是否登录
		HttpSession session = request.getSession();
		User loginUser = (User) session.getAttribute("loginUser");
		System.out.println("当前登录的账户:" + loginUser);
		if (loginUser == null) {
			// 说明还没有登录,则直接跳转到登录页面
			resultModel.setCode(1);
			resultModel.setMsg("请先登录!");
		} else {
			// 步骤2:说明登录,则获取传递的参数值
			String id = request.getParameter("id");
			String buyNum = request.getParameter("buyNum");
			// 步骤3:获取这个用户以前的购物车
			//map中存的是商品信息和数量,redis中使用的键值对(用户id:Map)
			Map map = ProductRedisOpration.getProductFromRedis(String.valueOf(loginUser.getUserId()));
			if (map == null) {
				// 若这个用户没有购物车信息,则创建一个空集合对象,并按照商品对象的hashcode排序
				map = new TreeMap<>(new Comparator() {
					@Override
					public int compare(Product o1, Product o2) {
						return o1.hashCode() - o2.hashCode();
					}
				});
			}
			// 步骤4:把用户想要添加到购物车的商品,存入map集合
			//根据id查信息,并获取到product中
			Product product = (Product) frontService.productDetail(id).getData();
			int newBuyNum = 0;
			if (map.containsKey(product)) {// 购物车中有这个商品信息,则只需要修改购买数量
				newBuyNum = map.get(product) + Integer.parseInt(buyNum);
			} else {
				newBuyNum = Integer.parseInt(buyNum);
			}
			//避免购买的东西数量大于库存量
			if (newBuyNum > product.getStock()) {
				newBuyNum = product.getStock();
			}
			map.put(product, newBuyNum);
			// 步骤5:重新存储到redis中
			ProductRedisOpration.saveProductToRedis(String.valueOf(loginUser.getUserId()), map);
			resultModel.setCode(0);
			resultModel.setMsg("成功添加到购物车!");

		}
		JsonTool.sendJsonStr(response, resultModel);
	}
效果图
前端购物车模板
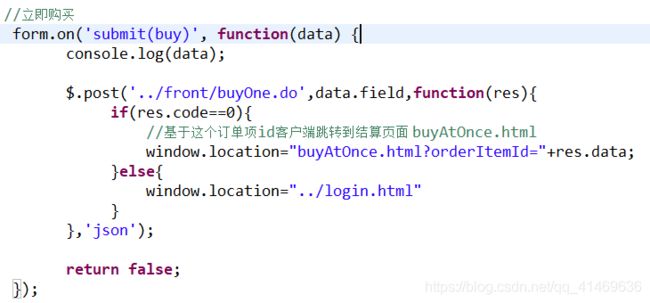
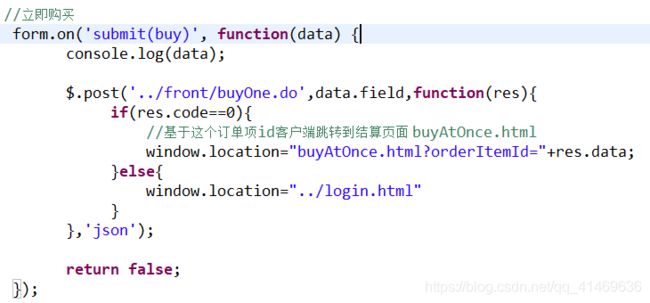
6.立即下单
绑定单击事件
创建地址模板
渲染数据
7.生成订单
