C++课程学习记录
目录
-
- 1. 前置说明
- 2. 二叉树的模拟
-
- 2.1 参考资料
- 2.2 二叉树的构建
-
- 2.2.1 递归构建
- 2.2.2 迭代构建
- 2.3 二叉树的遍历
- 2.4 二叉树的应用
- 3. 继承与派生
-
- 3.1 最简单的生死
- 3.2 动态申请空间的生死
- 3.3 继承中的protectd权限
- 3.4 三种继承方式
- 3.5 修改某些继承成员的继承类型
- 3.6 多级派生
- 3.7 多重继承
-
- 3.7.1 变量域覆盖
- 3.7.2 使用域作用运算符分辨成员
- 3.8 虚基类
- 3.9 基类和派生类的转换
- 4. 多态性与虚函数
-
- 4.1 前言
- 4.2 虚函数
- 4.3 纯虚函数
- 4.4 抽象类
1. 前置说明
这篇博客是用来记录期中考试过后我对C++的课上复现以及课后练习的过程
- 知识点请食用目录进行参考
- 未涉及的知识点请食用我在之前写过の一篇期中机考总结
传送门:C++期中机考试题
2. 二叉树的模拟
2.1 参考资料
- 先贴上这一篇对我影响颇深的博客,没有他我怎么都想不明白二叉树的三种遍历方式
数据结构——二叉树先序、中序、后序及层次四种遍历(C语言版) - 由于二叉树的构建其中一种涉及到了递归建树,我再贴一篇博客,以此记录这篇博客对我递归理解的启发与深远影响
100天精通Python(基础篇)——第10天:函数进阶 - 最后再贴一篇,除了课上听的与结合chat问出来的,这篇博客写的也很详细,尤其是代码部分比较符合我的习惯,也算帮了大忙。并且,由于以下我只涉及到了二叉树的构建与遍历,其他的包括删除结点与查询结点并未涉及,大家可以按照需要进行补充
二叉排序树(二叉查找树、二叉搜索树)(图解+完整代码)
2.2 二叉树的构建
2.2.1 递归构建
#include 2.2.2 迭代构建
#include 三种输出结果:
前序遍历:3, 2, 1, 4, 5, 7, 6, 9, 8
中序遍历:1, 2, 3, 4, 5, 6, 7, 8, 9
后序遍历:1, 2, 6, 8, 9, 7, 5, 4, 3
2.3 二叉树的遍历
伪代码:(中序遍历为例)
---------------------
传入结点
if (结点为空) return;

传入结点的左指针;
输出;
传入结点的右指针;
2.4 二叉树的应用
赠送一道算法题
AcWing 3384. 二叉树遍历
AC代码
#include 3. 继承与派生
参考书籍:《C++面向对象程序设计》 ——科学出版社
3.1 最简单的生死
#include 输出:
3
4
2
5
-5
-2
-4
-3
- 列表化初始化的时候感觉和父类这个对象是当前子类的成员变量一样
- 析构顺序为:父生,子生,子死,父死
3.2 动态申请空间的生死
类与上述一致
int main()
{
	A* a = new A(2);
	AA* aa = new AA(3, 4);
	delete a;
	delete aa;
	return 0;
}
- 这没啥好说的想谁生就生,想谁析构就让谁析构
- 父类的使用与平常一致,没有影响
- 有一个好玩的地方就是关于析构函数中
virtual关键字是否使用的问题。如果当前类可继承,并且确实被继承了,那么它的析构函数就一定要加virtual关键字,这样才能确保内存释放干净 - 可以将基类与派生类之间的继承关系理解为一棵多叉树,其中最开始被继承的基类为根节点。假设此时有一个例子为:利用一个
A类的指针创建一个B类的对象A* ptr = new B,那么- 创建过程:
- 从B结点开始递归搜索到A结点
- 从A结点开始依次执行到B结点
- 销毁过程:
- 从
ptr所属对象A的结点开始递归搜索到B结点 - 从B结点开始依次向A结点销毁
- 从
- 创建过程:
3.3 继承中的protectd权限
#include输出:
1 2 3
-1 -2 -3
4 5 6
4 5 6 7
-5 -6 -7
-4 -5 -6
protected的数据成员只可以在这个类的派生类中使用,其他地方都不可以调用- 基类的
private数据成员只可以在这个类中使用,其他地方包括它的派生类都不可以访问
3.4 三种继承方式
- 公有继承
就是没啥区别,这是主要工程上主要使用的继承方式
- 私有继承
可以理解为
- 将基类的公有与保护的成员全部变成私有类型了,类外都不能访问到基类的
public成员了 - 将基类的公有与保护的成员作为自己的私有成员继承下来了,后续的派生类都没有访问的权限
- 将基类的公有与保护的成员全部变成私有类型了,类外都不能访问到基类的
- 保护继承
- 可以理解为将基类的公有的成员全部变成保护类型了,类外同样都不能访问到基类的
public成员了 - 将基类的公有成员作为自己的保护成员继承下来了,后续的派生类任然可以访问将基类的
public成员作为protected成员进行访问
- 可以理解为将基类的公有的成员全部变成保护类型了,类外同样都不能访问到基类的
3.5 修改某些继承成员的继承类型
只是在派生类中对继承下来的成员进行了继承方式的修改,并不影响基类中成员本身的权限属性
举个例子
#include 再举个例子
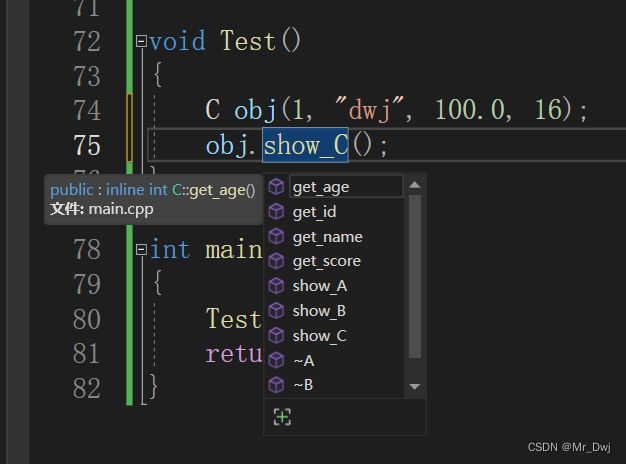
#include 3.6 多级派生
没什么好多说的,上代码!代码看懂了,输出结果看懂了,就OK了
唯一需要强调的一点是,在多级派生时,对于一个派生类对象的初始化,一定要附带着把他所有的“爹”也全部初始化,否则调用默认构造函数初始化他的所有“爹”
#include // 输出结果
基类A被创建
直接派生类B被创建
间接派生类C被创建
id: 1
name: dwj
score: 100
age: 16
间接派生类C被销毁
直接派生类B被销毁
基类A被销毁
由于是公有继承,故在C类创建的对象中,可以调用父类的全部
public以及protected方法,当然自己的什么都可以调用啦~
3.7 多重继承
也就是一个派生类继承了 ≥ 2 \ge2 ≥2个基类
3.7.1 变量域覆盖
当前对象的成员如果与基类的成员重名或者函数重名并且参数列表完全一致,就会被当前的派生类完全覆盖,以下为变量名覆盖
程序
#include 输出结果
A的name: John
B的name: John
C的name: John

Process finished with exit code 0
3.7.2 使用域作用运算符分辨成员
修改后的类C为
class C : public A, public B
{
public:
    C(string _name_A, string _name_B)
    : A(_name_A), B(_name_B) {}
    void show()
    {
        cout  << "A的name: " << name << endl;
        cout  << "B的name: " << name << endl;
    }
};
运行后错误提示为
error: reference to 'name' is ambiguous
修改类C为
class C : public A, public B
{
public:
    C(string _name_A, string _name_B)
    : A(_name_A), B(_name_B) {}
    void show()
    {
        cout  << "A的name: " << A::name << endl;
        cout  << "B的name: " << B::name << endl;
    }
};
运行结果
A的name: Tom
B的name: Jerry

Process finished with exit code 0
3.8 虚基类
无论虚基类出现在继承层次的哪个位置上,他们都是在非虚基类之前被构造。有虚基类的派生类的构造函数的调用次序是:编译器按照直接基类的声明次序,检查虚基类的出现情况,每个继承子树按照深度优先的顺序检查并调用虚基类的构造函数。虚基类多次出现只调用一次构造函数。虚基类的构造函数调用完之后,再按照声明的顺序调用非虚基类的构造函数(真的是又臭又长)
总结一下就是两点:
- 按照声明顺序,深度优先搜索虚基类,后序构造
- 按照声明顺序,深度优先搜索非虚基类,后序构造
举三个例子就知道了(图中虚继承用虚线表示)
例一:
class A { };
class B : public virtual A { };
class C : public virtual A { };
class D : public B, public C { };

那么
D对象创建时,构造函数的调用顺序是:A, B, C, D
例二:
class A { };
class B { };
class C : public B, public virtual A { };
class D : public virtual A { };
class E : public C, public virtual D { };

那么
E对象创建时,构造函数的调用顺序是:A, D, B, C, E
例三:
class A {};
class B : public A {};
class C {};
class D {};
class E : public virtual D {};
class F : public B, public E, public virtual C {};

那么
F对象创建时,构造函数的调用顺序是:D, C, A, B, E, F
3.9 基类和派生类的转换
大概就是对于一个派生类,在赋值 or 指针传递 or 引用传递给一个基类对象 or 基类指针 or 基类引用时,会失去派生类的另外加的成员变量,变成一个基类的对象。为了通过基类的指针,改变派生类的成员方法,引出了C++中的一大特性:多态性
4. 多态性与虚函数
4.1 前言
先补充一下函数调用绑定的知识点:分为静态绑定与动态绑定
静态绑定:函数与函数体在编译的时候就对应捆绑起来了,比如重载
动态绑定:按照主观意愿,使用一个函数名动态的调用很多同名的函数
4.2 虚函数
其实就是在父类中的函数声明最前面加上
virtual关键词,从而在子类中可以重名改写这个函数,最后在相应的对象中通过指针或者引用调用响应对象的相同的函数,实现不同的自定义功能
- 举个例子
#includeusing namespace std; class A { protected: int a; public: A() { a = 0; } virtual void Output() { cout << "A: " << a << endl; } }; class B : public A { private: int b; public: B() : A() { b = 1; } void Output() { cout << "A: " << a << endl; cout << "B: " << b << endl; } }; int main() { A obj_A; A *pA = &obj_A; pA->Output(); B obj_B; pA = &obj_B; pA->Output(); return 0; } - 输出

- 如果删除基类中的
virtual关键词,则无法调用子类对象中的Output函数,只会输出这个

- 并且会警告

4.3 纯虚函数
其实就是提供一个接口,只有函数声明,不写任何函数定义,从而实现了一个从基类定义的接口,供所有的子类进行函数的重写以及后续主函数中的调用(通过指针)
唯一的语法注意点就是加一个
=0,如下是一个示例
class A
{
private:
public:
    virtual void f() = 0;
    virtual void g();
    void h();
};
f()是一个纯虚函数,用来做基类中的接口的g()是一个虚函数,需要有自己的定义h()是一个普通的基类中的成员函数,在其派生类中不可以进行重写
4.4 抽象类
包含纯虚函数的类就是一个抽象类;如果类中全是纯虚函数,则这个类就是纯抽象类,如下是一个示例
class A
{
private:
public:
    virtual void f() = 0;
    virtual void g() = 0;
    virtual void h() = 0;
};