【Java-SpringBoot+Vue+MySql】Day3.1-SpringBoot Web开发
目录
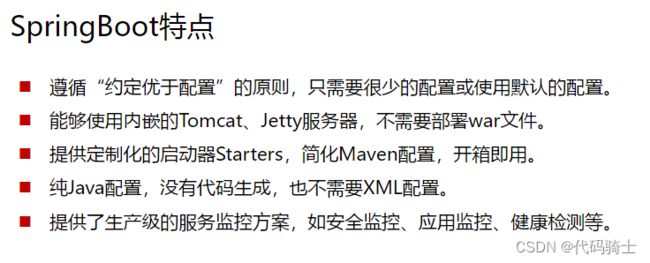
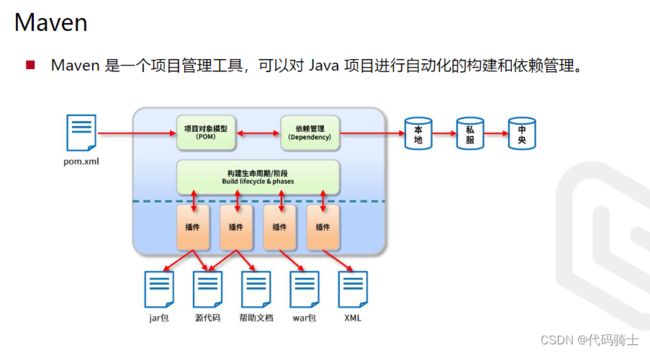
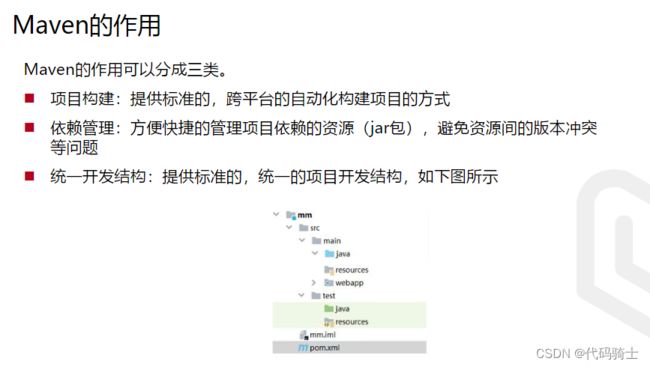
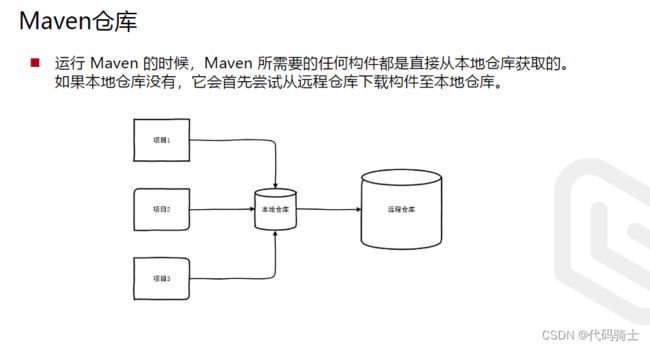
前期回顾——SpringBoot与Maven
一、web入门
1、知识点密集区
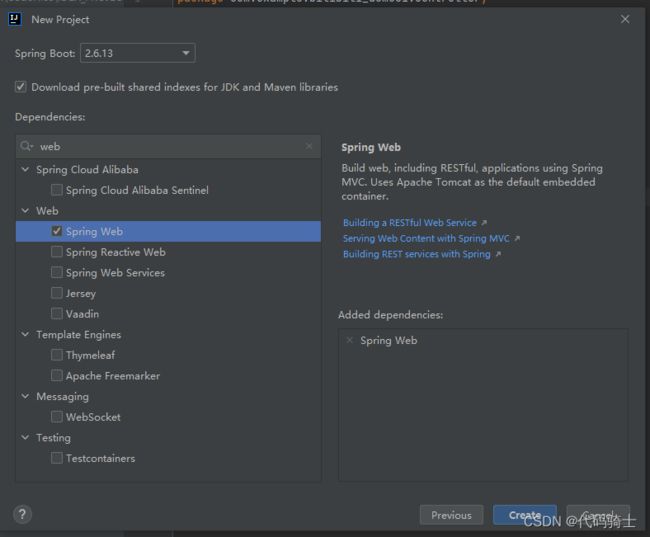
(1)spring web依赖
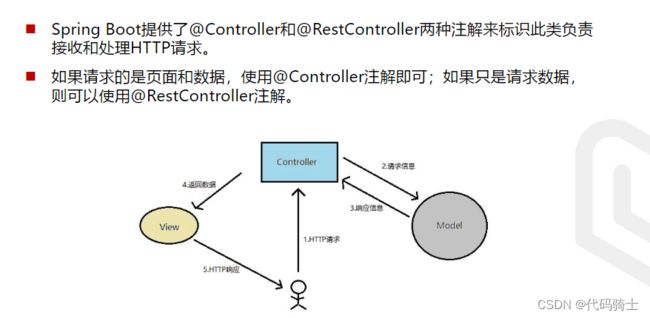
(2)控制器
(3)路由映射
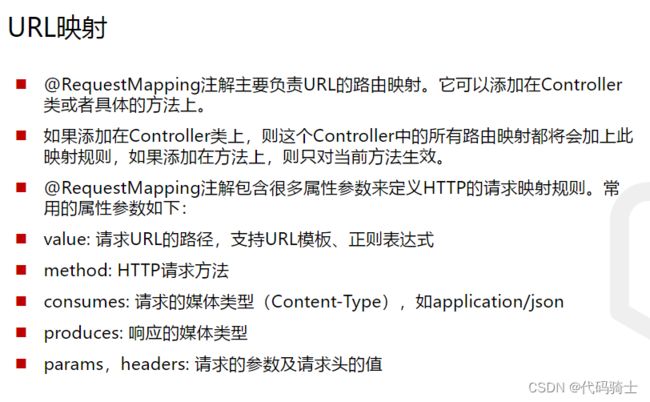
(4)URL映射
(5)Method匹配编辑
(6)参数传递
2、代码示例区
(1)GET请求1-页面显示字符串
(2)GET请求2-使用URL传递参数
(3)参数传递2
(4) POST请求传递参数
(5) POST请求传递参数2
使用url传参
使用请求体传参
(6) POST请求传递参数3
(7) POST请求传递参数4
(8)通配符匹配
二、web进阶
1、上传文件
2、拦截器
(1) 创建拦截层
(2)创建配置层
资源分享
前期回顾——SpringBoot与Maven
一、web入门
1、知识点密集区
(1)spring web依赖
新建项目时添加sprin web依赖
(2)控制器
适用于前后端不分离的项目与本项目无关。
 (3)路由映射
 @RequestMapping(value=,method)
(4)URL映射
(5)Method匹配
(6)参数传递
 2、代码示例区
(M=模型V=视图C=控制器)
(1)GET请求1-页面显示字符串
package com.example.bilibili_demo01.controller;

import org.springframework.web.bind.annotation.RequestMapping;
import org.springframework.web.bind.annotation.RequestMethod;
import org.springframework.web.bind.annotation.RestController;

@RestController//标志控制器
public class HelloController {
    //路由映射
    //url访问:http://localhost:8080/hello
    @RequestMapping(value = "/hello",method = RequestMethod.GET)//等价于 @GetMapping("/hello")

    //视图函数
    public String hello(){
        return "hello";
    }
}
(2)GET请求2-使用URL传递参数
package com.example.bilibili_demo01.controller;

import org.springframework.web.bind.annotation.RequestMapping;
import org.springframework.web.bind.annotation.RequestMethod;
import org.springframework.web.bind.annotation.RestController;

@RestController//标志控制器
public class HelloController {
    //路由映射
    //url访问:http://localhost:8080/hello
    @RequestMapping(value = "/hello",method = RequestMethod.GET)//等价于 @GetMapping("/hello")

    //视图函数
    public String hello(String name){  //url传参:http://localhost:8080/hello?name=zhansan
        return "hello,"+name;
    }
}
package com.example.bilibili_demo01.controller;

import org.springframework.web.bind.annotation.RequestMapping;
import org.springframework.web.bind.annotation.RequestMethod;
import org.springframework.web.bind.annotation.RestController;

@RestController//标志控制器
public class HelloController {
    //路由映射
    //url访问:http://localhost:8080/hello
    @RequestMapping(value = "/hello",method = RequestMethod.GET)//等价于 @GetMapping("/hello")

    //视图函数
    public String hello(String name,int age){  //url传参:http://localhost:8080/hello?name=zhansan&age=18
        String sage = String.valueOf(age);
        return "name="+name+" "+"age="+sage;
    }
}
(3)参数传递2
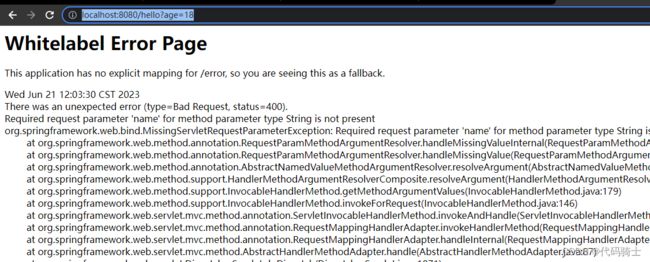
@RequestParam("name")指定的变量必须传参,否则无法调用函数
package com.example.bilibili_demo01.controller;

import org.springframework.web.bind.annotation.RequestMapping;
import org.springframework.web.bind.annotation.RequestMethod;
import org.springframework.web.bind.annotation.RequestParam;
import org.springframework.web.bind.annotation.RestController;

@RestController//标志控制器
public class HelloController {
    //路由映射
    //url访问:http://localhost:8080/hello
    @RequestMapping(value = "/hello",method = RequestMethod.GET)//等价于 @GetMapping("/hello")

    //视图函数
    public String hello(@RequestParam("name") String name, int age){  //url传参:http://localhost:8080/hello?name=zhansan&age=18
        String sage = String.valueOf(age);
        return "name="+name+" "+"age="+sage;
    }
}
http://localhost:8080/hello?age=18
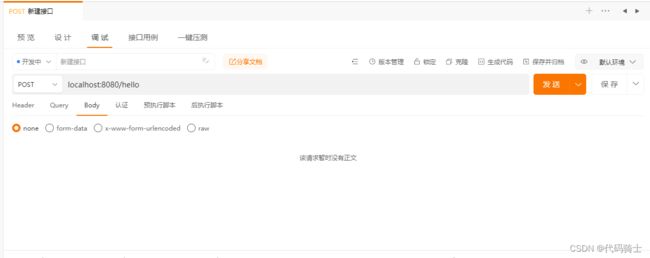
(4) POST请求传递参数
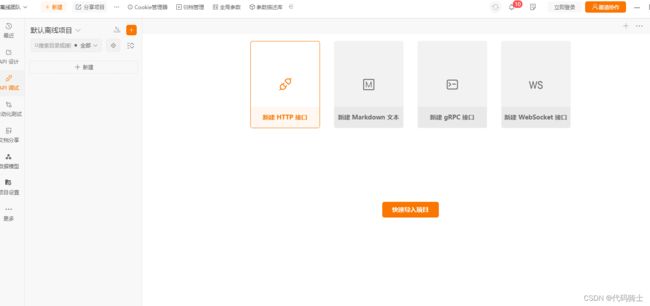
由于还没有写前端部分,所以我们下载APIPost做前端post接口测试
package com.example.bilibili_demo01.controller;

import org.springframework.web.bind.annotation.RequestMapping;
import org.springframework.web.bind.annotation.RequestMethod;
import org.springframework.web.bind.annotation.RequestParam;
import org.springframework.web.bind.annotation.RestController;

@RestController//标志控制器
public class HelloController {
    //路由映射
    //url访问:http://localhost:8080/hello
    @RequestMapping(value = "/hello",method = RequestMethod.POST)//等价于 @GetMapping("/hello")

    //视图函数
    public String hello(){
        return "This is a POST请求";
    }
}
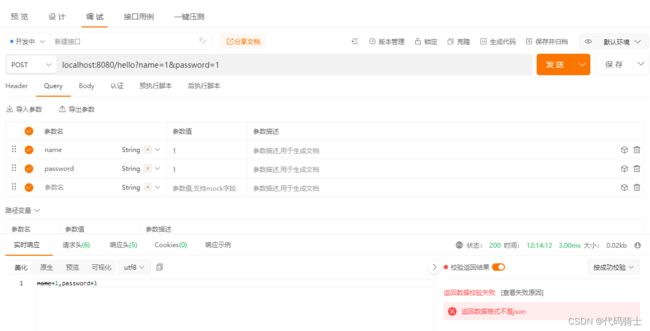
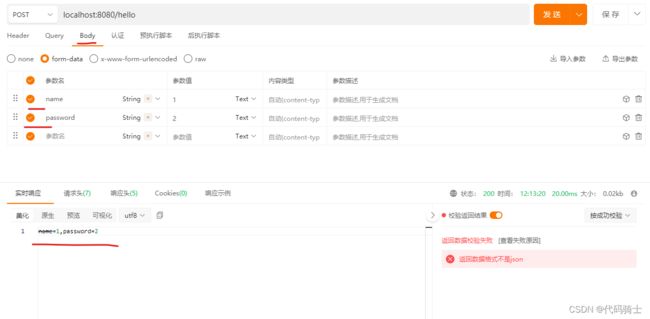
(5) POST请求传递参数2
package com.example.bilibili_demo01.controller;

import org.springframework.web.bind.annotation.RequestMapping;
import org.springframework.web.bind.annotation.RequestMethod;
import org.springframework.web.bind.annotation.RequestParam;
import org.springframework.web.bind.annotation.RestController;

@RestController//标志控制器
public class HelloController {
    //路由映射
    //url访问:http://localhost:8080/hello
    @RequestMapping(value = "/hello",method = RequestMethod.POST)//等价于 @GetMapping("/hello")

    //视图函数
    public String hello(String name,String password){
        return "name="+name+",password="+password;
    }
}
使用url传参
使用请求体传参
(6) POST请求传递参数3
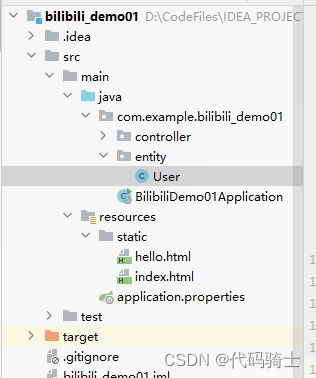
创建实体层,添加User类
package com.example.bilibili_demo01.entity;

public class User {
    private String username;
    private String password;

    public User(String username, String password) {
        this.username = username;
        this.password = password;
    }

    public String getUsername() {
        return username;
    }

    public String getPassword() {
        return password;
    }

    public void setUsername(String username) {
        this.username = username;
    }

    public void setPassword(String password) {
        this.password = password;
    }

    @Override
    public String toString() {
        return "User{" +
                "username='" + username + '\'' +
                ", password='" + password + '\'' +
                '}';
    }
}
控制层
package com.example.bilibili_demo01.controller;

import com.example.bilibili_demo01.entity.User;
import org.springframework.web.bind.annotation.RequestMapping;
import org.springframework.web.bind.annotation.RequestMethod;
import org.springframework.web.bind.annotation.RestController;

@RestController//标志控制器
public class HelloController {
    //路由映射
    //url访问:http://localhost:8080/hello
    @RequestMapping(value = "/hello",method = RequestMethod.POST)//等价于 @GetMapping("/hello")

    //视图函数
    public String hello(User user){
        return ""+user;
    }
}
接口测试
(7) POST请求传递参数4
使用json格式传参
代码:
package com.example.bilibili_demo01.controller;

import com.example.bilibili_demo01.entity.User;
import org.springframework.web.bind.annotation.RequestBody;
import org.springframework.web.bind.annotation.RequestMapping;
import org.springframework.web.bind.annotation.RequestMethod;
import org.springframework.web.bind.annotation.RestController;

@RestController//标志控制器
public class HelloController {
    //路由映射
    //url访问:http://localhost:8080/hello
    @RequestMapping(value = "/hello",method = RequestMethod.POST)//等价于 @GetMapping("/hello")
    //视图函数
    public String hello(@RequestBody User user){
        System.out.println(user);
        return ""+user;
    }
}
(8)通配符匹配
package com.example.bilibili_demo01.controller;

import com.example.bilibili_demo01.entity.User;
import org.springframework.web.bind.annotation.*;

@RestController//标志控制器
public class HelloController {
    //路由映射
    //url访问:http://localhost:8080/hello
    @RequestMapping(value = "/hello",method = RequestMethod.POST)
    //视图函数
    public String hello(@RequestBody User user){
        System.out.println(user);
        return ""+user;
    }
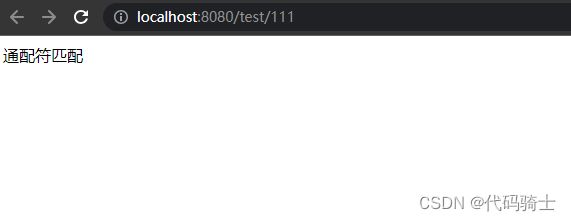
    @RequestMapping(value = "test/*",method = RequestMethod.GET)//http://localhost:8080/test/111
    public String test(){
        return "通配符匹配";
    }
}
二、web进阶
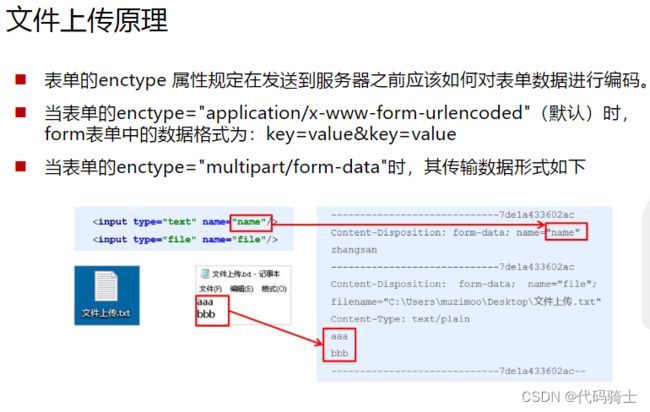
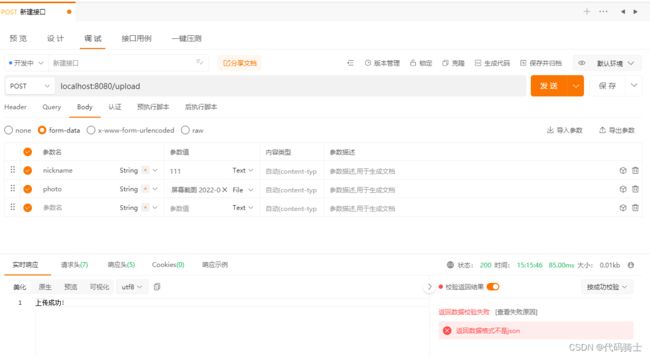
1、上传文件
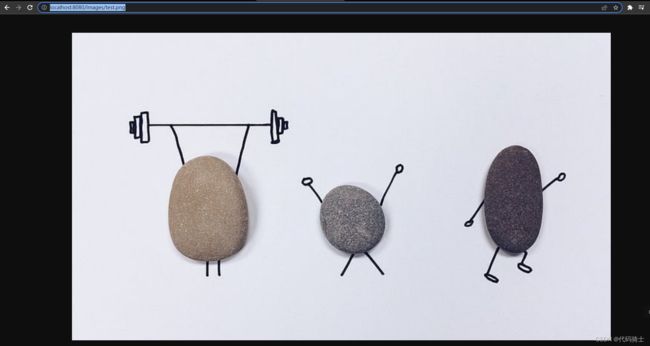
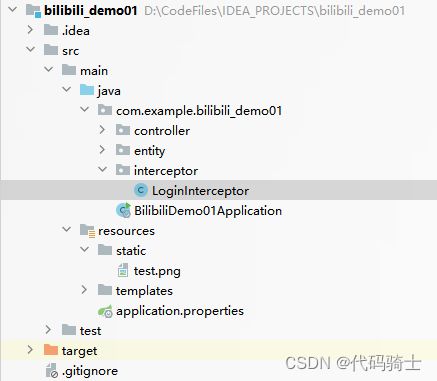
在static目录下存放一张测试图片
在application.properties中添加代码
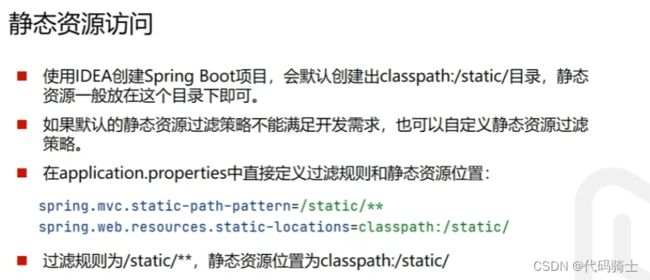
spring.mvc.static-path-pattern=/images/**
将默认资源路径改为/images/,再访问就必须在路径加上images
自定义路径:
#默认在resources/static/**
spring.mvc.static-path-pattern=/images/**
#自定义在resources下某个目录
spring.web.resources.static-locations=classpath:/css
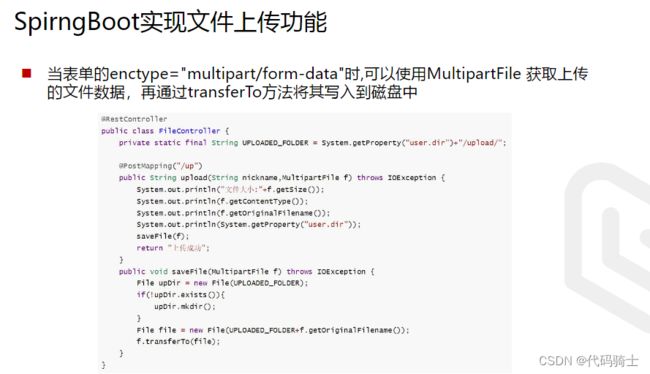
在控制层创建FiledUploadController类
package com.example.bilibili_demo01.controller;

import org.springframework.web.bind.annotation.PostMapping;
import org.springframework.web.bind.annotation.RestController;
import org.springframework.web.multipart.MultipartFile;

import javax.servlet.http.HttpServletRequest;
import java.io.File;
import java.io.IOException;

@RestController
public class FiledUploadController {
    @PostMapping("/upload")
    public String up(String nickname, MultipartFile photo, HttpServletRequest request) throws IOException{
        System.out.println(nickname);
        //获取图片原始名称
        System.out.println(photo.getOriginalFilename());
        //取文件类型
        System.out.println(photo.getContentType());
        //System.out.println(System.getProperty("user.dir"));

        String path = request.getServletContext().getRealPath("/upload/");
        System.out.println(path);

        saveFile(photo,path);
        return "上传成功!";
    }

    public void saveFile(MultipartFile photo,String path) throws IOException {
        //判断存储的目录是否存着钱,如果不存在则创建
        File dir = new File(path);
        if(!dir.exists()){
            //创建目录
            dir.mkdir();
        }
        File file = new File(path+photo.getOriginalFilename());
        photo.transferTo(file);
    }
}
在apipost中模拟文件上传
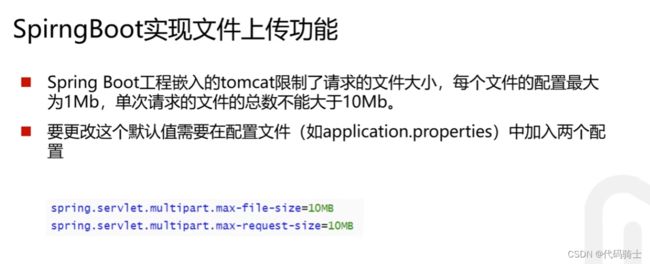
但是如果上传太大的文件就会出现报错:文件大小超过默认值
修改上传文件大小
spring.servlet.multipart.max-file-size=10MB为了方便在浏览器访问已上传的图片,在application.properties中定义。
将默认资源路径改为/upload/
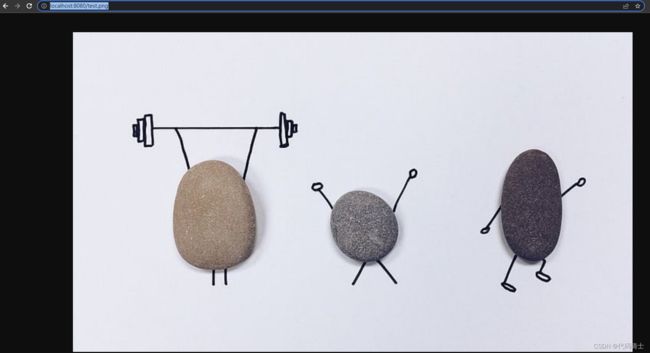
spring.web.resources.static-locations=/upload/通过浏览器访问成功:http://localhost:8080/Orbit.png
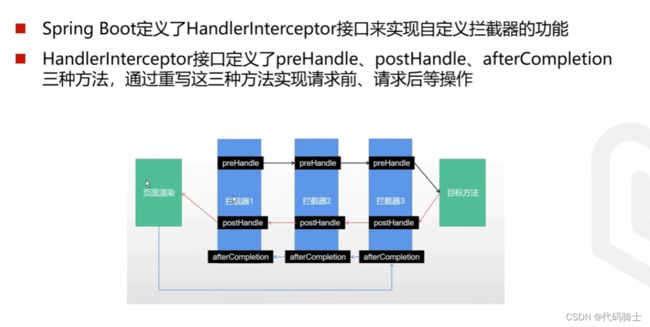
2、拦截器
(1) 创建拦截层
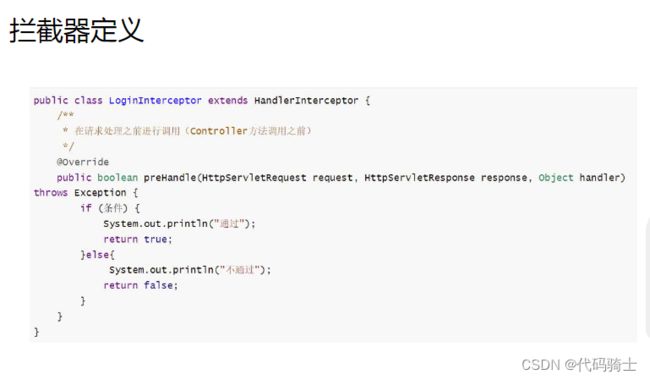
创建登录拦截器
package com.example.bilibili_demo01.interceptor;

import org.springframework.web.servlet.HandlerInterceptor;

import javax.servlet.http.HttpServletRequest;
import javax.servlet.http.HttpServletResponse;

public class LoginInterceptor implements HandlerInterceptor {
    @Override
    public boolean preHandle(HttpServletRequest request, HttpServletResponse response,Object handler)throws Exception{
        System.out.println("preHandle");
        return true;
    }
}
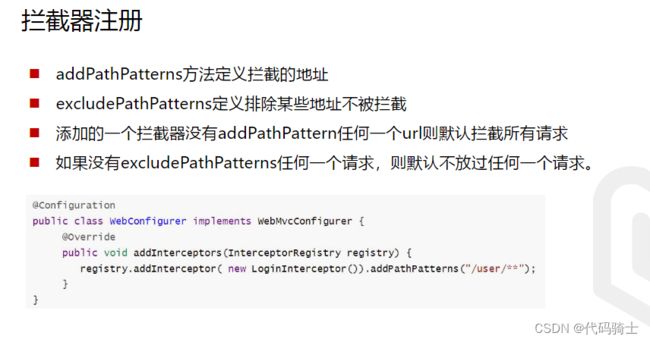
(2)创建配置层
调用拦截器
package com.example.bilibili_demo01.config;

import com.example.bilibili_demo01.interceptor.LoginInterceptor;
import org.springframework.context.annotation.Configuration;
import org.springframework.web.servlet.config.annotation.InterceptorRegistry;
import org.springframework.web.servlet.config.annotation.WebMvcConfigurer;
@Configuration
public class WebConfig implements WebMvcConfigurer {
    @Override
    public void addInterceptors(InterceptorRegistry registry){
        registry.addInterceptor(new LoginInterceptor());//拦截全部路径
        //registry.addInterceptor(new LoginInterceptor()).addPathPatterns("/user/**");//拦截全部路径
    }
}
启动项目访问页面,后台可以看到拦截成功
资源分享
参考链接:3.SpringBoot Controller_哔哩哔哩_bilibili
学习资源:
链接:https://pan.baidu.com/s/1Me37Mtbbmgox60xgKsuZsQ
提取码:rplm
--来自百度网盘超级会员V3000的分享推荐大佬博客:Notion – The all-in-one workspace for your notes, tasks, wikis, and databases.

