使用centos7安装rocket.chat
安装说明
首先访问rocket.chat的官网 点这里
官网很详细的说明了不同操作系统的安装方式如Ubuntu 、centos
这是只说centos7的安装步骤,其余的请在官网自行浏览
1.进入官网点击install选择centos如下图所示

点击centos进入官方的安装界面如图所示:
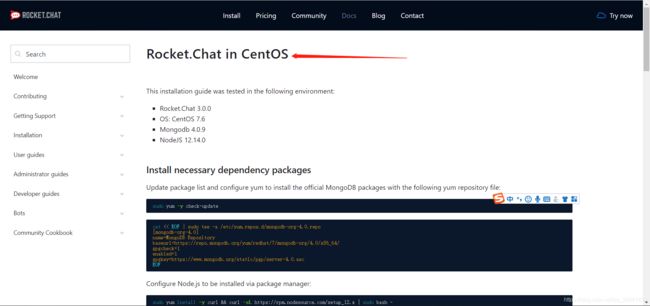
可以看到官方使用的是Centos 7.6 ,其中还包括Mongodb 4.0.9和NodeJS 12.14.0。
安装步骤
1.Install necessary dependency packages–安装必须依赖的包
Update package list and configure yum to install the official MongoDB packages with the following yum repository file – 更新你的yum包 并且安装MongoDB
sudo yum -y check-update
cat << EOF | sudo tee -a /etc/yum.repos.d/mongodb-org-4.0.repo
[mongodb-org-4.0]
name=MongoDB Repository
baseurl=https://repo.mongodb.org/yum/redhat/7/mongodb-org/4.0/x86_64/
gpgcheck=1
enabled=1
gpgkey=https://www.mongodb.org/static/pgp/server-4.0.asc
EOF
Configure Node.js to be installed via package manager --通过yum的包管理器来安装Node.js
sudo yum install -y curl && curl -sL https://rpm.nodesource.com/setup_12.x | sudo bash -
Install build tools, MongoDB, nodejs and graphicsmagick–使用构建工具安装MongoDB、nodejs和 graphicsmagick
sudo yum install -y gcc-c++ make mongodb-org nodejs
sudo yum install -y epel-release && sudo yum install -y GraphicsMagick
Using npm install inherits and n, and the node version required by Rocket.Chat–使用 npm来安装依赖和切换到Rocket.Chat要求的node的版本
sudo npm install -g inherits n && sudo n 12.14.0
2.Install Rocket.Chat–安装Rocket.Chat
Download the latest Rocket.Chat version–下载最新的Rocket.Chat的版本
curl -L https://releases.rocket.chat/latest/download -o /tmp/rocket.chat.tgz
tar -xzf /tmp/rocket.chat.tgz -C /tmp
Install (this guide uses /opt but feel free to choose a different directory)–安装(可以选择不同的目录)
cd /tmp/bundle/programs/server && npm install
sudo mv /tmp/bundle /opt/Rocket.Chat
3.Configure the Rocket.Chat service–Rocket.Chat的配置
Add the rocketchat user, set the right permissions on the Rocket.Chat folder and create the Rocket.Chat service file–添加用户并创建正确的权限来创建Rocket的服务
sudo useradd -M rocketchat && sudo usermod -L rocketchat
sudo chown -R rocketchat:rocketchat /opt/Rocket.Chat
cat << EOF |sudo tee -a /lib/systemd/system/rocketchat.service
[Unit]
Description=The Rocket.Chat server
After=network.target remote-fs.target nss-lookup.target nginx.target mongod.target
[Service]
ExecStart=/usr/local/bin/node /opt/Rocket.Chat/main.js
StandardOutput=syslog
StandardError=syslog
SyslogIdentifier=rocketchat
User=rocketchat
Environment=MONGO_URL=mongodb://localhost:27017/rocketchat?replicaSet=rs01 MONGO_OPLOG_URL=mongodb://localhost:27017/local?replicaSet=rs01 ROOT_URL=http://localhost:3000/ PORT=3000
[Install]
WantedBy=multi-user.target
EOF
使用 vi修改刚刚写的rocketchat.service 将ROOT_URL配置成你自己ip的url。
4.Setup storage engine and replication for MongoDB (mandatory for versions > 1), and enable and start MongoDB and Rocket.Chat–设置MongoDB的存储和版本,并且启动MongoDB和Rocket
sudo sed -i "s/^# engine:/ engine: mmapv1/" /etc/mongod.conf
sudo sed -i "s/^#replication:/replication:\n replSetName: rs01/" /etc/mongod.conf
sudo systemctl enable mongod && sudo systemctl start mongod
mongo --eval "printjson(rs.initiate())"
后台运行和启动rocket
sudo systemctl enable rocketchat && sudo systemctl start rocketchat
查看当前rocket启动否成功
sudo systemctl status rocketchat
关闭rocket
sudo systemctl stop rocketchat
此时rocket配置完成,使用自己的ip:3000访问此地址进入rocket的配置页面完成配置登录进入聊天界面,此时rocket配置完成
使用nginx反向代理配置
如有没有是https访问的rocket使用视频是无法显示的,因为rocket是使用webrct来做的web端,由于webrtc必须要使用https所以我们还要配置https
1.安装nginx
首先安装编译工具和库文件
yum -y install make zlib zlib-devel gcc-c++ libtool openssl openssl-devel
cd /usr
wget http://downloads.sourceforge.net/project/pcre/pcre/8.35/pcre-8.35.tar.gz
tar zxvf pcre-8.35.tar.gz
cd pcre-8.35
./configure -prefix-/usr/pce
make && make install
cd /usr
wget http://nginx.org/download/nginx-1.6.2.tar.gz
tar zxvf nginx-1.6.2.tar.gz
cd nginx-1.6.2
/configure --prefix=/usr/local/nginx --with-http_stub_status_module --with-http_ssl_module --with-pcre=/usr/pcre-8.35
make&&makeinstall
查看nginx的版本
usr/local/nginx/sbin/nginx -v
nginx安装完成。
nginx配置
/usr/sbin/groupadd www
/usr/sbin/groupadd www
cat /usr/local/nginx/conf/nginx.conf

user www www;
worker_processes 2; #设置值和CPU核心数一致
error_log /usr/local/webserver/nginx/logs/nginx_error.log crit; #日志位置和日志级别
pid /usr/local/webserver/nginx/nginx.pid;
#Specifies the value for maximum file descriptors that can be opened by this process.
worker_rlimit_nofile 65535;
events
{
  use epoll;
  worker_connections 65535;
}
http
{
  include mime.types;
  default_type application/octet-stream;
  log_format main  '$remote_addr - $remote_user [$time_local] "$request" '
               '$status $body_bytes_sent "$http_referer" '
               '"$http_user_agent" $http_x_forwarded_for';

#charset gb2312;

  server_names_hash_bucket_size 128;
  client_header_buffer_size 32k;
  large_client_header_buffers 4 32k;
  client_max_body_size 8m;

  sendfile on;
  tcp_nopush on;
  keepalive_timeout 60;
  tcp_nodelay on;
  fastcgi_connect_timeout 300;
  fastcgi_send_timeout 300;
  fastcgi_read_timeout 300;
  fastcgi_buffer_size 64k;
  fastcgi_buffers 4 64k;
  fastcgi_busy_buffers_size 128k;
  fastcgi_temp_file_write_size 128k;
  gzip on;
  gzip_min_length 1k;
  gzip_buffers 4 16k;
  gzip_http_version 1.0;
  gzip_comp_level 2;
  gzip_types text/plain application/x-javascript text/css application/xml;
  gzip_vary on;

  #limit_zone crawler $binary_remote_addr 10m;
 #下面是server虚拟主机的配置
 server
  {
    listen 80;#监听端口
    server_name localhost;#域名
    index index.html index.htm index.php;
    root /usr/local/webserver/nginx/html;#站点目录
      location ~ .*\.(php|php5)?$
    {
      #fastcgi_pass unix:/tmp/php-cgi.sock;
      fastcgi_pass 127.0.0.1:9000;
      fastcgi_index index.php;
      include fastcgi.conf;
    }
    location ~ .*\.(gif|jpg|jpeg|png|bmp|swf|ico)$
    {
      expires 30d;
  # access_log off;
    }
    location ~ .*\.(js|css)?$
    {
      expires 15d;
   # access_log off;
    }
    access_log off;
  }

}
验证配置的正确行
/usr/local/nginx/sbin/nginx -t
启动nginx
/usr/local/nginx/sbin/nginx
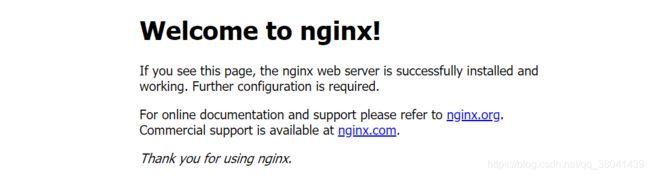
使用ip访问出现如下截图说明配置成功
nginx反向代理配置Rocket
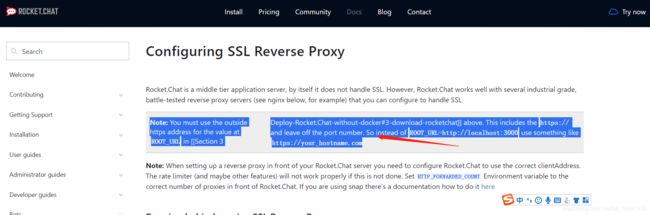
在官方中说明如下图所示
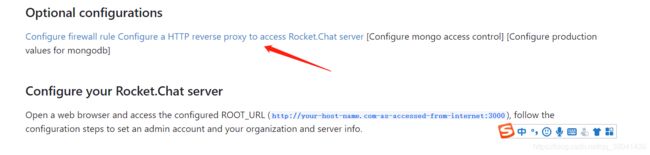
在官方中说明当配置https的时候需要把ROOT_URL中的3000端口去掉,改成你自己的域名如下图所示:
打开nginx的配置文件
vi /usr/local/nginx/conf/nginx.conf
将server替换
# Upstreams
upstream backend {
    server 127.0.0.1:3000;
}

# HTTPS Server

server {
    listen 443;
    server_name your_hostname.com;

    # You can increase the limit if your need to.
    client_max_body_size 200M;

    error_log /var/log/nginx/rocketchat.access.log;#创建记录错误的日志 可以访问早nginx的目录就可以了 rocketchat.access.log会自动生成

    ssl on;
    ssl_certificate /etc/nginx/certificate.crt;#你自己的证书crt
    ssl_certificate_key /etc/nginx/certificate.key;#你自己的证书key
    ssl_protocols TLSv1 TLSv1.1 TLSv1.2; # don’t use SSLv3 ref: POODLE

    location / {
        proxy_pass http://0.0.0.0:3000;
        proxy_http_version 1.1;
        proxy_set_header Upgrade $http_upgrade;
        proxy_set_header Connection "upgrade";
        proxy_set_header Host $http_host;
        proxy_set_header X-Real-IP $remote_addr;
        proxy_set_header X-Forwarded-For $proxy_add_x_forwarded_for;
        proxy_set_header X-Forward-Proto http;
        proxy_set_header X-Nginx-Proxy true;
        proxy_redirect off;
    }
}
配置完成后验证nginx配置文件的正确性
重新加载nginx
/usr/local/nginx/sbin/nginx -s reload
使用你自己的域名通过htpps来访问。