python django vue httprunner 实现接口自动化平台(最终版)
一、项目介绍:
1.1 项目地址
后端地址:
GitHub - 18713341733/test_platform_service: django vue 实现接口自动化平台
前端地址:
GitHub - 18713341733/test_platform_front: Django vue实现接口自动化平台
1.2 项目介绍
1.2.1 环境准备
Python >= 3.8.0 (推荐3.9+版本)
nodejs >= 14.0 (推荐最新) 或者 16,千万不要使用18(会报错)
Mysql >= 5.7.0 (可选,默认数据库sqlite3,推荐8.0版本)
Redis(可选,最新版)
项目运行及部署 | Django-Vue-Admin
1.2.2 django-vue-admin 介绍(只做了解,不重要)
接口自动化平台,是基于 开源项目 Django-vue-admin 来写的。
Django-vue-admin 地址:
django-vue-admin: 基于RBAC模型的权限控制的一整套基础开发平台,前后端分离,后端采用 django+django-rest-framework,前端采用 vue+ElementUI。
二、前端项目 test_platform_front
2.1 项目启动
1、克隆项目
git clone https://github.com/18713341733/test_platform_front.git2、进入 test_platform_front 项目
cd test_platform_front3、安装依赖
方式一:
npm install方式二:
npm install --registry=https://registry.npm.taobao.org方式三:
先安装cnpm
npm install -g cnpm --registry=https://registry.npm.taobao.org再使用cnpm安装依赖
sudo cnpm install --registry=https://registry.npm.taobao.org
4、 启动服务
npm run dev5、浏览器访问
http://localhost:8080初始账号:superadmin 密码:admin123456
后端接口文档地址:http://127.0.0.1:8000/swagger
三、后端项目 test_platform_service
3.1 项目启动
1、克隆项目
git clone https://github.com/18713341733/test_platform_service.git2、进入test_platform_service 项目
cd test_platform_service3、安装依赖
pip install -r requirements.txt4、配置mysql
在conf/env.py 中,配置mysql连接信息
3、在 env.py 中配置数据库信息

# 使用mysql时,改为此配置
DATABASE_ENGINE = "django.db.backends.mysql"
DATABASE_NAME = 'backend' # mysql 时使用

# 数据库地址 改为自己数据库地址
DATABASE_HOST = "127.0.0.1"
# # 数据库端口
DATABASE_PORT = 3306
# # 数据库用户名
DATABASE_USER = "root"
# # 数据库密码
DATABASE_PASSWORD = "123456"
5、创建mysql数据库
需要手动在mysql中,创建名为backend的数据库
- 1、mysql数据库版本建议:8.0 mysql数据库字符集:utf8mb4
- 2、在mysql中,创建名为backend的库
CREATE DATABASE backend charset=utf8mb4;
6、生成迁移脚本
python3 manage.py makemigrations
7、执行迁移
python3 manage.py migrate
8、执行 初始化数据
python3 manage.py init
9、启动项目
python3 manage.py runserver 127.0.0.1:8000
或者:
python3 manage.py runserver 0.0.0.0:8000
初始账号:superadmin 密码:admin123456
后端接口文档地址:http://127.0.0.1:8000/swagger
四、前后端联调
4. 1 修改前端监听后端服务的地址
4.1.1 启动后端项目
python3 manage.py runserver 0.0.0.0:8000
启动项目后,查一下后端的ip地址
4.1.2 启动前端项目
1、修改前端项目监听的后端地址
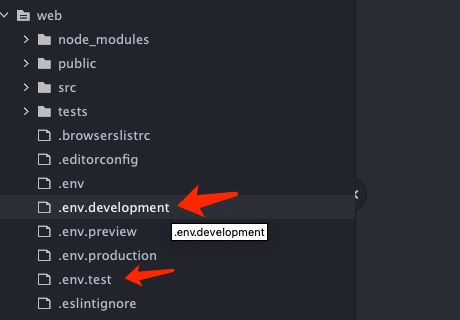
将两个文件: .env.development 与.env.test 中的监听地址,改成真实的后端地址
# 后端接口地址及端口(域名)
VUE_APP_API = "http://192.168.43.224:8000"
2、启动项目:
npm run serve
http://192.168.43.224:8080/
登录前端页面
初始账号:superadmin 密码:admin123456
后台手册 | Django-Vue-Admin
4.2 配置左侧菜单栏
4.2.1 项目初始菜单配置
在dvadmin/system/fixtures/init_menu.json 中,配置初始菜单。
 {
                "name": "部门管理",
                "icon": "bank",
                "sort": 3,
                "is_link": false,
                "is_catalog": false,
                "web_path": "/dept",
                "component": "system/dept/index",
                "component_name": "dept",
                "status": true,
                "cache": false,
                "visible": true,
                "parent": 277,
                "children": [],
                "menu_button": [
is_link:如果不是外部的连接,就填写 false
is_catalog: 是否是目录
web_path: 当前页面的uri地址。
"component": "system/dept/index" 前端组件的地址
component_name: 前端组件名称
4.2.2 配置菜单举例
TODO
4.3 后端项目结构介绍

4.3.1 apps
apps 存放的是接口自动化所需要的app。
包括:
- 项目模型
- 接口模型
- 用例模型
- 配置模型
- 套件模型
- 内置函数模型
- 环境变量模型
- 测试报告模型
- 用户模型

4.3.2 conf
项目配置地址conf
4.3.3. reports
测试报告地址reports
4.3.4 utils
接口自动化所需要的工具
4.3 前端项目结构介绍

4.3.1 接口自动化前端组件
/test_platform_front/src/views/apitest
4.3.2 接口自动化路由
/test_platform_front/src/apitestapi
五、编写接口自动化case
接口自动化底层驱动,是基于httprunner 1 实现的。
如编写一个百度的接口请求。

https://ug.baidu.com/mcp/pc/pcsearch
POST
body: {"invoke_info":{"pos_1":[{}],"pos_2":[{}],"pos_3":[{}]}}
header:
Content-Type:application/json
1、创建项目
接口自动化-项目管理-项目新增

2、配置base url
环境管理-环境新增
这里只需要填写接口的host就可以。

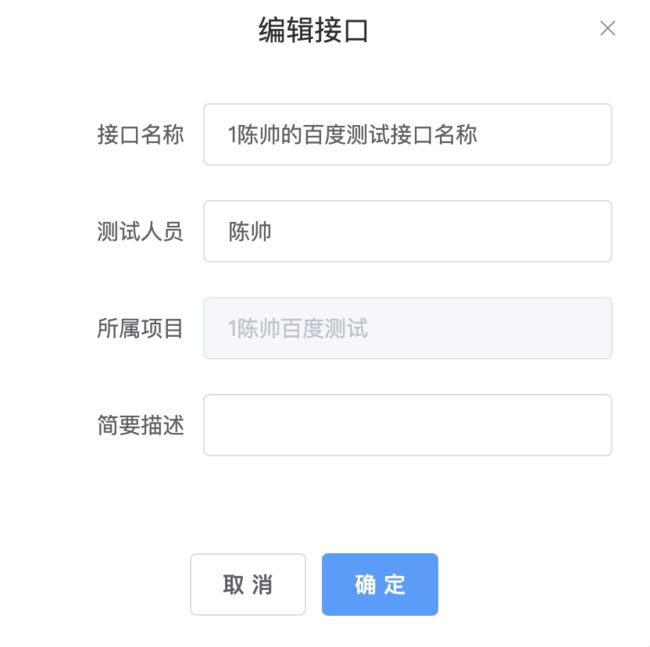
3、新增接口
接口管理-接口新增
4、配置管理--配置新增
在这里可以编写统一的header,如
Content-Type:application/json

5、编写case
新增case

编写body

编写断言:
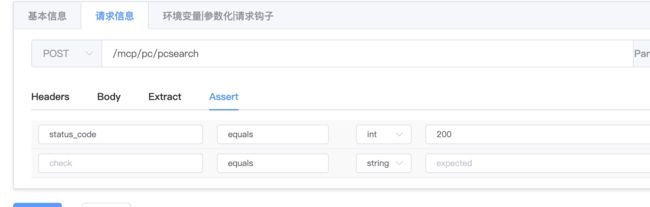
点击保存
5、运行case
用例管理--用例列表

6、测试报告

六、其他相关资料
Django实现接口自动化平台(七)数据库设计_做测试的喵酱的博客-CSDN博客
Django实现接口自动化平台(五)httprunner(2.x)基本使用【持续更新中】_做测试的喵酱的博客-CSDN博客
三、django-vue-admin开源项目二次开发——后端快速实现curd及接口_做测试的喵酱的博客-CSDN博客
二、django-vue-admin开源项目二次开发——修改默认菜单_做测试的喵酱的博客-CSDN博客