Linux_R语言通过RDameng连接DM8
一、下载安装软件anaconda
python需要下载很多包,Anaconda集成了几乎常用的包,如果你需要的包要求不同版本的Python,你无需切换到不同的环境,因为conda同样是一个环境管理器。仅需要几条命令,你可以创建一个完全独立的环境来运行不同的Python版本,同时继续在你常规的环境中使用你常用的Python版本。
主要就是R语言依赖的包热别多,anaconda可以一键安装。
anaconda官网下载地址:https://mirrors.tuna.tsinghua.edu.cn/anaconda/archive/

输入yes 并且 输入目录
[root@localhost ~]# cd /opt/
[root@localhost opt]# mkdir dm_soft
[root@localhost opt]# cd dm_soft/
[root@localhost dm_soft]# ls
Anaconda3-2023.03-1-Linux-x86_64.sh
[root@localhost dm_soft]# chmod 755 Anaconda3-2023.03-1-Linux-x86_64.sh
[root@localhost dm_soft]# ./Anaconda3-2023.03-1-Linux-x86_64.sh

Welcome to Anaconda3 2023.03-1

In order to continue the installation process, please review the license
agreement.
Please, press ENTER to continue
>>> 回车
Please answer 'yes' or 'no':
>>> yes

Anaconda3 will now be installed into this location:
/root/anaconda3

  - Press ENTER to confirm the location
  - Press CTRL-C to abort the installation
  - Or specify a different location below

## 安装目录
[/root/anaconda3] >>> /opt/anaconda3
## 是否初始化终端
Do you wish the installer to initialize Anaconda3
by running conda init? [yes|no]
[no] >>> yes
Do you wish the installer to initialize Anaconda3
by running conda init? [yes|no]
[no] >>> yes

no change     /opt/anaconda3/condabin/conda
no change     /opt/anaconda3/bin/conda
no change     /opt/anaconda3/bin/conda-env
no change     /opt/anaconda3/bin/activate
no change     /opt/anaconda3/bin/deactivate
no change     /opt/anaconda3/etc/profile.d/conda.sh
no change     /opt/anaconda3/etc/fish/conf.d/conda.fish
no change     /opt/anaconda3/shell/condabin/Conda.psm1
no change     /opt/anaconda3/shell/condabin/conda-hook.ps1
no change     /opt/anaconda3/lib/python3.10/site-packages/xontrib/conda.xsh
no change     /opt/anaconda3/etc/profile.d/conda.csh
modified      /root/.bashrc

==> For changes to take effect, close and re-open your current shell. <==

If you'd prefer that conda's base environment not be activated on startup,
   set the auto_activate_base parameter to false:

conda config --set auto_activate_base false

##拷贝
[root@localhost bin]# cp /opt/anaconda3/bin/conda /usr/bin/
二、替换数据源
[root@localhost bin]# conda config --add channels https://mirrors.tuna.tsinghua.edu.cn/anaconda/cloud/conda-forge/
[root@localhost bin]# conda config --add channels https://mirrors.tuna.tsinghua.edu.cn/anaconda/pkgs/free/
[root@localhost bin]# conda config --add channels https://mirrors.tuna.tsinghua.edu.cn/anaconda/pkgs/main/
[root@localhost bin]# conda config --append channels https://mirrors.tuna.tsinghua.edu.cn/anaconda/cloud/fastai/
[root@localhost bin]# conda config --append channels https://mirrors.tuna.tsinghua.edu.cn/anaconda/cloud/pytorch/
[root@localhost bin]# conda config --append channels https://mirrors.tuna.tsinghua.edu.cn/anaconda/cloud/bioconda/
# 上面的命令拷贝下来 方便批量运行
conda config --add channels https://mirrors.tuna.tsinghua.edu.cn/anaconda/cloud/conda-forge/
conda config --add channels https://mirrors.tuna.tsinghua.edu.cn/anaconda/pkgs/free/
conda config --add channels https://mirrors.tuna.tsinghua.edu.cn/anaconda/pkgs/main/
conda config --append channels https://mirrors.tuna.tsinghua.edu.cn/anaconda/cloud/fastai/
conda config --append channels https://mirrors.tuna.tsinghua.edu.cn/anaconda/cloud/pytorch/
conda config --append channels https://mirrors.tuna.tsinghua.edu.cn/anaconda/cloud/bioconda/
# 搜索时显示通道地址
[root@localhost bin]# conda config --set show_channel_urls yes
# 最后,执行conda info
[root@localhost bin]# conda info

三、创建容器并激活
## 1. 创建环境
[root@localhost bin]# conda create -n dm_test python=3.8

## 2.首次激活 conda 虚拟环境,可用 source activate 激活(如下),
[root@localhost bin]# source activate dm_test
## 3. 退出conda
(dm_test) [root@localhost bin]# conda deactivate
## 4. 激活
[root@localhost bin]# conda activate dm_test
(dm_test) [root@localhost bin]#
四、安装R语言
## 1. 安装R语言
[root@localhost opt]# conda install r-base=3.6.1
## 2. 查看R语言版本
[root@localhost opt]# R --version
R version 3.6.1 (2016-06-21) -- "Bug in Your Hair"
Copyright (C) 2016 The R Foundation for Statistical Computing
Platform: x86_64-pc-linux-gnu (64-bit)

R is free software and comes with ABSOLUTELY NO WARRANTY.
You are welcome to redistribute it under the terms of the
GNU General Public License versions 2 or 3.
For more information about these matters see
http://www.gnu.org/licenses/.
五、安装DBI
DBI 是 R 语言中关系数据库的底层接口包,RDameng 包的正常使用需要先安装 DBI。 以 DBI_1.0.0 为例,R 安装完毕后,上传 DBI_1.0.0.tar.gz 至/opt/dmsoft 目录下,使用如下命令安装 DBI 工具包。
也可以从以下链接下载 DBI 1.0.0 版本的源码包:
https://cran.r-project.org/src/contrib/Archive/DBI/DBI_1.0.0.tar.gz
这个链接会下载一个名为 DBI_1.0.0.tar.gz 的压缩文件,您可以使用该文件进行手动安装。
## 安装1.0.0安装包
> install.packages("/opt/dmsoft/DBI_1.0.0.tar.gz", repos = NULL, type="source")
* installing *source* package ‘DBI’ ...
** package ‘DBI’ successfully unpacked and MD5 sums checked
** R
** inst
** preparing package for lazy loading
** help
*** installing help indices
** building package indices
** installing vignettes
** testing if installed package can be loaded
* DONE (DBI)
## 加载目录不报错就说明加载成功
> library(DBI)


#想要安装的 DBI 1.0.0 版本确实存在于 CRAN 存储库中。
#可以通过以下命令来检查安装 DBI 版本的可用性:
#remove.packages("DBI")
六、编译安装RDameng
-
使用的数据库必须是DM8 1.3.47及以后的版本才支持。
-
用户在安装 RDameng 之前需要检查或修改操作系统的配置,以保证 RDameng 正确安装和运行,RDameng 目前仅支持 Linux x86 系统。
-
DMDCI提供的第三方库及头文件分别保存在RDameng_1.1.tar.gz解压后的RDameng/dci_libs目录和RDameng/dci_inc目录下,可选安装RDameng包前复制至指定位置。以复制第三方库及头文件至指定位置为例,上传RDameng_1.1.tar.gz至/opt/package目录下,解压RDameng_1.0.tar.gz获取第三方库。
## R语言版本上传解压
(base) [root@localhost dmsoft]# tar -xzf  RDameng_1.1.tar.gz

## 配置环境变量
(base) [root@localhost dmsoft]# vi /etc/profile
(base) [root@localhost dmsoft]# export LD_LIBRARY_PATH=/opt/dmsoft/RDameng/dci_libs
(base) [root@localhost dmsoft]# source /etc/profile

## 安装R语言
(dm_test) [root@localhost ~]# R CMD INSTALL --configure-args=' --with-dci-lib=/opt/dmsoft/RDameng/dci_libs --with-dci-inc=/opt/dmsoft/RDameng/dci_inc' /opt/dmsoft/RDameng_1.1.tar.gz
遇到了如下报错:
/usr/bin/ld: cannot find -lgfortran

yum install gcc-gfortran

七、运行测试用例
在R语言的服务器上/etc/dm_svc.conf 添加文件 新建dm_svc.conf 把FNUM2CHAR_MODE=(1)参数加上
[root@localhost R]# cat /etc/dm_svc.conf
TIME_ZONE=(480)
LANGUAGE=(cn)
FNUM2CHAR_MODE=(1)
drop table TEST;
CREATE TABLE TEST(C1 VARCHAR2(50 CHAR));
insert into "SYSDBA"."TEST"("C1")  VALUES(1/3);
select length(C1)from TEST;
SP_SET_PARA_VALUE(1,'CALC_AS_DECIMAL',3);
library(DBI)
library(RDameng)
#数据库地址地址
dbHost <- "192.168.145.190"
#数据库名称
dbServerName <- "DmServiceDMSERVER"
#用户名
dbUserName <- "SYSDBA"
#密码
dbPassword <- "SYSDBA"
#初始化driver
drv <- dbDriver("Dm")
#拼写TNS字符串
connect.string <- paste("(DESCRIPTION=(ADDRESS=(PROTOCOL=tcp)(HOST=", dbHost, ")(PORT= 5236))(CONNECT_DATA=(SERVICE_NAME=", dbServerName, ")))", sep = "")
#连接数据库
oracleCon <- dbConnect(drv,username = dbUserName, password = dbPassword,dbname = connect.string)
#查看连接信息
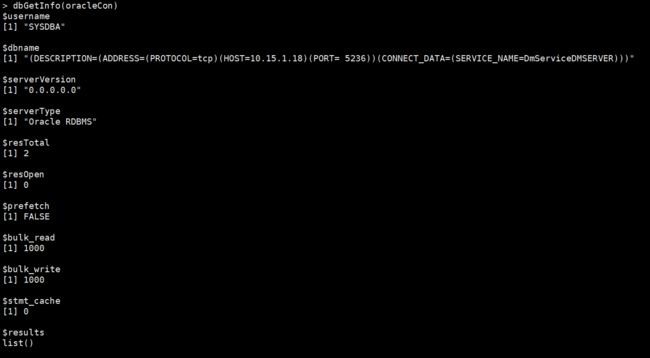
#dbGetInfo(oracleCon)
#查看驱动详细信息
#dbGetInfo(drv)
#插入数据
thisnum <- 1/3
print(thisnum)
dataFrame <-data.frame(c1=thisnum)
dbWriteTable(oracleCon,"TEST",dataFrame,append=T,row.names=F)
#执行查询sql
result <- dbGetQuery(oracleCon, "SELECT LENGTH(C1) FROM TEST")
print(result)
#执行查询sql
c1_result <- dbGetQuery(oracleCon, "SELECT C1 FROM TEST")
print(c1_result)
db_version_str <- dbGetQuery(oracleCon, "SELECT BUILD_VERSION FROM v$instance")
print(db_version_str)
result <- dbGetQuery(oracleCon, "select SF_GET_PARA_VALUE(2,'DECIMAL_ENHANCED')")
print(format(result, scientific=FALSE))
测试图

资料包
链接:https://pan.baidu.com/s/1XRzdN3u2GUhNlK5qFaNKwg?pwd=lr3a
提取码:lr3a