Centos 7 安装 Oracle 11G
Oracle 11G 安装教程
- 准备环境
- p13390677_112040_Linux-x86-64_1of7.zip
- p13390677_112040_Linux-x86-64_2of7.zip
- Centos 7- rhel7-
- 英文版的系统
- –不想换语言的执行(LANG=en_US)–
-
传输 文件到服务器上
-
创建用户和组
[root@localhost ~]# groupadd  oracle
[root@localhost ~]# useradd oracle -g oracle
[root@localhost ~]# passwd oracle
- 解压文件
su oracle
[oracle@localhost ~]$ unzip p13390677_112040_Linux-x86-64_1of7.zip
[oracle@localhost ~]$ unzip p13390677_112040_Linux-x86-64_2of7.zip
- 安装
cd database
./runInstaller
5.1 报错
[oracle@localhost database]$ ./runInstaller
Starting Oracle Universal Installer...

Checking Temp space: must be greater than 120 MB.   Actual 38010 MB    Passed
Checking swap space: must be greater than 150 MB.   Actual 2047 MB    Passed
Checking monitor: must be configured to display at least 256 colors
    >>> Could not execute auto check for display colors using command /usr/bin/xdpyinfo. Check if the DISPLAY variable is set.    Failed <<<<

Some requirement checks failed. You must fulfill these requirements before

continuing with the installation,

Continue? (y/n) [n] y


>>> Ignoring required pre-requisite failures. Continuing...
Preparing to launch Oracle Universal Installer from /tmp/OraInstall2023-07-13_12-56-54AM. Please wait ...
DISPLAY not set. Please set the DISPLAY and try again.
Depending on the Unix Shell, you can use one of the following commands as examples to set the DISPLAY environment variable:
- For csh:                      % setenv DISPLAY 192.168.1.128:0.0
- For sh, ksh and bash:         $ DISPLAY=192.168.1.128:0.0; export DISPLAY
Use the following command to see what shell is being used:
        echo $SHELL
Use the following command to view the current DISPLAY environment variable setting:
        echo $DISPLAY
- Make sure that client users are authorized to connect to the X Server.
To enable client users to access the X Server, open an xterm, dtterm or xconsole as the user that started the session and type the following command:
% xhost +
To test that the DISPLAY environment variable is set correctly, run a X11 based program that comes with the native operating system such as 'xclock':
        %
If you are not able to run xclock successfully, please refer to your PC-X Server or OS vendor for further assistance.
Typical path for xclock: /usr/X11R6/bin/xclock
ps: 最好使用代图形化界面的系统安装,使用xhell 会提示下载xmanager… 或者使用vnc
>>> Ignoring required pre-requisite failures. Continuing...
Preparing to launch Oracle Universal Installer from /tmp/OraInstall2023-07-13_12-58-19AM. Please wait ...[oracle@localhost database]$ No protocol specified
Exception in thread "main" java.lang.NoClassDefFoundError
        at java.lang.Class.forName0(Native Method)
        at java.lang.Class.forName(Class.java:164)
        at java.awt.Toolkit$2.run(Toolkit.java:821)
        .....
5.2 解决报错
DISPLAY=:0.0; export DISPLAY or DISPLAY=IP:0.0; export DISPLAY
xhost +
5.3 再一次执行
cd database
 /.runInstaller
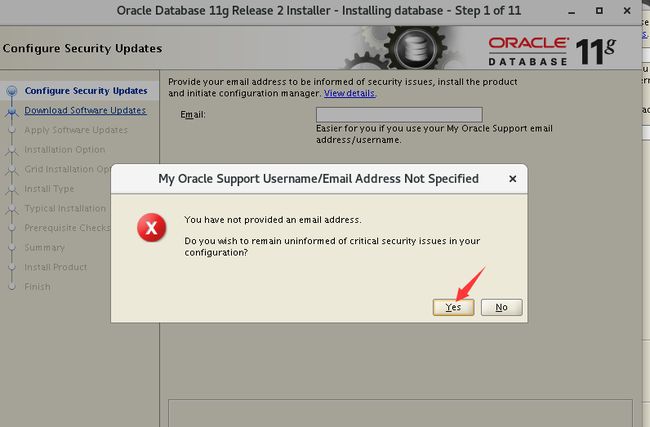
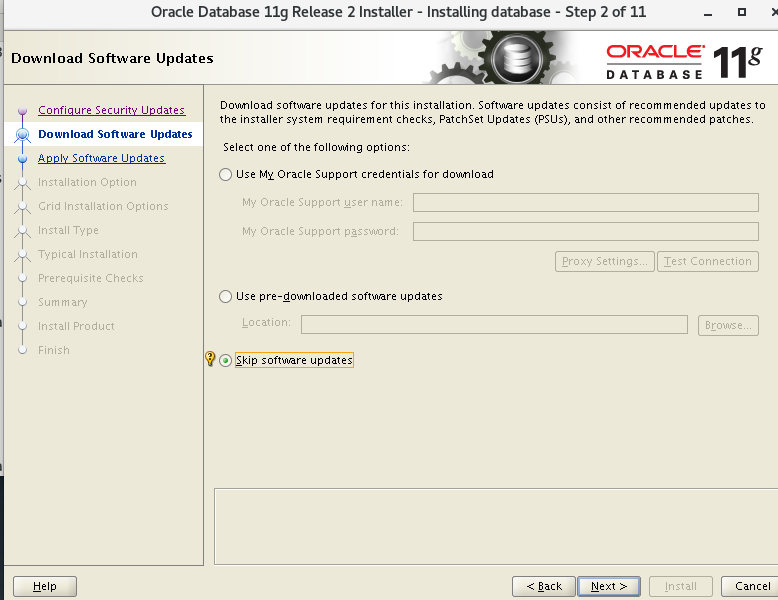
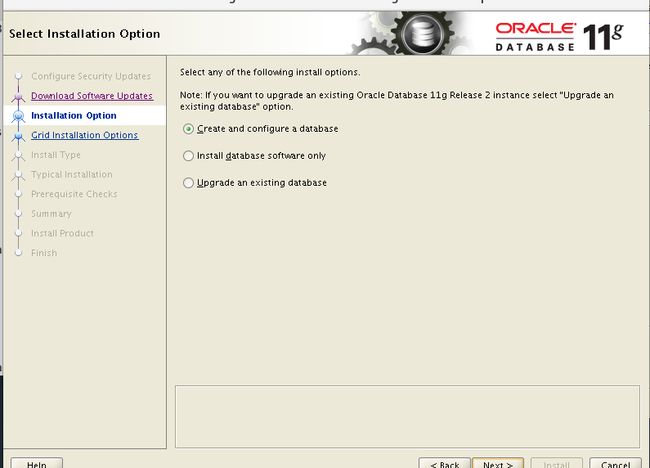
- 弹出Oracle安装界面之后
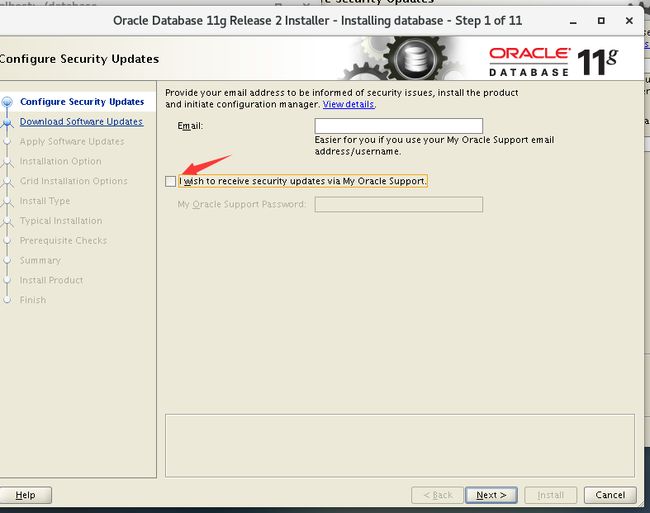
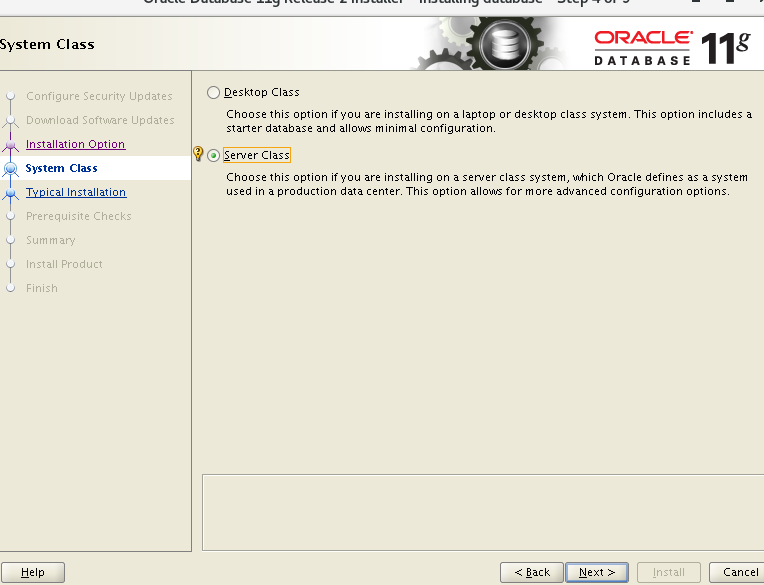

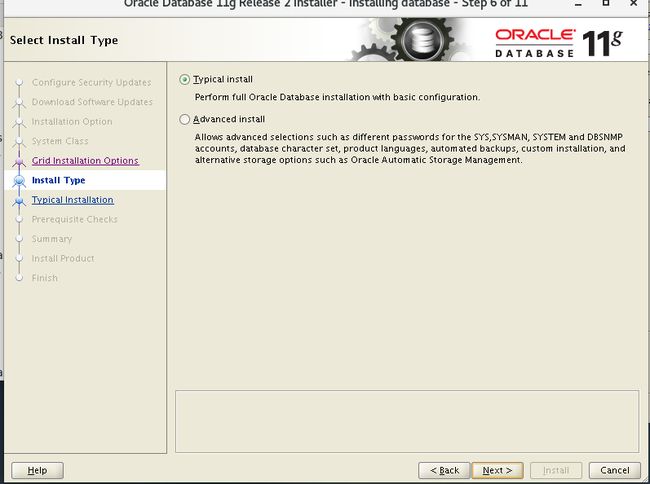
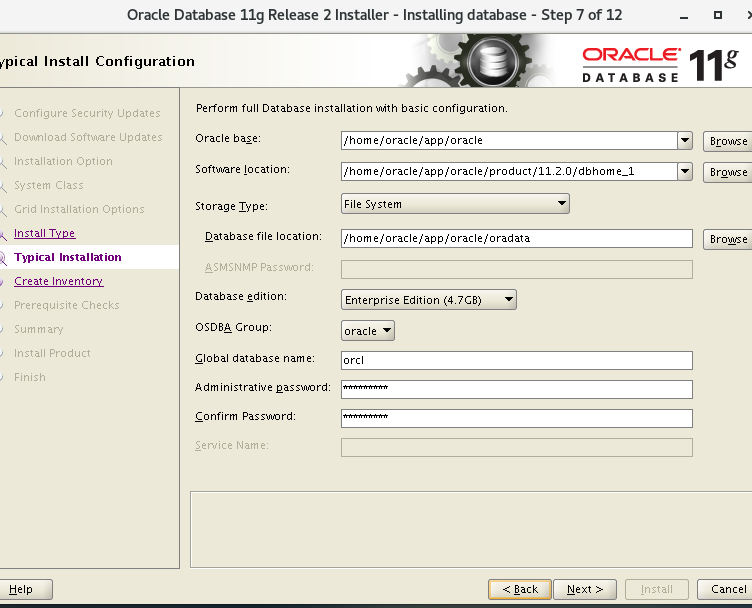
ps: 密码有复杂度要求:大小写+数字即可


-
安装 配置文件
yum -y install binutils compat-libcap1 compat-libstdc++-33 compat-libstdc++-33*.i686 elfutils-libelf-devel gcc gcc-c++ glibc*.i686 glibc glibc-devel glibc-devel*.i686 ksh libgcc*.i686 libgcc libstdc++ libstdc++*.i686 libstdc++-devel libstdc++-devel*.i686 libaio libaio*.i686 libaio-devel libaio-devel*.i686 make sysstat unixODBC unixODBC*.i686 unixODBC-devel unixODBC-devel*.i686 libXp7.1 再一次检测

7.2 安装 pdks包
wget  http://vault.centos.org/5.11/os/x86_64/CentOS/pdksh-5.2.14-37.el5_8.1.x86_64.rpm
[oracle@localhost database]$ rpm -ivh pdksh-5.2.14-37.el5_8.1.x86_64.rpm
warning: pdksh-5.2.14-37.el5_8.1.x86_64.rpm: Header V3 DSA/SHA1 Signature, key ID e8562897: NOKEY
error: Failed dependencies:
	pdksh conflicts with (installed) ksh-20120801-144.el7_9.x86_64
安装时可能会报错
7.3 删除 ksh…包
rpm -e   ksh-20120801-144.el7_9.x86_64
 rpm -ivh pdksh-5.2.14-37.el5_8.1.x86_64.rpm
- 忽略 swap size

[root@localhost database]# vim /home/oracle/app/oracle/product/11.2.0/dbhome_1/sysman/lib/ins_emagent.mk

然后continue

负责 然后执行脚本

- 放行防火墙
[root@localhost database]# firewall-cmd --add-port=1521/tcp
success
[root@localhost database]# firewall-cmd --add-port=1521/tcp --permanent
success
- 配置环境变量
su oracle
切换到oracle用户操作。
编辑配置文件
vi ~/.bash_profile
文件末尾加入以下内容,ORACLE_HOME中换成你实际安装的路径

export ORACLE_HOME=/home/oracle/app/oracle/product/11.2.0/dbhome_1/
export ORACLE_SID=orcl
export PATH=$PATH:$ORACLE_HOME/bin
使用配置文件立即生效。
source ~/.bash_profile
启动oracle
su oracle
sqlplus /nolog
SQL> connect /as sysdba
SQL> startup
sys用户登录
[oracle@localhost ~]$ sqlplus /nolog

Copyright (c) 1982, 2013, Oracle.  All rights reserved.

SQL> connect as sysdba
Enter user-name: sys
Enter password:
Connected.
SQL> select 1 from dual;

SQL>
SQL> connect as sysdba
Enter user-name: sys
Enter password:
Connected.
SQL> select 1 from dual;
SQL>
参考链接: https://blog.csdn.net/lxyoucan/article/details/113547596