opencv图形用户界面HighGUI初识,图形读写、滑动条、鼠标操作
opencv图形读写、滑动条、鼠标操作
- 1.opencv读图片并显示
-
- 格式支持
- 接口说明
- 2.opencv写图片
-
- 代码示例
- 效果展示
- 3.opencv滑动条
-
- 代码示例:
- 效果展示:
- 4.opencv鼠标操作
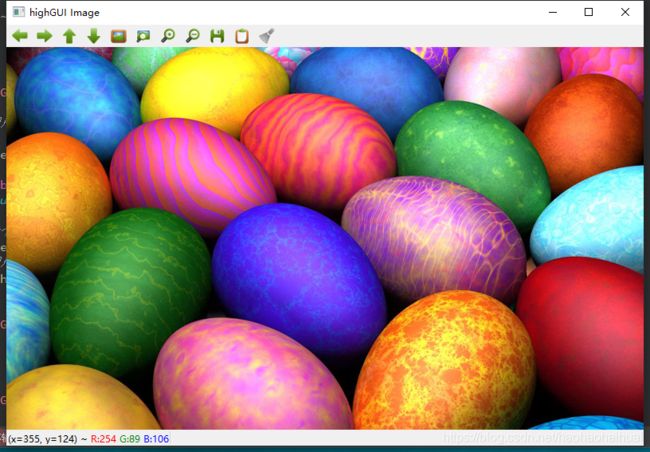
1.opencv读图片并显示
格式支持
通过上面几行即可简单的显示一张图片,下面是cv支持的一些格式
- Windows位图 - *.bmp, *.dib
- JPEG 文件- *.jpeg, *.jpg, *.jpe
- JPEG 2000 文件 - *.jp2
- png文件 - *.png
- Web图片 - *.webp
- 便携文件格式 - *.pbm, *.pgm, *.ppm *.pxm, *.pnm
- Sun光栅文件 - *.sr, *.ras
- TIFF 文件 - *.tiff, *.tif
- OpenEXR 图片文件 - *.exr
- Radiance HDR - *.hdr, *.pic
- Raster and Vector geospatial data supported by GDAL
需要注意的是上述文件格式虽然是opencv支持的,但是在不同系统中需要依赖系统解码功能,如果系统不支持可能解码失败,例如在一些类unix系统中如果不带jpg解码功能可以打开OPENCV_BUILD_3RDPARTY_LIBS,以便打开cv源码自带的解码功能解码jpg。
	//读取图片
    cv::Mat image = cv::imread("F:/work/opencv/cvhighgui/add.jpg");
    if(image.empty())
    {
        qDebug("error: load image failed.");
        return;
    }
    //创建一个名为 "highGUI"的窗口
    cv::namedWindow("highGUI Image");
    //显示图片
    cv::imshow("highGUI Image", image);
接口说明
Mat imread( const String& filename, int flags = IMREAD_COLOR );
filename:第一个参数是图片路径
flags:载入标志
下面这个载入标志枚举:
//! Imread flags
enum ImreadModes {
       IMREAD_UNCHANGED            = -1, //!< If set, return the loaded image as is (with alpha channel, otherwise it gets cropped). Ignore EXIF orientation.
       IMREAD_GRAYSCALE            = 0,  //!< If set, always convert image to the single channel grayscale image (codec internal conversion).
       IMREAD_COLOR                = 1,  //!< If set, always convert image to the 3 channel BGR color image.
       IMREAD_ANYDEPTH             = 2,  //!< If set, return 16-bit/32-bit image when the input has the corresponding depth, otherwise convert it to 8-bit.
       IMREAD_ANYCOLOR             = 4,  //!< If set, the image is read in any possible color format.
       IMREAD_LOAD_GDAL            = 8,  //!< If set, use the gdal driver for loading the image.
       IMREAD_REDUCED_GRAYSCALE_2  = 16, //!< If set, always convert image to the single channel grayscale image and the image size reduced 1/2.
       IMREAD_REDUCED_COLOR_2      = 17, //!< If set, always convert image to the 3 channel BGR color image and the image size reduced 1/2.
       IMREAD_REDUCED_GRAYSCALE_4  = 32, //!< If set, always convert image to the single channel grayscale image and the image size reduced 1/4.
       IMREAD_REDUCED_COLOR_4      = 33, //!< If set, always convert image to the 3 channel BGR color image and the image size reduced 1/4.
       IMREAD_REDUCED_GRAYSCALE_8  = 64, //!< If set, always convert image to the single channel grayscale image and the image size reduced 1/8.
       IMREAD_REDUCED_COLOR_8      = 65, //!< If set, always convert image to the 3 channel BGR color image and the image size reduced 1/8.
       IMREAD_IGNORE_ORIENTATION   = 128 //!< If set, do not rotate the image according to EXIF's orientation flag.
     };
灰度图方式读取:
cv::Mat image = cv::imread(“F:/work/opencv/cvhighgui/add.jpg”, IMREAD_GRAYSCALE);
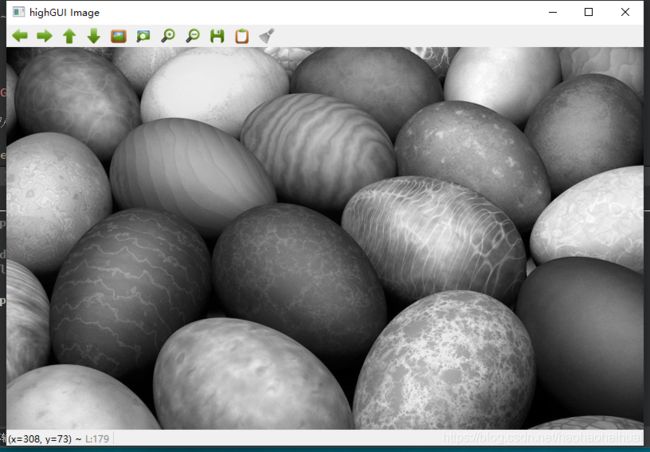
CV_EXPORTS_W void namedWindow(const String& winname, int flags = WINDOW_AUTOSIZE);
filename:第一个参数是窗口名称
flags:载入标志
/! Flags for cv::namedWindow
enum WindowFlags {
       WINDOW_NORMAL     = 0x00000000, //!< the user can resize the window (no constraint) / also use to switch a fullscreen window to a normal size.
       WINDOW_AUTOSIZE   = 0x00000001, //!< the user cannot resize the window, the size is constrainted by the image displayed.
       WINDOW_OPENGL     = 0x00001000, //!< window with opengl support.

       WINDOW_FULLSCREEN = 1,          //!< change the window to fullscreen.
       WINDOW_FREERATIO  = 0x00000100, //!< the image expends as much as it can (no ratio constraint).
       WINDOW_KEEPRATIO  = 0x00000000, //!< the ratio of the image is respected.
       WINDOW_GUI_EXPANDED=0x00000000, //!< status bar and tool bar
       WINDOW_GUI_NORMAL = 0x00000010, //!< old fashious way
    };
窗口显示的一些控制,比如opengl支持,全屏显示等。
2.opencv写图片
CV_EXPORTS_W bool imwrite( const String& filename, InputArray img, const std::vector& params = std::vector());
filename: 保存的图片名称
img:图片数据,如Mat数据
params:特殊格式保存的参数编码
- 对于jpeg格式0-100是图片质量,默认95
- 对于png格式0-9表示压缩率,默认是3
- 对于PPM,PGM表示二进制格式标志,0或者0,默认1
代码示例
//读取图片1
    cv::Mat image1 = cv::imread("F:/work/opencv/cvhighgui/add.jpg");
    //读取图片2
    cv::Mat image2 = cv::imread("F:/work/opencv/cvhighgui/dragon.jpg");

    cv::Mat imagewrite;
    //将图1与图2线性混合
    addWeighted(image1,0.5,image2,0.9,0,imagewrite);

    //显示图片
    cv::imshow("highGUI Image", imagewrite);

    vector<int> params;
    params.push_back(IMWRITE_JPEG_QUALITY);
    params.push_back(100);
    try
    {
        //写入文件
        cv::imwrite("jpg_write.jpg",imagewrite,params);
    }
    catch(runtime_error &err)
    {
        qDebug("cv image write error:%s",err.what());
    }
效果展示
图片1:
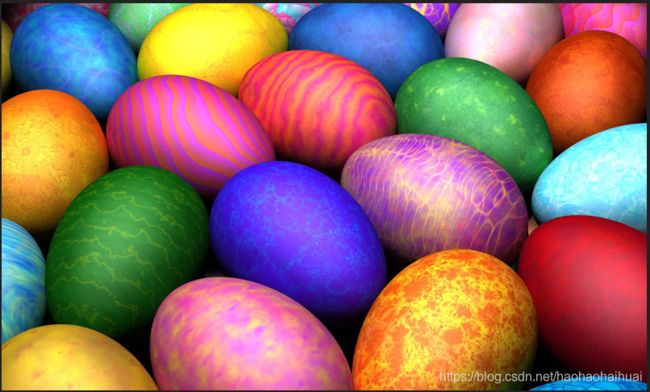
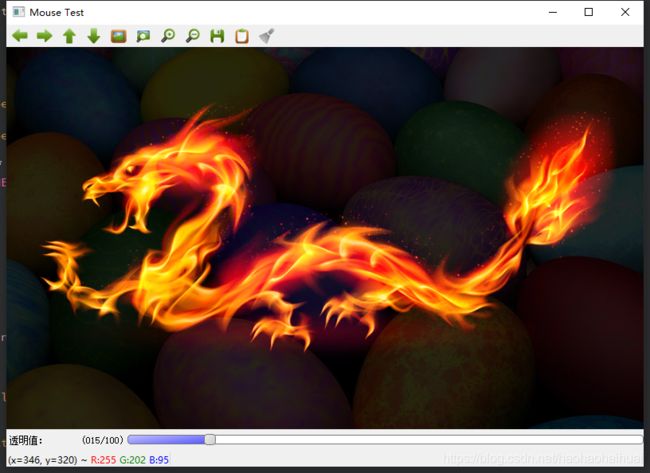
图片2:

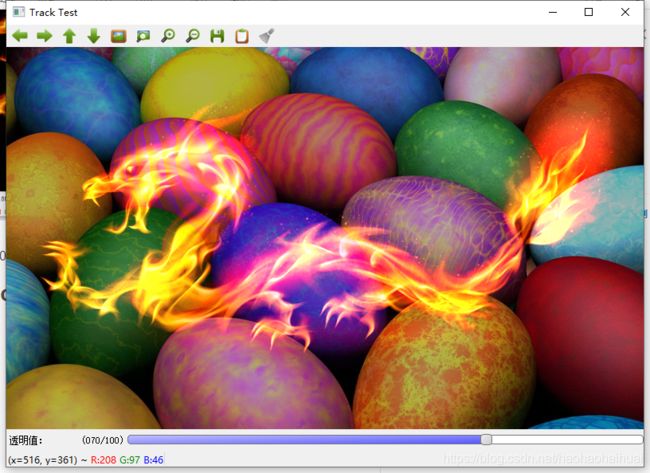
图片融合后保存jpg_write.jpg:
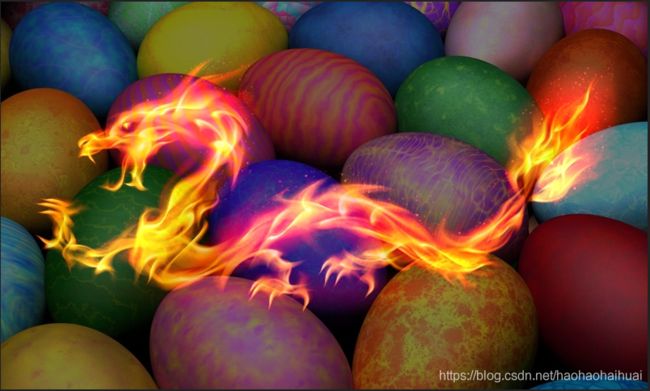
需要注意的是,2张进行融合的图片分辨率需要一致,否则会出错。
3.opencv滑动条
int createTrackbar(const String& trackbarname, const String& winname,
int* value, int count,
TrackbarCallback onChange = 0,
void* userdata = 0);
参数说明:
trackbarname:滑动条名字
winname:依附窗口名字
value:滑块当前值
count:滑块最大值
onChange:滑块改变时的回调本数
userdata:传给回调函数的数据
代码示例:
#define CV_WINDOW_NAME "Track Test"
const int m_nMaxValue = 100;
int m_nCurrentValue = 0;

cv::Mat mat1;
cv::Mat mat2;
cv::Mat mat3;
void onTrackCallback(int,void*)
{
    //计算alpha值
    double m_gAlphaValue = (double)m_nCurrentValue/m_nMaxValue;
    //将图1与图2线性混合
    cv::addWeighted(mat1,m_gAlphaValue,mat2,1.0,0,mat3);
    //显示图片
    cv::imshow(CV_WINDOW_NAME, mat3);
}

void CvHighGUI::cvTrackBar()
{
    //读取图片1
    mat1 = cv::imread("F:/work/opencv/cvhighgui/add.jpg");
    //读取图片2
    mat2 = cv::imread("F:/work/opencv/cvhighgui/dragon.jpg");

    //创建一个名为 "Tack test"的窗口
    cv::namedWindow(CV_WINDOW_NAME);

    char trackName[32];
    strcat(trackName,"透明值:");
    //创建滑动条
    cv::createTrackbar(trackName, CV_WINDOW_NAME,  &m_nCurrentValue, m_nMaxValue, onTrackCallback);

    onTrackCallback(0,0);
}
效果展示:
4.opencv鼠标操作
void onMouseCallback(int event, int x, int y, int flags, void* userdata)
{
    switch (event) {
    case EVENT_MBUTTONDBLCLK:
        qDebug("cv mouse double clicked!");
        break;
    case EVENT_FLAG_LBUTTON:
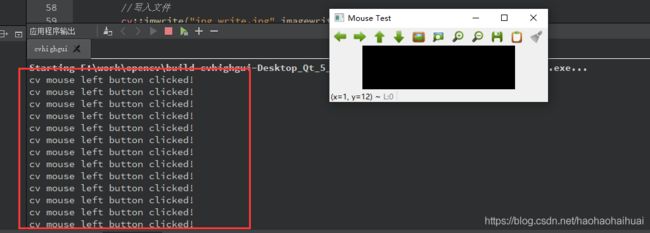
        qDebug("cv mouse left button clicked!");
        break;
    default:
        break;
    }
}
void CvHighGUI::cvMouseEvent()
{
    //创建一个名为 "Mouse test"的窗口
    cv::namedWindow(CV_WINDOW_NAME);
    cv::setMouseCallback(CV_WINDOW_NAME, onMouseCallback);
}
当鼠标左键按下时:
HighGUI的简单介绍就到此结束了,这里的滑动条和鼠标操作只是为了展示opencv的用法,其实在Qt下面以及具备了这些功能,大部分时候我们需要的是cv里面的一些算法功能。
作者:费码程序猿
欢迎技术交流:QQ:255895056
转载请注明出处,如有不当欢迎指正
