2023最新-用yolov8训练自己的数据集
YOLOv8训练教程
- 一、代码下载
- 二、环境配置
-
- 2.1 创建新环境
- 2.2 安装pytorch
- 2.3 安装第三方包
- 2.4 安装ultralytics
- 2.5 Bug解决
- 2.6 手动下载权重
- 2.7 检验是否可用
- 三、训练自己的数据集
-
- 3.1 处理数据集
- 3.2 训练数据
- 3.3 验证数据
- 3.4 预测数据
- 3.5 模型导出
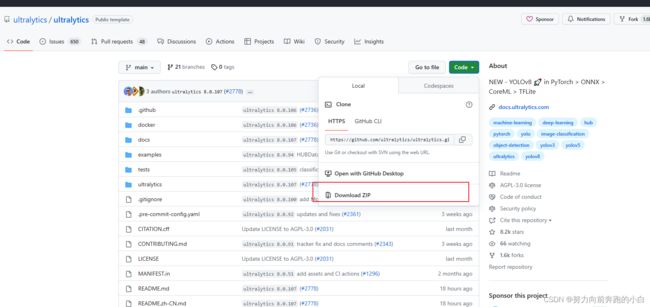
一、代码下载
git clone https://github.com/ultralytics/ultralytics
二、环境配置
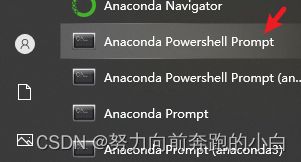
2.1 创建新环境
conda create -n yolov8 python=3.8
激活新的环境
conda activate yolov8
2.2 安装pytorch
你可以在pytorch官网中找到对应的安装命令,这里版本要求推荐torch=1.12.0+,下面贴出torch=1.12.0的各项安装命令,可以根据自己的电脑情况进行选择
CUDA 11.8
pip install torch==2.0.0+cu118 torchvision==0.15.1+cu118 torchaudio==2.0.1 --index-url https://download.pytorch.org/whl/cu118
CUDA 11.7
pip install torch==1.13.1+cu117 torchvision==0.14.1+cu117 torchaudio==0.13.1 --extra-index-url https://download.pytorch.org/whl/cu117
CUDA 11.6
pip install torch==1.12.0+cu116 torchvision==0.13.0+cu116 --extra-index-url https://download.pytorch.org/whl/cu116
CUDA 11.3
pip install torch==1.12.0+cu113 torchvision==0.13.0+cu113 --extra-index-url https://download.pytorch.org/whl/cu113
CUDA 10.2
pip install torch==1.12.0+cu102 torchvision==0.13.0+cu102 --extra-index-url https://download.pytorch.org/whl/cu102
CPU only
pip install torch==1.12.0+cpu torchvision==0.13.0+cpu --extra-index-url https://download.pytorch.org/whl/cpu
2.3 安装第三方包
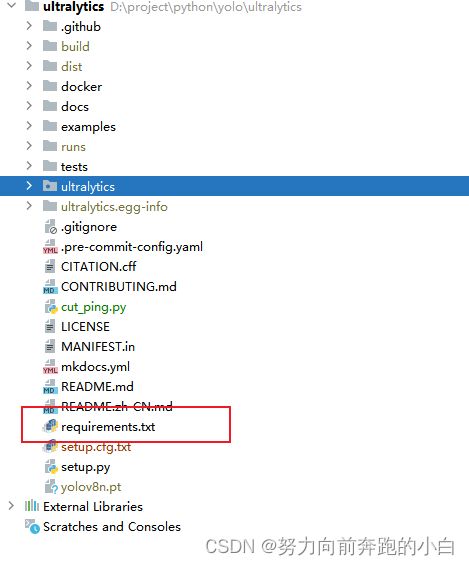
这里有我们需要安装的各种第三方包
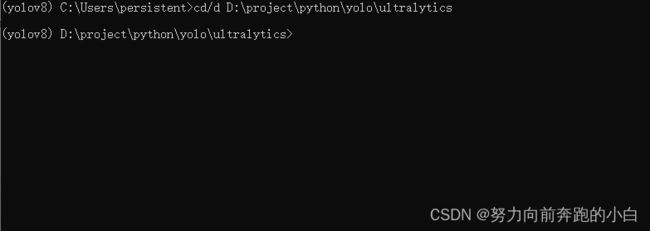
先将环境位置定位到requirements所在的位置,然后输入以下命令
pip install -r requirements.txt -i https://mirrors.bfsu.edu.cn/pypi/web/simple/
2.4 安装ultralytics
ultralytics集成了yolo的各种包以及模型等。
pip install ultralytics
2.5 Bug解决
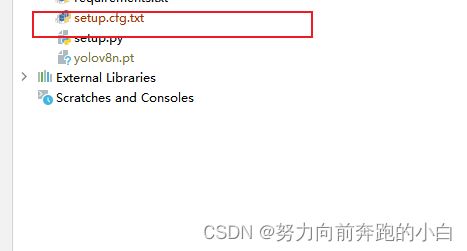
【WARNING:Ignore distutils configs in setup.cfg due to encoding errors】,如果安装过程出现这个,可以直接将setup.cfg 另存为txt文件。
2.6 手动下载权重
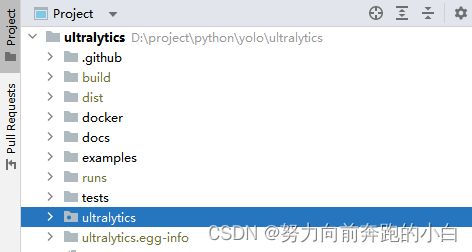
虽然yolov8会自动帮我们下载权重,但毕竟网站在国外,经常会出现下载失败。所以想要什么模型,先手动下载好,再github项目下都有。
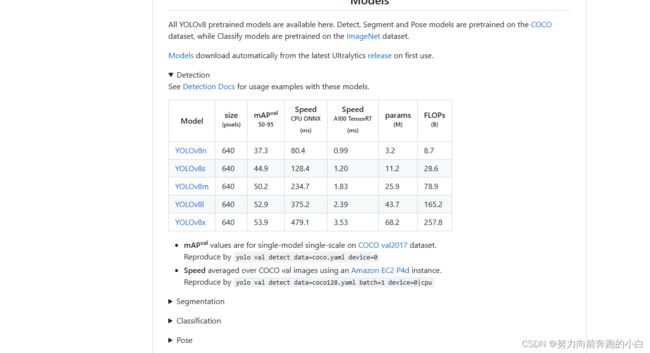
再粘贴到detect文件下。
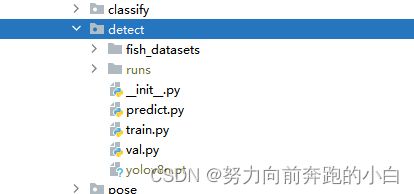
2.7 检验是否可用
用官方给的图片预测一下,命令如下
yolo task=detect mode=predict model=yolov8n.pt source=assets/ device=cpu save=True
三、训练自己的数据集
3.1 处理数据集
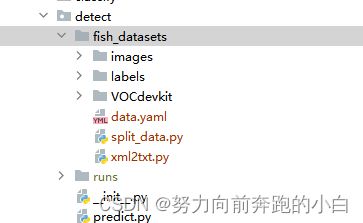
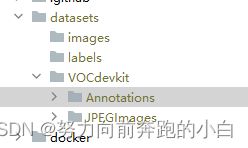
因为我们的数据集是voc格式,需要转换一下变成yolo格式,先像这样创建文件夹。
运行xml2txt.py,在这个文件中其会把Annotations中的XML格式标注文件转换到txt中的yolo格式标注文件。
import xml.etree.ElementTree as ET
import os, cv2
import numpy as np
from os import listdir
from os.path import join

classes = []

def convert(size, box):
    dw = 1. / (size[0])
    dh = 1. / (size[1])
    x = (box[0] + box[1]) / 2.0 - 1
    y = (box[2] + box[3]) / 2.0 - 1
    w = box[1] - box[0]
    h = box[3] - box[2]
    x = x * dw
    w = w * dw
    y = y * dh
    h = h * dh
    return (x, y, w, h)


def convert_annotation(xmlpath, xmlname):
    with open(xmlpath, "r", encoding='utf-8') as in_file:
        txtname = xmlname[:-4] + '.txt'
        txtfile = os.path.join(txtpath, txtname)
        tree = ET.parse(in_file)
        root = tree.getroot()
        filename = root.find('filename')
        img = cv2.imdecode(np.fromfile('{}/{}.{}'.format(imgpath, xmlname[:-4], postfix), np.uint8), cv2.IMREAD_COLOR)
        h, w = img.shape[:2]
        res = []
        for obj in root.iter('object'):
            cls = obj.find('name').text
            if cls not in classes:
                classes.append(cls)
            cls_id = classes.index(cls)
            xmlbox = obj.find('bndbox')
            b = (float(xmlbox.find('xmin').text), float(xmlbox.find('xmax').text), float(xmlbox.find('ymin').text),
                 float(xmlbox.find('ymax').text))
            bb = convert((w, h), b)
            res.append(str(cls_id) + " " + " ".join([str(a) for a in bb]))
        if len(res) != 0:
            with open(txtfile, 'w+') as f:
                f.write('\n'.join(res))


if __name__ == "__main__":
    postfix = 'jpg'
    imgpath = 'VOCdevkit/JPEGImages'
    xmlpath = 'VOCdevkit/Annotations'
    txtpath = 'VOCdevkit/txt'

    if not os.path.exists(txtpath):
        os.makedirs(txtpath, exist_ok=True)

    list = os.listdir(xmlpath)
    error_file_list = []
    for i in range(0, len(list)):
        try:
            path = os.path.join(xmlpath, list[i])
            if ('.xml' in path) or ('.XML' in path):
                convert_annotation(path, list[i])
                print(f'file {list[i]} convert success.')
            else:
                print(f'file {list[i]} is not xml format.')
        except Exception as e:
            print(f'file {list[i]} convert error.')
            print(f'error message:\n{e}')
            error_file_list.append(list[i])
    print(f'this file convert failure\n{error_file_list}')
    print(f'Dataset Classes:{classes}')

这个需要可以保存,后面yaml文件需要填写。
运行split_data.py,这个文件是划分训练、验证、测试集。
import os, shutil
from sklearn.model_selection import train_test_split

val_size = 0.1
test_size = 0.2
postfix = 'jpg'
imgpath = 'VOCdevkit/JPEGImages'
txtpath = 'VOCdevkit/txt'

os.makedirs('images/train', exist_ok=True)
os.makedirs('images/val', exist_ok=True)
os.makedirs('images/test', exist_ok=True)
os.makedirs('labels/train', exist_ok=True)
os.makedirs('labels/val', exist_ok=True)
os.makedirs('labels/test', exist_ok=True)

listdir = [i for i in os.listdir(txtpath) if 'txt' in i]
train, test = train_test_split(listdir, test_size=test_size, shuffle=True, random_state=0)
train, val = train_test_split(train, test_size=val_size, shuffle=True, random_state=0)
print(f'train set size:{len(train)} val set size:{len(val)} test set size:{len(test)}')

for i in train:
    shutil.copy('{}/{}.{}'.format(imgpath, i[:-4], postfix), 'images/train/{}.{}'.format(i[:-4], postfix))
    shutil.copy('{}/{}'.format(txtpath, i), 'labels/train/{}'.format(i))

for i in val:
    shutil.copy('{}/{}.{}'.format(imgpath, i[:-4], postfix), 'images/val/{}.{}'.format(i[:-4], postfix))
    shutil.copy('{}/{}'.format(txtpath, i), 'labels/val/{}'.format(i))

for i in test:
    shutil.copy('{}/{}.{}'.format(imgpath, i[:-4], postfix), 'images/test/{}.{}'.format(i[:-4], postfix))
    shutil.copy('{}/{}'.format(txtpath, i), 'labels/test/{}'.format(i))
新建一个data.yaml
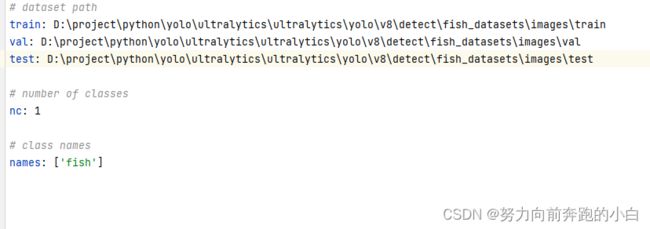
路径一定要写绝对路径,要不然会报错。
这样数据集就处理好了。
3.2 训练数据
输入训练命令
yolo task=detect mode=train model=yolov8s.yaml data=yolo/v8/detect/fish_datasets/data.yaml epochs=100 batch=4
3.3 验证数据
输入验证命令,用训练好的模型去验证
yolo task=detect mode=val model=ultralytics/yolo/v8/detect/runs/detect/train5/weights/best.pt data=ultralytics/yolo/v8/detect/fish_datasets/data.yaml device=cpu
3.4 预测数据
yolo task=detect mode=predict model=ultralytics/yolo/v8/detect/runs/detect/train5/weights/best.pt source=ultralytics/yolo/v8/detect/fish_datasets/images/val device=cpu
3.5 模型导出
使用下面的命令就可以导出模型了
yolo task=detect mode=export model=ultralytics/yolo/v8/detect/runs/detect/train5/weights/best.pt
本文也参考了不少大佬的文章,大家也可以去看看大佬们的教程。
YOLOV8最强操作教程
YOLOv8教程系列:一、使用自定义数据集训练YOLOv8模型(详细版教程,你只看一篇->调参攻略),包含环境搭建/数据准备/模型训练/预测/验证/导出等
YOLOv8 从环境搭建到推理训练
