spring-IOC
IOC容器
简介
IoC(Inversion of Control)控制反转,是一种基于面向对象编程法则的设计思想,它设计出的程序具有松耦合、更优良的特点。
IoC容器是Spring框架中重要的核心组件之一,贯穿了Spring从出生到成长的整个过程,Spring通过IoC容器管理所有Java对象的实例化和初始化,控制对象与对象之间的实例化、初始化以及依赖关系。由IoC容器管理的Java对象称为Spring Bean,它与使用new 关键字创建的Java对象没有任何区别。
Bean管理:Bean对象的创建和Bean对象中属性的的赋值(或者叫Bean对象之间关系的维护)
控制反转,反转的是什么?
- 将对象的创建权交出去,交给第三方容器负责。
- 将对象和对象之间关系的维护权交出去,交给第三方容器负责。
如何实现控制反转?
DI(Dependency Injection) 依赖注入
依赖注入:指Spring创建对象的过程中,将对象依赖属性通过配置进行注入,它实现了控制反转的思想。当一个对象作为另一个对象的属性的时候,我们可以使用依赖注入的方式将对象的内容注入。
依赖注入的实现方式:①set注入、②构造注入
IoC在Spring中的实现
Spring的IoC容器中管理的组件叫做Bean, 在创建Bean之前,首先需要创建IoC容器,Spring提供的IoC容器有两种实现方式。
1、BeanFactory
这是IoC容器的基本实现,是Spring内部使用的接口
2、ApplicationContext
BeanFactory的子接口,提供了更多高级特性。面向Spring的使用者,几乎所有的场合都使用ApplicationContext而不是底层的BeanFactory
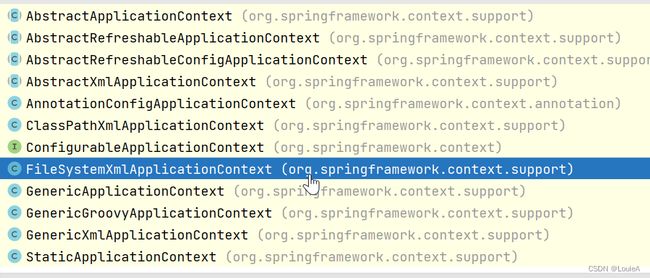
ApplicationContext的主要实现类
| 类名 | 简介 |
|---|---|
ClassPathXmlApplicationContext |
通过类读取路径下的XML格式的配置文件创建IoC对象 |
FileSystemXmlApplicationContext |
通过文件系统路径读取XML格式的配置文件创建IoC对象 |
ConfigurableApplicationContext |
ApplicationContext的子接口,包含一些扩展方法refresh()和close(),让ApplicationContext具有启动、关闭和刷新上下文功能 |
WebApplicationContex |
专门为Web应用准备,基于Web环境创建的IoC容器对象,并将对象引入存入ServletContext域中 |
基于xml管理Bean
步骤
①导入相关依赖
<dependency>
    <groupId>org.springframeworkgroupId>
    <artifactId>spring-contextartifactId>
    <version>6.0.9version>
dependency>
<dependency>
    <groupId>junitgroupId>
    <artifactId>junitartifactId>
    <version>4.13.2version>
    <scope>testscope>
dependency>
<dependency>
    <groupId>org.apache.logging.log4jgroupId>
    <artifactId>log4j-coreartifactId>
    <version>2.20.0version>
dependency>
<dependency>
    <groupId>org.apache.logging.log4jgroupId>
    <artifactId>log4j-slf4j2-implartifactId>
    <version>2.20.0version>
dependency>
②创建spring和log4j2的配置文件
spring.xml
<beans xmlns="http://www.springframework.org/schema/beans"
       xmlns:xsi="http://www.w3.org/2001/XMLSchema-instance"
       xsi:schemaLocation="http://www.springframework.org/schema/beans http://www.springframework.org/schema/beans/spring-beans.xsd">

    <bean id="user" class="com.louis.ioc_xml.User">bean>
beans>
log4j2的配置文件可从取:https://blog.csdn.net/xry12354/article/details/131647570
③创建User对象
package com.louis.ioc_xml;

/**
 * @author XRY
 * @date 2023年06月22日13:58
 */
public class User {

    private String name;
    private Integer age;

    public void run(){
        System.out.println("run....");
    }
}
④获取Bean
方式一:根据id获取
由于id属性指定了bean的唯一标识,所以根据bean标签的id属性可以精确获取到一个组件对象。
写法:
<bean id="user" class="com.louis.ioc_xml.User">bean>
id属性:唯一标识
class属性:要创建对象所在类的全路径(包名称+类名称)
@Test
public void testBeanById(){
    ApplicationContext applicationContext =
            new ClassPathXmlApplicationContext("bean.xml");
    User user = (User)applicationContext.getBean("user");
    logger.info("user = " + user);
}
/*[2023-06-22 14:17:20:953] [INFO] - TestBeanById.testBeanById(TestBeanById.java:20) - user = com.louis.ioc_xml.User@77d2e85*/
方式二:根据类型获取
@Test
public void testBeanByClass(){
    ApplicationContext applicationContext = new ClassPathXmlApplicationContext("bean.xml");
    User bean = applicationContext.getBean(User.class);
    logger.info("user"+bean);
}
/*[2023-06-22 14:22:24:009] [INFO] - TestBeanById.testBeanByClass(TestBeanById.java:29) - usercom.louis.ioc_xml.User@1a9c38eb*/
方式三:根据id和类型获取
@Test
public void testBeanByClassAndId(){
    ApplicationContext applicationContext = new ClassPathXmlApplicationContext("bean.xml");
    User user = applicationContext.getBean("user", User.class);
    logger.info("user" + user);
}
/*[2023-06-22 14:25:27:189] [INFO] - TestBeanById.testBeanByClassAndId(TestBeanById.java:37) - usercom.louis.ioc_xml.User@77d2e85*/
获取bean的细节
根据类型获取Bean时,要求IoC容器中指定类型的bean有且只能有一个。
组件类实现了接口,如果实现类只有一个则可以通过类型获取bean,如果实现类有多个,即使这些实现类都配置了bean也不能够使用类型获取。
只有一个实现类
//UserDaoImpl
package com.louis.bean;

/**
 * @author XRY
 * @date 2023年06月22日14:37
 */
public class UserDaoImpl implements UserDao{
    @Override
    public void run() {
        System.out.println("check the target");
    }
}
测试
@Test
public void testInterface(){
    ApplicationContext applicationContext = new ClassPathXmlApplicationContext("bean.xml");
    UserDao userDao = applicationContext.getBean("userDao", UserDao.class);
    logger.info("userDao" + userDao);
    userDao.run();
}
/*[2023-06-22 14:43:27:092] [INFO] - TestBeanById.testInterface(TestBeanById.java:47) - userDaocom.louis.bean.UserDaoImpl@58ffcbd7
    check the target*/
User有多个实现类
//PersonDaoImpl
package com.louis.bean;

/**
 * @author XRY
 * @date 2023年06月22日14:47
 */
public class PersonDaoImpl implements UserDao{
    @Override
    public void run() {
        System.out.println("person");
    }
}
测试
@Test
public void testTwoInterface(){
    ApplicationContext applicationContext = new ClassPathXmlApplicationContext("bean.xml");
    UserDao personDao = (UserDao)applicationContext.getBean("personDao");
    logger.info("personDao" + personDao);
    UserDao bean = applicationContext.getBean(UserDao.class);
    logger.info("bean" + bean);
}
 /*[2023-06-22 14:55:05:632] [INFO] - TestBeanById.testTwoInterface(TestBeanById.java:57) - personDaocom.louis.bean.PersonDaoImpl@555cf22
    org.springframework.beans.factory.NoUniqueBeanDefinitionException: No qualifying bean of type 'com.louis.bean.UserDao' available: expected single matching bean but found 2: userDao,personDao*/
结论
根据类型来获取bean时,在满足bean唯一性的前提下,其实只是看instanceof指定的类型的返回结果,只要返回的结果是true就可以认定为和类型匹配,能够获取到。
java中instanceof运算符用来判断前面的对象是否是后面的类,或其子类、实现类的实例。如果是返回true,否则返回false。
依赖注入
创建对象过程中,给属性设置值。
原生方法实现
package com.louis.di;

/**
 * @author XRY
 * @date 2023年06月23日9:46
 */
public class Book {
    private String name;
    private String author;

    public Book() {
    }

    public Book(String name, String author) {
        this.name = name;
        this.author = author;
    }

    public String getName() {
        return name;
    }

    public void setName(String name) {
        this.name = name;
    }

    public String getAuthor() {
        return author;
    }

    public void setAuthor(String author) {
        this.author = author;
    }


    public static void main(String[] args){
        //使用原生方法实现值的设置
        //set
        Book book = new Book();
        book.setName("西游记");
        book.setAuthor("吴承恩");

        //构造器
        Book book1 = new Book("水浒传","施耐庵");
    }
}
基于setter注入
步骤
1、创建类,定义属性生成属性的set方法
package com.louis.di;

/**
 * @author XRY
 * @date 2023年06月23日9:46
 */
public class Book {
    private String name;
    private String author;


    public String getName() {
        return name;
    }

    public void setName(String name) {
        this.name = name;
    }

    public String getAuthor() {
        return author;
    }

    public void setAuthor(String author) {
        this.author = author;
    }

    @Override
    public String toString() {
        return "Book{" +
                "name='" + name + '\'' +
                ", author='" + author + '\'' +
                '}';
    }
}
2、在spring的配置文件中进行配置
<bean id="book" class="com.louis.di.Book">

    <property name="name" value="红楼梦">property>
    <property name="author" value="曹雪芹">property>
bean>
3、测试
@Test
public void testBook(){
    ApplicationContext applicationContext = new ClassPathXmlApplicationContext("bean-di.xml");
    Book book = applicationContext.getBean("book", Book.class);
    logger.info("set注入" + book);
}

/*[2023-06-23 10:02:10:517] [INFO] - TestBeanById.testBook(TestBeanById.java:72) - set注入Book{name='红楼梦', author='曹雪芹'}*/
基于构造器注入
步骤
1、创建类,定义属性,生成有参构造方法(可以没有无参)
package com.louis.di;

/**
 * @author XRY
 * @date 2023年06月23日9:46
 */
public class Book {
    private String name;
    private String author;

    public Book() {
    }

    public Book(String name, String author) {
        this.name = name;
        this.author = author;
    }

    @Override
    public String toString() {
        return "Book{" +
                "name='" + name + '\'' +
                ", author='" + author + '\'' +
                '}';
    }
}
2、在spring中进行配置
<bean id="bookConstructor" class="com.louis.di.Book">
    <constructor-arg name="name" value="三国演义">constructor-arg>
    <constructor-arg name="author" value="罗贯中">constructor-arg>

bean>
3、测试
@Test
public void testConstructor(){
    ApplicationContext applicationContext = new ClassPathXmlApplicationContext("bean-di.xml");
    Book bookConstructor = applicationContext.getBean("bookConstructor", Book.class);
    logger.info("bookCon" + bookConstructor);
}
/*有参构造方法执行了
[2023-06-23 10:13:15:457] [INFO] - TestBeanById.testConstructor(TestBeanById.java:81) - bookConBook{name='三国演义', author='罗贯中'}*/
注入过程中特殊值的处理
字面量赋值
字面量:
如:int a = 1;直接赋值,表示我们看到的这个数据本身。
<property name="name" value="张三"/>
null值
<bean id="book" class="com.louis.di.Book">

    <property name="name" value="红楼梦">property>
    <property name="author">
        <null>null>
    property>
bean>
xml实体
当设置的值中有类似<>的时候,需要进行转义处理。解决方案:用xml实体来代替
<property name="name" value="<>">property>
CDATA节
它是xml中一种特殊的写法,当设置的值中有类似<>的时候,就是要写<>时可以使用。
<property name="name">

    <value>]]>value>
property>
不同类型进行依赖注入
对象类型属性注入
如:部门和员工
Department
public class Department {
    private String dName;

    public void info(){
        System.out.println("Department name");
    }
}
Employee
public class Employee {
    private String eName;
    private Integer age;
    private Department dept;


    public void work(){
        System.out.println("Employee working");
    }
}
方式一:引用外部bean
1、生成它们的set方法
Department
//部门类
public class Department {
    private String dname;

    public String getDname() {
        return dname;
    }

    public void setDname(String dname) {
        this.dname = dname;
    }

    public void info(){
        System.out.println("Department name");
    }
}
Employee
public class Employee {
    private String eName;
    private Integer age;
    private Department dept;

    public String geteName() {
        return eName;
    }

    public void seteName(String eName) {
        this.eName = eName;
    }

    public Integer getAge() {
        return age;
    }

    public void setAge(Integer age) {
        this.age = age;
    }

    public Department getDept() {
        return dept;
    }

    public void setDept(Department dept) {
        this.dept = dept;
    }

    public void work(){
        System.out.println("Employee working");
        //为了验证引入是否成功
        dept.info();
    }
}
2、编写配置文件
<bean id="dept" class="com.louis.di_test.Department">
    <property name="dname" value="IT">property>
bean>
<bean id="emp" class="com.louis.di_test.Employee">
    <property name="eName" value="Alex">property>
    <property name="age" value="18">property>

    <property name="dept" ref="dept">property>
bean>
3、测试
@Test
public void testObj(){
    ApplicationContext applicationContext = new ClassPathXmlApplicationContext("bean-diTest.xml");
    Employee emp = applicationContext.getBean("emp", Employee.class);
    emp.work();
    logger.info("emp" + emp);
}
/*Employee working
Department name
[2023-06-23 11:45:56:941] [INFO] - TestBeanById.testObj(TestBeanById.java:92) - empEmployee{eName='Alex', age=18, dept=Department{dname='IT'}}
*/
方式二:内部bean
1、生成set方法
2、编写配置文件
<bean id="emp2" class="com.louis.di_test.Employee">
    <property name="eName" value="Louie">property>
    <property name="age" value="20">property>

    <property name="dept">
        <bean id="dept2" class="com.louis.di_test.Department">
            <property name="dname" value="设计">property>
         bean>
    property>
bean>
3、测试
@Test
public void testObj2(){
    ApplicationContext applicationContext = new ClassPathXmlApplicationContext("bean-diTest.xml");
    Employee emp2 = applicationContext.getBean("emp2", Employee.class);
    emp2.work();
    logger.info("emp2" + emp2);
}
/*
Employee working
Department name
[2023-06-23 11:54:58:543] [INFO] - TestBeanById.testObj2(TestBeanById.java:104) - emp2Employee{eName='Louie', age=20, dept=Department{dname='设计'}}
*/
方式三:级联属性赋值
1、创建实体对象,生成set方法
2、编写配置文件
<bean id="dept3" class="com.louis.di_test.Department">
    <property name="dname" value="超人组">property>
bean>
<bean id="emp3" class="com.louis.di_test.Employee">
    <property name="eName" value="khan">property>
    <property name="age" value="23">property>
    <property name="dept" ref="dept3">property>
    <property name="dept.dname" value="研发科">property>
bean>
3、测试
@Test
public void testObj3(){
    ApplicationContext applicationContext = new ClassPathXmlApplicationContext("bean-diTest.xml");
    Employee emp3 = applicationContext.getBean("emp3", Employee.class);
    emp3.work();
    logger.info("emp3" + emp3);
}

/*Employee working
Department name
[2023-06-23 12:02:44:654] [INFO] - TestBeanById.testObj3(TestBeanById.java:118) - emp3Employee{eName='khan', age=23, dept=Department{dname='研发科'}}*/
为数组类型属性赋值
1、编写实体类
public class Person {
    private String[] hobby;

    public String[] getHobby() {
        return hobby;
    }

    public void setHobby(String[] hobby) {
        this.hobby = hobby;
    }

    @Override
    public String toString() {
        return "Person{" +
                "hobby=" + Arrays.toString(hobby) +
                '}';
    }
}
2、编写配置文件
<bean id="person" class="com.louis.di_array.Person">

    <property name="hobby">
        <array>
            <value>eatvalue>
            <value>sleepvalue>
            <value>codevalue>
        array>
    property>
bean>
3、测试
@Test
public void testArray(){
    ApplicationContext applicationContext = new ClassPathXmlApplicationContext("bean-diarray.xml");
    Person person = applicationContext.getBean("person", Person.class);
    logger.info("person" + person);
}

/*[2023-06-23 12:14:00:835] [INFO] - TestBeanById.testArray(TestBeanById.java:129) - personPerson{hobby=[eat, sleep, code]}*/
为集合类型属性赋值
(一)为list集合类型属性赋值
1、编写实体类并生成set方法
Department
public class Department {
    private String dname;
    private List<Employee> empList;

    public List<Employee> getEmpList() {
        return empList;
    }

    public void setEmpList(List<Employee> empList) {
        this.empList = empList;
    }

    public String getDname() {
        return dname;
    }

    public void setDname(String dname) {
        this.dname = dname;
    }

    public void info(){
        System.out.println("Department name");
    }

    @Override
    public String toString() {
        return "Department{" +
                "dname='" + dname + '\'' +
                ", empList=" + empList +
                '}';
    }
}
Employee
public class Employee {
    private String eName;
    private Integer age;
    private Department dept;

    public String geteName() {
        return eName;
    }

    public void seteName(String eName) {
        this.eName = eName;
    }

    public Integer getAge() {
        return age;
    }

    public void setAge(Integer age) {
        this.age = age;
    }

    public Department getDept() {
        return dept;
    }

    public void setDept(Department dept) {
        this.dept = dept;
    }

    public void work(){
        System.out.println("Employee working");
        dept.info();
    }

    @Override
    public String toString() {
        return "Employee{" +
                "eName='" + eName + '\'' +
                ", age=" + age +
                ", dept=" + dept +
                '}';
    }
}
2、编写配置文件
<bean id="emp" class="com.louis.di_test.Employee">
    <property name="eName" value="Louis">property>
    <property name="age" value="23">property>
bean>
<bean id="empTwo" class="com.louis.di_test.Employee">
    <property name="eName" value="Alex">property>
    <property name="age" value="22">property>
bean>
<bean id="dept" class="com.louis.di_test.Department">
    <property name="dname" value="研发科">property>
    <property name="empList">
        <list>

            <ref bean="emp">ref>
            <ref bean="empTwo">ref>
        list>
    property>
bean>
3、测试
@Test
public void testList(){
    ApplicationContext applicationContext = new ClassPathXmlApplicationContext("bean-dilist.xml");
    Department dept = applicationContext.getBean("dept", Department.class);
    dept.info();
    logger.info("dept" + dept);
}

/*Department name
employee.geteName() = Louis
employee.geteName() = Alex
[2023-06-23 12:31:05:121] [INFO] - TestBeanById.testList(TestBeanById.java:139) - deptDepartment{dname='研发科', empList=[Employee{eName='Louis', age=23, dept=null}, Employee{eName='Alex', age=22, dept=null}]}
*/
(二)为Map集合属性注入值
1、编写实体类并生成set方法
Student
public class Student {
    private String sname;
    private String sid;
    //一个学生可能对应多个老师
    private Map<String, Teacher> teacherMap;

    public Map<String, Teacher> getTeacherMap() {
        return teacherMap;
    }

    public void setTeacherMap(Map<String, Teacher> teacherMap) {
        this.teacherMap = teacherMap;
    }

    public String getSname() {
        return sname;
    }

    public void setSname(String sname) {
        this.sname = sname;
    }

    public String getSid() {
        return sid;
    }

    public void setSid(String sid) {
        this.sid = sid;
    }

    public void learn(){
        System.out.println("学生姓名" + sname + "----" + "学号" + sid);
        System.out.println(teacherMap);
    }

    @Override
    public String toString() {
        return "Student{" +
                "sname='" + sname + '\'' +
                ", sid='" + sid + '\'' +
                ", teacherMap=" + teacherMap +
                '}';
    }
}
Teacher
public class Teacher {
    private String tname;
    private String tid;

    public String getTname() {
        return tname;
    }

    public void setTname(String tname) {
        this.tname = tname;
    }

    public String getTid() {
        return tid;
    }

    public void setTid(String tid) {
        this.tid = tid;
    }

    @Override
    public String toString() {
        return "Teacher{" +
                "tname='" + tname + '\'' +
                ", tid='" + tid + '\'' +
                '}';
    }
}
2、编写配置文件
<bean id="teacher" class="com.louis.di_map.Teacher">
    <property name="tid" value="110">property>
    <property name="tname" value="Alex">property>
bean>
<bean id="teacher2" class="com.louis.di_map.Teacher">
    <property name="tid" value="120">property>
    <property name="tname" value="Khan">property>
bean>
<bean id="student" class="com.louis.di_map.Student">
    <property name="sid" value="18162004">property>
    <property name="sname" value="Louie">property>
    <property name="teacherMap">
        <map>
            <entry>
                <key>
                    <value>key1value>
                key>
                <ref bean="teacher">ref>
            entry>
            <entry>
                <key>
                    <value>key2value>
                key>
                <ref bean="teacher2">ref>
            entry>
        map>
    property>
bean>
3、测试
@Test
public void testMap(){
    ApplicationContext applicationContext = new ClassPathXmlApplicationContext("bean-diMap.xml");
    Student student = applicationContext.getBean("student", Student.class);
    logger.info("student" + student);
    student.learn();
}

/*[2023-06-23 12:57:29:327] [INFO] - TestBeanById.testMap(TestBeanById.java:152) - studentStudent{sname='Louie', sid='18162004', teacherMap={key1=Teacher{tname='Alex', tid='110'}, key2=Teacher{tname='Khan', tid='120'}}}
学生姓名Louie----学号18162004
{key1=Teacher{tname='Alex', tid='110'}, key2=Teacher{tname='Khan', tid='120'}}*/
引用集合类型的bean
将list和map的实现方式换一种写法。
1、在原有的Student和Teacher的基础上,再添加一个Lesson类
public class Lesson {
    private String lessonName;

    public String getLessonName() {
        return lessonName;
    }

    public void setLessonName(String lessonName) {
        this.lessonName = lessonName;
    }

    @Override
    public String toString() {
        return "Lesson{" +
                "lessonName='" + lessonName + '\'' +
                '}';
    }
}
2、再Student类中添加课程列表
List<Lesson> list;

public List<Lesson> getList() {
    return list;
}

public void setList(List<Lesson> list) {
    this.list = list;
}
3、编写配置文件
加上util的命名空间引入
<beans xmlns="http://www.springframework.org/schema/beans"
       xmlns:xsi="http://www.w3.org/2001/XMLSchema-instance"
       xmlns:util="http://www.springframework.org/schema/util"
       xsi:schemaLocation="
       http://www.springframework.org/schema/util
       http://www.springframework.org/schema/util/spring-util.xsd
       http://www.springframework.org/schema/beans
       http://www.springframework.org/schema/beans/spring-beans.xsd">

    <bean id="lessonOne" class="com.louis.di_map.Lesson">
        <property name="lessonName" value="JAVA开发">property>
    bean>
    <bean id="lessonTwo" class="com.louis.di_map.Lesson">
        <property name="lessonName" value="Python 开发">property>
    bean>
    <bean id="teacherOne" class="com.louis.di_map.Teacher">
        <property name="tname" value="Louie">property>
        <property name="tid" value="11011">property>
    bean>
    <bean id="teacherTwo" class="com.louis.di_map.Teacher">
        <property name="tname" value="Alex">property>
        <property name="tid" value="12012">property>
    bean>
    <bean id="student" class="com.louis.di_map.Student">
        <property name="sname" value="khan">property>
        <property name="sid" value="201811011">property>

        <property name="list" ref="lessonList">property>
        <property name="teacherMap" ref="teacherMap">property>
    bean>
    <util:list id="lessonList">
        <ref bean="lessonOne">ref>
        <ref bean="lessonTwo">ref>
    util:list>
    <util:map id="teacherMap">
        <entry>
            <key>
                <value>111value>
            key>
            <ref bean="teacherOne">ref>
        entry>
        <entry>
            <key>
                <value>222value>
            key>
            <ref bean="teacherTwo">ref>
        entry>
    util:map>
beans>
4、测试
@Test
public void testUtil(){
    ApplicationContext applicationContext = new ClassPathXmlApplicationContext("bean-diRef.xml");
    Student student = applicationContext.getBean("student", Student.class);
    student.learn();
    logger.info("student" + student);
}

/*学生姓名khan----学号201811011
{111=Teacher{tname='Louie', tid='11011'}, 222=Teacher{tname='Alex', tid='12012'}}
[2023-06-23 14:28:04:062] [INFO] - TestBeanById.testUtil(TestBeanById.java:164) - studentStudent{sname='khan', sid='201811011', teacherMap={111=Teacher{tname='Louie', tid='11011'}, 222=Teacher{tname='Alex', tid='12012'}}, list=[Lesson{lessonName='JAVA开发'}, Lesson{lessonName='Python 开发'}]}
*/
p命名空间
命名空间:为避免命名时冲突,再命名后面加上:重命名的方式
xmlns:p = "http://www.springframework.org/schema/p"
编写配置文件
<bean id="studentP" class="com.louis.di_map.Student" p:sid="201811" p:sname="Louis" p:list-ref="lessonList" p:teacherMap-ref="teacherMap">
bean>
<util:list id="lessonList">
    <ref bean="lessonOne">ref>
    <ref bean="lessonTwo">ref>
util:list>
<util:map id="teacherMap">
    <entry>
        <key>
            <value>111value>
        key>
        <ref bean="teacherOne">ref>
    entry>
    <entry>
        <key>
            <value>222value>
        key>
        <ref bean="teacherTwo">ref>
    entry>
util:map>
测试
@Test
public void testP(){
    ApplicationContext applicationContext = new ClassPathXmlApplicationContext("bean-diRef.xml");
    Student studentP = applicationContext.getBean("studentP", Student.class);
    studentP.learn();
    logger.info("studentP" + studentP);
}

/*学生姓名Louis----学号201811
{111=Teacher{tname='Louie', tid='11011'}, 222=Teacher{tname='Alex', tid='12012'}}
[2023-06-23 14:43:14:562] [INFO] - TestBeanById.testP(TestBeanById.java:176) - studentPStudent{sname='Louis', sid='201811', teacherMap={111=Teacher{tname='Louie', tid='11011'}, 222=Teacher{tname='Alex', tid='12012'}}, list=[Lesson{lessonName='JAVA开发'}, Lesson{lessonName='Python 开发'}]}
*/
引入外部属性文件
应用场景:在一个文件中如果出现多个bean的创建和注入,维护就会比较困难。可以将一些特定的文件放在特定位置在spring中进行引入,如数据库文件。
实现步骤(数据库的配置文件引入)
1、引入相关依赖
 <dependency>
    <groupId>com.alibabagroupId>
    <artifactId>druidartifactId>
    <version>1.2.16version>
dependency>
<dependency>
    <groupId>mysqlgroupId>
    <artifactId>mysql-connector-javaartifactId>
    <version>8.0.33version>
dependency>

<dependency>
    <groupId>commons-dbutilsgroupId>
    <artifactId>commons-dbutilsartifactId>
    <version>1.7version>
dependency>
2、创建Dbutils.properties
username=root
password=root
url=jdbc:mysql://localhost:3306/spring
driver=com.mysql.cj.jdbc.Driver
3、创建spring的配置文件
引入context命名空间,引入属性文件,使用表达式完成注入。
context命名空间
xmlns:contex="http://www.springframework.org/schema/context"
xsi:schemaLocation="
http://www.springframework.org/schema/context
http://www.springframework.org/schema/context/spring-context.xsd"
引入属性文件
<contex:property-placeholder location="classpath:Dbutils.properties">contex:property-placeholder>
完整配置
<beans xmlns="http://www.springframework.org/schema/beans"
       xmlns:xsi="http://www.w3.org/2001/XMLSchema-instance"
       xmlns:contex="http://www.springframework.org/schema/context"
       xsi:schemaLocation="
       http://www.springframework.org/schema/context
       http://www.springframework.org/schema/context/spring-context.xsd
       http://www.springframework.org/schema/beans
       http://www.springframework.org/schema/beans/spring-beans.xsd">


    <contex:property-placeholder location="classpath:Dbutils.properties">contex:property-placeholder>

    <bean id="druidDataSource" class="com.alibaba.druid.pool.DruidDataSource">
        <property name="url" value="${url}">property>
        <property name="username" value="${username}">property>
        <property name="password" value="${password}">property>
        <property name="driver" value="${driver}">property>
    bean>
beans>
4、测试
@Test
public void testDbutils(){
    ApplicationContext applicationContext = new ClassPathXmlApplicationContext("bean-Dbutils.xml");
    DruidDataSource dataSource = applicationContext.getBean("druidDataSource", DruidDataSource.class);
    logger.info("dataSource" + dataSource);
}
/*
* [2023-06-23 15:36:52:008] [INFO] - TestBeanById.testDbutils(TestBeanById.java:189) - dataSource{
    CreateTime:"2023-06-23 15:36:51",
    ActiveCount:0,
    PoolingCount:0,
    CreateCount:0,
    DestroyCount:0,
    CloseCount:0,
    ConnectCount:0,
    Connections:[
    ]
}
* */