SP.UI.ModalDialog
ASP.Net AJAX模板是一门全新的引人注目的客户端技术,允许开发者快速构建AJAX易于维护的交互式应用程序。由于ASP.Net AJAX模板和SharePoint 2010都支持oData协议,因此两者结合在一起将是一个强大的组合。
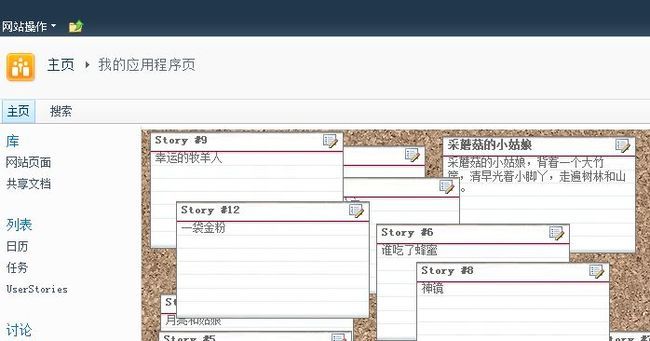
SharePoint 2010 之所以可以带给人们Web 2.0的外观和感觉很大一部分要归功于其弹出式模式对话框的使用。为了进一步丰富上一篇中的AJAX应用,我们在每张卡片上挂接一个操作,打开一个对话框以便对该卡片做更细致的处理。在之前的使用SharePoint 2010模式对话框一文中,我们学习了如何在模式对话框中打开远端的页面,以及如何响应对话框确定或取消事件。本文中的模式对话框会更进一步,基于本地的HTML内容打开对话框。
首先,我们在前文中做好的索引卡上添加一个编辑图标。我们将在其上挂接打开模式对话框的操作:
1 |
<div class="userStoryTitle"> |
2 |
{{ 标题 }} |
3 |
<span class="userStoryButtons"> |
4 |
<a href="#" onclick="javascript:openDialog(); return false;"> |
5 |
<img src="/_layouts/images/edititem.gif" /> |
6 |
</a> |
7 |
</span> |
8 |
</div> |
为了先简单测试一下打开对话框的效果,同时也复习一下前面学习的模式对话框的使用,我们编写如下的打开对话框代码:
1 |
function openDialog() { |
2 |
var options = { |
4 |
width: 800, |
5 |
height: 600, |
6 |
title: "User Story", |
7 |
}; |
8 |
SP.UI.ModalDialog.showModalDialog(options); |
9 |
} |
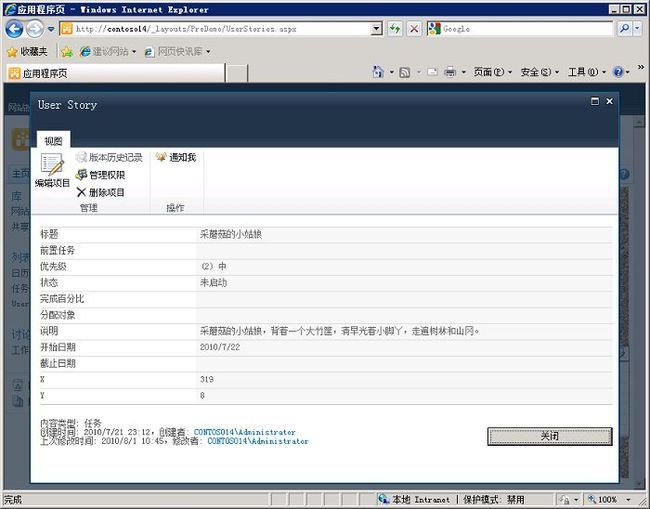
显然硬编码的URL中的参数id不是最佳做法,这里只是作为示范。结果看起来像这样:
这是一个非常有用的技术,允许我们在不离开现有的SharePoint网页的情况下打开一个对话框,使用户可以直接浏览另一个网页。然而,在这里我们希望我们的应用程序中编辑的信息是在浏览器的内存里(通过ASP.Net AJAX模板存储数据)。该showModalDialog()函数可以支持这一方案,但要稍微复杂一些。
模式对话框方式打开本地HTML内容
首先,我们需要一个HTML元素用于弹出。作为用来测试的一个初稿,我们使用如下的html内容:
1 |
<div id="userStoryDetails"> |
2 |
Hello World! |
3 |
</div> |
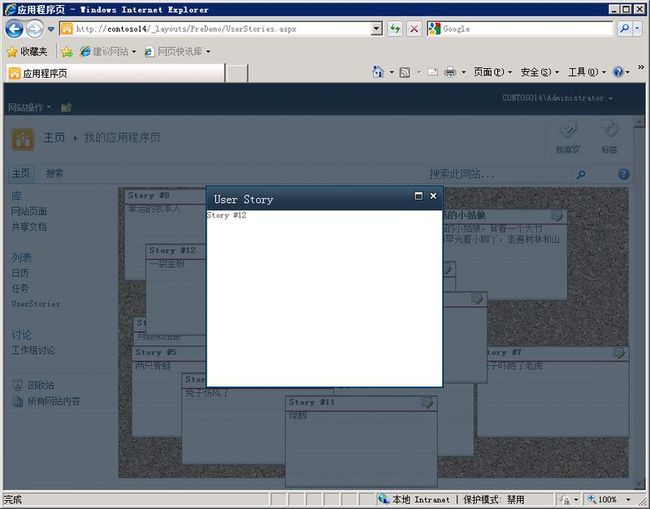
由于我们传递给showModalDialog()的options参数支持一个'html'参数来替代'url'参数,因此猜测可能看起来我们只需要简单地在openDialog中获取到userStoryDetails元素并作为选项传递即可。然而,这一做法有一个问题。默认SharePoint的showModalDialog()函数将销毁传递给它的DOM元素。结果是对话框只可以打开一次,再次打开就会失败。
为了避免这种行为,我们可以在一个全局变量中缓存该DOM元素,而不是放在函数层中作为一个局部变量。代码如下所示:
01 |
var userStoryDetails; |
02 |
|
03 |
Sys.onReady(function () { |
04 |
userStoryDetails = document.getElementById("userStoryDetails"); |
05 |
... |
06 |
}); |
07 |
|
08 |
function openDialog() { |
09 |
var options = { |
10 |
html: userStoryDetails, |
11 |
width: 600, |
12 |
height: 300, |
13 |
title: "User Story", |
14 |
}; |
15 |
SP.UI.ModalDialog.showModalDialog(options); |
16 |
} |
有了这个代码,我们就可以多次关闭和打开模式对话框了。结果如下所示:
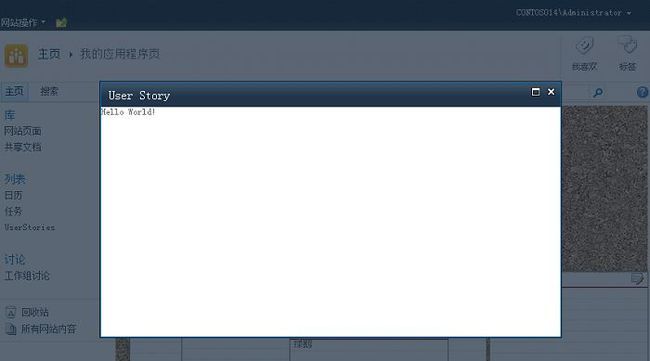
接下来我们来处理对话框操作完成后的结果。在前面的文章中我们也介绍过做法。首先在对话框的代码中调用commonModalDialogClose(),然后在主窗口中实现回调函数,以便SharePoint在关闭弹窗时调用。
修改我们的userStoryDetails内容,增加调用commonModalDialogClose()的代码如下:
01 |
<div id="userStoryDetails"> |
02 |
<input |
03 |
type="button" |
04 |
value="确定" |
05 |
onclick="SP.UI.ModalDialog.commonModalDialogClose(SP.UI.DialogResult.OK, '点了确定'); return false;" |
06 |
class="ms-ButtonHeightWidth" |
07 |
/> |
08 |
<input |
09 |
type="button" |
10 |
value="取消" |
11 |
onclick="SP.UI.ModalDialog.commonModalDialogClose(SP.UI.DialogResult.cancel, '点了取消'); return false;" |
12 |
class="ms-ButtonHeightWidth" |
13 |
/> |
14 |
</div> |
请注意commonModalDialogClose()第一个参数,是一个DialogResult。这个参数非常重要,因为我们的回调函数将通过此方法,区分不同的对话框关闭方式。例如,当用户点击在右上角的X时,SharePoint会传递DialogResult.cancel作为第一个参数。
commonModalDialogClose()的第二个参数会直接作为回调函数的第二个参数进行传递。
为了关闭对话框时对结果进行处理,我们可以为showModalDialog函数的options参数中增加一个dialogReturnValueCallback参数。结果如下:
01 |
function openDialog() { |
02 |
var options = { |
03 |
html: userStoryDetails, |
04 |
width: 800, |
05 |
height: 600, |
06 |
title: "User Story", |
07 |
dialogReturnValueCallback: onDialogClose |
08 |
}; |
09 |
SP.UI.ModalDialog.showModalDialog(options); |
10 |
} |
11 |
|
12 |
function onDialogClose(dialogResult, returnValue) { |
13 |
if (dialogResult == SP.UI.DialogResult.OK) { |
14 |
alert('( ^_^ )/~~拜拜!'); |
15 |
} |
16 |
if (dialogResult == SP.UI.DialogResult.cancel) { |
17 |
alert(returnValue); |
18 |
} |
19 |
} |
现在我们可以打开和关闭SharePoint模式对话框并处理结果。如果需要,我们还可以对模式对话框的options中的其他参数进行调整。例如的X,Y,allowMaximize,showMaximized和showClose。这方面的文档很少,希望MSDN上的这个页面在不久的将来能够更新。
接下来,我们要正式进行对话框内容的编写。
显示selectedData
为了可以显示当前选定的项目,我们将需要将弹出对话框中的HTML绑定到当前选中的列表项。下面是一个最简单的例子:
1 |
<div id="userStoryDetails" class="sys-template">{{ 标题 }}</div> |
注意其中sys-template类的使用。在上一篇博文中我们说过,任何dataView依附的元素都需要加上这个类。用于在页面加载时将该元素设为display:none,dataView显示时会将其设回到display:block。
接下来,我们需要第二个dataView对象来绑定对话框中显示的HTML内容。
1 |
detailsDataView = Sys.query("#userStoryDetails").dataView().get(0); |
注意,我们并没有像第一个dataView那样设置dataProvider或fetchOperation。原因是我们将绑定其data属性到主dataView的selectedData属性,如下所示:
1 |
$create(Sys.Binding, { |
2 |
source: dataView, |
3 |
path: "selectedData", |
4 |
target: detailsDataView, |
5 |
targetProperty: "data" |
6 |
}); |
selectedData 是DataView的一个特殊属性,代表当前选定的项目。现在离我们完成主-子关系的应用场景已经非常接近了。剩下的主要任务就是告诉主DataView什么时侯更新 selectedData。我们可以通过在主DataView的模板中的某个元素上添加sys:command="select"来完成该任务。添加到打开该模式对话框的按钮上应该最合乎逻辑:
1 |
<span class="userStoryButtons"> |
2 |
<a href="#" onclick="javascript:openDialog(); return false;" sys:command="select"> |
3 |
<img alt="edit" src="/_layouts/images/edititem.gif"> |
4 |
</a> |
5 |
</span> |
现在,我们完成了如下所示的逻辑:
显示主项对应的详细信息
到目前为止,我们所显示的信息过于单薄了。在后面的博文中,我们会实现对字段内容的编辑和保存功能。本文中,我们仅仅再多加些只读字段。
01 |
<div id="userStoryDetails" class="sys-template"> |
02 |
<table class="ms-formtable" width="100%"> |
03 |
<tr> |
04 |
<td class="ms-formlabel" width="190">标题:</td> |
05 |
<td class="ms-formbody">{{ 标题 }}</td> |
06 |
</tr> |
07 |
<tr> |
08 |
<td class="ms-formlabel" width="190">点数:</td> |
09 |
<td class="ms-formbody">{{ 点数 }}</td> |
10 |
</tr> |
11 |
<tr> |
12 |
<td colspan="2" nowrap> |
13 |
<span>创建于 </span> |
14 |
<span>{{ String.format("{0:yyyy-M-dd h:m tt}", 创建时间) }}</span> |
15 |
|
16 |
<input type="button" name="OK" value="确定" class="ms-ButtonHeightWidth" |
17 |
onclick="SP.UI.ModalDialog.commonModalDialogClose(SP.UI.DialogResult.OK); return false;" /> |
18 |
<input type="button" name="Cancel" value="取消" class="ms-ButtonHeightWidth" |
19 |
onclick="SP.UI.ModalDialog.commonModalDialogClose(SP.UI.DialogResult.cancel,'点了取消'); return false;" /> |
20 |
</td> |
21 |
</tr> |
22 |
</table> |
23 |
</div> |
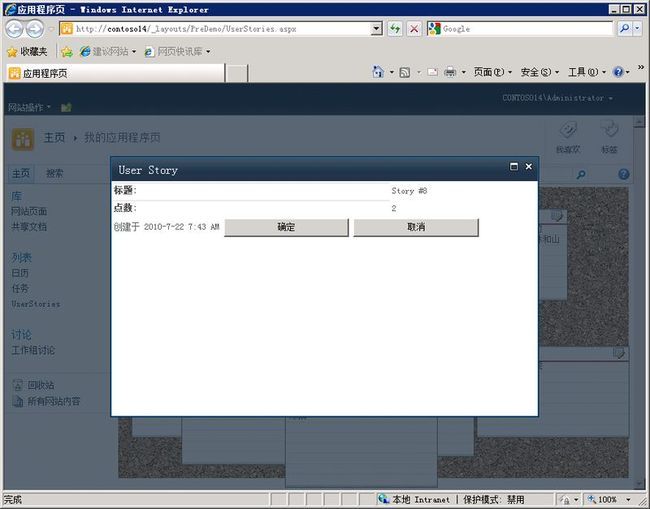
关于上面的详细信息视图,有两处需要注意。其一,我们可以显示像点数这样的没有在主dataView出现过的字段(假设在列表中有这个字段)。之所以可以,是因为主dataView实际上默认情况下是下载了列表的所有字段。关于如何从相
关的列表中获取数据也是我们在将来博文中要讨论的一个话题。
其二,我们处理日期时间的方式是如此简单。String.format是AJAX库提供的一个方法,可以用于格式化SharePoint提供的酷似C#/VB中的日期格式,使其变成读者可以接受的格式。以下是我们做好的新的详细信息视图:
下面是至今为止整个应用程序的源代码:
001 |
<%@ Assembly Name="$SharePoint.Project.AssemblyFullName$" %> |
002 |
<%@ Import Namespace="Microsoft.SharePoint.ApplicationPages" %> |
003 |
<%@ Register Tagprefix="SharePoint" Namespace="Microsoft.SharePoint.WebControls" Assembly="Microsoft.SharePoint, Version=14.0.0.0, Culture=neutral, PublicKeyToken=71e9bce111e9429c" %> |
004 |
<%@ Register Tagprefix="Utilities" Namespace="Microsoft.SharePoint.Utilities" Assembly="Microsoft.SharePoint, Version=14.0.0.0, Culture=neutral, PublicKeyToken=71e9bce111e9429c" %> |
005 |
<%@ Register Tagprefix="asp" Namespace="System.Web.UI" Assembly="System.Web.Extensions, Version=3.5.0.0, Culture=neutral, PublicKeyToken=31bf3856ad364e35" %> |
006 |
<%@ Import Namespace="Microsoft.SharePoint" %> |
007 |
<%@ Assembly Name="Microsoft.Web.CommandUI, Version=14.0.0.0, Culture=neutral, PublicKeyToken=71e9bce111e9429c" %> |
008 |
<%@ Page Language="C#" AutoEventWireup="true" CodeBehind="UserStories.aspx.cs" Inherits="PreDemo.Layouts.PreDemo.UserStories" DynamicMasterPageFile="~masterurl/default.master" %> |
009 |
|
010 |
<asp:Content ID="PageHead" ContentPlaceHolderID="PlaceHolderAdditionalPageHead"runat="server"> |
011 |
<style type="text/css"> |
012 |
.sys-template |
013 |
{ |
014 |
display:none; |
015 |
} |
016 |
.userStoryBackground |
017 |
{ |
018 |
background-image: url('Images/corkboard.png'); |
019 |
width:695px; |
020 |
height:397px; |
021 |
} |
022 |
.userStoryCard |
023 |
{ |
024 |
border: 1px solid #777777; |
025 |
width: 206px; |
026 |
height:124px; |
027 |
cursor: move; |
028 |
background-image: url('Images/blankcard.png'); |
029 |
margin:4px; |
030 |
} |
031 |
.userStoryDescription |
032 |
{ |
033 |
padding: 5px; |
034 |
line-height:1.2; |
035 |
} |
036 |
.userStoryTitle |
037 |
{ |
038 |
font-weight: bold; |
039 |
padding: 2px 5px 0px 5px; |
040 |
} |
041 |
.userStoryButtons |
042 |
{ |
043 |
position: absolute; |
044 |
right: 0px; |
045 |
padding: 2px 2px 0 0; |
046 |
} |
047 |
.userStoryButtons img |
048 |
{ |
049 |
border: 0 none; |
050 |
} |
051 |
</style> |
052 |
<script src="/_layouts/Scripts/jQuery/jquery-1.4.1.js" type="text/javascript"></script> |
053 |
<script src="/_layouts/Scripts/plugins/jquery-ui-1.8.2.custom.min.js"type="text/javascript"></script> |
054 |
<script src="/_layouts/Scripts/MicrosoftAjax/Start.js" type="text/javascript"></script> |
055 |
<script src= "/_layouts/Scripts/MicrosoftAjax/MicrosoftAjax.js" type="text/javascript"></script> |
056 |
|
057 |
<script type="text/javascript"> |
058 |
|
059 |
Sys.require([ |
060 |
Sys.components.dataView, |
061 |
Sys.components.openDataContext, |
062 |
]); |
063 |
var dataContext; |
064 |
var dataView; |
065 |
var userStoryDetails; |
066 |
var detailsDataView; |
067 |
|
068 |
|
069 |
Sys.onReady(function () { |
070 |
userStoryDetails = document.getElementById("userStoryDetails"); |
071 |
|
072 |
dataContext = Sys.create.openDataContext({ |
073 |
serviceUri: "/_vti_bin/ListData.svc", |
074 |
mergeOption: Sys.Data.MergeOption.appendOnly |
075 |
}); |
076 |
|
077 |
dataView = Sys.query("#userStoriesList").dataView({ |
078 |
dataProvider: dataContext, |
079 |
fetchOperation: "UserStories", |
080 |
feachParameters: { orderby: '标题' }, |
081 |
autoFetch: "true", |
082 |
rendered: onRendered |
083 |
}).get(0); |
084 |
|
085 |
detailsDataView = Sys.query("#userStoryDetails").dataView().get(0); |
086 |
|
087 |
$create(Sys.Binding, { |
088 |
source: dataView, |
089 |
path: "selectedData", |
090 |
target: detailsDataView, |
091 |
targetProperty: "data" |
092 |
}); |
093 |
}); |
094 |
function onRendered() { |
095 |
$(".userStoryCard").draggable({ |
096 |
stop: onDragStop |
097 |
}); |
098 |
} |
099 |
function onDragStop(event, ui) { |
100 |
var userStoryCard = ui.helper[0]; |
101 |
var selectedUserStoryJsonObject = dataView.findContext(userStoryCard).dataItem; |
102 |
var newX = ui.position.left; |
103 |
var newY = ui.position.top; |
104 |
Sys.Observer.setValue(selectedUserStoryJsonObject, "X", newX); |
105 |
Sys.Observer.setValue(selectedUserStoryJsonObject, "Y", newY); |
106 |
dataContext.saveChanges(); |
107 |
} |
108 |
|
109 |
function openDialog() { |
110 |
var options = { |
111 |
html: userStoryDetails, |
112 |
width: 580, |
113 |
height: 320, |
114 |
title: "User Story", |
115 |
dialogReturnValueCallback: onDialogClose |
116 |
}; |
117 |
SP.UI.ModalDialog.showModalDialog(options); |
118 |
} |
119 |
|
120 |
function onDialogClose(dialogResult, returnValue) { |
121 |
if (dialogResult == SP.UI.DialogResult.OK) { |
122 |
|
123 |
} |
124 |
if (dialogResult == SP.UI.DialogResult.cancel) { |
125 |
|
126 |
} |
127 |
} |
128 |
</script> |
129 |
</asp:Content> |
130 |
|
131 |
<asp:Content ID="Main" ContentPlaceHolderID="PlaceHolderMain" runat="server"> |
132 |
<div id="userStoryDetails" class="sys-template"> |
133 |
<table class="ms-formtable" width="100%"> |
134 |
<tr> |
135 |
<td class="ms-formlabel" width="190">标题:</td> |
136 |
<td class="ms-formbody">{{ 标题 }}</td> |
137 |
</tr> |
138 |
<tr> |
139 |
<td class="ms-formlabel" width="190">点数:</td> |
140 |
<td class="ms-formbody">{{ 点数 }}</td> |
141 |
</tr> |
142 |
<tr> |
143 |
<td colspan="2" nowrap> |
144 |
<span>创建于 </span> |
145 |
<span>{{ String.format("{0:yyyy-M-dd h:m tt}", 创建时间) }}</span> |
146 |
|
147 |
<input type="button" name="OK" value="确定" class="ms-ButtonHeightWidth" |
148 |
onclick="SP.UI.ModalDialog.commonModalDialogClose(SP.UI.DialogResult.OK); return false;" /> |
149 |
<input type="button" name="Cancel" value="取消" class="ms-ButtonHeightWidth" |
150 |
onclick="SP.UI.ModalDialog.commonModalDialogClose(SP.UI.DialogResult.cancel,'点了取消'); return false;" /> |
151 |
</td> |
152 |
</tr> |
153 |
</table> |
154 |
</div> |
155 |
|
156 |
<div id="userStoriesList" class="sys-template userStoryBackground"xmlns:sys="javascript:Sys"> |
157 |
<div class="userStoryCard" sys:style="{{ 'left:'+X+'px;top:'+Y+'px;'}}"> |
158 |
<div class="userStoryTitle"> |
159 |
{{ 标题 }} |
160 |
<span class="userStoryButtons"> |
161 |
<a href="#" onclick="javascript:openDialog(); return false;" sys:command="select"> |
162 |
<img alt="edit" src="/_layouts/images/edititem.gif"> |
163 |
</a> |
164 |
</span> |
165 |
</div> |
166 |
<div class="userStoryDescription"><div>{{ 说明 }}</div> |
167 |
</div> |
168 |
</div> |
169 |
|
170 |
</asp:Content> |
171 |
|
172 |
<asp:Content ID="PageTitle" ContentPlaceHolderID="PlaceHolderPageTitle" runat="server"> |
173 |
应用程序页 |
174 |
</asp:Content> |
175 |
|
176 |
<asp:Content ID="PageTitleInTitleArea"ContentPlaceHolderID="PlaceHolderPageTitleInTitleArea" runat="server" > |
177 |
我的应用程序页 |
178 |
</asp:Content> |
总结
我们已经了解了如何绑定一个详细信息DataView到当前选中的主DataView项目,并为不同的数据类型使用不同的格式设置。下一篇中我们将更新详细信息DataView,使其支持列表项的编辑
