Django+mysql+bootstrap学习
python与mysql
创建表结构
create databse unicom DEFAULT CHARSET utf8 COLLATE utf8_general_ci;
use unicom;
create table admin(
	id int not null auto_increment primary key,
	username varchar(16) not null,
	password varchar(64) not null,
	mobile char(11) not null
) default charset=utf8;
python+mysql
- 在进行新增、删除、修改时,一定要记得commit,不然数据库没有数据。
- 在查询时,不需要commit,执行fetchall/fetchone
cursor.excute("select ...")

#第一条数据,字典形式,无数据时空列表
v1 = cursor.fetchone()

#所有数据,列表套字典形式,无数据时是None
v1 = cursor.fetchall()
- sql语句不要用python的字符串格式化进行拼接(会sql注入),一定要用excute+参数
import mysql

#1. 连接mysql
conn = pymysql.connect(host="127.0.0.1", port=3306, user="root", password="root123", charset='utf8', db="unicom")
cursor = conn.cursor(cursor=pymysql.cursors.DictCursor)

#2. 发送指令
sql = "insert into admin(username,password,mobile) values(%s, %s, %s)"
cursor.execute(sql, ['rui','rui123','13333333333'])
conn.commit()

#3.关闭
cursor.close()
conn.close()
案例:Flask+Mysql+HTML
-
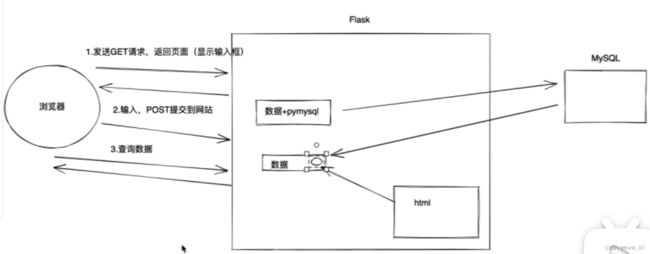
添加用户:将前端输入的内容添加到数据库中。
注意: html中添加method
DOCTYPE html>
<html lang="en">
<head>
    <meta charset="UTF-8">
    <title>我的demo title>
head>
<body>
<h1>添加用户h1>
<form method="post" action="/user/add">
    <input type="text" name="user" placeholder="用户名">
    <input type="text" name="pwd" placeholder="密码">
    <input type="text" name="mobile" placeholder="手机号">
    <input type="submit" value="提交">
form>

body>
html>
from flask import Flask, render_template, request
import pymysql

#在当前文件下创建应用
app = Flask(__name__)

# 创建了网址/user/add和函数user_add的对应关系
# 以后用户在浏览器上访问/user/add,网站自动执行user_add

@app.route("/user/add", methods=["GET", "POST"])#装饰器,url,路由
def user_add():#视图函数
    if request.method == "GET":
        return render_template("user_add.html")

    username = request.form.get("user")
    password = request.form.get("pwd")
    mobile = request.form.get("mobile")

    # 1. 连接mysql
    conn = pymysql.connect(host="127.0.0.1", port=3306, user="root", password="root", charset='utf8', db='unicom')
    cursor = conn.cursor()
    print("连接成功")

    # 2. 发送指令
    sql = "insert into admin(username,password,mobile) values(%s, %s, %s)"
    cursor.execute(sql, (username, password, mobile))
    conn.commit()

    # sql = "select * from admin"
    # cursor.execute(sql)
    # data = cursor.fetchone()


    # 3.关闭
    cursor.close()
    conn.close()

    return "success"


if __name__ == '__main__':
    app.run(debug=True)
-
展示用户信息
注意: html文件中使用
{% for item in data_list %}进行循环,{{ item.id }}的方式获取键值。
DOCTYPE html>
<html lang="en">
<head>
    <meta charset="UTF-8">
    <title>用户列表title>
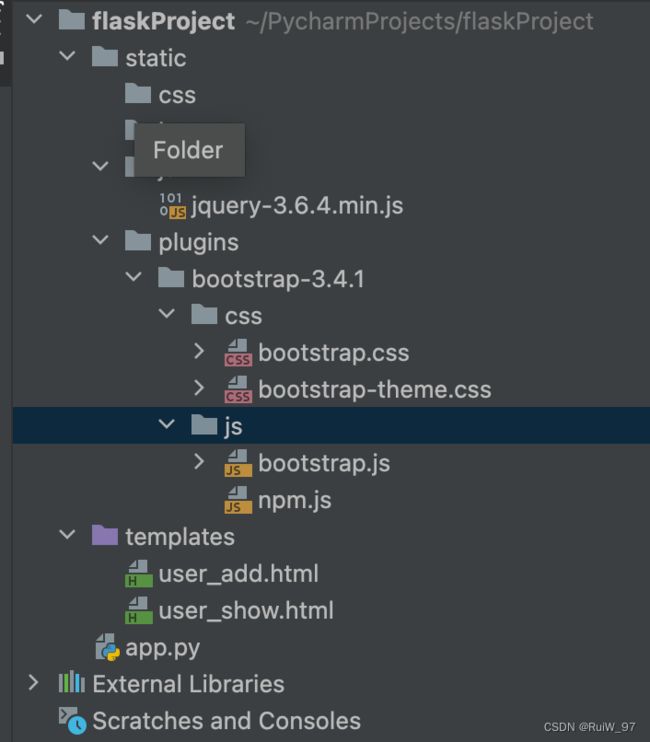
    <link rel="stylesheet" href="/static/plugins/bootstrap-3.4.1/css/bootstrap.css">
head>
<body>
<div class="container">
    <h1>用户列表h1>
    <table class="table table-bordered">
    <thead>
        <tr>
            <th>IDth>
            <th>姓名th>
            <th>密码th>
            <th>手机号th>
        tr>
    thead>
    <tbody>
    {% for item in data_list %}
        <tr>
            <th>{{ item.id }}th>
            <th>{{ item.username }}th>
            <th>{{ item.password }}th>
            <th>{{ item.mobile }}th>
        tr>
    {% endfor %}
    tbody>
table>
div>


<script src="/static/js/jquery-3.6.4.min.js">script>
<script src="/static/plugins/bootstrap-3.4.1/js/bootstrap.js">script>
body>
html>
@app.route("/user/show")#装饰器,url,路由
def user_show():#视图函数

    # 1. 连接mysql
    conn = pymysql.connect(host="127.0.0.1", port=3306, user="root", password="lvmeng135Ues!", charset='utf8', db='unicom')
    cursor = conn.cursor(cursor=pymysql.cursors.DictCursor)
    print("连接成功")

    # 2. 发送指令
    sql = "select * from admin"
    cursor.execute(sql)
    data = cursor.fetchall()


    # 3.关闭

    cursor.close()
    conn.close()

    print(data)

# 1.找到html文件的特殊占位符,替换数据
# 2.将替换完成的字符串返回给用户的浏览器。

    return render_template("user_show.html", data_list=data)
在html的 head 中插入 ,body中插入
使用bootstrap。
网页如图:
Django
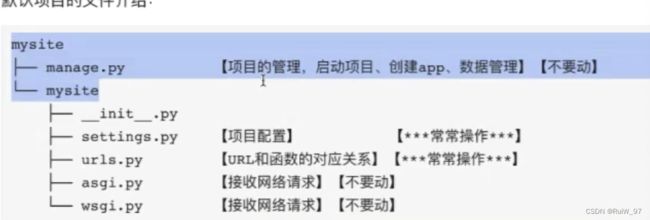
(一)创建项目
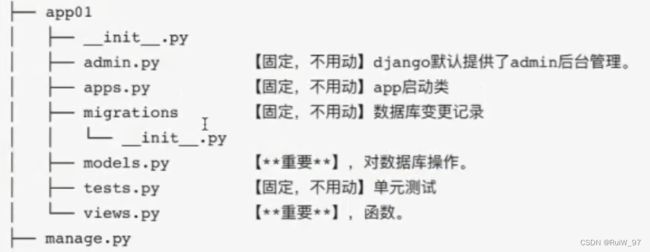
(二)app
- 项目
	- app,用户管理
	- app,订单管理
	- app,后台管理
	- app,网站
多个app【表结构、函数、html模板、css】独立
创建app
python manage.py startapp app_name
(三)快速上手
1.注册app
2.编写URL和视图函数对应关系(urls.py)
from django.urls import path
from app01 import views

urlpatterns = [
    # /index/  ->   函数
    path('index/', views.index),
]
3.编写视图函数(views.py)
from django.shortcuts import render, HttpResponse

def index(request):
    return HttpResponse("welcome")
4.启动项目
命令行python manage.py runserver启动或Pycharm启动
5.templates模板
views.py文件中的函数使用 return render(request, "xxx.html") 可以展示html的内容。
注意:
删除项目创建自带的settings.py文件中TEMPLATES DIRS内容,views.py的函数会根据app的注册顺序,在每个app的templates目录中寻找相应html文件。
6.静态文件
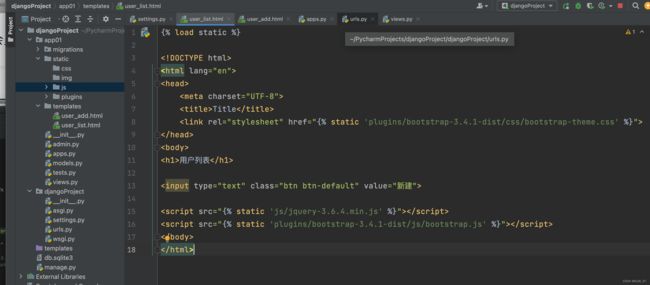
新建static文件夹,包括图片、css、js。注意:html文件中导入{% load static %}之后,使用相对路径。
