点云3D检测算法-Point pillar踩坑日记
工程地址:
https://github.com/nutonomy/second.pytorch
1.环境搭建,跟着官网的教程走
1.1注意官网上的这条语句,存在一些坑
conda install pytorch torchvision -c pytorch它会重新安装cudatoolkit和cudnn,版本可能很老旧;
其次,有些情况下,安装的torch是cpu 版本的。得确认安装的cuda版本是否有问题。比如nvidia-smi会显示当前驱动支持的cuda最高版本,而你自己安装的cuda版本可能相差的很大。建议cuda的版本接近nvidia-smi推荐的版本,越接近越好。


1.2 配置SparseConvNet
如果bash build.sh 或者 bash develop.sh 都失败了。说明安装的pytorch肯定有问题,得确认cuda,cudnn, pytorch-gpu版本是否兼容。
2.point pillar 执行时遇到的一些问题
2.1 无法找到‘second’module
当导入一个模块时: import xxx ,默认情况下python解释器会搜索当前目录、已安装的内置模块和第三方模块。但目前无法找到‘second’module,而‘second’在上一层目录,因此需要添加该路径,使得程序可以成功import second。在python脚本中添加如下内容
import sys
sys.path.append("..")
2.2关于c++ 的一些问题

缺少c++库
#在头文件中 /home/xxx/second.pytorch/second/core/cc/nms/nms_cpu.h 添加以下内容
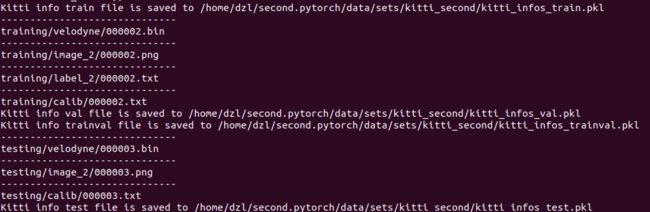
#include 2.3 找不到数据文件

手动查看了一下,这个文件是存在的 。执行脚本的时候,把KITTI_DATASET_ROOT改成你自己的绝对路径
python create_data.py create_kitti_info_file --data_path=/home/xxx/dataset/kitti其次,下载的kitti数据集,解压的时候,可能出现破损文件,请一一排查,具体请看2.5。
2.4 把create_data.py 脚本中以下路径改了,改成你自己的 目录

2.5 OSError: unrecognized data stream contents when reading image file

根据网上的资料,并没有起作用。raise OSError(message“whenreadingimagefile“)OSError:codec configquration error when reading image_做个好男人!的博客-CSDN博客1.问题描述:2.原因分析根据报错提示,是PIL库报错如果排除非法使用PIL库函数,则有可能是PIL库出了问题,卸载重装即可。3.卸载pip3 uninstall pillow安装pip3 install pillowhttps://blog.csdn.net/t18438605018/article/details/112276449接着我将train.txt,val.txt,trainval.txt,test.txt中的内容只改为一行。运行成功
说明原先 train.txt,val.txt,trainval.txt,test.txt中的内容,某些地方肯定有问题。
经排查,以下索引的图像文件破损,在train.txt,val.txt,trainval.txt,test.txt中删除即可。
000348,000565,000690,001112,001672,002099,004965,005526,006790,006883,001008,002079,004485,005542,006026,007266,005768,004341,005991,003225,004929,005870,001992,006985,005995,003990,005692,001567。
2.6 OSError('./libllvmlite.so: cannot open shared object file
pip install numba==0.49.1 --ignore-installed llvmlite
#注意numba的版本是和numpy的版本捆绑的,如果你更改了numpy的版本,那么numba的使用可能会出问题
2.7pycharm调试代码的时候,出现以下两个问题。
TypeError: Caught TypeError in DataLoader worker process 0.
TypeError: expected dtype object, got 'numpy.dtype[bool_]'
已解决 TypeError: expected dtype object, got ‘numpy.dtype[int64]‘_typeerror: expected dtype object, got 'numpy.dtype_xiao黄的博客-CSDN博客
根据网上资料,可能跟高性能计算库numba有关
#numba版本不对,更新
pip install numba==0.53
2.8 ImportError: cannot import name 'builder' from 'google.protobuf.internal'
更换版本3.20.0
pip install protobuf==3.20.0
2.9 没有发现有用的cuda核可以正常使用。

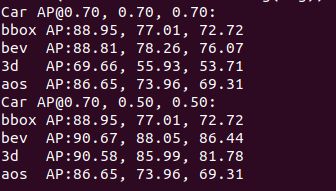
查了一堆资料,cuda的版本过低了。升级到了cuda=11.1后,可以训练。训练完成后,可以看到精度指标
2.10训练完成,测试的时候。另外报错,numpy版本不兼容问题。
TypeError: 'numpy.float64' object cannot be interpreted as an intege
报错原因:当前版本的numpy不支持使用浮点数作为步长,需要更换numpy版本。
pip install numpy==1.17.0 -i https://pypi.tuna.tsinghua.edu.cn/simple然而numpy版本还是不对,又报了以下错误
ModuleNotFoundError: No module named 'numpy.random._bit_generator'
原因:numpy版本更换会影响numba的使用。![]()
对应numba的版本也要降
pip install numba==0.53.0 -i https://pypi.tuna.tsinghua.edu.cn/simple
接下来可以正常测试了。
