yolov8目标检测onnx推理及后处理实现
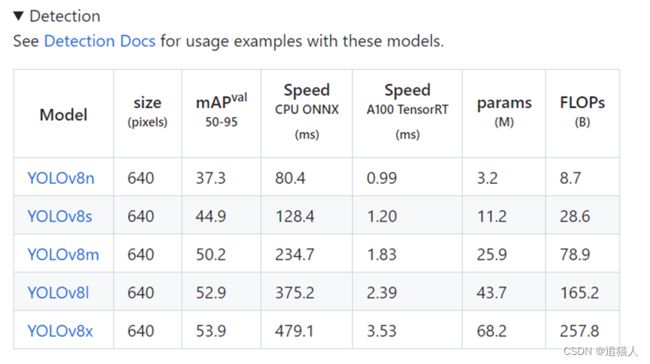
使用onnx进行yolov8模型推理测试。首先从YOLOv8开源地址下载预训练模型,由于测试在CPU上进行,就只下载最小的YOLOv8n模型。
YOLOv8n预训练模型为pytorch的pt格式,大小为6.2M,下载完成后,通过pytorch转换为onnx。转换脚本:
import torch
net = torch.load('yolov8n.pt', map_location='cpu')
net.eval()
dummpy_input = torch.randn(1, 3, 640, 640)
torch.onnx.export(net, dummpy_input, 'yolov8n.onnx', export_params=True,
                  input_names=['input'],
                  output_names=['output'])
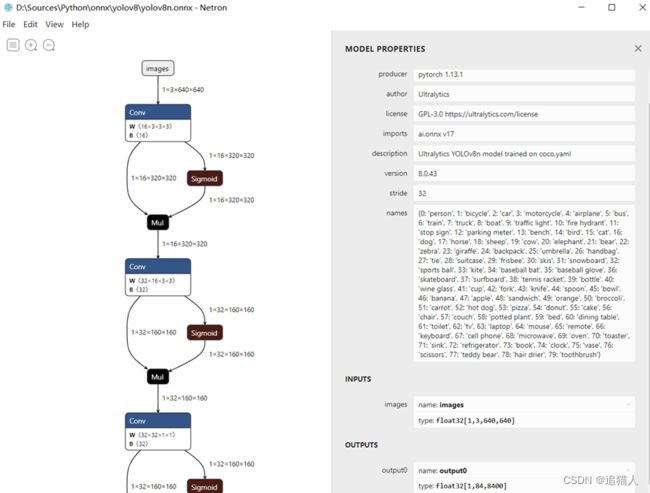
完成模型转换后,接下来进行onnx推理测试。编写推理脚本前可以通过netron工具查看模型输入输出,可以看到yolov8输入为[1,3,640,640],输入为[1,84,8400]。
YOLOv8输出shape跟yolo之前系列模型(YOLOv5输出为[25200,85]),有较大差异,查找一番后,发现yolov8在两个方面做了调整,一是取消了anchor(因为每个anchor对应3个bbox),因此总的bbox数降低三倍;二是取消了bbox的置信度,将bbox置信度与分类融合。
为了复用之前YOLO系列的后处理代码(非极大值抑制),需要将YOLOv8输出结果进行处理,将分类预测中的最大值提取出来作为bbox置信度。将推理结果转换为[1,8400,85]形式。
pred_class = pred[..., 4:]
pred_conf = np.max(pred_class, axis=-1)
pred = np.insert(pred, 4, pred_conf, axis=-1)
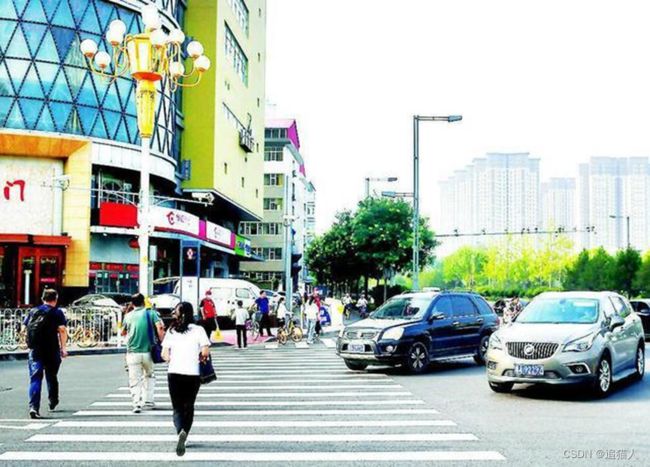
测试图片:
测试结果:
完整的推理脚本:
import onnxruntime as rt
import numpy as np
import cv2
import  matplotlib.pyplot as plt


def nms(pred, conf_thres, iou_thres):
    conf = pred[..., 4] > conf_thres
    box = pred[conf == True]
    cls_conf = box[..., 5:]
    cls = []
    for i in range(len(cls_conf)):
        cls.append(int(np.argmax(cls_conf[i])))
    total_cls = list(set(cls))
    output_box = []
    for i in range(len(total_cls)):
        clss = total_cls[i]
        cls_box = []
        for j in range(len(cls)):
            if cls[j] == clss:
                box[j][5] = clss
                cls_box.append(box[j][:6])
        cls_box = np.array(cls_box)
        box_conf = cls_box[..., 4]
        box_conf_sort = np.argsort(box_conf)
        max_conf_box = cls_box[box_conf_sort[len(box_conf) - 1]]
        output_box.append(max_conf_box)
        cls_box = np.delete(cls_box, 0, 0)
        while len(cls_box) > 0:
            max_conf_box = output_box[len(output_box) - 1]
            del_index = []
            for j in range(len(cls_box)):
                current_box = cls_box[j]
                interArea = getInter(max_conf_box, current_box)
                iou = getIou(max_conf_box, current_box, interArea)
                if iou > iou_thres:
                    del_index.append(j)
            cls_box = np.delete(cls_box, del_index, 0)
            if len(cls_box) > 0:
                output_box.append(cls_box[0])
                cls_box = np.delete(cls_box, 0, 0)
    return output_box


def getIou(box1, box2, inter_area):
    box1_area = box1[2] * box1[3]
    box2_area = box2[2] * box2[3]
    union = box1_area + box2_area - inter_area
    iou = inter_area / union
    return iou


def getInter(box1, box2):
    box1_x1, box1_y1, box1_x2, box1_y2 = box1[0] - box1[2] / 2, box1[1] - box1[3] / 2, \
                                         box1[0] + box1[2] / 2, box1[1] + box1[3] / 2
    box2_x1, box2_y1, box2_x2, box2_y2 = box2[0] - box2[2] / 2, box2[1] - box1[3] / 2, \
                                         box2[0] + box2[2] / 2, box2[1] + box2[3] / 2
    if box1_x1 > box2_x2 or box1_x2 < box2_x1:
        return 0
    if box1_y1 > box2_y2 or box1_y2 < box2_y1:
        return 0
    x_list = [box1_x1, box1_x2, box2_x1, box2_x2]
    x_list = np.sort(x_list)
    x_inter = x_list[2] - x_list[1]
    y_list = [box1_y1, box1_y2, box2_y1, box2_y2]
    y_list = np.sort(y_list)
    y_inter = y_list[2] - y_list[1]
    inter = x_inter * y_inter
    return inter


def draw(img, xscale, yscale, pred):
    img_ = img.copy()
    if len(pred):
        for detect in pred:
            detect = [int((detect[0] - detect[2] / 2) * xscale), int((detect[1] - detect[3] / 2) * yscale),
                      int((detect[0]+detect[2] / 2) * xscale), int((detect[1]+detect[3] / 2) * yscale)]
            img_ = cv2.rectangle(img, (detect[0], detect[1]), (detect[2], detect[3]), (0, 255, 0), 1)
    return img_


if __name__ == '__main__':
    height, width = 640, 640
    img0 = cv2.imread('1.jpg')
    x_scale = img0.shape[1] / width
    y_scale = img0.shape[0] / height
    img = img0 / 255.
    img = cv2.resize(img, (width, height))
    img = np.transpose(img, (2, 0, 1))
    data = np.expand_dims(img, axis=0)
    sess = rt.InferenceSession('yolov8n.onnx')
    input_name = sess.get_inputs()[0].name
    label_name = sess.get_outputs()[0].name
    pred = sess.run([label_name], {input_name: data.astype(np.float32)})[0]
    pred = np.squeeze(pred)
    pred = np.transpose(pred, (1, 0))
    pred_class = pred[..., 4:]
    pred_conf = np.max(pred_class, axis=-1)
    pred = np.insert(pred, 4, pred_conf, axis=-1)
    result = nms(pred, 0.3, 0.45)
    ret_img = draw(img0, x_scale, y_scale, result)
    ret_img = ret_img[:, :, ::-1]
    plt.imshow(ret_img)
    plt.show()


