Docker搭建Sentry
原文
转载请注明出处
简介
sentry是一款错误日志收集平台,可以将代码错误信息进行收集。
平常我们开发完成以后,发现问题的手段仅自测-》测试人员-》最后市场反馈。一般我们收到市场反馈的时候已经产生了事故,作为一个合格的程序猿,如果默默等着市场提问题肯定是不够滴!
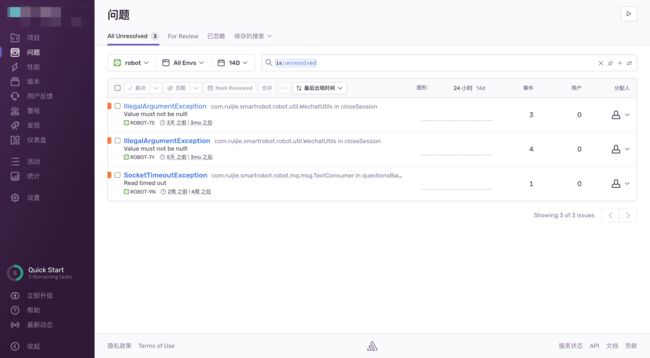
sentry就非常贴心的帮助我们收集了所有的错误异常(注意不是日志!)
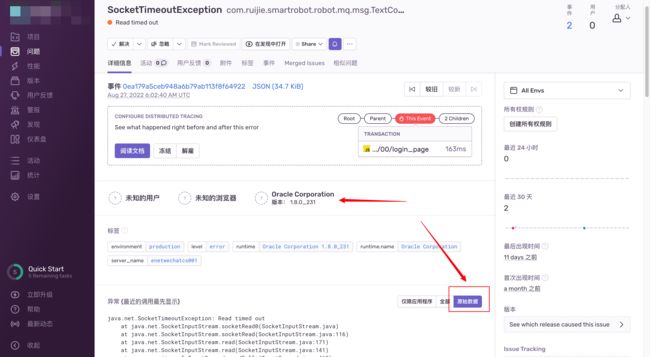
还能点进这个异常查看原始代码(基本都能定位到代码的哪一行),这样我们就能主动发现问题,然后结合我们的日志,排查问题。是不是很优雅?
还能收集部份其他信息!我这里是springboot的服务,只记录了java的平台版本。像Android和IOS这种还能收集到当前手机型号、版本、分辨率等信息。千万别小看这些信息,像移动端这种客户端的日志,如果客户不主动上报,就需要一套非常完善的日志系统。
非常优雅有木有?
安装Sentry
安装Docker以及相关依赖
sudo yum install docker-ce docker-ce-cli containerd.io docker-compose-plugin
注:安装过程如果特别慢,请稍安勿躁;也可以切换为国内源进行安装。
启动Docker后台服务
systemctl start docker
测试运行
docker run hello-world
设置开机启动
systemctl enable docker
查看一下docker和docker compose的版本,以验证是否安装成功
查看Docker版本
docker --version
查看Docker compose版本
docker compose version
安装git
yum install git
下载onpremise
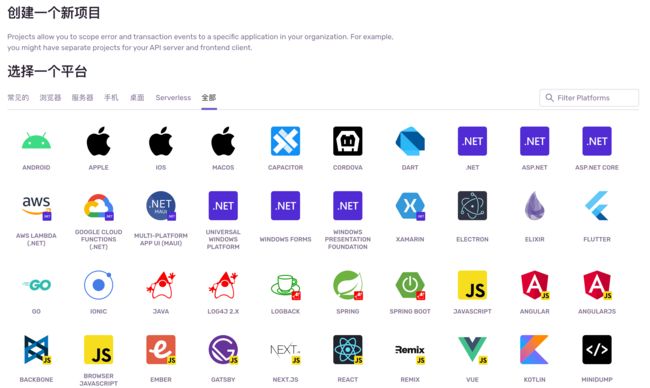
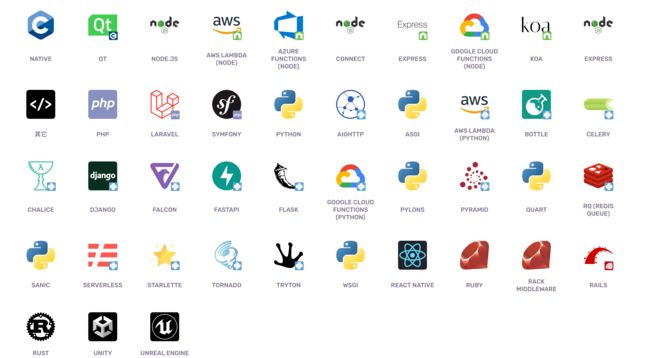
官方制作的自动化安装脚本,sentry组件非常多,如下图所示。所以不要想自己一个个去装,能要你命
git clone https://github.com/getsentry/onpremise.git
这个是旧的
git https://github.com/getsentry/self-hosted.git
这个是新仓库
两个地址可以拉取,网上大多数都是旧的,后面估计仓库迁移了,但旧的也能用。
安装sentry
安装的过程中会下载很多docker镜像,能否成功就看这一步了~
cd onpremise
./install.sh
安装过程中,如果出现错误,本地会有日志,可以看下。
出现超时情况,可以多次重试./install.sh命令来尝试解决,如果一直不行的话,可以看下我后面的问题总结。
安装快结束的时候会提示你是否现在注册账户,我这里选择是(输入y),接着输入对应信息即可。
启动
docker compose up -d
打开浏览器输入IP地址+端口号9000就可以访问Sentry登录界面了。
邮箱配置
mail配置
进入onpremise/sentry目录下,编辑config.yml
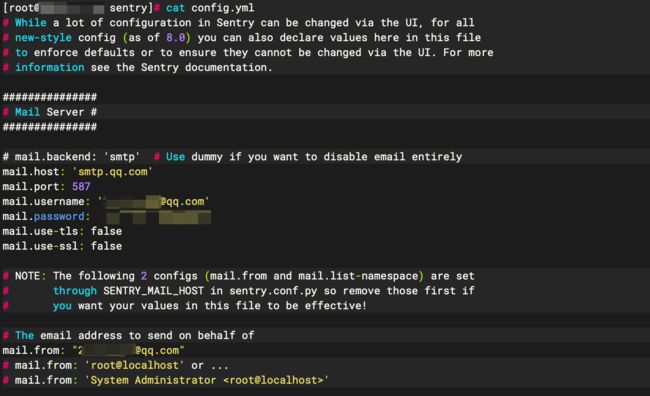
着重讲解一下几个配置项
- mail.host:邮件服务域名
- mail.port:587
- mail.username:邮箱登录名
- mail.use-tls&ssl:我这里都是false,实际应该是true对应587,但我测试下来是能成功发送的。
- mail.password:不是邮箱登录密码,是邮箱给的IMAP/SMTP服务密码
- mail.from:与mail.username要一致
域名配置
域名配置
system.url-prefix: 'https://sentry.xxx.com/'
system.internal-url-prefix: 'https://sentry.xxx.com/'
这里配置的主要影响我们邮件发送出去后,点击跳转的访问地址。
不配置的话默认使用当前部署的外网ip+9000端口
重新部署
改好配置以后,执行命令将原来的容器都移除
docker compose down
不用担心数据会没,sentry默认是用文件存储数据,都存在本地,所以不用担心。
重新运行并启动
docker compose up -d
验证并测试
启动成功后,登入并进入管理
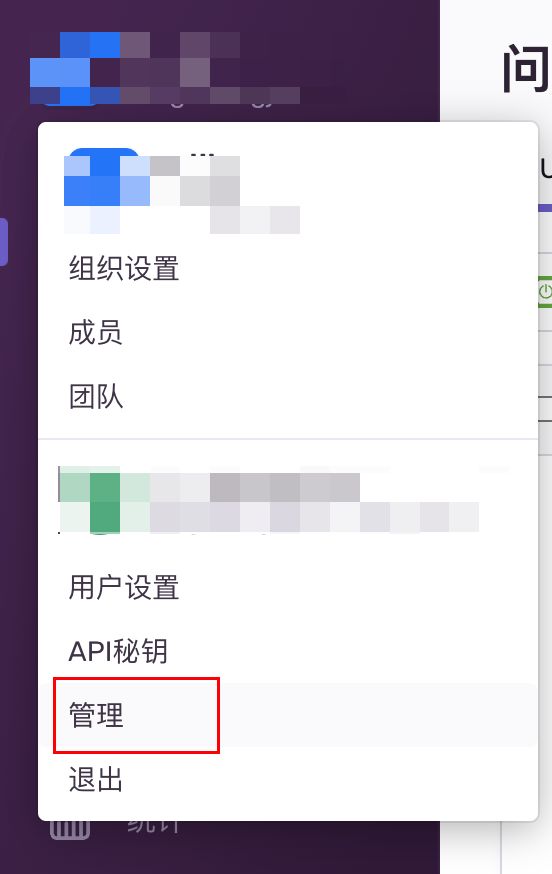
选择mail,可以看到邮箱配置已生效,点击发送测试邮件进行测试~
[外链图片转存失败,源站可能有防盗链机制,建议将图片保存下来直接上传(img-8qnyZ3dU-1662706628056)(/Users/junj/Library/Application Support/typora-user-images/image-20220908191628146.png)]
常见问题
安装
报错1
▶ Parsing command line ...

▶ Detecting Docker platform
Detected Docker platform is linux/amd64

▶ Initializing Docker Compose ...

▶ Setting up error handling ...

▶ Checking for latest commit ...

▶ Checking minimum requirements ...
Found Docker version 20.10.17
Found Docker Compose version 1.25.0
Unable to find image 'busybox:latest' locally
latest: Pulling from library/busybox
2c39bef88607: Pulling fs layer
2c39bef88607: Verifying Checksum
2c39bef88607: Download complete
2c39bef88607: Pull complete
Digest: sha256:20142e89dab967c01765b0aea3be4cec3a5957cc330f061e5503ef6168ae6613
Status: Downloaded newer image for busybox:latest
WARN: Recommended minimum CPU cores available to Docker is 4, found 2
WARN: Recommended minimum RAM available to Docker is 7800 MB, found 7678 MB

▶ Turning things off ...
Define and run multi-container applications with Docker.

Usage:
  docker-compose [-f ...] [options] [COMMAND] [ARGS...]
  docker-compose -h|--help

Options:
  -f, --file FILE             Specify an alternate compose file
                              (default: docker-compose.yml)
  -p, --project-name NAME     Specify an alternate project name
                              (default: directory name)
  --verbose                   Show more output
  --log-level LEVEL           Set log level (DEBUG, INFO, WARNING, ERROR, CRITICAL)
  --no-ansi                   Do not print ANSI control characters
  -v, --version               Print version and exit
  -H, --host HOST             Daemon socket to connect to

  --tls                       Use TLS; implied by --tlsverify
  --tlscacert CA_PATH         Trust certs signed only by this CA
  --tlscert CLIENT_CERT_PATH  Path to TLS certificate file
  --tlskey TLS_KEY_PATH       Path to TLS key file
  --tlsverify                 Use TLS and verify the remote
  --skip-hostname-check       Don't check the daemon's hostname against the
                              name specified in the client certificate
  --project-directory PATH    Specify an alternate working directory
                              (default: the path of the Compose file)
  --compatibility             If set, Compose will attempt to convert keys
                              in v3 files to their non-Swarm equivalent
  --env-file PATH             Specify an alternate environment file

Commands:
  build              Build or rebuild services
  bundle             Generate a Docker bundle from the Compose file
  config             Validate and view the Compose file
  create             Create services
  down               Stop and remove containers, networks, images, and volumes
  events             Receive real time events from containers
  exec               Execute a command in a running container
  help               Get help on a command
  images             List images
  kill               Kill containers
  logs               View output from containers
  pause              Pause services
  port               Print the public port for a port binding
  ps                 List containers
  pull               Pull service images
  push               Push service images
  restart            Restart services
  rm                 Remove stopped containers
  run                Run a one-off command
  scale              Set number of containers for a service
  start              Start services
  stop               Stop services
  top                Display the running processes
  unpause            Unpause services
  up                 Create and start containers
  version            Show the Docker-Compose version information
An error occurred, caught SIGERR on line 8
Cleaning up...
大概率是你的docker-compose版本不对,可以更新到最新版本后再尝试。
我做的过程中也遇到很多问题,装了好多次才成功。问题五花八门~,就不一一列出来,大概讲下排错思路。
网络问题
这个是以前最经常遇到的,什么github 443 timout,docker连接超时。
阿里云最近好像对这块都打通了(去年的时候还是各种超时),速度还挺快的。
如果你也是阿里云,遇到超时,不妨多试试~。
其他的云服务商,docker相关的都可以通过配置国内镜像源解决,但我不确定国内源都有同步所有docker仓库数据,不然又遇到奇奇怪怪的问题。
github相关的,我有看到是配置host解析的ip,亲测是有效的。
异常无法上报
我遇到是配置了https,然后异常上报但sentry平台未接收到,后面配置了SSL证书后才成功上报的~
所以要注意如果选择了https,nginx一定要配置ssl证书!!
邮箱配置
[Errno 101] Network is unreachable
大概率是mail.host 或 mail.port配置有误
(501, b’Mail from address must be same as authorization user.', ‘sentry@localhost’)
大概率是你密码用了邮箱登录密码,要使用生成的授权码~
