使用Golang实现一套流程可配置,适用于广告、推荐系统的业务性框架——简单应用
在诸如广告、推荐等系统中,我们往往会涉及过滤、召回和排序等过程。随着系统业务变得复杂,代码的耦合和交错会让项目跌入难以维护的深渊。于是模块化设计是复杂系统的必备基础。这篇文章介绍的业务框架脱胎于线上多人协作开发、高并发的竞价广告系统,在实践中不停被优化,直到易于理解和应用。
基础组件
Handler
在系统中,我们定义一个独立的业务逻辑为一个Handler。
比如过滤“机型”信息的逻辑可以叫做DeviceFilterHandler,排序的逻辑叫SortHandler。
Handler的实现也很简单,只要实现frame.HandlerBaseInterface接口和它对应的方法即可(见github):
package main

import (
	"fmt"
	"ghgroups/frame"
	ghgroupscontext "ghgroups/frame/ghgroups_context"
	"reflect"
)

type ExampleHandler struct {
	frame.HandlerBaseInterface
}

func NewExampleHandler() *ExampleHandler {
	return &ExampleHandler{}
}

// ///
// ConcreteInterface
func (e *ExampleHandler) Name() string {
	return reflect.TypeOf(*e).Name()
}

// ///
// HandlerBaseInterface
func (e *ExampleHandler) Handle(*ghgroupscontext.GhGroupsContext) bool {
	fmt.Printf("run %s", e.Name())
	return true
}
ConcreteInterface
在系统中,我们要求每个组件都要有名字。这样我们可以在配置文件中指定它在流程中的具体位置。
组件通过继承接口ConcreteInterface,并实现其Name方法来暴露自己的名称。它可以被写死(如上例),也可以通过配置文件来指定(见后续案例)。
type ConcreteInterface interface {
	Name() string
}
HandlerBaseInterface
处理业务逻辑的代码需要在Handle(context *ghgroupscontext.GhGroupsContext) bool中实现的。上例中,我们只让其输出一行文本。
这个方法来源于HandlerBaseInterface接口。
type HandlerBaseInterface interface {
	ConcreteInterface
	Handle(context *ghgroupscontext.GhGroupsContext) bool
}
因为HandlerBaseInterface 继承自ConcreteInterface ,所以我们只要让自己构建的Handler继承自HandlerBaseInterface,并实现相应方法即可。
应用
一般一个复杂的业务不能只有一个Handler,但是为了便于方便讲解,我们看下怎么运行只有一个Handler的框架(见github)。
package main

import (
	"fmt"
	"ghgroups/frame"
	"ghgroups/frame/constructor"
	ghgroupscontext "ghgroups/frame/ghgroups_context"
	"ghgroups/frame/utils"
	"reflect"
)

func main() {
	constructor := utils.BuildConstructor("")
	constructor.Register(reflect.TypeOf(ExampleHandler{}))
	mainProcess := reflect.TypeOf(ExampleHandler{}).Name()
	run(constructor, mainProcess)
}

func run(constructor *constructor.Constructor, mainProcess string) {
	if err := constructor.CreateConcrete(mainProcess); err != nil {
		fmt.Printf("%v", err)
	}
	if someInterfaced, err := constructor.GetConcrete(mainProcess); err != nil {
		fmt.Printf("%v", err)
	} else {
		if mainHandlerGroup, ok := someInterfaced.(frame.HandlerBaseInterface); !ok {
			fmt.Printf("mainHandlerGroup %s is not frame.HandlerBaseInterface", mainProcess)
		} else {
			context := ghgroupscontext.NewGhGroupsContext(nil)
			// context.ShowDuration = true
			mainHandlerGroup.Handle(context)
		}
	}
}
在main函数中,我们需要向对象构建器constructor注册我们写的Handler。然后调用run方法,传入构建器和需要启动的组件名(mainProcess)即可。运行结果如下
ExampleHandler
run ExampleHandler
第一行是框架打印的流程图(目前只有一个),第二行是运行时ExampleHandler的Handle方法的执行结果。
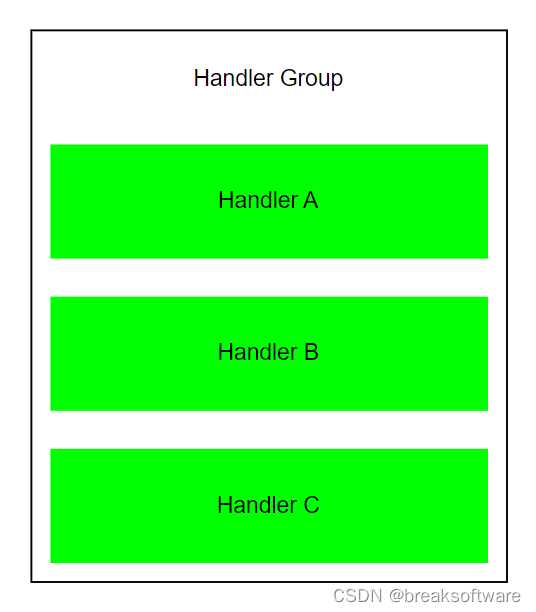
HandlerGroup
框架底层已经实现好了HandlerGroup的代码,我们只要把每个Handler实现即可(Handler的代码可以前面的例子)。
然后在配置文件中,配置好Handler的执行顺序:
name: handler_group_a
type: HandlerGroup
handlers:
  - ExampleAHandler
  - ExampleBHandler
应用
部分代码如下(完整见github)
package main

import (
	"fmt"
	"ghgroups/frame"
	"ghgroups/frame/constructor"
	constructorbuilder "ghgroups/frame/constructor_builder"
	"ghgroups/frame/factory"
	ghgroupscontext "ghgroups/frame/ghgroups_context"
	"os"
	"path"
	"reflect"
)

func main() {
	factory := factory.NewFactory()
	factory.Register(reflect.TypeOf(ExampleAHandler{}))
	factory.Register(reflect.TypeOf(ExampleBHandler{}))

	runPath, errGetWd := os.Getwd()
	if errGetWd != nil {
		fmt.Printf("%v", errGetWd)
		return
	}
	concretePath := path.Join(runPath, "conf")
	constructor := constructorbuilder.BuildConstructor(factory, concretePath)
	mainProcess := "handler_group_a"

	run(constructor, mainProcess)
}
这次对象构建器我们需要使用constructorbuilder.BuildConstructor去构建。因为其底层会通过配置文件所在的文件夹路径(concretePath )构建所有的组件。而在此之前,需要告诉构建器还有两个我们自定义的组件(ExampleAHandler和ExampleBHandler)需要注册到系统中。于是我们暴露出对象工厂(factory )用于提前注册。
运行结果如下
handler_group_a
        ExampleAHandler
        ExampleBHandler
run ExampleAHandler
run ExampleBHandler
前三行是配置文件描述的执行流程。后两行是实际执行流程中的输出。
AsyncHandlerGroup
AsyncHandlerGroup是一组并行执行的Handler。

和HandlerGroup一样,框架已经实现了AsyncHandlerGroup的底层代码,我们只用实现各个Handler即可。
有别于HandlerGroup,它需要将配置文件中的type设置为AsyncHandlerGroup。
name: async_handler_group_a
type: AsyncHandlerGroup
handlers:
  - ExampleAHandler
  - ExampleBHandler
应用
使用的代码和HandlerGroup类似,具体见github。
执行结果如下
async_handler_group_a
        ExampleAHandler
        ExampleBHandler
run ExampleBHandler
run ExampleAHandler
Layer
Layer由两部分组成:Divider和Handler。Handler是一组业务逻辑,Divider用于选择执行哪个Handler。

Divider
不同于Handler,Divider需要继承和实现DividerBaseInterface接口。
type DividerBaseInterface interface {
	ConcreteInterface
	Select(context *ghgroupscontext.GhGroupsContext) string
}
Select方法用于填充业务逻辑,选择该Layer需要执行的Handler的名称。下面是Divider具体实现的一个样例(见github)。
package main

import (
	"ghgroups/frame"
	ghgroupscontext "ghgroups/frame/ghgroups_context"
	"reflect"
)

type ExampleDivider struct {
	frame.DividerBaseInterface
}

func NewExampleDivider() *ExampleDivider {
	return &ExampleDivider{}
}

// ///
// ConcreteInterface
func (s *ExampleDivider) Name() string {
	return reflect.TypeOf(*s).Name()
}

// ///
// DividerBaseInterface
func (s *ExampleDivider) Select(context *ghgroupscontext.GhGroupsContext) string {
	return "ExampleBHandler"
}
应用
每个Layer都要通过配置文件来描述其组成。相较于HandlerGroup,由于它不会执行所有的Handler,而是要通过Divider来选择执行哪个Handler,于是主要是新增Divider的配置项。
name: layer_a
type: Layer
divider: ExampleDivider
handlers:
  - ExampleAHandler
  - ExampleBHandler
具体执行的代码见github。我们看下运行结果
layer_a
        ExampleDivider
        ExampleAHandler
        ExampleBHandler
run ExampleBHandler
可以看到它只是执行了Divider选择的ExampleBHandler。
LayerCenter
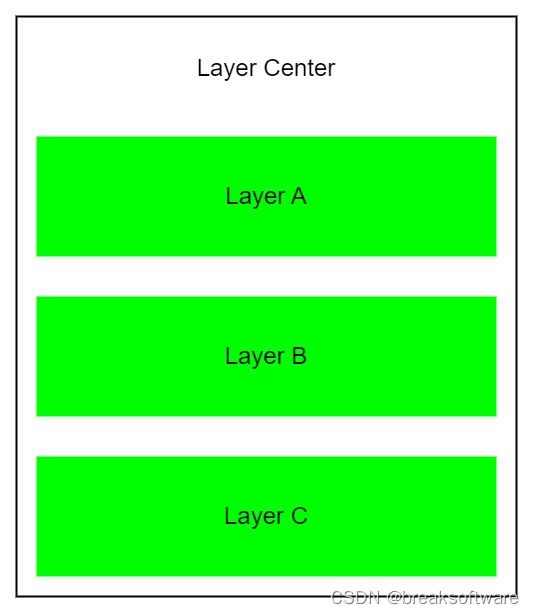
LayerCenter是一组串行执行的Layer的组合。

在使用LayerCenter时,我们只要实现好每个Layer,然后通过配置文件配置它们的关系即可。
type: LayerCenter
name: layer_center
layers:
  - layer_a
  - layer_b
应用
具体代码和前面类似,可以见github。
运行结果如下
layer_center
        layer_a
                ExampleADivider
                ExampleA1Handler
                ExampleA2Handler
        layer_b
                ExampleBDivider
                ExampleB1Handler
                ExampleB2Handler
run ExampleA2Handler
run ExampleB1Handler
可以看到每个Layer选择了一个Handler执行。
源码见github。
