Spring Security6入门及自定义登录
一、前言
Spring Security已经更新到了6.x,通过本专栏记录以下Spring Security6学习过程,当然大家可参考Spring Security5专栏对比学习
Spring Security5专栏地址:security5
Spring Security是spring家族产品中的一个安全框架,核心功能包括用户认证(Authentication)和用户授权(Authorization)两部分。
用户认证:验证某个用户是否为系统中的合法主体,也就是说用户能否访问该系统。用户认证一般要求用户提供用户名和密码。系统通过校验用户名和密码来完成认证过程。
用户授权:指的是验证某个用户是否有权限执行某个操作。在一个系统中,不同用户所具有的权限是不同的。比如对一个文件来说,有的用户只能进行读取,而有的用户可以进行修改。一般来说,系统会为不同的用户分配不同的角色,而每个角色则对应一系列的权限。就是所谓的RBAC系统。
权限认证框架类似的还有shiro、以及国产Sa-Token,可以类比学习
二、项目创建
创建一个springboot项目,jdk版本17、boot版本3.1.2、security版本6
pom.xml如下
    4.0.0

        org.springframework.boot
        spring-boot-starter-parent
        3.1.2


    com.demo
    security6
    0.0.1-SNAPSHOT
    security6
    security6

        17


            org.springframework.boot
            spring-boot-starter-web


            org.springframework.boot
            spring-boot-starter-security


                org.springframework.boot
                spring-boot-maven-plugin
自定义一个controller
@RestController
public class IndexController {
    @RequestMapping("index")
    public String index(){
        return "index";
    }

}
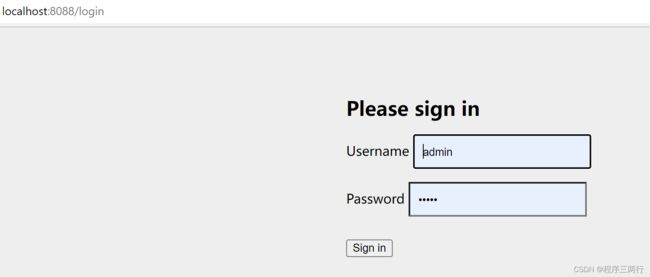
启动项目访问index路径,可以看到securit已经拦截请求
使用控制台提供的默认密码即可登录
实际是security底层有个拦截器,拦截判断是否登录,没有的话会跳转到登录login页面
当然上面的用户名和密码可以通过配置改变,如下
spring.security.user.name=admin
spring.security.user.password=12345
三、前后端不分离项目自定义相关配置
首先引入前后端不分离页面模板引擎Thymeleaf依赖
     org.springframework.boot
     spring-boot-starter-thymeleaf
让后resources/templates下创建登录页面和首页
登录页面login.html
登录
欢迎登录
首页页面index.html
    首页


欢迎使用本系统
注意:security退出是一个post请求
controller类
@Controller
public class IndexController {
    @RequestMapping("info")
    @ResponseBody
    public String info(){
        return "欢迎使用本系统!";
    }

    //前往index页面
    @RequestMapping("index")
    public String index(){
        return "index";
    }
    //前往登录页面
    @RequestMapping("toLoginPage")
    public String login(){
        return "login";
    }
}
和5的使用方法一样,修改security相关配置还是通过自定义配置类,如下
/**
 * 5版本只需@Configuration一个注解,不需要@EnableWebSecurity,
 * 6需要同时引入,并且5是需要extends WebSecurityConfigurerAdapter类
 */
@Configuration
@EnableWebSecurity
public class MySecurityConfig {
    /**
     * 5版本是override 方法: configure(HttpSecurity http),6是下面bean
     */
    @Bean
    public SecurityFilterChain securityFilterChain(HttpSecurity http) throws Exception{
        //authorizeHttpRequests:针对http请求进行授权认证,定义不需要认证就能的资源路径,如info
        http.authorizeHttpRequests(authorizeHttpRequests->authorizeHttpRequests
                .requestMatchers("/info").permitAll()
                .anyRequest().authenticated());

        /**登录表单配置
         * loginPage:登录页面请求地址
         * loginProcessingUrl:登录接口 过滤器
         * successForwardUrl:登录成功响应地址
         * failureForwardUrl:登录失败响应地址
         */
        http.formLogin(formLogin->formLogin
                .loginPage("/toLoginPage").permitAll()
                .loginProcessingUrl("/login")
                .successForwardUrl("/index")
                .failureForwardUrl("/toLoginPage"));

        //关闭crsf 跨域漏洞防御
        http.csrf(withDefaults());//相当于 http.csrf(Customizer.withDefaults());或者http.csrf(crsf->crsf.disable());

        //退出
        http.logout(logout -> logout.invalidateHttpSession(true));

        return http.build();
    }
}
四、前后端分离项目登录
对于前后端分离项目,我们不再需要模板引擎thymeleaf依赖以及index,login页面,核心配置类如下
@Configuration
@EnableWebSecurity
public class MySecurityConfig {
    @Bean
    public SecurityFilterChain securityFilterChain(HttpSecurity http) throws Exception{
        //不需要认证的请求
        http.authorizeHttpRequests(authorizeHttpRequests->authorizeHttpRequests
                .requestMatchers("/info").permitAll()
                .anyRequest().authenticated());

        //登录
        http.formLogin(formLogin -> formLogin
                //登录接口
                .loginProcessingUrl("/login")
                //登录成功响应,直接使用接口表达式,也可和5版本一样子自定义类
                .successHandler((request,response,authentication)->{
                    //这里可以根据自己业务封装响应体
                    response.setContentType("text/html;charset=UTF-8");
                    response.getWriter().write("ok");
                    System.out.println(authentication.getCredentials()+"--"+authentication.getPrincipal()+"--"+authentication.getAuthorities());
                })
                //登录失败响应
                .failureHandler((request,response,authenticationException) ->{
                    response.setContentType("text/html;charset=UTF-8");
                    response.getWriter().write("ok");
                    authenticationException.printStackTrace();
                })
        );

        //关闭crsf,跨域漏洞防御
        http.csrf(withDefaults());
        //跨域拦截
        http.cors(withDefaults());

        return http.build();
    }
}
