nginx部署本地umi build项目
一、安装
brew install nginx
Brew 安装可以参考网上教程
https://juejin.cn/post/6986190222241464350
安装后启动nginx服务查看是否成功
brew services start nginx
启动报错
Error: undefined method `launchd_service_path‘ for xxx
解决:更新brew
brew update -v
https://blog.csdn.net/qq_33589510/article/details/128805046
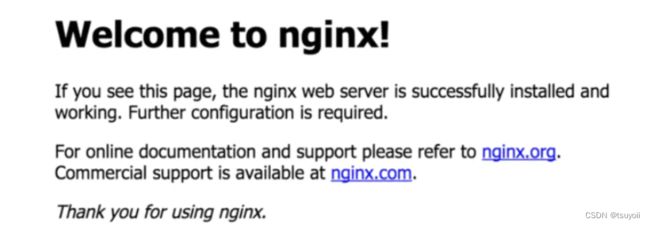
重新启动后访问localhost:8080可以看到成功

二、将build之后的产物dist部署到nginx
1.umi build后得到dist文件夹
2.查看nginx中的nginx.conf文件
查看nginx配置信息
brew info nginx
这里找了网上大佬的图参考
图片来源网络https://juejin.cn/post/6986190222241464350
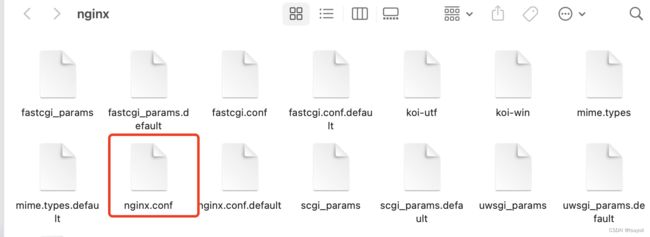
我的截图
打开安装目录
open /opt/homebrew/etc/nginx

这个就是配置文件
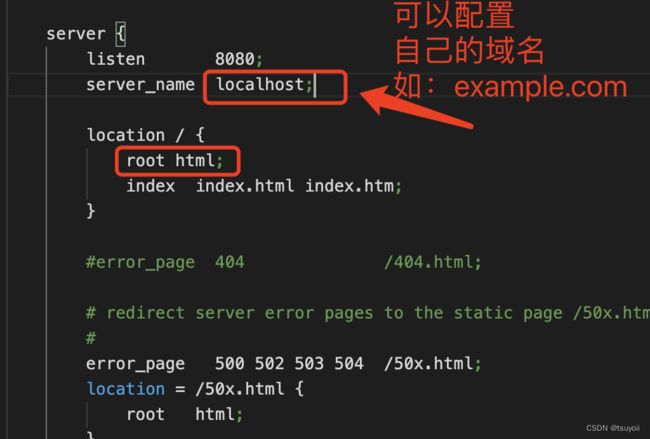
在vscode中打开它,并找到server块,这里提供我的

root后面的是Nginx服务器的文档根目录。也就是你以后存放dist的路径
但是我的root后面只跟了一个html, 而且nginx文件夹下也没有叫html的文件夹
如果您的Nginx配置文件中的 root 指令没有值,而是显示为 root html;,则意味着Nginx将使用默认的文档根目录。在这种情况下,文档根目录通常是 /usr/share/nginx/html 或 /var/www/html。
在您的Nginx配置文件中,如果 root 指令没有绝对路径,则Nginx将使用一个相对路径来找到文档根目录。在这种情况下,相对路径是相对于Nginx配置文件的目录。
在您的示例中,root 指令的值为 html,这意味着Nginx将在Nginx配置文件所在目录下寻找名为 html 的目录,并将其作为文档根目录。
这意味着Nginx将在Nginx配置文件所在目录下寻找名为 html 的目录,并将其作为文档根目录。如果该目录不存在,您需要创建它并赋予权限

mkdir /opt/homebrew/etc/nginx/html
chmod 755 /opt/homebrew/etc/nginx/html
这两个命令是用于在命令行中创建目录并设置权限的。
第一个命令 mkdir /opt/homebrew/etc/nginx/html 用于在 /opt/homebrew/etc/nginx目录下创建一个名为 html的新目录。如果其中任何一个父级目录(/opt/homebrew/etc/nginx)不存在,该命令也会创建它们。
第二个命令 chmod 755 /opt/homebrew/etc/nginx/html 用于将 html 目录的权限设置为755。这意味着目录的所有者具有读取、写入和执行权限(7),而组和其他用户具有读取和执行权限(5)。chmod 命令用于更改Unix/Linux 系统中的文件和目录的权限。
请注意,/opt/homebrew/etc/nginx/html 路径和您指定的权限可能根据您特定的系统配置而有所不同。如果需要,请根据实际情况调整命令。
3.然后可以看到nginx文件夹下已经有了html文件夹

接着配置nginx.conf文件
location / {
    root /opt/homebrew/etc/nginx/html/dist;
    index index.html index.htm;
}
保存并检验配置
nginx -t
![]()
出现这两行则表示没问题
这时,将dist文件夹复制到html文件夹下,
重启nginx服务
nginx -s reload
并访问localhost:8080(或你之前修改的域名example.com)即可,
问题
1.应后端要求,js和css文件前面加前缀如: /static/umi.js或/static/umi.css
在umi的config.ts中加上publicPath:’/static/‘
(补:这里加了publicPath后打开本地会报错 mf-va_remoteEntry.js:318 Uncaught (inpromise) ChunkLoadError: Loading chunk mf-dep_src_umi_cache_mfsu_mf-va__CWD__node_modules__umijs_babel-preset-umi_node_modules__babel_runti-028e26 failed.,删除src/.umi文件夹后重新start即可)
结果访问报nginx无法加载js和css, 报错net::ERR_ABORTED 404 (Not Found)
- 检查文件路径: 确保请求的JS或CSS文件的路径是正确的,并且文件确实存在于该路径中。你可以使用命令行或文件浏览器来检查文件路径是否正确。
- 检查Nginx配置: 确保Nginx的配置文件中正确地映射了请求的文件路径。特别是,确保你使用了正确的root指令来指定你的Web根目录,并且你的location指令正确地映射了请求的文件路径。
- 检查文件权限: 确保文件权限允许Nginx服务器读取请求的文件。你可以使用chmod命令来更改文件权限,以确保Nginx可以访问它们。
- 检查防火墙设置: 如果你使用了防火墙,请确保防火墙不会阻止Nginx服务器访问请求的文件。
由于我的是加了东西后报错的,所以我认为是文件路径不对的问题
将dist下的umi.js和umi.css放到dist/static/下果然成功了
但是不可能每次在dist这里修改,所以我将nginx配置改成重定向,重定向也可以使用alias,但我这里是需要去掉上一级目录,所以直接用了rewrite
server {
	listen 8080;
	server_name localhost;

	#charset koi8-r;

	#access_log logs/host.access.log main;

	root /opt/homebrew/etc/nginx/html/dist;

	location /static/ {
		# 重定向/static/到/ 例如/static/umi.js 重定向到 /umi.js
		rewrite ^/static/(.*)$ /$1 break;
	}

	location / {
		index index.html index.htm;
	}

	#error_page 404 /404.html;

	# redirect server error pages to the static page /50x.html
	#
	error_page 500 502 503 504 /50x.html;
	location = /50x.html {
		root html;
	}

	# proxy the PHP scripts to Apache listening on 127.0.0.1:80
	#
	#location ~ \.php$ {
	# proxy_pass http://127.0.0.1;
	#}

	# pass the PHP scripts to FastCGI server listening on 127.0.0.1:9000
	#
	#location ~ \.php$ {
		# root html;
		# fastcgi_pass 127.0.0.1:9000;
		# fastcgi_index index.php;
		# fastcgi_param SCRIPT_FILENAME /scripts$fastcgi_script_name;
		# include fastcgi_params;
	#}

	# deny access to .htaccess files, if Apache's document root
	# concurs with nginx's one
	#
	#location ~ /\.ht {
	# deny all;
	#}
}
再次执行
nginx -t
nginx -s reload
location / {
    index index.html index.htm;
}
加上
try_files $uri $uri/ /index.html;
变成
location / {
    index index.html index.htm;
    try_files $uri $uri/ /index.html;
}
重新启动nginx即可
常用的指令有
nginx -t 检查配置是否有错误,每次修改都应该先检查一下
nginx -s reload 重新加载配置
nginx -s reopen 重启
nginx -s stop 停止
nginx -s quit 优雅地退出,在退出前完成已经接受的连接请求
nginx -V 查看版本,以及配置文件地址
nginx -v 查看版本
nginx -c filename 指定配置文件
nginx -h 帮助
https://www.jianshu.com/p/8994bd8d3414
最后
(注意:此处为我根据自己的项目写的,具体情况可能和我的不同,酌情参考)
可以在项目package.json中写上脚本,将文件自动拷贝到nginx

"posttest:nginx": "set NODE_ENV=development && umi build",
"test:nginx": "scp -r ./dist /opt/homebrew/etc/nginx/html",
yarn run test:nginx
后
启动nginx或直接刷新页面即可

