Vue [Day7]
文章目录
- 自定义创建项目
- ESlint 代码规范
- vuex 概述
- 创建仓库
- 向仓库提供数据
- 使用仓库中的数据
-
- 通过store直接访问
- 通过辅助函数 mapState(简化)
- mutations传参语法(同步
- 实时输入,实时更新
- 辅助函数 mapMutations
- action (异步
- 辅助函数mapActions
- getters (类似于计算属性
-
- 通过store访问getters
- 通过辅助函数mapGetters映射
- 模块module
-
- 使用模块中的数据 / 模块中state的访问语法
-
- 直接通过模块名访问
- 通过mapState映射
-
- 默认根级别的映射 ...mapState(['user', 'setting'])
- 子模块映射 mapState('模块名',['xxx]) +开启命名空间
- 使用模块中getters中的数据 / 模块中getters的访问语法
-
- 直接通过模块名访问 $store.getters['模块名/xxx']
- 通过mapGetters映射
-
- 默认根级别映射mapGetters(['xxx'])
- 子模块映射mapGetters('模块名',['xxx'])+开启命名空间Son2.vue
- 掌握模块中的mutation调用语法
-
- 直接通过store调用 $store.commit('模块名/xxx',额外参数)
- 通过mapMutations映射
-
- 默认根级别映射mapMutations(['xxx'])
- 子模块映射mapMutations('模块名',['xxx'])+开启命名空间
- 直接通过模块名访问 $store.dispatch('模块名/xxx',额外参数)
- 通过mapActions映射
-
- 默认根级别映射mapActions(['xxx'])
- 子模块映射mapActions('模块名',['xxx'])+开启命名空间
自定义创建项目
vue create exp-mobile(项目名
2.选第三个,自定义
3.空格是选中
![Vue [Day7]_第1张图片](http://img.e-com-net.com/image/info8/dbb1fc8c753048e9a35b50dfb87a9b21.jpg)
4.选vue 2.x
![Vue [Day7]_第2张图片](http://img.e-com-net.com/image/info8/35c14487a8854b19ba5fe5010f8e302c.jpg)
5.选择哈希
![]()
6.选择Less处理器

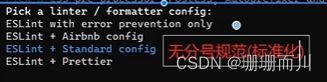
7.选择无分号规范
8.选择保存时校验
![Vue [Day7]_第3张图片](http://img.e-com-net.com/image/info8/f036b2b3a1ab484b97ca8457928a079d.jpg)
9.将配置文件放在单独文件中

小结
![Vue [Day7]_第4张图片](http://img.e-com-net.com/image/info8/6eb0479b937e4f2f9f02f64b9c2ca05c.jpg)
ESlint 代码规范
![Vue [Day7]_第5张图片](http://img.e-com-net.com/image/info8/485f8d94fd4a47e4b5f86da598faba06.jpg)
vuex 概述
![Vue [Day7]_第6张图片](http://img.e-com-net.com/image/info8/ac3b7a4004994024a4c35110d68ab99c.jpg)
创建仓库
![Vue [Day7]_第7张图片](http://img.e-com-net.com/image/info8/5daad13fb3ec4596b2ebb21245fb1541.jpg)
store/index.js
// 这里存放的就是vuex相关的核心代码
import Vue from 'vue'
import Vuex from 'vuex'

// 插件安装
Vue.use(Vuex)

// 创建空仓库
const store = new Vuex.Store()

// 导出给main.js
export default store
main.js
import Vue from 'vue'
import App from './App.vue'
import store from './store'

Vue.config.productionTip = false

new Vue({
  render: h => h(App),
  store //! !!!!
  //   仓库在所有组件都可以访问,用this.$store

}).$mount('#app')
App.vue
 created () {
    console.log(this.$store)
  }
向仓库提供数据
![Vue [Day7]_第8张图片](http://img.e-com-net.com/image/info8/df1a4bc20947417180f3c584b6eeb611.jpg)
store/index.js
// 创建空仓库
const store = new Vuex.Store({
  // 通过state可以提供数据,所有组件共享的数据,任意组件都可以访问
  state: {
    title: 'hhhhh',
    count: 100
  }
})
使用仓库中的数据
通过store直接访问
![Vue [Day7]_第9张图片](http://img.e-com-net.com/image/info8/12250f8b4a434e8795e3995f9ed30a59.jpg)
components/Son2.vue
div class="box">
      <h2>Son2 子组件</h2>
      从vuex中获取的值:<label>{{$store.state.count}}</label>
      <br />
      <button>值 - 1</button>
    </div>
通过辅助函数 mapState(简化)
mapState把store中的数据自动映射到组件的计算属性computed中
computed: {
    ...mapState(['count', 'title'])
  },
![Vue [Day7]_第10张图片](http://img.e-com-net.com/image/info8/4a61146f143f48db97677f711c7a26c8.jpg)
App.vue 节选
<template>
    <div id="app">
      <h1>根组件{{ $store.state.title }}</h1>
      <!-- 3.用了 mapState ,就直接简写 -->
      <h1>根组件{{ title }}</h1>
      <input type="text">
      <Son1></Son1>
      <hr>
      <Son2></Son2>
    </div>
  </template>

<script>
import Son1 from './components/Son1.vue'
import Son2 from './components/Son2.vue'

// 1.导入
import { mapState } from 'vuex'
console.log(mapState(['count', 'title']))

export default {
  name: 'app',
  //   2.展开运算符进行映射
  computed: {
    ...mapState(['count', 'title'])
  },
# 组件(间接)修改仓库数据 mutation
![Vue [Day7]_第11张图片](http://img.e-com-net.com/image/info8/123be6033d2a46638ee5014d293e9e62.jpg)
![Vue [Day7]_第12张图片](http://img.e-com-net.com/image/info8/32201187d754448689724378950b1aa4.jpg)
store/index.js
import Vue from 'vue'
import Vuex from 'vuex'

Vue.use(Vuex)

const store = new Vuex.Store({
  strict: true,
  state: {
    title: 'hhhhh',
    count: 100
  },

  // 通过mutations可以提供修改数据的方法
  mutations: {
    // 所有mutations函数,第一个参数,都是state
    addCount (state) {
      state.count++
    }
  }
})

export default store
App.vue
    <span  @click="handleAdd">count</span>      <input type="text">


 methods: {
    handleAdd () {
      // 调用
      this.$store.commit('addCount')
    }
  },
mutations传参语法(同步
提交参数只能有一个,如果有多个参数,包装成一个对象传递
![Vue [Day7]_第13张图片](http://img.e-com-net.com/image/info8/7f04e767e70642a698c82aa69bae376a.jpg)
实时输入,实时更新
不能用v-model,因为vuex是单向数据流
但是v-model 等于 :value @input![Vue [Day7]_第14张图片](http://img.e-com-net.com/image/info8/63ada2f8a98141569d610b26482378a6.jpg)
App.vue
  <input :value="title" @input="handleInput" type="text">


 handleInput (e) {
      // 1.实时获取输入框的值
      console.log(e.target.value)

      // 2.提交mutation,调用mutation函数
      this.$store.commit('changeTitle', e.target.value)
    }
store/index.js
changeTitle (state, newTitle) {
      state.title = newTitle
    }
辅助函数 mapMutations
把位于mutations中的方法提取出来,映射到methods中
![Vue [Day7]_第15张图片](http://img.e-com-net.com/image/info8/6b88b7ffa7ad4113a7a936c012f831b8.jpg)
store/index.js
const store = new Vuex.Store({
  strict: true,
  state: {
    title: 'hhhhh',
    count: 100
  },

  // 通过mutations可以提供修改数据的方法
  mutations: {
    subCount (state, n) {
      state.count -= n
    },
    changeTitle (state, newTitle) {
      state.title = newTitle
    },
    changeCount (state, tt) {
      state.count = tt
    }
  }

})
Son1.vue
 <button @click="handleSub(10)">值 - 10</button>
      <button @click="handleSub(20)">值 - 20</button>
      <button @click="handleSub(30)">值 - 30</button>

      <!-- 更简单的写法,连外面的函数都不套了 -->
      <button @click="subCount(2)">值 - 2</button>
      <br>
      <button @click="changeTitle('qqq')">改成【qqq】标题</button>


 ...mapMutations(['subCount', 'changeTitle']),
    handleSub (tt) {
      this.subCount(tt)
    },
action (异步
![Vue [Day7]_第16张图片](http://img.e-com-net.com/image/info8/8fface071b684fab9557e9a6774cfdff.jpg)
辅助函数mapActions
把actions中的方法提取出来,映射到组件methods中
( …mapMutations([‘subCount’, ‘changeTitle’]),和 …mapActions([‘changeCountAction’]) 都在methods中
![Vue [Day7]_第17张图片](http://img.e-com-net.com/image/info8/1514f946041f4003bde3bdb6a8e4655b.jpg) index.js
index.js
//  action 处理异步
  // 不能直接操作state,操作state还是需要commit mutation
  actions: {
    // 此处未分模块,可当成store仓库
    // context.commit('mutation名字',额外参数)
    changeCountAction (context, num) {
      // 这里是setTime模拟异步,以后大部分场景是发请求
      setTimeout(() => {
        context.commit('changeCount', num)
      }, 2000)
    }
  }
Son2.vue
<button @click="changeCountAction(0)">2秒后改成count=0</button>


  methods: {
    changeTitle () {
      this.$store.commit('changeTitle', 'sssss')
    },
    ...mapActions(['changeCountAction']) // !!!!
  }
getters (类似于计算属性
![Vue [Day7]_第18张图片](http://img.e-com-net.com/image/info8/192b6aaeda1447ecbbf7e0452d2c924e.jpg)
通过store访问getters
store/index.js
 state: {
    title: 'hhhhh',
    count: 100,
    list: [1, 2, 3, 4, 5, 6, 7, 8, 9, 10]
  },


//   类似于计算属性
  getters: {
    // 注意点:
    // 1. 形参第一个参数,就是state
    // 2. 必须有返回值,返回值就是getters的值
    filterList (state) {
      return state.list.filter(item => item > 5)
    }
  }
Son1.vue
<hr>
<div>{{$store.state.list}}</div>
<div>{{ $store.getters.filterList }}</div>
通过辅助函数mapGetters映射
Son2.vue
<hr>
<div>{{ filterList }}</div>

import {  mapGetters } from 'vuex'


 computed: {
    ...mapGetters(['filterList'])
  },
模块module
![Vue [Day7]_第19张图片](http://img.e-com-net.com/image/info8/c3f4e83a95a340328a88c27c47c4cfe3.jpg)
![Vue [Day7]_第20张图片](http://img.e-com-net.com/image/info8/aabbc5b6b9174d1da8e3f4879cbb536c.jpg) store/modules/user.js
store/modules/user.js
const state = {
  userInfo: {
    name: 'slx',
    age: 18
  },
  score: 80
}
const mutations = {}
const actions = {}
const getters = {}

export default {
  state,
  mutations,
  actions,
  getters
}
store/modules/setting.js
const state = {
  theme: 'light'
}
const mutations = {}
const actions = {}
const getters = {}

export default {
  state,
  mutations,
  actions,
  getters
}
store/index.js
import setting from './modules/setting'

 modules: {
    user, setting
  }
使用模块中的数据 / 模块中state的访问语法
![Vue [Day7]_第21张图片](http://img.e-com-net.com/image/info8/266af074f3e74b7c97047ea908c443bf.jpg)
子模块的状态,还是会挂到根级别的state中,属性名就是模块名
![Vue [Day7]_第22张图片](http://img.e-com-net.com/image/info8/fb25d97d5d964eabb999e2c7ae62a876.jpg)
直接通过模块名访问
Son1.js
<div>{{ $store.state.user.userInfo.name }}</div>
通过mapState映射
默认根级别的映射 …mapState([‘user’, ‘setting’])
Son2.js
<div>{{ user.userInfo.name }}</div>
<div>{{ setting.theme }}</div>
import { mapState } from 'vuex'
  computed: {
    ...mapState(['user', 'setting']),

  },
子模块映射 mapState(‘模块名’,['xxx]) +开启命名空间
user.js
export default {
  namespaced: true,//开启命名空间
  state,
  mutations,
  actions,
  getters
}
Son2.vue
<div>{{ userInfo.name }}</div>
<div>{{ score }}</div>


 ...mapState('user', ['userInfo', 'score']), //! !!!
使用模块中getters中的数据 / 模块中getters的访问语法
直接通过模块名访问 $store.getters[‘模块名/xxx’]
user.js
const getters = {
  // 分模块后,state就是子模块的state
  UpperName (state) {
    return state.userInfo.name.toUpperCase()
  }
}
Son1.vue
<div>{{ $store.getters['user/UpperName'] }}</div>
通过mapGetters映射
![Vue [Day7]_第23张图片](http://img.e-com-net.com/image/info8/7a42b165d11e4a5d858ebb4fb891d171.jpg)
默认根级别映射mapGetters([‘xxx’])
Son2.vue
<div>{{ filterList }}</div>


   ...mapGetters(['filterList'])
store/index.js
  getters: {
    // 注意点:
    // 1. 形参第一个参数,就是state
    // 2. 必须有返回值,返回值就是getters的值
    filterList (state) {
      return state.list.filter(item => item > 5)
    }
  },
子模块映射mapGetters(‘模块名’,[‘xxx’])+开启命名空间Son2.vue
<div>{{ UpperName }}</div>


  ...mapGetters('user', ['UpperName']), //! !!!
掌握模块中的mutation调用语法
![Vue [Day7]_第24张图片](http://img.e-com-net.com/image/info8/d23bcc1d26354ce2b00a6486bf1cf56f.jpg)
直接通过store调用 $store.commit(‘模块名/xxx’,额外参数)
setting.js
const mutations = {
  setTheme (state, newtheme) {
    state.theme = newtheme
  }
}
export default {
  namespaced: true,
  state,
  mutations,
  actions,
  getters
}
Son1.vue
        <div>{{ $store.state.setting.theme }}</div>
        <button @click="changeTheme">改主题色</button>
changeTheme () {
      this.$store.commit('setting/setTheme', 'dark')
    },
通过mapMutations映射
默认根级别映射mapMutations([‘xxx’])
子模块映射mapMutations(‘模块名’,[‘xxx’])+开启命名空间
setting.js
const state = {
  theme: 'light',
  size: 16
}
const mutations = {
  setTheme (state, newtheme) {
    state.theme = newtheme
  },
  setSize (state, newSize) {
    state.size = newSize
  }
}
Son2.vue
<div>{{$store.state.setting.size}}px</div>
<button @click="setSize(90)">改px</button>


//真的注意,放在methods里,不是computed
 methods: {
    ...mapMutations('setting', ['setSize']),
    ...mapMutations('setting', ['setTheme'])

  }
## 模块中action的访问语法 
直接通过模块名访问 $store.dispatch(‘模块名/xxx’,额外参数)
Son1.vue
 <button @click="updateTheme2">一秒后更新</button>
methods: {
    updateTheme2 () {
      this.$store.dispatch('setting/setThemeSecond', 'orange')
    },
setting.js
const actions = {
  setThemeSecond (context, newTheme) {
    setTimeout(() => {
      // 调用mutation  context上下文,默认提交的就是自己模块action和mutation
      context.commit('setTheme', newTheme)
    }, 1000)
  }
}
![Vue [Day7]_第25张图片](http://img.e-com-net.com/image/info8/ac8fbf78940842f8aa132a3173db380a.jpg)
通过mapActions映射
默认根级别映射mapActions([‘xxx’])
子模块映射mapActions(‘模块名’,[‘xxx’])+开启命名空间
Son2.vue
 <button @click="setThemeSecond('black')">一秒后更新主题</button>

  methods: {
 ...mapActions('setting', ['setThemeSecond'])
 }