centos7部署kubernetes1.25.2高可用部署
centos7部署kubernetes1.25.2+containerd1.6.8+haproxy2.6.6+keepalived2.2.7高可用部署
- 部署规划
-
- 准备工作
- 服务器参数基础信息
- kubectl版本要求
- ETCD 硬件配置要求
- 部署安装
-
- 前提工作
- 开始安装
-
- 关闭防火墙配置
- 关闭网络配置任选一样关闭即可, 避免网络冲突
- 关闭/selinux/dnsmasq/swap安全配置
- 禁用交换分区
- 允许iptables检查桥接流量
- 安装时间同步工具ntpdate
- 安装kubectl
- 安装containerd
- lb-1, lb-2节点安装Haproxy
- lb-1, lb-2节点keepalived安装
- master-1节点执行初始化
- 将管理与计算节点加入kubernetes集群
- 安装calico
- 确认是否正常
- 遇见问题
部署规划
此高可用采用的是ETCD堆叠方式进行部署
准备工作
一台兼容的 Linux 主机。Kubernetes 项目为基于 Debian 和 Red Hat 的 Linux 发行版以及一些不提供包管理器的发行版提供通用的指令。
每台机器 2 GB 或更多的 RAM(如果少于这个数字将会影响你应用的运行内存)。
CPU 2 核心及以上。
集群中的所有机器的网络彼此均能相互连接(公网和内网都可以)。
节点之中不可以有重复的主机名、MAC 地址或 product_uuid。请参见这里了解更多详细信息。
开启机器上的某些端口。请参见这里了解更多详细信息。
禁用交换分区。为了保证 kubelet 正常工作,你必须禁用交换分区。
服务器参数基础信息
| NAME | IP | ROLES | VERSION | OS |
|---|---|---|---|---|
| master-1 | 192.168.2.63 | control | v1.25.2 | centos7.9 |
| master-2 | 192.168.2.66 | control | v1.25.2 | centos7.9 |
| master-3 | 192.168.2.68 | control | v1.25.2 | centos7.9 |
| node-1 | 192.168.2.200 | v1.25.2 | centos7.9 | |
| node-2 | 192.168.2.65 | v1.25.2 | centos7.9 | |
| lb-2 | 192.168.2.69 | v1.25.2 | centos7.9 | |
| lb-2 | 192.168.2.70 | v1.25.2 | centos7.9 |
kubectl版本要求
kubectl 版本和集群版本之间的差异必须在一个小版本号内。 例如:v1.25 版本的客户端能与 v1.24、 v1.25 和 v1.26 版本的控制面通信。 用最新兼容版的 kubectl 有助于避免不可预见的问题
ETCD 硬件配置要求
https://etcd.io/docs/v3.6/op-guide/hardware/
部署安装
前提工作
- 固定IP地址
- hostnamectl set-hostname master-1 # 固定服务器名
- sudo yum install -y vim # 提前安装vim
- vim /etc/hosts # 配置hosts文件, 把集群所有的服务器添加进hosts文件
- 集群服务器之间免密
开始安装
关闭防火墙配置
systemctl status firewalld
systemctl stop firewalld
systemctl disable firewalld
关闭网络配置任选一样关闭即可, 避免网络冲突
systemctl stop NetworkManager
systemctl disable NetworkManager
systemctl stop network   # 任选一样关闭
systemctl disable network # 任选一样关闭
关闭/selinux/dnsmasq/swap安全配置
 setenforce 0
 vim /etc/sysconfig/selinux
 # 修改SELINUX=enforcing
 SELINUX=disabled
禁用交换分区
 swapoff -a
 vim /etc/fstab
 # 注释下列行
 # /dev/mapper/centos-swap swap swap defaults 0 0
 # 调整swappiness参数
 echo vm.swappiness=0 >> /etc/sysctl.conf
 # 使配置生效
 sysctl -p
 # 确认swap分区已关闭
 free -m
Swap为0

允许iptables检查桥接流量
sudo modprobe br_netfilter
lsmod | grep br_netfilter
# 添加桥接配置
cat <| sudo tee /etc/modules-load.d/k8s.conf
overlay
br_netfilter
EOF
# 设置所需的 sysctl 参数,参数在重新启动后保持不变
cat <| sudo tee /etc/sysctl.d/k8s.conf
net.bridge.bridge-nf-call-iptables  = 1
net.bridge.bridge-nf-call-ip6tables = 1
net.ipv4.ip_forward                 = 1
EOF
# 应用 sysctl 参数而不重新启动
sudo sysctl --system
安装时间同步工具ntpdate
# centos7安装
yum install ntp ntpdate -y
#centos8安装
rpm -ivh http://mirrors.wlnmp.com/centos/wlnmp-release-centos.noarch.rpm
yum install wntp -y
# 所有节点同步时间。时间同步配置如下
ln -sf /usr/share/zoneinfo/Asia/Shanghai /etc/localtime
echo 'Asia/Shanghai' > /etc/timezone
ntpdate time2.aliyun.com
# 加入crontab
crontab -e
*/5 * * * * ntpdate time2.aliyun.com
# 加入到开机自动同步
vim /etc/rc.local
ntpdate time2.aliyun.com
安装kubectl
# 指定版本号安装
curl -LO https://dl.k8s.io/release/v1.25.2/bin/linux/amd64/kubectl

# 默认安装最新版本
 curl -LO "https://dl.k8s.io/release/$(curl -L -s https://dl.k8s.io/release/stable.txt)/bin/linux/amd64/kubectl"

# 下载kubectl校验文件
curl -LO "https://dl.k8s.io/$(curl -L -s https://dl.k8s.io/release/stable.txt)/bin/linux/amd64/kubectl.sha256"

# 验证 kubectl 的可执行文件
echo "$(cat kubectl.sha256)  kubectl" | sha256sum --check
成功输出为
kubectl: OK
验证失败时,sha256 将以非零值退出,并打印如下输出:# 不成功可以重新下载校验文件再次确认
kubectl: FAILED
sha256sum: WARNING: 1 computed checksum did NOT match
# centos7安装yum源
curl -o /etc/yum.repos.d/CentOS-Base.repo https://mirrors.aliyun.com/repo/Centos-7.repo
yum install -y yum-utils device-mapper-persistent-data lvm2
yum-config-manager --add-repo https://mirrors.aliyun.com/docker-ce/linux/centos/docker-ce.repo
# centos8安装yum源
curl -o /etc/yum.repos.d/CentOS-Base.repo http://mirrors.aliyun.com/repo/Centos-8.repo
yum install -y yum-utils device-mapper-persistent-data lvm2
yum-config-manager --add-repo https://mirrors.aliyun.com/docker-ce/linux/centos/docker-ce.repo
导入镜像源并安装
# 以下全部复制执行(导入K8s镜像源)并安装kubectl
cat < /etc/yum.repos.d/kubernetes.repo
[kubernetes]
name=Kubernetes
baseurl=https://mirrors.aliyun.com/kubernetes/yum/repos/kubernetes-el7-x86_64/
enabled=1
gpgcheck=1
repo_gpgcheck=0
gpgkey=https://mirrors.aliyun.com/kubernetes/yum/doc/yum-key.gpg https://mirrors.aliyun.com/kubernetes/yum/doc/rpm-package-key.gpg
EOF
sed -i -e '/mirrors.cloud.aliyuncs.com/d' -e '/mirrors.aliyuncs.com/d' /etc/yum.repos.d/CentOS-Base.repo
# 查看需要安装版本
yum list kubectl --showduplicates | sort -r
yum list kubeadm --showduplicates | sort -r
yum list kubelet --showduplicates | sort -r
# 安装指定版本
sudo yum install -y kubectl-1.25.2-0 kubeadm-1.25.2-0 kubelet-1.25.2-0
# 执行测试,以确认你安装的版本
kubectl version --client
# 或者使用如下命令来查看版本的详细信息
kubectl version --client --output=yaml
安装containerd
# 安装依赖
yum install -y yum-utils device-mapper-persistent-data lvm2
# 添加yum源
yum-config-manager --add-repo http://mirrors.aliyun.com/docker-ce/linux/centos/docker-ce.repo
yum install containerd.io-1.6.8-3.1.el7 -y
# 生成配置文件
containerd config default > /etc/containerd/config.toml
# 替换 containerd 默认的 sand_box 镜像,编辑
vim /etc/containerd/config.toml
sandbox_image = "registry.aliyuncs.com/google_containers/pause:3.6"
# 修改SystemCgroup为true, 注意大小写
SystemdCgroup = true
# 启动服务
systemctl restart containerd && systemctl enable containerd
# 查看版本信息
crictl version
# 此时运行ctr即可看到
ctr images list

# 执行k8s 命令可看到有告警提示信息
crictl images list

# 修改配置文件忽略告警信息
vim /etc/crictl.yaml
runtime-endpoint: unix:///run/containerd/containerd.sock
image-endpoint: unix:///run/containerd/containerd.sock
timeout: 10 #超时时间
debug: false #debug是否输出debug信息
# 再次验证
crictl images list

lb-1, lb-2节点安装Haproxy
推荐文档:
https://github.com/kubernetes/kubeadm/blob/main/docs/ha-considerations.md
# 为了不必要麻烦提前关闭防火墙
systemctl disable firewalld.service
systemctl status firewalld.service
# 安装依赖
yum install -y gcc gcc-c++ vim net-tools telnet dos2unix iptraf ntp tree sysstat lrzsz bash-completion chrony wget unzip wget ntp ntpdate
# 时间同步
# 所有节点同步时间。时间同步配置如下 ln -sf /usr/share/zoneinfo/Asia/Shanghai /etc/localtime echo 'Asia/Shanghai' > /etc/timezone ntpdate time2.aliyun.com # 加入crontab crontab -e */5 * * * * ntpdate time2.aliyun.com # 加入到开机自动同步 vim /etc/rc.local ntpdate time2.aliyun.com # 编译安装
wget https://www.haproxy.org/download/2.6/src/haproxy-2.6.6.tar.gz
yum install -y systemd-devel
tar -xf haproxy-2.6.6.tar.gz -C /usr/local/
cd /usr/local/haproxy-2.6.6/
make TARGET=linux-glibc USE_SYSTEMD=1
make install
# 注册到systemd:
cat  > /usr/lib/systemd/system/haproxy.service << EOF
[Unit]
Description=HAProxy Load Balancer
After=syslog.target network.target

[Service]
ExecStartPre=/usr/local/sbin/haproxy -f /etc/haproxy/haproxy.cfg   -c -q
ExecStart=/usr/local/sbin/haproxy -Ws -f /etc/haproxy/haproxy.cfg  -p /run/haproxy.pid
ExecReload=/bin/kill -USR2 $MAINPID

[Install]
WantedBy=multi-user.target
EOF
准备配置文件
mkdir /etc/haproxy/
cat > /etc/haproxy/haproxy.cfg << EOF
#---------------------------------------------------------------------
# Global settings
#---------------------------------------------------------------------
global
    # log /dev/log local0
    # log /dev/log local1 notice
    log 127.0.0.1 local2 info
    daemon

#---------------------------------------------------------------------
# common defaults that all the 'listen' and 'backend' sections will
# use if not designated in their block
#---------------------------------------------------------------------
defaults
    mode                    http
    log                     global
    option                  httplog
    option                  dontlognull
    option http-server-close
    option forwardfor       except 127.0.0.0/8
    option                  redispatch
    retries                 1
    timeout http-request    10s
    timeout queue           20s
    timeout connect         5s
    timeout client          20s
    timeout server          20s
    timeout http-keep-alive 10s
    timeout check           10s

#---------------------------------------------------------------------
# apiserver frontend which proxys to the control plane nodes
#---------------------------------------------------------------------
frontend apiserver
    bind *:6443 # 绑定自己的端口号
    mode tcp
    option tcplog
    default_backend apiserver

#---------------------------------------------------------------------
# round robin balancing for apiserver
#---------------------------------------------------------------------
backend apiserver
    option httpchk GET /healthz
    http-check expect status 200
    mode tcp
    option ssl-hello-chk
    balance     roundrobin
        server master-1 192.168.2.63:6443 check # 修改成自己的master节点
        server master-2 192.168.2.66:6443 check # 修改成自己的master节点
        server master-3 192.168.2.68:6443 check # 修改成自己的master节点

listen admin_stats      # 配置状态页
    mode http           # 运行模式
    bind *:1080         # 监听端口
    stats enable        # 启用状态页
    stats hide-version  # 隐藏版本
    maxconn 1024        # 最大连接数
    stats refresh 30s   # 页面自动刷新时间30s
    stats uri /stats    # 访问路径
    #stats admin if TRUE # 启用管理功能
    stats auth admin:000000  # 账号密码
EOF

systemctl enable haproxy
systemctl start haproxy
lb-1, lb-2节点keepalived安装
推荐文档:
https://github.com/kubernetes/kubeadm/blob/main/docs/ha-considerations.md
# 下载安装包
wget --no-check-certificate https://www.keepalived.org/software/keepalived-2.2.7.tar.gz
yum install -y openssl-devel libnl libnl-devel
tar -xf keepalived-2.2.7.tar.gz -C /usr/local/
cd /usr/local/keepalived-2.2.7
./configure --prefix=/usr/local/keepalived/
make USE_SYSTEMD=1
make install
# 修改配置文件
ln -s /usr/local/keepalived/etc/keepalived /etc/keepalived
cp /etc/keepalived/keepalived.conf /etc/keepalived/keepalived.conf
lb-1节点配置文件
cat > /etc/keepalived/keepalived.conf << EOF
! /etc/keepalived/keepalived.conf
! Configuration File for keepalived
global_defs {
    router_id lb-1
}
vrrp_script check_apiserver {
  script "/etc/keepalived/check_apiserver.sh"
  interval 3
  weight -2
  fall 10
  rise 2
}

vrrp_instance VI_1 {
    state MASTER
    interface ens192
    virtual_router_id 51
    priority 101
    authentication {
        auth_type PASS
        auth_pass 1222
    }
    virtual_ipaddress {
        192.168.2.16
    }
    track_script {
        check_apiserver
    }
}
EOF
systemctl enable keepalived
systemctl start keepalived
lb-2配置文件
cat > /etc/keepalived/keepalived.conf << EOF
! /etc/keepalived/keepalived.conf
! Configuration File for keepalived
global_defs {
    router_id lb-2
}
vrrp_script check_apiserver {
  script "/etc/keepalived/check_apiserver.sh"
  interval 3
  weight -2
  fall 10
  rise 2
}

vrrp_instance VI_1 {
    state BACKUP
    interface ens192
    virtual_router_id 51
    priority 100
    authentication {
        auth_type PASS
        auth_pass 1222
    }
    virtual_ipaddress {
        192.168.2.16
    }
    track_script {
        check_apiserver
    }
}

EOF
systemctl enable keepalived
systemctl start keepalived
# 准备健康检查脚本
cat > /etc/keepalived/check_apiserver.sh << EOF
#!/bin/sh

errorExit() {
    echo "*** $*" 1>&2
    exit 1
}

curl --silent --max-time 2 --insecure https://localhost:6443/ -o /dev/null || errorExit "Error GET https://localhost:6443/"
if ip addr | grep -q 192.168.2.16; then
    curl --silent --max-time 2 --insecure https://192.168.2.16:6443/ -o /dev/null || errorExit "Error GET https://192.168.2.16:6443/"
fi
EOF
master-1节点执行初始化
kubeadm init –help # 查看初始化参数配置
kubeadm init --kubernetes-version=1.25.2 \
 --apiserver-bind-port=6443 \
 --image-repository=registry.aliyuncs.com/google_containers \
 --service-cidr=10.96.0.0/12 \
 --cri-socket unix:///var/run/containerd/containerd.sock  \
 --ignore-preflight-errors=Swap \
 --control-plane-endpoint=192.168.2.16
 --upload-certs
参数说明
kubernetes-version # 换成自己安装的版本号
apiserver-bind-port # api绑定的端口号
image-repository # 配置镜像仓库地址
service-cidr # 为服务的虚拟 IP 地址另外指定 IP 地址段
cri-socket # 要连接的 CRI 套接字的路径
ignore-preflight-errors # 错误将显示为警告的检查列表
control-plane-endpoint # 为控制平面指定一个稳定的 IP 地址或 DNS 名称,换成自己的服务器名或ip
upload-certs # 将控制平面证书上传到 kubeadm-certs Secret
# 执行不成功则执行下列命令重新执行初始化操作,慎用!!!
kubeadm reset
# 初始化完毕, 会显示下列信息
Your Kubernetes control-plane has initialized successfully!

To start using your cluster, you need to run the following as a regular user:

  mkdir -p $HOME/.kube
  sudo cp -i /etc/kubernetes/admin.conf $HOME/.kube/config
  sudo chown $(id -u):$(id -g) $HOME/.kube/config

Alternatively, if you are the root user, you can run:

  export KUBECONFIG=/etc/kubernetes/admin.conf

You should now deploy a pod network to the cluster.
Run "kubectl apply -f [podnetwork].yaml" with one of the options listed at:
  https://kubernetes.io/docs/concepts/cluster-administration/addons/

You can now join any number of the control-plane node running the following command on each as root:

  kubeadm join 192.168.2.16:6443 --token wrc9f3.4njs226cnfryyyce \
  --discovery-token-ca-cert-hash sha256:5d51987e81015e7f0e66da41a79e22519593a3390e84b35b9e24ada2dfec8eb8 \
  --control-plane --certificate-key f3c87b27edd94091829d43da72ac94fbbc562496c55efd73388175cf8bddc36e

Please note that the certificate-key gives access to cluster sensitive data, keep it secret!
As a safeguard, uploaded-certs will be deleted in two hours; If necessary, you can use
"kubeadm init phase upload-certs --upload-certs" to reload certs afterward.

Then you can join any number of worker nodes by running the following on each as root:

kubeadm join 192.168.2.16:6443 --token wrc9f3.4njs226cnfryyyce \
  --discovery-token-ca-cert-hash sha256:5d51987e81015e7f0e66da41a79e22519593a3390e84b35b9e24ada2dfec8eb8
将上例信息保存,根据提示信息执行, 认证密钥有时效性
mkdir -p $HOME/.kube
  sudo cp -i /etc/kubernetes/admin.conf $HOME/.kube/config
  sudo chown $(id -u):$(id -g) $HOME/.kube/config
export KUBECONFIG=/etc/kubernetes/admin.conf # root用户需要执行
# master执行下列命令可查看已经获取的镜像
ctr images list
将管理与计算节点加入kubernetes集群
# 需要在所有master节点执行命令, 开放端口
firewall-cmd --zone=public --add-port=2380/tcp --permanent && firewall-cmd --zone=public --add-port=2379/tcp --permanent && firewall-cmd --zone=public --add-port=6443/tcp --permanent && firewall-cmd --zone=public --add-port=10250/tcp --permanent && firewall-cmd --reload
# 根据提示信息, 管理节点执行命令
kubeadm join master-1:6443 --token wrc9f3.4njs226cnfryyyce \
  --discovery-token-ca-cert-hash sha256:5d51987e81015e7f0e66da41a79e22519593a3390e84b35b9e24ada2dfec8eb8 \
  --control-plane --certificate-key f3c87b27edd94091829d43da72ac94fbbc562496c55efd73388175cf8bddc36e
# 根据提示信息, 计算节点执行命令
kubeadm join master-1:6443 --token wrc9f3.4njs226cnfryyyce \
  --discovery-token-ca-cert-hash sha256:5d51987e81015e7f0e66da41a79e22519593a3390e84b35b9e24ada2dfec8eb8
安装calico
官方文档
https://projectcalico.docs.tigera.io/getting-started/kubernetes/self-managed-onprem/onpremises
# master节点安装
curl https://projectcalico.docs.tigera.io/archive/v3.24/manifests/calico-etcd.yaml -o calico.yaml
kubectl apply -f calico.yaml
确认是否正常
查看READY是否都是1/1, STATUS状态是否都是Running
kubectl get pod -n kube-system -o wide

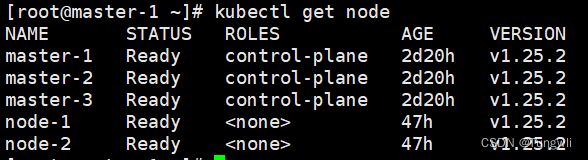
查看节点是否在Ready状态
kubectl get node
遇见问题
calico-node READY 0/1 STATUS Running
通过log日志查看
[WARNING] plugin/kubernetes: Kubernetes API connection failure: Get “https://10.96.0.1:443/version”: dial tcp 10.96.0.1:443: connect: no route to host
解决办法:
排查负载节点或master节点443端口是否开启
可能是iptables问题
systemctl stop kubelet
systemctl stop containerd
iptables --flush
iptables -tnat --flush
systemctl start kubelet
systemctl start containerd
至此kubernetes高可用安装完毕, 后续可根据自己需要可以加可视化界面, 监控, 存储等等一些服务以及组件。