模拟实现定时器
前言
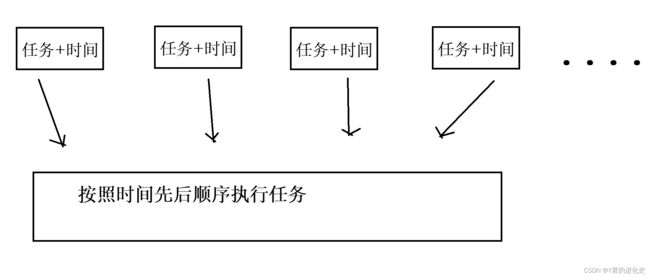
定时器的功能,就是一个类似于闹钟的到点运行的功能。
目录
前言
一、Timer 类
二、分析 Timer 类
三、完整代码实现
结语
一、Timer 类
Java库提供 Timer 类,实现 schedule 方法,给方法提供任务和时间,到时间就运行任务,如:
import java.util.Timer;
import java.util.TimerTask;

public class Main {
    public static void main(String[] args) {
        Timer timer = new Timer();
        timer.schedule(new TimerTask() {
            @Override
            public void run() {
                System.out.println("111");
            }
        },1000);
    }
}
运行截图:
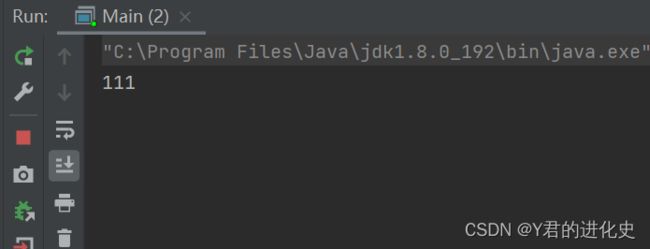
当当前任务执行完毕之后,线程 timer 是不会结束的, 会一直阻塞等待,直到下一个任务的录入。
二、分析 Timer 类
1)定时器是将多个任务按照时间先后执行,由此一个任务具有任务的具体内容,和执行时间:
class TimerTake{
    private long time;
    private Runnable runnable;

    public TimerTake(long time, Runnable runnable) {
        this.time = time+System.currentTimeMillis();//当前时间+等待时间
        this.runnable = runnable;
    }

    public long getTime() {
        return time;
    }

    public Runnable getRunnable() {
        return runnable;
    }
}
2)执行顺序是按照时间先后,故该TimerTake 类应该带有比较器:
class TimerTake implements Comparable{
    private long time;
    private Runnable runnable;

    public TimerTake(long time, Runnable runnable) {
        this.time = time;
        this.runnable = runnable;
    }

    public long getTime() {
        return time;
    }

    public Runnable getRunnable() {
        return runnable;
    }

    @Override
    public int compareTo(TimerTake o) {
        return (int)(this.time-o.time);
    }
} 3)为了更好的实现有一个任务实现一个任务,没有任务等待下一个任务的添加,这里组织任务的数据结构使用阻塞队列(阻塞队列_线程安全版本_生产消费者模型_Y君的进化史的博客-CSDN博客),不过考虑到时间先后顺序,采用阻塞优先级队列更加合理,再写一个类MyTimer组织TimerTake类,任务的添加在schedule方法中实现:
class MyTimer{
    private PriorityBlockingQueue queue = new PriorityBlockingQueue();

    public void schedule(Runnable runnable,long time){
        TimerTake timerTake = new TimerTake(runnable,time);
        queue.put(timerTake);
    }
}
4)需要在一调用schedule时,按照时间执行任务,说明在MyTimer构造方法中应该存在线程的调用,使其一直运行:
class Timer extends Thread {
@Override
public void run() {
while(true){
if(queue.isEmpty()){
//空队列,没有任务
}
try {
TimerTake timerTake = queue.take();
long time = System.currentTimeMillis();//当前时间
if(time >= timerTake.getTime()){
//执行任务
timerTake.getRunnable().run();
}else{
//将任务添加回去
queue.put(timerTake);
}
} catch (InterruptedException e) {
e.printStackTrace();
}
}
}
}
MyTimer(){
Timer timer = new Timer();
timer.start();
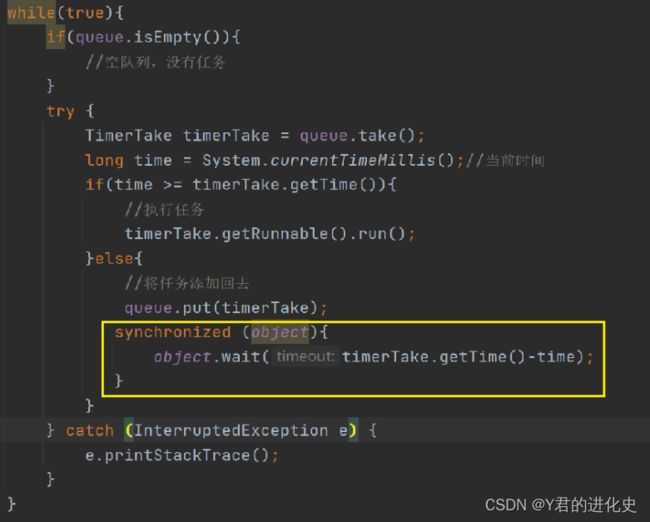
}5)上述代码确实可以处理任务的执行问题,但是一直使用while和if判断会消耗大量的CPU资源,所以选择使用休眠等待时间,有两个选择sleep 和 wait-notify。使用sleep会影响任务的录入,故选择wait-notify:
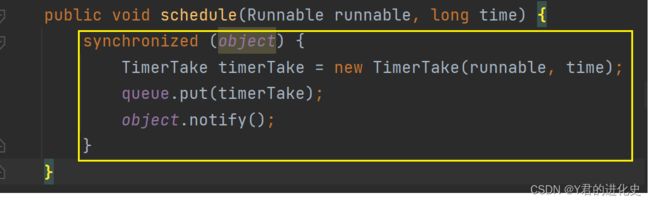
6)那什么时候使用notify唤醒呢?应该在任务加入的时候使用:
public void schedule(Runnable runnable,long time){
TimerTake timerTake = new TimerTake(runnable,time);
queue.put(timerTake);
synchronized (object){
object.notify();
}
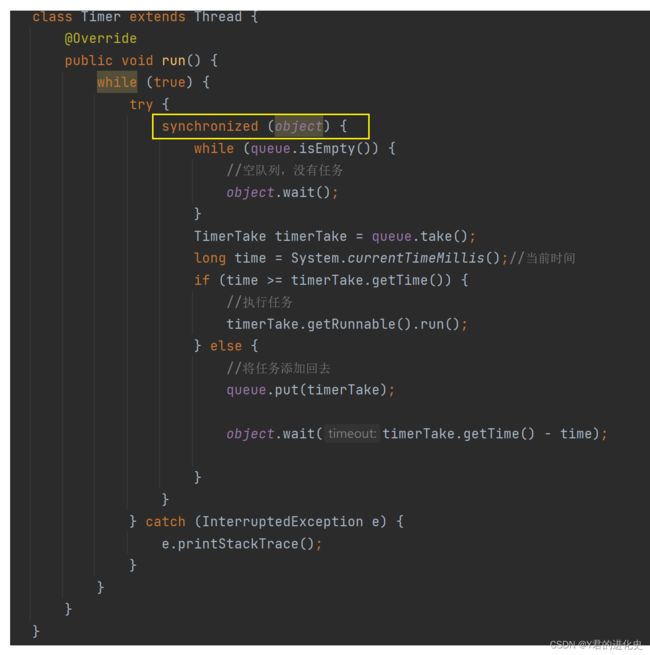
}7)队列为空时,采取wait-notify等待-唤醒机制,等任务添加时唤醒:
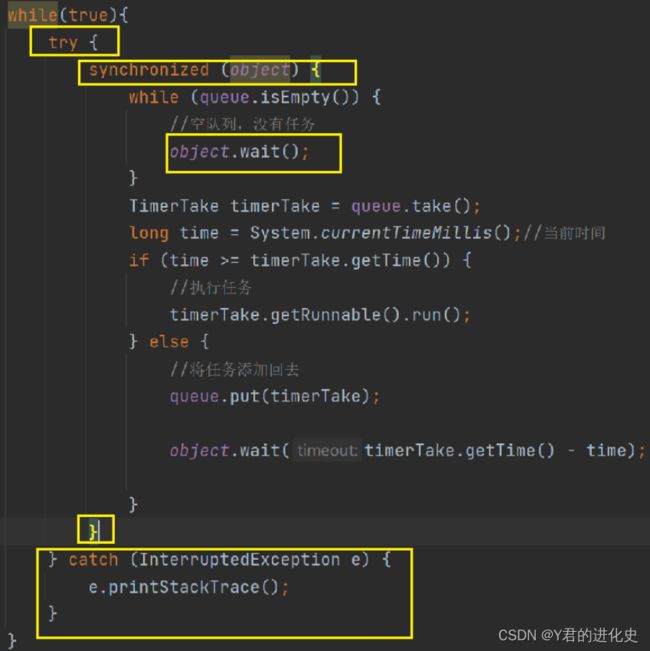
8)考虑到线程安全问题,整个代码再加上synchronized 和 volatile:
![]()
三、完整代码实现
下面代码是Timer的模拟实现:
import java.util.concurrent.PriorityBlockingQueue;


class TimerTake implements Comparable{
    private long time;
    private Runnable runnable;

    public TimerTake( Runnable runnable,long time) {
        this.time = time+System.currentTimeMillis();//当前时间+等待时间
        this.runnable = runnable;
    }

    public long getTime() {
        return time;
    }

    public Runnable getRunnable() {
        return runnable;
    }

    @Override
    public int compareTo(TimerTake o) {
        return (int)(this.time-o.time);
    }
}

class MyTimer {
    volatile private PriorityBlockingQueue queue = new PriorityBlockingQueue();

    public void schedule(Runnable runnable, long time) {
        synchronized (object) {
            TimerTake timerTake = new TimerTake(runnable, time);
            queue.put(timerTake);
            object.notify();
        }
    }

    private static Object object = new Object();

    class Timer extends Thread {
        @Override
        public void run() {
            while (true) {
                try {
                    synchronized (object) {
                        while (queue.isEmpty()) {
                            //空队列,没有任务
                            object.wait();
                        }
                        TimerTake timerTake = queue.take();
                        long time = System.currentTimeMillis();//当前时间
                        if (time >= timerTake.getTime()) {
                            //执行任务
                            timerTake.getRunnable().run();
                        } else {
                            //将任务添加回去
                            queue.put(timerTake);

                            object.wait(timerTake.getTime() - time);

                        }
                    }
                } catch (InterruptedException e) {
                    e.printStackTrace();
                }
            }
        }
    }

    MyTimer(){
        Timer timer = new Timer();
        timer.start();
    }
}
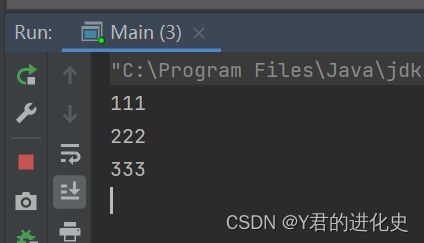
下面代码是博主通过main方法调用这个模拟的MyTimer实现几个小功能:
public class Main {
    public static void main(String[] args) {
        MyTimer myTimer = new MyTimer();
        myTimer.schedule(new Runnable() {
            @Override
            public void run() {
                System.out.println("111");
            }
        },1000);
        myTimer.schedule(new Runnable() {
            @Override
            public void run() {
                System.out.println("333");
            }
        },3000);
        myTimer.schedule(new Runnable() {
            @Override
            public void run() {
                System.out.println("222");
            }
        },2000);
    }
}
运行截图是:
结语
这篇博客如果对你有帮助,给博主一个免费的点赞以示鼓励,欢迎各位点赞评论收藏⭐,谢谢!!!