原文链接: 1Panel上的长亭雷池WAF搭配openresty的用法
前言
最近把面板换成了国内公司出的但是开源的1panel,跑容器也是挺符合心里需求的,
主界面也挺干净整洁。看到第三方应用库有个免费WAF,然后又上了开源了但没完全开源的长亭雷池WAF。
记录一下在同一台机子上长亭雷池WAF搭配默认openresty的用法。
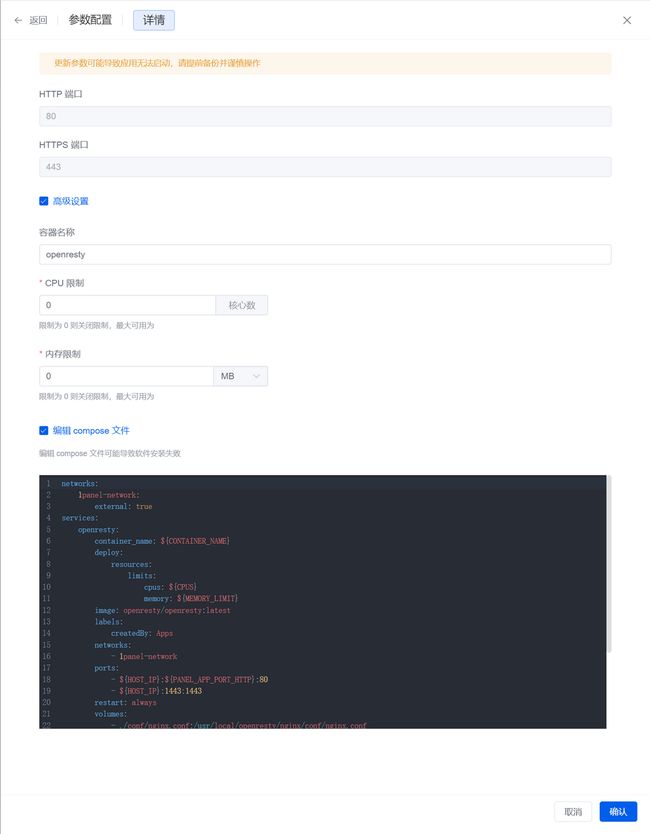
1. 调整openresty容器网络
需要将openresty修改为桥接网络模式。且修改https外部映射为其他端口如1443。
注意:改桥接端口之后,反向代理的思路就和使用Nginx Proxy Manager一样了,
- 不能写
127.0.0.1:端口来反向代理了。
点击应用参数修改docker-compose.yml,重建openresty。
version: '3'
services:
  openresty:
    image: openresty/openresty:latest #这里镜像注意对应自己的架构平台
    container_name: ${CONTAINER_NAME}
    restart: always
    networks:
      - 1panel-network
    ports:
      - "${PANEL_APP_PORT_HTTP}:80"
      - "1443:1443"
    volumes:
      - ./conf/nginx.conf:/usr/local/openresty/nginx/conf/nginx.conf
      - ./conf/fastcgi_params:/usr/local/openresty/nginx/conf/fastcgi_params
      - ./conf/fastcgi-php.conf:/usr/local/openresty/nginx/conf/fastcgi-php.conf
      - ./log:/var/log/nginx
      - ./conf/conf.d:/usr/local/openresty/nginx/conf/conf.d/
      - ./www:/www
      - ./root:/usr/share/nginx/html
      - /etc/localtime:/etc/localtime
    labels:
      createdBy: "Apps"

networks:
  1panel-network:
    external: true
2. 修改站点监听端口
站点正常配置,开启https啥的。
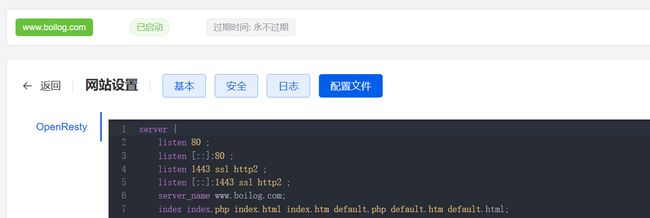
进入站点文件配置,修改https监听端口为1443,与外部端口一致。
3. 雷池WAF添加站点
3.1 添加第三方库
然后应用商店安装雷池WAF
以默认1Panel安装在/opt/路径下为例子,如果不是按需修改以下。
3.1.1 国内网络
1panel计划任务类型Shell 脚本的计划任务框里,添加并执行以下命令,或者终端运行以下命令,
git clone -b localApps https://ghproxy.com/https://github.com/okxlin/appstore /opt/1panel/resource/apps/local/appstore-localApps

cp -rf /opt/1panel/resource/apps/local/appstore-localApps/apps/* /opt/1panel/resource/apps/local/

rm -r /opt/1panel/resource/apps/local/appstore-localApps
然后应用商店刷新本地应用即可。
3.1.2 国际互联网络
1panel计划任务类型Shell 脚本的计划任务框里,添加并执行以下命令,或者终端运行以下命令,
git clone -b localApps https://github.com/okxlin/appstore /opt/1panel/resource/apps/local/appstore-localApps

cp -rf /opt/1panel/resource/apps/local/appstore-localApps/apps/* /opt/1panel/resource/apps/local/

rm -r /opt/1panel/resource/apps/local/appstore-localApps
然后应用商店刷新本地应用即可。
3.2 雷池WAF添加站点
- 一种是直接添加普通容器端口做上游,
雷池WAF监听443端口,上传证书即可。 - 另一种就是搭配
openresty。
具体方式是如下:
- 添加上游服务为
https://127.0.0.1:1443 - 域名填写与
openresty站点一致 雷池WAF监听443端口- 正常上传证书
这样子就正常添加了,正常网站配置还是由openresty 提供,雷池WAF做个下游。
4. 关于SSL证书持续
雷池WAF社区版本这边还没证书夹,每添加一个站点就需要上传证书。
然后命名也是随机产生。想要使访问站点的SSL证书正常,还是得不断将签发的证书将旧证书文件替换掉。
这里用acme.sh签发的来替换。
具体的对应站点SSL证书对应可以查看配置获取。
具体文件路径在类似如下文件夹里
/opt/1panel/apps/local/safeline/safeline/data/resources/nginx/sites-enabled# 配置文件示例
server {
listen 0.0.0.0:443 ssl;
server_name www.example.com;
ssl_certificate /etc/nginx/certs/agicaikcgbac__.example.com-fullchain.cer;
ssl_certificate_key /etc/nginx/certs/shcvogagbaovga__.example.com.key;
location = /forbidden_page {
internal;
root /etc/nginx/forbidden_pages;
try_files /default_forbidden_page.html =403;
}
如上所示则可以获得证书文件文件名如下:
– agicaikcgbac__.example.com-fullchain.cer
– shcvogagbaovga__.example.com.key
则替换雷池WAF证书的命令可以写为
# safeline-www.example.com
cp /root/.acme.sh/*.example.com_ecc/fullchain.cer /opt/1panel/apps/local/safeline/safeline/data/resources/nginx/certs/agicaikcgbac__.example.com-fullchain.cer
cp /root/.acme.sh/*.example.com_ecc/*.example.com.key /opt/1panel/apps/local/safeline/safeline/data/resources/nginx/certs/shcvogagbaovga__.example.com.key也可以顺手替换一下openresty创建的站点的证书
# openresty-www.example.com
cp /root/.acme.sh/*.example.com_ecc/fullchain.cer /opt/1panel/apps/openresty/openresty/www/sites/www.example.com/ssl/fullchain.pem
cp /root/.acme.sh/*.example.com_ecc/*.example.com.key /opt/1panel/apps/openresty/openresty/www/sites/www.example.com/ssl/privkey.pem
然后将这两个替换证书的命令添加到计划任务列表就行了。


