Vue CLI创建Vue项目详细步骤
一、安装Node环境(建议使用LTS版本)
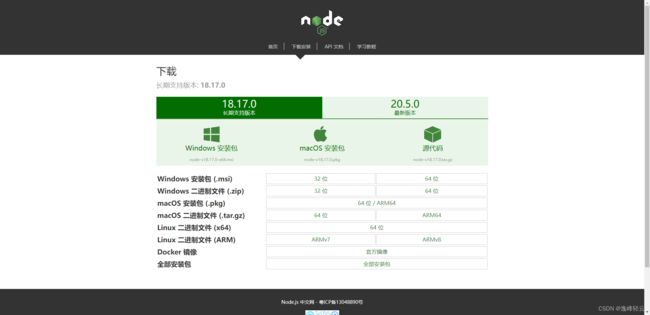
在开始之前,请确保您已经安装了Node.js环境。您可以从Node.js官方网站下载LTS版本,以确保稳定性和兼容性。
中文官网下载
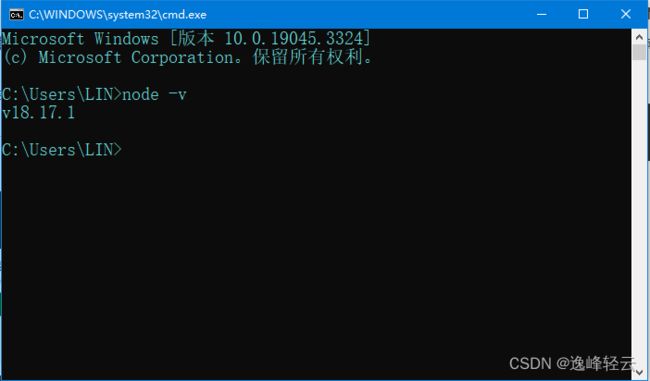
确认已安装 Node.js。可以在终端中运行 node -v 命令来检查是否已安装。
⚙️ 二、下载Vue和Vue CLI脚手架
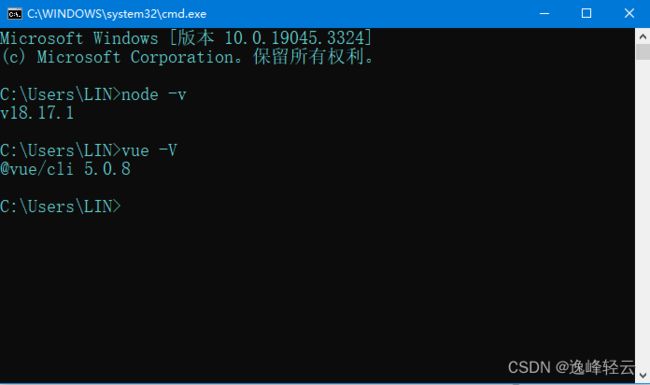
打开命令行终端,执行以下命令来全局安装Vue和Vue CLI:
npm install -g vue @vue/cli
在终端中运行 vue -V 命令来检查是否已安装(这里要大写的V)
三、创建Vue项目
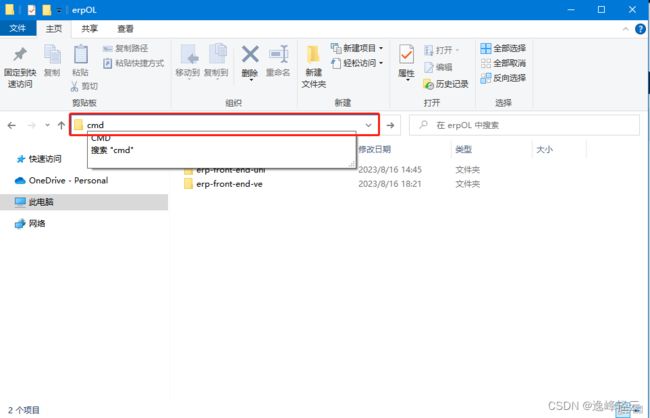
在想要创建的位置路径下打开cmd(直接点击路径输入cmd即可打开当前位置的终端)
在终端中进入要创建项目的目录,运行以下命令创建新的项目:vue create 。
vue create <project-name>
其中 是要创建的项目名称
3.2 ️ 进入详细选择
创建过程中,您将进入一个交互式的选择界面,根据您的需求进行配置。
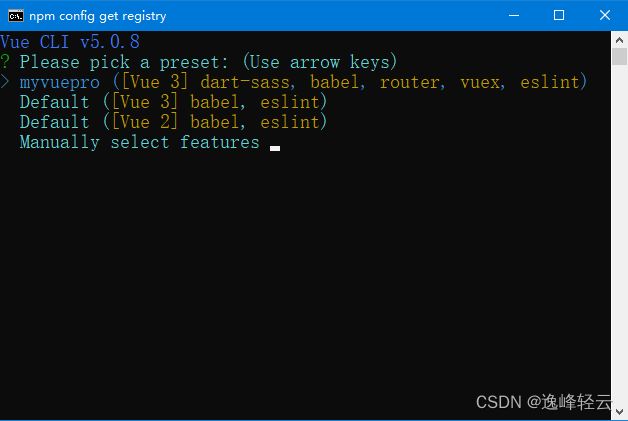
3.2.1 选择创建模式
选择Vue的创建模式:Vue 2.x、Vue 3.x 或自定义。

Vue CLI v5.0.8
? Please pick a preset: (Use arrow keys)
myvuepro ([Vue 3] dart-sass, babel, router, vuex, eslint)
Default ([Vue 3] babel, eslint)
Default ([Vue 2] babel, eslint)
Manually select features
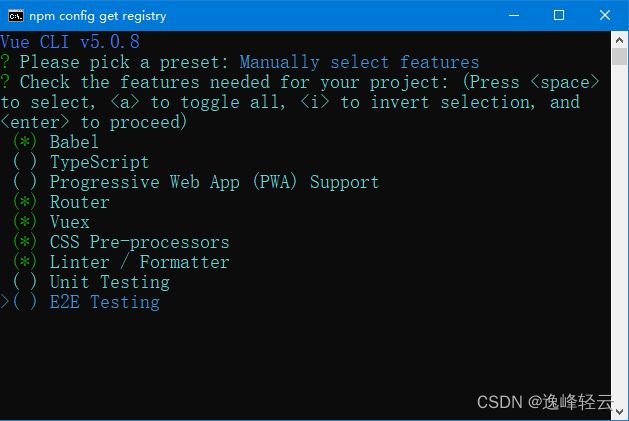
3.2.2 ️ 选择需要支持的特性
根据项目需求,选择需要支持的特性,如Babel、Router、Vuex等。
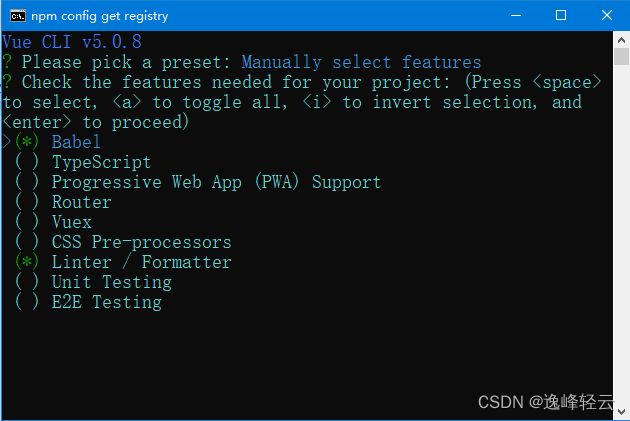
Vue CLI v5.0.8
? Please pick a preset: Manually select features
? Check the features needed for your project: (Press
to select, to toggle all, to invert selection, and
to proceed)
() Babel
( ) TypeScript
( ) Progressive Web App (PWA) Support
( ) Router
( ) Vuex
( ) CSS Pre-processors
() Linter / Formatter
( ) Unit Testing
( ) E2E Testing
我的配置:
3.2.3 选择Vue版本
选择您希望使用的Vue版本,例如2.x或3.x。
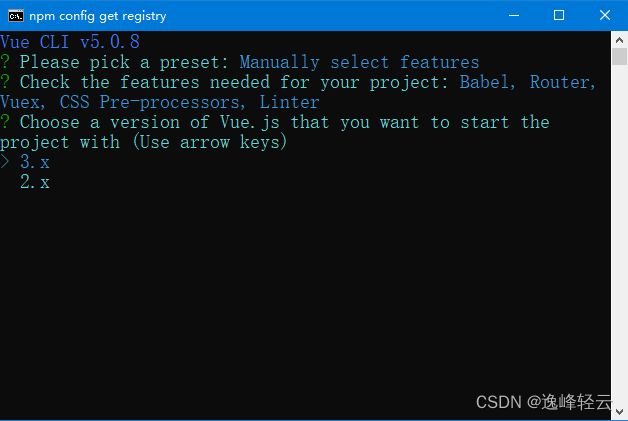
Vue CLI v5.0.8
? Please pick a preset: Manually select features
? Check the features needed for your project: Babel, Router,
Vuex, CSS Pre-processors, Linter
? Choose a version of Vue.js that you want to start the
project with (Use arrow keys)
3.x
2.x
3.2.4 是否选择history路由模式
根据需求选择是否使用history路由模式,这会影响路由的URL显示方式。
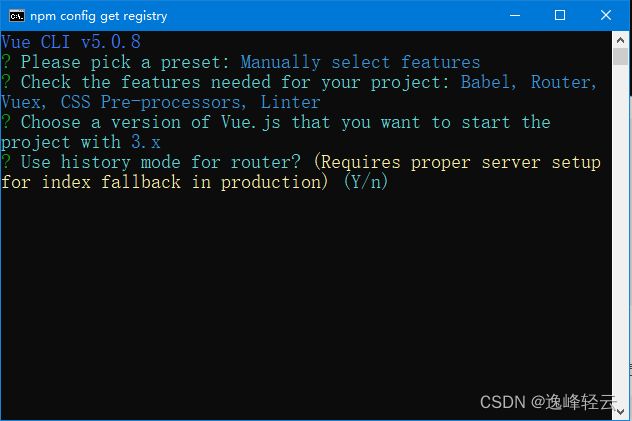
Vue CLI v5.0.8
? Please pick a preset: Manually select features
? Check the features needed for your project: Babel, Router,
Vuex, CSS Pre-processors, Linter
? Choose a version of Vue.js that you want to start the
project with 3.x
? Use history mode for router? (Requires proper server setup
for index fallback in production) (Y/n)
这里的意思是问你本次项目是否采用history模式,如果选择Y,需要后台配置具体看vueRouter官网解释,这里我门选择 n
3.2.5 选择CSS预处理器
选择是否使用CSS预处理器,如Sass、Less等。

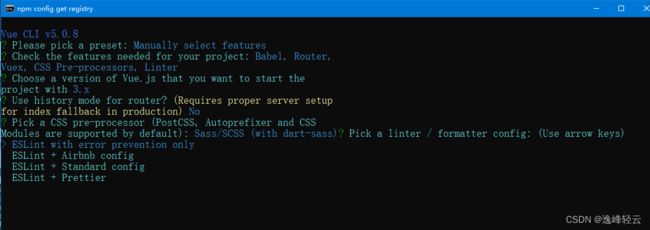
这里的意思是问你选择哪一种CSS预处理语言,我的项目中一般使用的是SCSS我选择第一个
Vue CLI v5.0.8
? Please pick a preset: Manually select features
? Check the features needed for your project: Babel, Router,
Vuex, CSS Pre-processors, Linter
? Choose a version of Vue.js that you want to start the
project with 3.x
? Use history mode for router? (Requires proper server setup
for index fallback in production) No
? Pick a CSS pre-processor (PostCSS, Autoprefixer and CSS
Modules are supported by default): (Use arrow keys)
Sass/SCSS (with dart-sass)
Less
Stylus
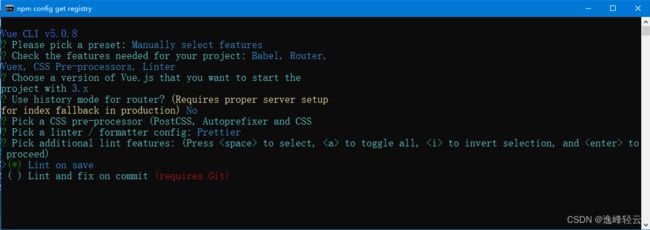
3.2.6 格式化代码方式
3.2.7 代码规则检测
这里的意思是问你什么时候进行代码规则检测,我一般会选择保存就检测,也就是Lint on Save
3.2.8
这里的意思是将Babel,PostCSS,ESLint这些配置文件放哪,通常我们会选择放到独立位置,让package.json文件干净点,所以选择第一个

3.2.9
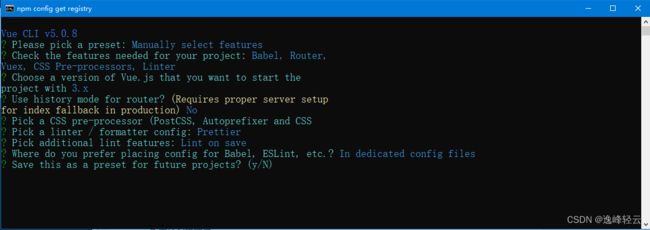
这里是问你是否记录这次配置选择,选择之后会让你为这次配置起一个名字,这样下次可以直接快速配置选择,最后回车后就会初始化项目了

完成后如下图:
3.4 打开项目文件
使用命令行进入项目目录:
cd project-name
3.5 ▶️ 运行项目并查看页面
运行以下命令以启动开发服务器:
npm run serve
在浏览器中打开显示的URL,即可看到Vue应用的页面。
通过这些步骤,您已经成功地使用Vue CLI创建了一个新的Vue项目,根据项目需求进行了相应的配置。接下来,您可以根据需要进行开发和定制。 Vue CLI的强大功能将为您的项目带来便利和效率!