你没有见过的6个创意CSS链接悬停效果
创建 CSS 链接悬停效果可以为原本平淡无奇的网页添加一些风格。如果您曾经发现自己在尝试制作流畅的悬停效果时遇到了困难,那么我有六个 CSS 效果供您采用并用于您的下一个项目。
滑动高亮链接悬停效果
此效果将框阴影应用于内联链接,从而改变过程中链接文本的颜色。我们从链接周围的填充开始,然后添加相同值的负边距以防止填充破坏文本流。
我们将使用box-shadow而不是 background 属性,因为它允许我们转换。
Hover this linka {
box-shadow: inset 0 0 0 0 #54b3d6;
color: #54b3d6;
margin: 0 -.25rem;
padding: 0 .25rem;
transition: color .3s ease-in-out, box-shadow .3s ease-in-out;
}
a:hover {
box-shadow: inset 100px 0 0 0 #54b3d6;
color: white;
}文本交换链接悬停效果
这是一个有趣的例子,我们在悬停时将链接的文本与其他一些文本交换。将鼠标悬停在文本上,链接的文本会随着新文本的滑入而滑出。
这个链接悬停效果中发生了相当多的诡计。但神奇的方法是使用数据属性来定义滑入的文本并使用content链接的::after伪元素的属性调用它。
首先,HTML 标记:
Hover get a link
a {
  overflow: hidden;
  position: relative;
  display: inline-block;
}

a::before,
a::after {
 content: '';
  position: absolute;
  width: 100%;
  left: 0;
}
a::before {
  background-color: #54b3d6;
  height: 2px;
  bottom: 0;
  transform-origin: 100% 50%;
  transform: scaleX(0);
  transition: transform .3s cubic-bezier(0.76, 0, 0.24, 1);
}
a::after {
  content: attr(data-replace);
  height: 100%;
  top: 0;
  transform-origin: 100% 50%;
  transform: translate3d(200%, 0, 0);
  transition: transform .3s cubic-bezier(0.76, 0, 0.24, 1);
  color: #54b3d6;
}

a:hover::before {
  transform-origin: 0% 50%;
  transform: scaleX(1);
}
a:hover::after {
  transform: translate3d(0, 0, 0);
}

a span {
  display: inline-block;
  transition: transform .3s cubic-bezier(0.76, 0, 0.24, 1);
}

a:hover span {
  transform: translate3d(-200%, 0, 0);
}

/* Presentational Styles */
body {
  display: grid;
  font-family: 'Poppins', sans-serif;
  font-size: 27px;
  line-height: 1.5;
  height: 100vh;
  place-items: center;
}

a {
  text-decoration: none;
  color: #18272F;
  font-weight: 700;
  vertical-align: top;
}
不断增长的背景链接悬停效果
这是我在很多地方看到的非常流行的效果。这个想法是您将链接的::before伪元素用作位于链接实际文本后面的粗下划线。然后,在悬停时,伪元素会扩展以覆盖整个事物。
Hover this cool link.
好的,链接的一些基本样式。我们不想要,text-decoration因为::before会像一个一样,然后::before在我们给出绝对定位时保持一些相对定位。
a {
  text-decoration: none;
  position: relative;
}现在让我们将其设置::before为高一些8px,使其看起来像一个粗下划线。我们还将给它绝对定位,这样我们就可以控制它使其成为实际链接的全宽,同时偏移它,使它在left并且只是一点点,bottom所以它看起来像是在巧妙地突出链接。不妨给它,z-index: -1这样我们就确信它位于链接后面。
a::before {
  content: '';
  background-color: hsla(196, 61%, 58%, .75);
  position: absolute;
  left: 0;
  bottom: 3px;
  width: 100%;
  height: 8px;
  z-index: -1;
}当链接悬停时,让我们让它看起来好像::before在增长。我们需要的只是将高度从 更改3px为100%。请注意,我还将bottom偏移量放回零,以便背景在增长时覆盖更多空间。
a:hover::before {
  bottom: 0;
  height: 100%;
}
现在对这些更改进行轻微过渡:
a::before {
  content: '';
  background-color: hsla(196, 61%, 58%, .75);
  position: absolute;
  left: 0;
  bottom: 3px;
  width: 100%;
  height: 8px;
  z-index: -1;
  transition: all .3s ease-in-out;
}
从右到左的颜色交换链接悬停效果
这是它的工作原理。我们给链接一个线性背景渐变,在中间标记处有两种颜色之间的硬停止。
a {
  background-image: linear-gradient(
    to right,
    #54b3d6,
    #54b3d6 50%,
    #000 50%
  );
} 我们将背景设置为链接宽度的两倍,或者200%, 并将其一直定位到左侧。这样,就好像只有两种颜色的渐变中的一种正在显示。
a {
  background-image: linear-gradient(
    to right,
    #54b3d6,
    #54b3d6 50%,
    #000 50%
  );
  background-size: 200% 100%;
  background-position: -100%;
}当我们达到几个非标准的-webkit-前缀属性时,魔法就会发生。一个从文本中去除颜色以使其透明。另一个将背景渐变剪辑到文本,因此看起来文本实际上是背景的颜色。
a {
  background-image: linear-gradient(
    to right,
    #54b3d6,
    #54b3d6 50%,
    #000 50%
  );
  background-size: 200% 100%;
  background-position: -100%;
  -webkit-background-clip: text;
  -webkit-text-fill-color: transparent;
}还在我这儿?现在让我们通过::before使用来制作链接的人造下划线。我们将赋予它与链接背景渐变的隐藏部分相同的颜色,并将其放置在实际链接下方,使其看起来像一个合适的text-decoration: underline.
a:before {
  content: '';
  background: #54b3d6;
  display: block;
  position: absolute;
  bottom: -3px;
  left: 0;
  width: 0;
  height: 3px;
}悬停时,我们::before从左侧滑入:
a:hover {
 background-position: 0;
}现在,这有点棘手。在悬停时,我们将链接的::before伪元素设为链接宽度的 100%。如果我们将它直接应用到链接的悬停,我们会使链接本身全宽,这会在屏幕上移动它。哎呀!
a:hover::before {
  width: 100%;
}
添加一点过渡以使事情变得顺畅:
a {
  background-image: linear-gradient(
    to right,
    #54b3d6,
    #54b3d6 50%,
    #000 50%
  );
  background-size: 200% 100%;
  background-position: -100%;
  -webkit-background-clip: text;
  -webkit-text-fill-color: transparent;
  transition: all 0.3s ease-in-out;
}
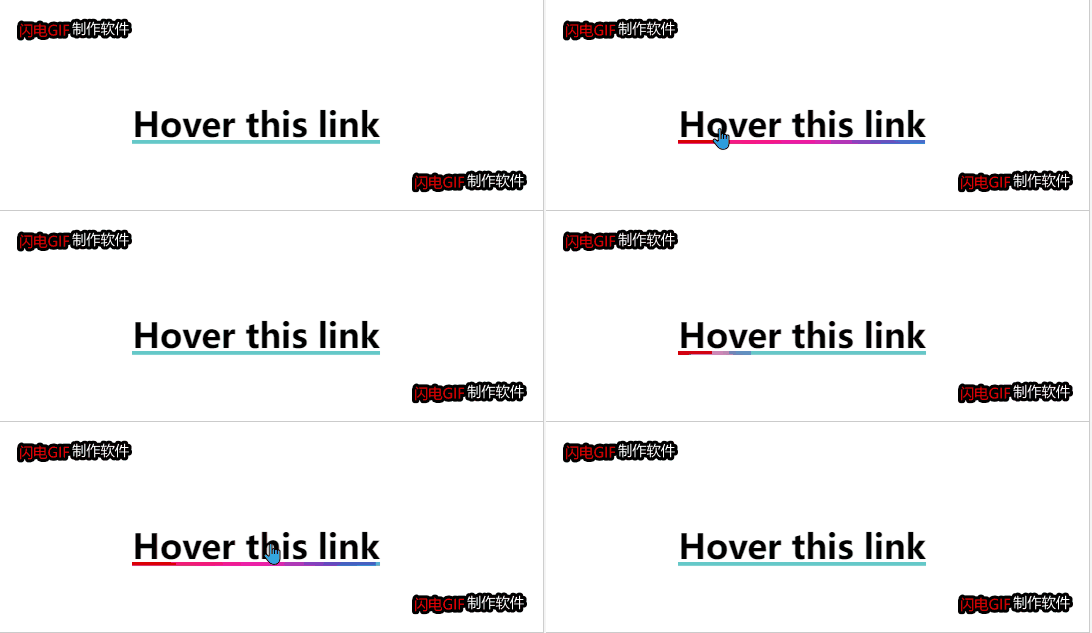
彩虹下划线链接悬停效果
html:
Hover this link 首先,我们删除链接的text-decoration:
a {
  text-decoration: none;
}现在对于那些渐变。我们在同一个background属性上将两个线性梯度链接在一起。一种渐变是悬停前的初始颜色。第二个是悬停时的彩虹。
a {
  background:
    linear-gradient(
      to right,
      rgba(100, 200, 200, 1),
      rgba(100, 200, 200, 1)
    ),
    linear-gradient(
      to right,
      rgba(255, 0, 0, 1),
      rgba(255, 0, 180, 1),
      rgba(0, 100, 200, 1)
  );
}让我们将背景尺寸设置为3px高一点,这样它看起来就像,你知道的,一个下划线。我们可以在background-size属性上同时调整两个渐变的大小,以便初始渐变是全宽和3px高的,而彩虹是零宽度。
a {
  background:
    linear-gradient(
      to right,
      rgba(100, 200, 200, 1),
      rgba(100, 200, 200, 1)
    ),
    linear-gradient(
      to right,
      rgba(255, 0, 0, 1),
      rgba(255, 0, 180, 1),
      rgba(0, 100, 200, 1)
  );
  background-size: 100% 3px, 0 3px;
}现在我们可以定位背景渐变——同时在background-position属性上——这样第一个渐变完全在视野中,彩虹被推到视野之外。哦,让我们确保在我们处理它时背景不会重复。
a {
  background:
    linear-gradient(
      to right,
      rgba(100, 200, 200, 1),
      rgba(100, 200, 200, 1)
    ),
    linear-gradient(
      to right,
      rgba(255, 0, 0, 1),
      rgba(255, 0, 180, 1),
      rgba(0, 100, 200, 1)
  );
  background-size: 100% 3px, 0 3px;
  background-position: 100% 100%, 0 100%;
  background-repeat: no-repeat;
}让我们更新background-sizeon hover 以便渐变交换值:
a:hover {
  background-size: 0 3px, 100% 3px;
}
最后,发生悬停时的一点过渡:
a {
  background:
    linear-gradient(
      to right,
      rgba(100, 200, 200, 1),
      rgba(100, 200, 200, 1)
    ),
    linear-gradient(
      to right,
      rgba(255, 0, 0, 1),
      rgba(255, 0, 180, 1),
      rgba(0, 100, 200, 1)
  );
  background-size: 100% 3px, 0 3px;
  background-position: 100% 100%, 0 100%;
  background-repeat: no-repeat;
  transition: background-size 400ms;
}
通过下划线链接悬停效果
Geoff Graham最近在剖析 Adam Argyle 的流畅悬停效果时实际上涵盖了同样的内容。在他的演示中,背景颜色从链接后面的左侧进入,然后在鼠标移出时从右侧退出
我的版本减少了背景,所以它更像是一个下划线。
a {
  position: relative;
}

a::before {
    content: '';
    position: absolute;
    width: 100%;
    height: 4px;
    border-radius: 4px;
    background-color: #18272F;
    bottom: 0;
    left: 0;
    transform-origin: right;
    transform: scaleX(0);
    transition: transform .3s ease-in-out;
  }

a:hover::before {
  transform-origin: left;
  transform: scaleX(1);
}
在使用 CSS 为内联链接创建自己的悬停效果时,有很多选择。你甚至可以玩这些效果并创造一些新的东西。我希望你喜欢这篇文章。继续试验!
翻译于:
作者:
哈希尔· 帕特尔 6 Creative Ideas for CSS Link Hover Effects | CSS-Tricks - CSS-Tricks


