【综合实验】之 SNAT 和 DNAT
文章目录
- 1 关闭三台虚拟机防火墙
- 2 配置网关服务器
- 4 配置内网192.168.80.20
- 5 配置外网12.0.0.200
- 6 测试三台虚拟机是否可以正常访问
- 7 配置网关服务器的 iptables 规则
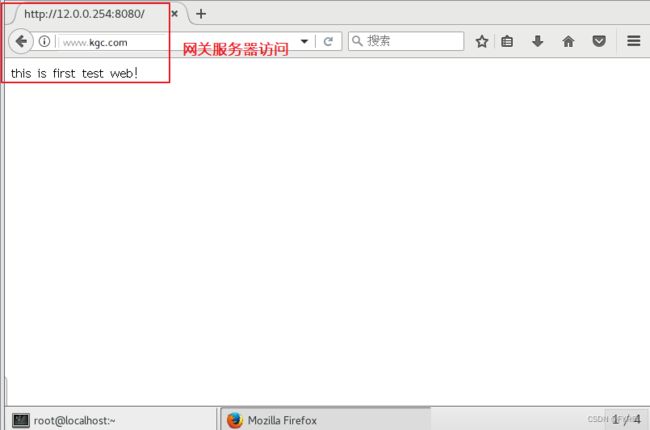
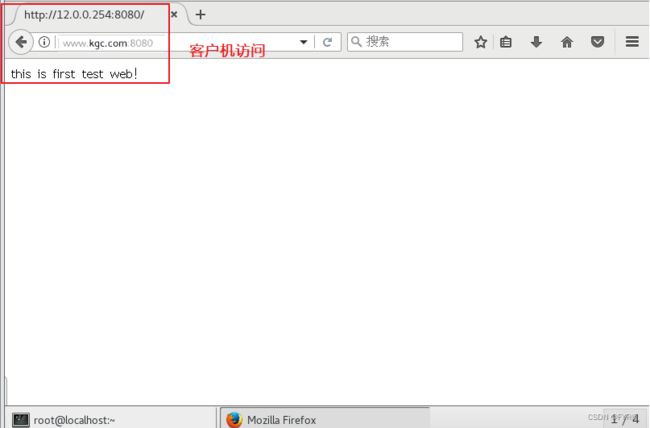
- 8 客户端12.0.0.254:8080测试
- 9 分离解析配置---网关服务器
需求一:12.0.0.12:8080 --> 192.168.80.20:80
需求二:http://www.kgc.com:8080 --> 192.168.80.20:80

1 关闭三台虚拟机防火墙
systemctl stop firewalld
systemctl disable firewalld
setenforce 0
2 配置网关服务器
第一步:添加一张外网网卡网段为12.0.0.0/24
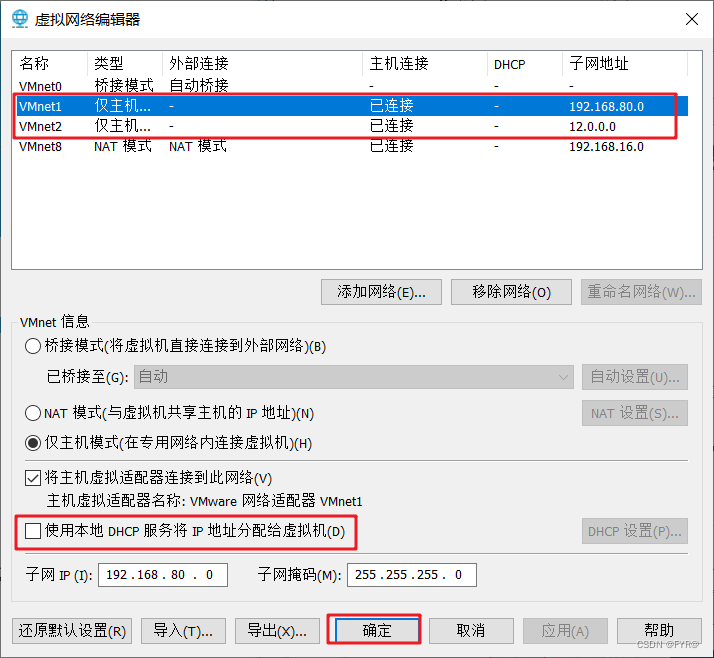
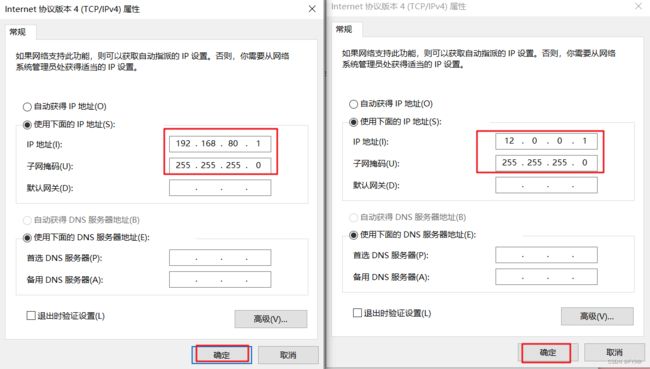
第二步:查看真机的网段与虚拟机所设网段是否一致,不一致要修改一致
第三步:添加一张网卡
![]()
![]()
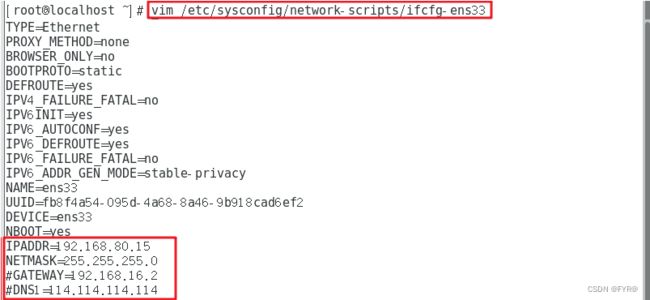
第四步:配置内网网卡ens33
[root@localhost ~]# vim /etc/sysconfig/network-scripts/ifcfg-ens33
[root@localhost ~]# cd /etc/sysconfig/network-scripts
[root@localhost network-scripts]# ifconfig          #查看网卡
[root@localhost network-scripts]# cp ifcfg-ens33 ifcfg-ens37
[root@localhost network-scripts]# vim ifcfg-ens37
![]()
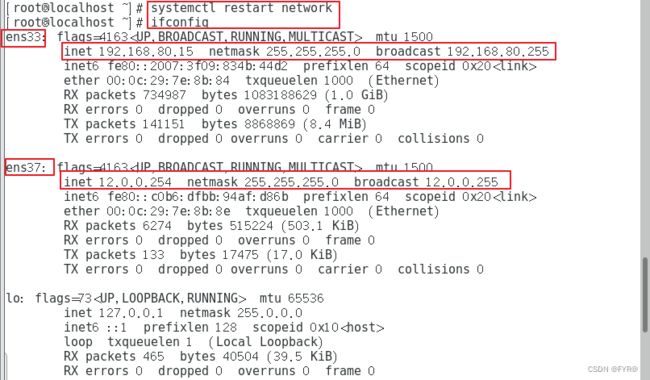
第六步:重启服务
[root@localhost network-scripts]# systemctl restart network
[root@localhost network-scripts]# ifconfig
[root@localhost ~]# vim /etc/sysctl.conf

net.ipv4.ip_forward = 1

[root@localhost ~]# sysctl -p   #打开ip路由转发功能
![]()
4 配置内网192.168.80.20
[root@localhost ~]# vim /etc/sysconfig/network-scripts/ifcfg-ens33
[root@localhost ~]# systemctl restart network
[root@localhost ~]# ifconfig
5 配置外网12.0.0.200
[root@localhost ~]# vim /etc/sysconfig/network-scripts/ifcfg-ens33
[root@localhost ~]# systemctl restart network
[root@localhost ~]# ifconfig
6 测试三台虚拟机是否可以正常访问
第一步:在192.168.80.20上安装http服务并启动httpd服务
由于是内网环境仅主机模式下 所以要安装一个本地yum仓库
#安装http服务
[root@localhost ~]# mount /dev/sr0 /mnt
[root@localhost ~]# cd /etc/yum.repos.d/
[root@localhost yum.repos.d]# ls
CentOS-Base.repo  CentOS-CR.repo  CentOS-Debuginfo.repo  CentOS-fasttrack.repo  CentOS-Media.repo  CentOS-Sources.repo  CentOS-Vault.repo
[root@localhost yum.repos.d]# mkdir repos.bak
[root@localhost yum.repos.d]# mv *.repo repos.bak
[root@localhost yum.repos.d]# touch local.repo
[root@localhost yum.repos.d]# vim local.repo
[local]
name=local
baseurl=file:///mnt
enabled=1
gpgcheck=0
[root@localhost yum.repos.d]# yum clean all && yum makecache
[root@localhost yum.repos.d]# yum install httpd -y

#启动httpd服务
[root@localhost ~]# systemctl start httpd.service
[root@localhost ~]# netstat -atpn |grep httpd     #查看服务是否启动
![]()
第二步:在默认目录中写一段话并在三台虚拟机上测试
[root@localhost ~]# cd /var/www/html/
[root@localhost html]# ls
[root@localhost html]# echo 'this is first test web!' > index.html
[root@localhost html]# ls
index.html
7 配置网关服务器的 iptables 规则
1、查看网关服务器的iptables规则并清除
iptables -nL			#查看规则
iptables -nL -t nat		#查看规则
iptables -F				#清除iptables的规则
iptables -F -t nat		#清除iptables的规则
![]()
2、添加规则 SNAT 和 DNAT
[root@localhost ~]# iptables -t nat -A POSTROUTING -s 192.168.80.0/24 -o ens37 -j SNAT --to 12.0.0.254                                       源地址(内网网段)      出站网卡
  外网网关
[root@localhost ~]# iptables -t nat -A PREROUTING -i ens37 -d 12.0.0.254 -p tcp --dport 8080 -j DNAT --to 192.168.80.20:80

[root@localhost ~]# iptables -nL -t nat
8 客户端12.0.0.254:8080测试
9 分离解析配置—网关服务器
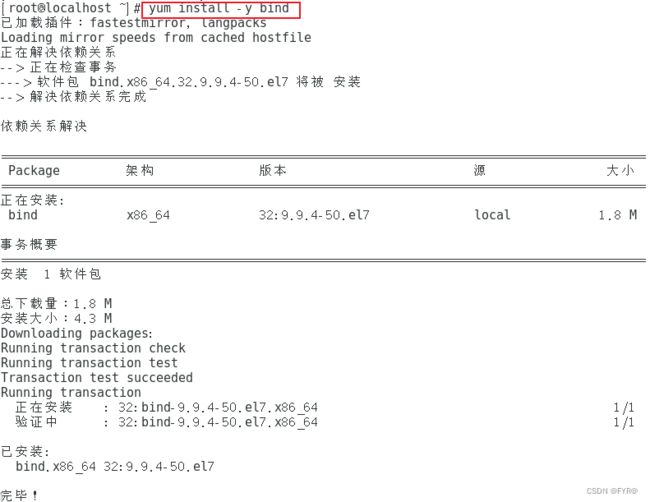
第一步:安装 bind
root@localhost ~]# yum install -y bind
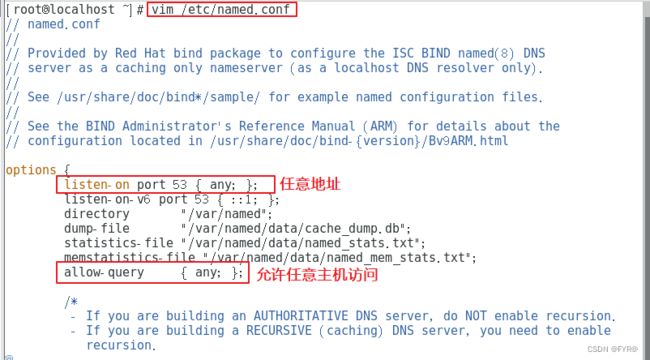
[root@localhost ~]# vim /etc/named.conf
第三步:修改配置文件/etc/named.rfc1912.zones
[root@localhost ~]# vim /etc/named.rfc1912.zones

view "nei" {
  match-clients { 192.168.80.0/24; };
  zone "kgc.com" IN {
        type master;
        file "kgc.com.zone.nei";
  };
  zone "." IN {
         type hint;
         file "name.ca";
  };

};

view "wai" {
  match-clients { any; };
  zone "kgc.com" IN {
        type master;
        file "kgc.com.zone.wai";
  };
};

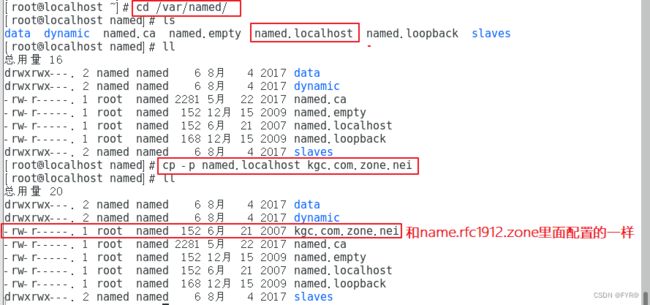
第四步:修改 kgc.com.zone.nei 和 kgc.com.zone.wai
[root@localhost ~]# cd /var/named/
[root@localhost ~]# cp -p named.localhost kgc.com.zone.nei

[root@localhost ~]# vim kgc.com.zone.nei
$TTL 1D
@       IN SOA  @ admin.kgc.com. (
                                        0       ; serial
                                        1D      ; refresh
                                        1H      ; retry
                                        1W      ; expire
                                        3H )    ; minimum
        NS      @
        A       192.168.80.15
www IN  A       192.168.80.20

[root@localhost named]# cp -p kgc.com.zone.nei kgc.com.zone.wai
[root@localhost named]# vim kgc.com.zone.wai

[root@localhost named]# systemctl start named
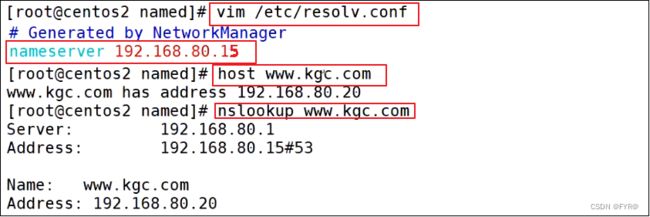
[root@localhost named]# vim /etc/resolv.conf
nameserver 192.168.80.15
[root@localhost named]# host www.kgc.com
[root@localhost named]# nslookup www.kgc.com
[root@localhost ~]# vim /etc/resolv.conf
nameserver 12.0.0.254
[root@localhost ~]# nslookup www.kgc.com
