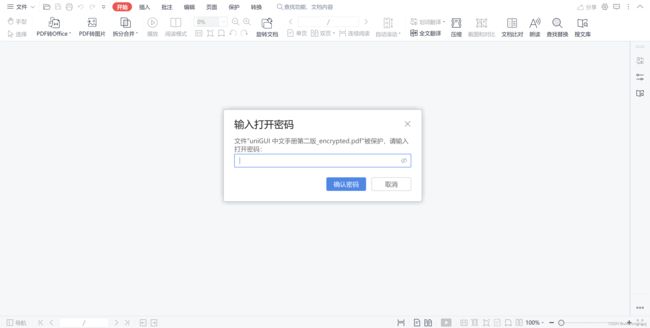
使用 wxPython 和 pymupdf进行 PDF 加密
PDF 文件是一种常见的文档格式,但有时候我们希望对敏感信息进行保护,以防止未经授权的访问。在本文中,我们将使用 Python 和 wxPython 库创建一个简单的图形用户界面(GUI)应用程序,用于对 PDF 文件进行加密。
C:\pythoncode\new\PDFEncrypt.py


准备工作
在开始之前,请确保已经安装了以下库:
- wxPython:在命令行中运行
pip install wxPython进行安装 - PyMuPDF(也称为 fitz):在命令行中运行
pip install PyMuPDF进行安装
创建 GUI 应用程序
我们将使用 wxPython 库创建 GUI 应用程序。首先,导入必要的库:
import wx
import fitz
接下来,创建一个主窗口类 MainFrame,继承自 wx.Frame 类:
class MainFrame(wx.Frame):
    def __init__(self):
        super().__init__(None, title="PDF Encryption", size=(400, 200))
        panel = wx.Panel(self)

        # 创建文件选择器
        self.file_picker = wx.FilePickerCtrl(panel, message="Select a PDF file", style=wx.FLP_USE_TEXTCTRL)

        # 创建密码输入框
        self.password_text = wx.TextCtrl(panel, style=wx.TE_PASSWORD)

        # 创建加密按钮
        encrypt_button = wx.Button(panel, label="Encrypt")
        encrypt_button.Bind(wx.EVT_BUTTON, self.on_encrypt_button)

        # 使用布局管理器设置组件的位置和大小
        sizer = wx.BoxSizer(wx.VERTICAL)
        sizer.Add(wx.StaticText(panel, label="PDF File:"), 0, wx.ALL, 5)
        sizer.Add(self.file_picker, 0, wx.EXPAND | wx.ALL, 5)
        sizer.Add(wx.StaticText(panel, label="Password:"), 0, wx.ALL, 5)
        sizer.Add(self.password_text, 0, wx.EXPAND | wx.ALL, 5)
        sizer.Add(encrypt_button, 0, wx.ALIGN_CENTER | wx.ALL, 5)
        panel.SetSizerAndFit(sizer)
以上代码创建了一个带有文件选择器、密码输入框和加密按钮的主窗口。
接下来,添加处理加密按钮点击事件的方法 on_encrypt_button:
class MainFrame(wx.Frame):
    # ...

    def on_encrypt_button(self, event):
        filepath = self.file_picker.GetPath()
        password = self.password_text.GetValue()

        if filepath and password:
            try:
                doc = fitz.open(filepath)
                doc.encrypt(password)

                encrypted_filepath = filepath.replace(".pdf", "_encrypted.pdf")
                doc.save(encrypted_filepath)
                doc.close()

                wx.MessageBox("PDF file encrypted successfully!", "Success", wx.OK | wx.ICON_INFORMATION)
            except Exception as e:
                wx.MessageBox(f"An error occurred: {str(e)}", "Error", wx.OK | wx.ICON_ERROR)
        else:
            wx.MessageBox("Please select a PDF file and enter a password.", "Error", wx.OK | wx.ICON_ERROR)
在 on_encrypt_button 方法中,我们获取用户选择的 PDF 文件路径和输入的密码。然后,使用 PyMuPDF 库打开 PDF 文件,对其进行加密并保存加密后的文件。
最后,创建一个应用程序类 App,并运行主循环:
class App(wx.App):
    def OnInit(self):
        frame = MainFrame()
        frame.Show()
        return True

if __name__ == "__main__":
    app = App()
    app.MainLoop()
以上代码创建了一个应用程序类 App,并在 if __name__ == "__main__": 代码块中运行应用程序的主循环。
运行应用程序
保存上述代码为 pdf_encryption.py 文件,然后在命令行中运行 python pdf_encryption.py。应用程序窗口将打开,您可以选择一个 PDF 文件并输入密码来加密它。
全部代码
import wx
import fitz


class MainFrame(wx.Frame):
    def __init__(self):
        super().__init__(None, title="PDF Encryption", size=(400, 200))
        panel = wx.Panel(self)

        self.file_picker = wx.FilePickerCtrl(panel, message="Select a PDF file", style=wx.FLP_USE_TEXTCTRL)
        self.password_text = wx.TextCtrl(panel, style=wx.TE_PASSWORD)
        encrypt_button = wx.Button(panel, label="Encrypt")
        encrypt_button.Bind(wx.EVT_BUTTON, self.on_encrypt_button)

        sizer = wx.BoxSizer(wx.VERTICAL)
        sizer.Add(wx.StaticText(panel, label="PDF File:"), 0, wx.ALL, 5)
        sizer.Add(self.file_picker, 0, wx.EXPAND | wx.ALL, 5)
        sizer.Add(wx.StaticText(panel, label="Password:"), 0, wx.ALL, 5)
        sizer.Add(self.password_text, 0, wx.EXPAND | wx.ALL, 5)
        sizer.Add(encrypt_button, 0, wx.ALIGN_CENTER | wx.ALL, 5)
        panel.SetSizerAndFit(sizer)

    def on_encrypt_button(self, event):
        filepath = self.file_picker.GetPath()
        password = self.password_text.GetValue()

        if filepath and password:
            try:
                doc = fitz.open(filepath)
                # doc.encrypt(password)

                perm = int(
                    fitz.PDF_PERM_ACCESSIBILITY # always use this
                            | fitz.PDF_PERM_PRINT # permit printing
                            | fitz.PDF_PERM_COPY # permit copying
                            | fitz.PDF_PERM_ANNOTATE # permit annotations
                ) # 可以打印,复制,添加注释
                owner_pass = "owner" # owner password
                user_pass = password # "user" # user password
                encrypt_meth = fitz.PDF_ENCRYPT_AES_256 # strongest algorithm

                encrypted_filepath = filepath.replace(".pdf", "_encrypted.pdf")
                # doc.save(encrypted_filepath)
                doc.save(encrypted_filepath,encryption=encrypt_meth,owner_pw=owner_pass,permissions=perm,user_pw=user_pass)
                # doc.save(encrypted_filepath)
                doc.close()

                wx.MessageBox("PDF file encrypted successfully!", "Success", wx.OK | wx.ICON_INFORMATION)
            except Exception as e:
                wx.MessageBox(f"An error occurred: {str(e)}", "Error", wx.OK | wx.ICON_ERROR)
        else:
            wx.MessageBox("Please select a PDF file and enter a password.", "Error", wx.OK | wx.ICON_ERROR)


class App(wx.App):
    def OnInit(self):
        frame = MainFrame()
        frame.Show()
        return True


if __name__ == "__main__":
    app = App()
    app.MainLoop()
总结
本文介绍了如何使用 Python 和 wxPython 库创建一个简单的图形用户界面应用程序,用于对 PDF 文件进行加密。通过选择 PDF 文件和输入密码,您可以加密 PDF 文件以保护其内容的安全性。