Spring之域对象共享数据
文章目录
- 前言
- 一、requset域
-
- 1.使用ServletAPI向request域对象共享数据
- 2.使用ModelAndView向request域对象共享数据
- 3.使用Model向request域对象共享数据
- 4.使用map向request域对象共享数据
- 5.使用ModelMap向request域对象共享数据
- 6.Model、ModelMap、Map的关系
- 二、session域
-
- 向session域共享数据
- 三、application域
-
- 向application域共享数据
- 总结
前言
域对象共享数据:request域(ModelAndView、Model、map、ModelMap、servletAPI),session域、application域。
一、requset域
1.使用ServletAPI向request域对象共享数据
==========success.html
<p th:text="${testScope}">p>
@RequestMapping("/testServletAPI")
public String testServletAPI(HttpServletRequest request){
request.setAttribute("testScope", "hello,servletAPI");
return "success";
}
success页面就能看到 hello,servletAPI 。
2.使用ModelAndView向request域对象共享数据
==========success.html
<p th:text="${testScope}">p>
@RequestMapping("/testModelAndView")
public ModelAndView testModelAndView(){
/**
* ModelAndView有Model和View的功能
* Model主要用于向请求域共享数据
* View主要用于设置视图,实现页面跳转
*/
ModelAndView mav = new ModelAndView();
//向请求域共享数据
mav.addObject("testScope", "hello,ModelAndView");
//设置视图,实现页面跳转
mav.setViewName("success");
return mav;
}
success页面就能看到 hello,ModelAndView 。
3.使用Model向request域对象共享数据
==========success.html
<p th:text="${testScope}">p>
@RequestMapping("/testModel")
public String testModel(Model model){
model.addAttribute("testScope", "hello,Model");
return "success";
}
success页面就能看到 hello,hello,Model 。
4.使用map向request域对象共享数据
==========success.html
<p th:text="${testScope}">p>
@RequestMapping("/testMap")
public String testMap(Map<String, Object> map){
map.put("testScope", "hello,Map");
return "success";
}
success页面就能看到 hello,Map 。
5.使用ModelMap向request域对象共享数据
==========success.html
<p th:text="${testScope}">p>
@RequestMapping("/testModelMap")
public String testModelMap(ModelMap modelMap){
modelMap.addAttribute("testScope", "hello,ModelMap");
return "success";
}
success页面就能看到 hello,ModelMap 。
6.Model、ModelMap、Map的关系
Model、ModelMap、Map类型的参数其实本质上都是 BindingAwareModelMap 类型的。可以看下面的继承和接口实现的关系。
public interface Model{}
public class ModelMap extends LinkedHashMap<String, Object> {}
public class ExtendedModelMap extends ModelMap implements Model {}
public class BindingAwareModelMap extends ExtendedModelMap {}
在上诉的所有添加对象后将创建的model、modelAndView等对象输出,如下图,可以看出他们的本质都是 BindingAwareModelMap 。
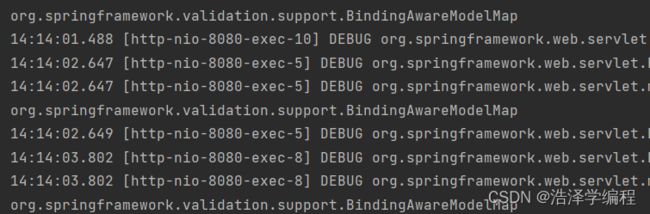
上面的方法其本质最后都是创建了一个ModelAndView对象。model存放请求数据、view设置视图,实现页面跳转。
二、session域
向session域共享数据
========success.html
<p th:text="${session.testSessionScope}">p>
@RequestMapping("/testSession")
public String testSession(HttpSession session){
session.setAttribute("testSessionScope", "hello,session");
return "success";
}
success页面就能看到 hello,session 。
三、application域
向application域共享数据
========success.html
<p th:text="${application.testApplicationScope}">p>
@RequestMapping("/testApplication")
public String testApplication(HttpSession session){
ServletContext application = session.getServletContext();
application.setAttribute("testApplicationScope", "hello,application");
return "success";
}
success页面就能看到 hello,application 。
总结
以上就是域共享对象的讲诉。