MyBatis
MyBatis
- 1. 概念
- 2. 准备工作
-
- 2.1 配置
- 2.2 添加实体类
- 2.3 添加 mapper 接⼝
- 2.4 添加 XML
- 3. 实现增删查改
-
- 3.1 查询
- 3.2 插入
- 3.3 修改
- 3.4 删除
- 4. 多表查询
-
- 4.1 返回字典映射:resultMap
1. 概念
MyBatis 是⼀款优秀的持久层框架,它⽀持⾃定义 SQL、存储过程以及⾼级映射。MyBatis 去除了⼏乎所有的 JDBC 代码以及设置参数和获取结果集的⼯作. MyBatis 可以通过简单的 XML 或注解来配置和映射原始类型、接⼝和 Java POJO(Plain Old Java Objects,普通⽼式 Java 对象)为数据库中的记录.
简单来说 MyBatis 是更简单完成程序和数据库交互的⼯具,也就是更简单的操作和读取数据库⼯具.
MyBatis 也是⼀个 ORM 框架,ORM(Object Relational Mapping),即对象关系映射。在⾯向对象编程语⾔中,将关系型数据库中的数据与对象建⽴起映射关系,进⽽⾃动的完成数据与对象的互相转换:
- 将输⼊数据(即传⼊对象)+SQL 映射成原⽣ SQL
- 将结果集映射为返回对象,即输出对象
⼀般的 ORM 框架,会将数据库模型的每张表都映射为⼀个 Java 类.
也就是说使⽤ MyBatis 可以像操作对象⼀样来操作数据库中的表,可以实现对象和数据库表之间的转换.
2. 准备工作
2.1 配置
配置连接字符串:
spring:
  datasource:
    url:  jdbc:mysql://localhost:3306/mycnblog?characterEncoding=utf8&useSSL=false
    username: root
    password: 123456
    driver-class-name:   com.mysql.cj.jdbc.Driver
配置 MyBatis 中的 XML 路径:
mybatis:
  mapper-locations: classpath:mybatis/*Mapper.xml
注意: 需要在 resources 目录下创建上述指定文件夹, 并且新建的 XML 必须以指定文件名例如: Mapper 结尾.
配置打印 MyBatis 执行的 SQL:
  configuration:
    log-impl: org.apache.ibatis.logging.stdout.StdOutImpl
由于打印 SQL 的日志级别是 bebug 而默认打印级别是 info 所以需要手动配置一下
logging:
  level:
    com:
      example:
        demo: debug
2.2 添加实体类
@Data
public class Userinfo {
    private int id;
    private String username;
    private String password;
    private String photo;//头像
    private LocalDateTime createtime;
    private LocalDateTime updatetime;
    private int state;
}
2.3 添加 mapper 接⼝
@Mapper
public interface UserMapper {

}
必须要加上 @Mapper 注解才能使用
2.4 添加 XML
DOCTYPE mapper PUBLIC "-//mybatis.org//DTD Mapper 3.0//EN" "http://mybatis.org/dtd/mybatis-3-mapper.dtd">
<mapper namespace="com.example.demo.mapper.UserMapper">

mapper>
Mapper 标签:需要指定 namespace 属性,表示命名空间,值为 mapper 接⼝的全限定名,包括全包名.类名.
3. 实现增删查改
测试类中使用 @Transactional 可以实现事务的回滚, 不会污染数据库
MyBatis 可以直接使用标签嵌套 SQL 语句, 相比于 JDBC 节省了很多步骤
总共分为两步:
- 先在接口中定义方法
- 在 XML 中实现
3.1 查询
Userinfo getUserById(@Param("id") Integer id);
    <select id = "getUserById" resultType = "com.example.demo.entity.Userinfo">
        select * from userinfo where id = #{id}
    select>
3.2 插入
int add(Userinfo userinfo);//可以直接传对象
    <insert id="add">
        insert into userinfo(username, password, createtime, updatetime)
        values(#{username}, #{password}, #{createtime}, #{updatetime})


    <insert id="addGetId" useGeneratedKeys="true" keyProperty="id">
        insert into userinfo(username, password, createtime, updatetime)
        values(#{username}, #{password}, #{createtime}, #{updatetime})
    insert>
3.3 修改
int upUsername(Userinfo userinfo);
    <update id="upUsername">
        update userinfo set username=#{username} where id = #{id}
    update>
3.4 删除
int delById(@Param("id") Integer id);
    <delete id="delById">
        delete from userinfo where id = ${id}
    delete>
${} 和 #{} 区别:
- ${} 是直接替换
- #{} 是预编译处理
预编译处理是指:MyBatis 在处理#{}时,会将 SQL 中的 #{} 替换为?号,使⽤ PreparedStatement的 set ⽅法来赋值.
直接替换:是MyBatis 在处理 ${} 时,就是把 ${} 替换成变量的值.
${} 直接替换有可能造成 SQL 注入问题, 所以尽量使用 #{} 这样比较安全, 但是一些特殊清空就需要用到 ${} , 例如: 按照用户指定方式排序就需要根据不同的情况来传关键字, 这时如果还是使用 #{} 就会把关键字当成一个普通的字符串就不能达到预期的目标.
为了避免 SQL 注入问题 ${} 传入的参数必须是可以枚举的
当我们使用 like 查询时如果也使用 #{} 就会报错, 例如:
select * from userinfo where username like '%#{username}%';
程序执行时就会将 #{} 替换为一个字符串就相当于:
select * from userinfo where username like '%'username'%';
这时 SQL 就会报错而由于参数不可以枚举所以也不能使用 ${} , 这时就可以使用 SQL中提供的字符串拼接函数:
select * from userinfo where username like concat('%', #{username}, '%')
4. 多表查询
4.1 返回字典映射:resultMap
resultMap 使⽤场景:
- 字段名称和程序中的属性名不同的情况,可使⽤ resultMap 配置映射
- ⼀对⼀和⼀对多关系可以使⽤ resultMap 映射并查询数据
字段名和属性名不同的情况


这时如果将查询结果填充到对象中由于字段值和属性值不一样就不会进行填充该属性值就会为 null , 所以就可以使用 resultMap

当我们进行多表查询时由于 select 必须指定一个返回结果类型但是没有合适的类型使用也可以使用 resultMap 映射, 但是由于太过复杂我们可以建立一个新的类来接收查询的结果
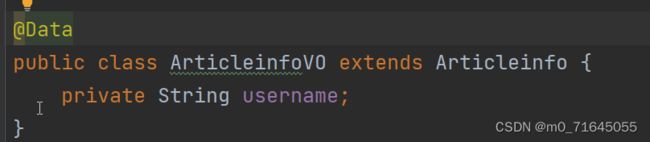
如果只是想取几个字段也可以不用继承直接在类里声明所有属性.
注意: 在继承时 lombok 提供的 toString() 只会打印子类自己的属性所以需要手动重写 toString().