Electron学习3 使用serialport操作串口
Electron学习3 使用serialport操作串口
- 一、准备工作
- 二、 SerialPort 介绍
-
- 1. 核心软件包
-
- (1) serialport
- (2) @serialport/stream
- (3) @serialport/bindings-cpp
- (4) @serialport/binding-mock
- (5) @serialport/bindings-interface
- 2. 解析器包
- 3. 命令行工具
- 三、创建一个demo程序
-
- 1. 创建 electron 项目
- 2. 安装 serialport
- 3. 安装 electron-rebuild
- 4. 使用 node-gyp 编译库
- 5. 修改 main.js 配置
- 8. 写测试程序
- 7. 运行程序
- 四、问题处理
-
- 1. 安装python2.7虚拟环境
- 2. 安装windows-build-tools
一、准备工作
本文将使用 nodejs 的 SerialPort 包来实现串口通讯功能。
Node SerialPort 是一个 JavaScript 库,用于连接到在 NodeJS 和 Electron 中工作的串行端口,以下是准备环境:
- Electron 开发环境
- 电脑有串口通讯能力,一般使用USB-串口转接板
- windows 操作系统
本文操作过程来自:
https://girishjoshi.io/post/access-serialport-from-electron-application-and-creating-gui-for-micropython-repl-on-esp8266/
二、 SerialPort 介绍
文档地址:
https://serialport.io/docs/
1. 核心软件包
(1) serialport
主对象,使用流式传输支持跨平台的串行端口访问。
(2) @serialport/stream
为绑定提供的流式接口。
(3) @serialport/bindings-cpp
为nodejs、electron提供跨平台的绑定支持。
(4) @serialport/binding-mock
为测试实现模拟绑定功能。
(5) @serialport/bindings-interface
一个typescript 接口用来实现自己的绑定时使用。
2. 解析器包
解析器用来对原始的二进制数据转换成自己需要的消息格式。 包含以下解析器包,这里不进行详解:
- @serialport/parser-byte-length
- @serialport/parser-cctalk
- @serialport/parser-delimiter
- @serialport/parser-inter-byte-timeout
- @serialport/parser-packet-length
- @serialport/parser-readline
- @serialport/parser-ready
- @serialport/parser-regex
- @serialport/parser-slip-encoder
- @serialport/parser-spacepacket
3. 命令行工具
比较有用的命令行工具,包括:
- @serialport/list
- @serialport/repl
- @serialport/terminal
三、创建一个demo程序
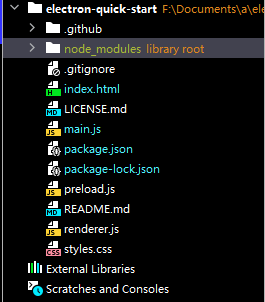
1. 创建 electron 项目
# Clone the Quick Start repository
$ git clone https://github.com/electron/electron-quick-start
# Go into the repository
$ cd electron-quick-start
# Install the dependencies and run
$ npm install && npm start
2. 安装 serialport
npm install --save serialport
3. 安装 electron-rebuild
因为选择npm版本不同,这里要对库进行重编译,要先安装 electron-rebuild 工具。
npm install --save-dev electron-rebuild
.\node_modules\.bin\electron-rebuild
npm rebuild
注意原文路径中用的 / , 我在windows 系统,改用 \。
4. 使用 node-gyp 编译库
npm install node-gyp electron electron-rebuild serialport --build-from-source
./node_modules/.bin/electron-rebuild
npm start
5. 修改 main.js 配置
修改 WebPreferences 如下:
webPreferences: {
      preload: path.join(__dirname, 'preload.js'),
      nodeIntegration: true,
      contextIsolation: false
}
8. 写测试程序
DOCTYPE html>
<html>
<head>
  <meta charset="UTF-8">
  <title>Electron test serialporttitle>
head>
<body>
<h1>Serial terminalh1>


<script>
  //load serialport module
  const {SerialPort} = require('serialport');

  SerialPort.list().then(_=>{console.info(_);});
  const serialPort = new SerialPort({path:'COM3', baudRate: 115200}, function (err) {
    if(err) {
      console.error(err);
    }
  });
  console.info(serialPort);
  serialPort.write("abc", (err)=>{
    if (err) {
      return console.log('Error on write: ', err.message)
    }
    console.log('message written')
  });
  serialPort.on('error', function(err) {
    console.log('Error: ', err.message)
  });

  serialPort.on('data', function (data){
    console.info('data', data);
  });

script>
<script>
  require('./renderer.js')
script>
body>
html>
7. 运行程序
npm start
四、问题处理
在执行electron-rebuild时,可能需要安装windows-build-tools。新版本的windows-build-tools支持Python3.*版本,但使用Python2.7比较保险。
1. 安装python2.7虚拟环境
如果本机没有Python2.7,则可以使用MiniAnaconda配置虚拟环境 。 先下载安装MiniAnaconda工具,然后用命令行创建虚拟环境 :
conda create -n py27 python=2.7
conda activate py27
2. 安装windows-build-tools
直接安装windows-build-tools大概率会失败,可按以下流程操作:
在执行npm install -g node-gpy后使用命令:
npm install -g --production [email protected]
- 当命令行界面开始不动时,打开任务管理器,把Build Tools结束任务;
- 再打开.windows-build-tools文件夹中的build-tools-log.txt,添加Variable: IsInstalled = 1,保存,关闭;
解决方案参考:https://blog.csdn.net/web15085181368/article/details/123192964
更多关于serialport的功能可参考官方文档。

