LNMP架构搭建Discuz论坛教程
文章目录
-
- 前言:本文以LNMP(linux+nginx+mysql+php)为基础架构,结合php的扩展程序redis来搭建discuz论坛,如有不足欢迎大家指正。
- 一、安装linux(centos7)系统
-
- 1.1、创建虚拟机
- 1.2、选择安装类型配置
- 1.3、安装来源
- 1.4、选择客户机操作系统
- 1.5、命名虚拟机
- 1.6、指定磁盘容量
- 1.7、自定义虚拟机配置
- 1.8、开启虚拟机
- 1.9、选择系统语言
- 1.10、配置时间/时区、硬盘分区、系统安装类型、以及系统的网络
-
- 1.10.1、时间选择
- 1.10.2、系统类型选择
- 1.10.4、硬盘分区
-
- 1.10.4.1、分区模式
- 1.10.4.2、 /Boot 分区
- 1.10.4.3、/swap 分区
- 1.10.4.4、/分区
- 1.10.5、配置操作系统网络
- 1.11、设置boot密码
- 1.12、系统安装完成重启虚拟机
- 1.13、接受license 许可
- 1.14、操作系统登录界面
- 二、安装nginx
-
- 2.1、 安装编译环境和依赖库等
- 2.2、下载nginx 源码包
- 2.3、解压nginx-1.24.0.tar.gz
- 2.4、进入目录nginx-1.24.0
- 2.5、 预编译
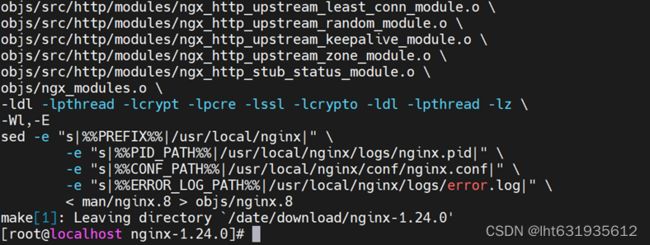
- 2.6、编译 make
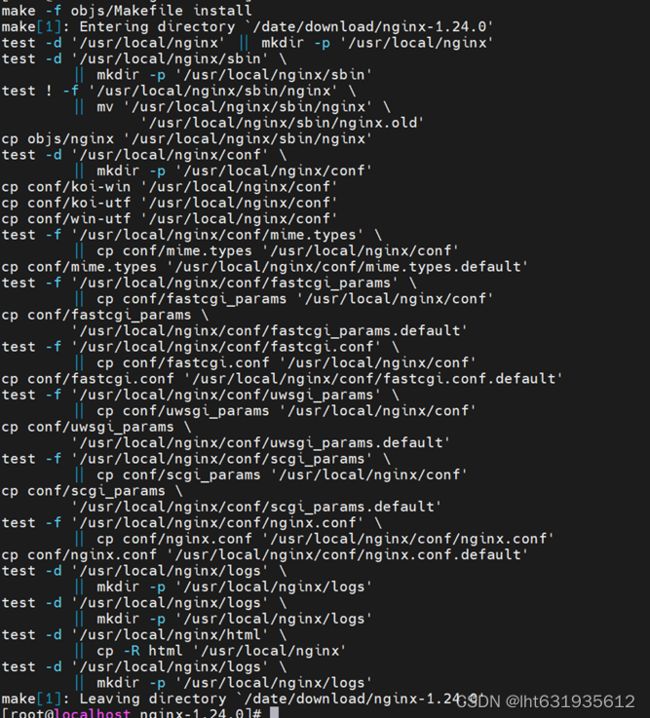
- 2.7、安装 make install
- 2.8、查看安装信息:
- 2.9、启动nginx
- 2.10、关闭防火墙
- 2.11、用浏览器测试nginx
- 2.12、配置nginx的service
-
- 2.12.1、使用vim编辑器创建nginx服务文件
- 2.12.2、重新加载服务
- 2.12.3、停止当前启动的nginx进程
- 2.12.4、使用服务的方式测试启动
- 2.12.5、再次浏览器测试
- 2.12.6、测试停止服务
- 2.12.7、设置服务开机启动
- 2.12.8、重启操作系统
- 2.12.9、浏览器测试
- 三、安装MySQL
-
- 3.1、创建存放Mysql安装包的目录
- 3.2、将文件上传至指定的目录
- 3.3、解压安装包
- 3.4、安装开始前卸载系统自带的mysql库
- 3.5、安装(全局的依赖common,必须第一个装)
- 3.6、安装(安装lib的依赖)
- 3.7、安装lib(client 和 server 都依赖它)
- 3.8、安装mysql的客户端
- 3.9、安装服务端
- 3.10、启动服务
- 3.11、查看数据库是否启动
- 3.12、在日志里查找root初始密码
- 3.13、使用mysql的客户端去验证一下
- 3.14、设置开机启动
- 3.15、修改密码(mysql8)
- 四、安装PHP
-
- 4.1、 安装epel源
- 4.2、安装remi源
- 4.3、安装php插件
- 4.4、安装PHP
- 4.5、查看版本信息
- 4.6、启动php
- 4.7、设置开机启动
- 4.8、链接php文件
- 五、安装redis
-
- 5.1、 安装gcc-c++
- 5.2、创建存放redis安装包
- 5.3、下载安装包
- 5.4、解压安装包
- 5.5、安装redis
- 5.6、拷贝配置文件到安装目录下
- 5.7、启动redis
- 5.8、配置环境变量,使用redis-cli工具
- 5.9、配置redis的后台服务
- 5.10、刷新服务配置并重启redis
- 六、配置nginx、mysql、以及PHP
-
- 6.1、编辑nginx的配置文件,在末尾加入include vhosts/*.conf;
- 6.2、 在nginx的 /usr/local/nginx/conf/目录下创建vhosts目录
- 6.3、创建discuz.conf的配置文件
- 6.4、测试配置文件是否正确
- 6.5、创建存在discuz论坛代码的目录
- 6.6、创建phpinfo.php文件
- 6.7、重启nginx
- 6.8、安装PHP-Redis连接驱动
- 6.9、测试php中的redis扩展是否成功
- 6.10、修改php配置文件
- 6.11、配置数据库mysql
-
- 6.11.1、登录数据库
- 6.11.2、创建discuz库和用户discuz,并赋予用户对数据库的权限
- 七、下载及上传代码
-
- 7.1、下载代码
- 7.2、上传代码
- 7.3、复制代码到目录
- 7.4、修改目录属性
- 八、安装Discuz论坛
-
- 8.1、登录论坛地址
- 8.2、环境检测
- 8.3、安装模式
- 8.4、输入数据库和discuz管理员信息
- 8.5、等待Discuz安装完成
- 8.6、安装完成后访问站点
前言:本文以LNMP(linux+nginx+mysql+php)为基础架构,结合php的扩展程序redis来搭建discuz论坛,如有不足欢迎大家指正。
一、安装linux(centos7)系统
1.1、创建虚拟机
打开虚拟机软件(VMware Workstation),在主页中点击创建新的虚拟机。

1.2、选择安装类型配置
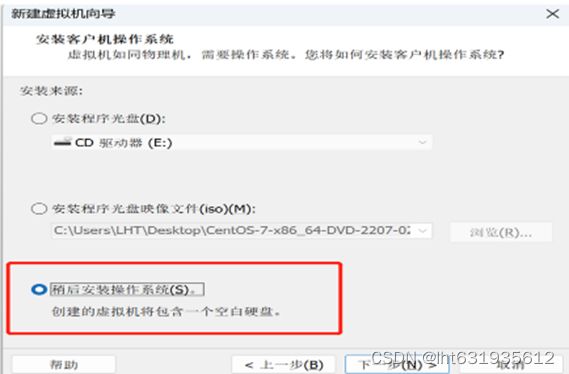
1.3、安装来源
选择“稍后安装操作系统”选项
1.4、选择客户机操作系统
1.5、命名虚拟机
1.6、指定磁盘容量
1.7、自定义虚拟机配置
点击“自定义硬件”,配置虚拟机内存、处理器、镜像挂载源以及虚拟机的网络模式。


1.8、开启虚拟机
点击“开启虚拟机”按钮。

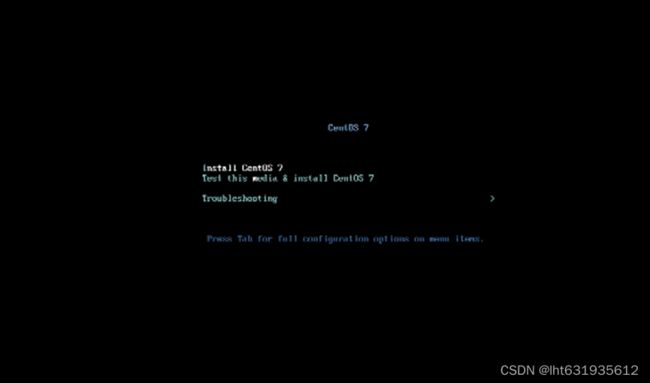
鼠标点击系统安装界面,鼠标会消失在操作台,点后使用键盘上下键,选择安装的模式:一般都会选择第一个,第二个会检查镜像完整度,比较耗费时间。模式显示白色,表示被选中。
1.9、选择系统语言
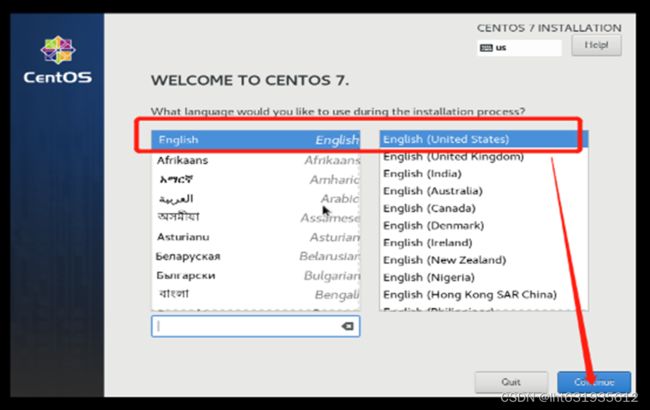
安装时尽量选择英文操作系统,这样出现错误信息后,容易在公网上找到报错原因。
1.10、配置时间/时区、硬盘分区、系统安装类型、以及系统的网络
1.10.1、时间选择
1.10.2、系统类型选择
1.10.4、硬盘分区
1.10.4.1、分区模式
分区时,选择自定义分区模式(I Will Configure Partitioning),然后点击左上角“Done”,进入详细的分区界面。

选择“Standard Partition”,然后点击 + 号

1.10.4.2、 /Boot 分区
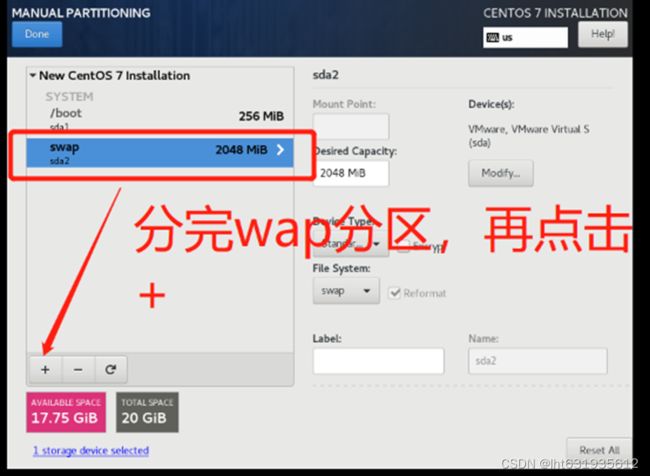
1.10.4.3、/swap 分区
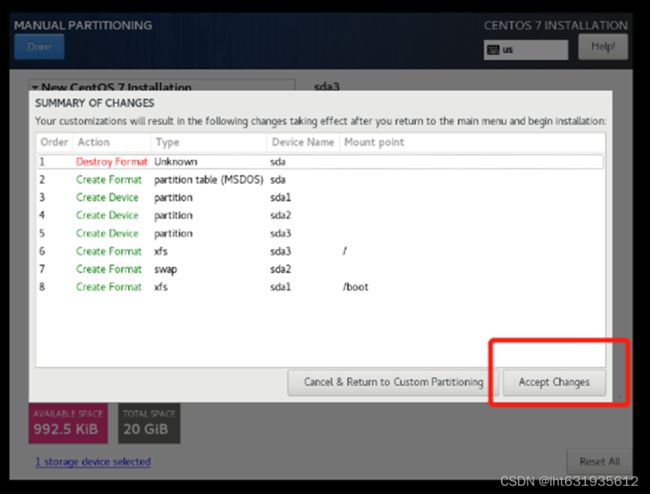
1.10.4.4、/分区
1.10.5、配置操作系统网络

网络按钮选择“ON”。

配置时间、系统安装类型、分区以及网络后,点击右下角“begin installation”按钮进入系统正式安装界面。

1.11、设置boot密码
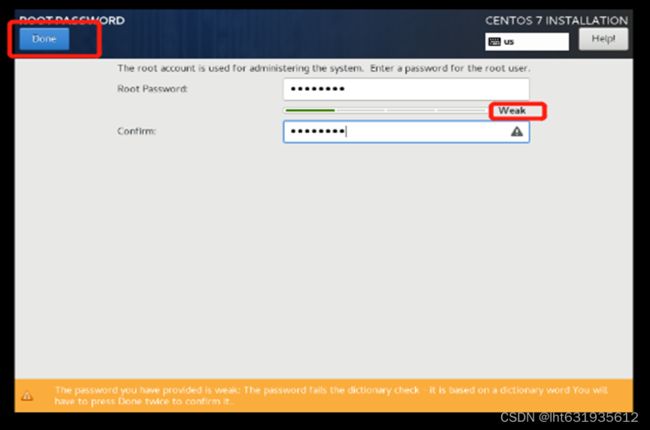
给root用户设置密码,同时也可以创建其他用户。

设置密码是时,有密码复杂度策略限制,尽量满足复杂度要求,Weak表示密码复杂度较弱,不满足要求。如果想用弱密码可以连续按2次“Done”按钮会跳过密码复杂度测试。
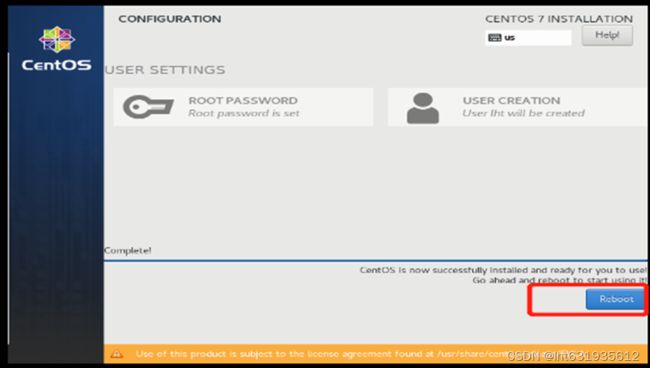
1.12、系统安装完成重启虚拟机
1.13、接受license 许可
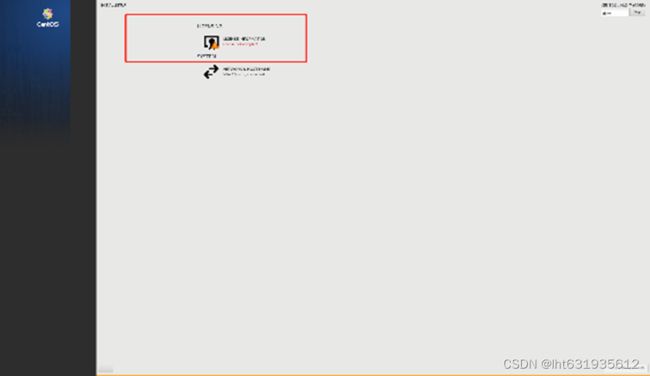
系统重启后,需要接受license 许可才能正式使用系统,过程如下:


1.14、操作系统登录界面
点击用户,输入密码登录系统。进入系统后根据如下提示进行继续操作。
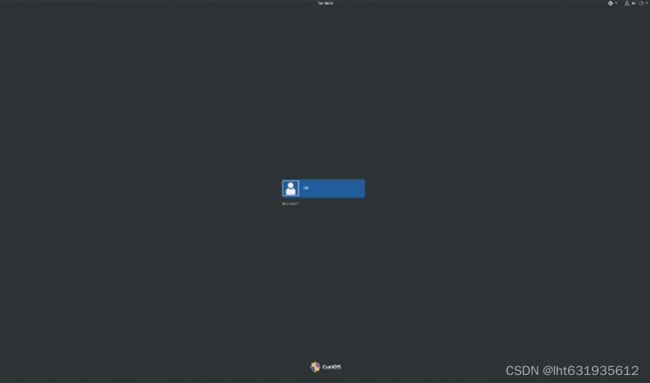


点击“Start Using CengtOS linux”,开始正式使用操作系统,出现如下提示界面,点击关闭即可。

二、安装nginx
nginx的安装用很多种方法,这里我们以源码编译安装为例:
2.1、 安装编译环境和依赖库等
yum -y install gcc gcc-c++ make zlib-devel pcre-devel openssl-devel
2.2、下载nginx 源码包
使用wget命令下载nginx源码包。
下载地址: http://nginx.org/download/nginx-1.24.0.tar.gz
wget http://nginx.org/download/nginx-1.24.0.tar.gz
2.3、解压nginx-1.24.0.tar.gz
tar -xzvf nginx-1.24.0.tar.gz
2.4、进入目录nginx-1.24.0
cd nginx-1.24.0
2.5、 预编译
预编译前。建立一个系统用户www(自己定义名字,为了管理方便最好和后面的PHP用一个用户)。
useradd -r www
./configure --user=www --group=www --prefix=/usr/local/nginx --with-http_stub_status_module --with-http_ssl_module
2.6、编译 make
make
2.7、安装 make install
make install
2.8、查看安装信息:
进入nginx执行程序所在目录
cd /usr/local/nginx/sbin/
2.9、启动nginx
进入目录 /usr/local/nginx/sbin/,执行如下命令
/usr/local/nginx/sbin/nginx
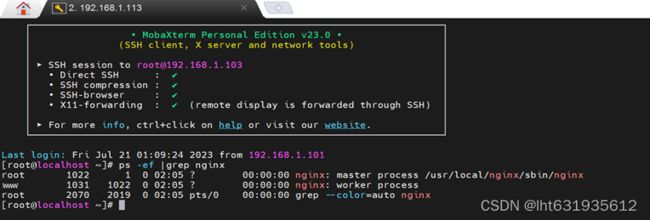
使用如下命令查看nginx是否启动
ps -ef |grep nginx
2.10、关闭防火墙
[root@localhost nginx-1.24.0]# systemctl stop firewalld
[root@localhost nginx-1.24.0]# systemctl disable firewalld
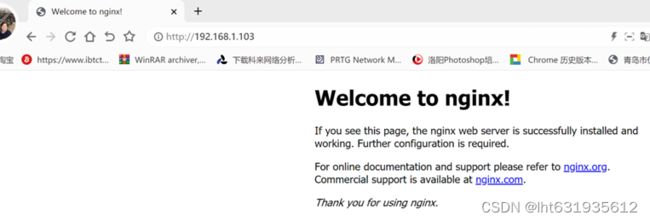
2.11、用浏览器测试nginx
在浏览器输入http://192.168.1.103,IP地址要写自己nginx所在机器的。出现welcom to nginx界面表示安装成功。

2.12、配置nginx的service
2.12.1、使用vim编辑器创建nginx服务文件
[root@localhost nginx-1.24.0]# vim /lib/systemd/system/nginx.service
![]()
在nginx.service文件中配置以下内容:
[Unit]
Description=nginx
After=network.target

[Service]
Type=forking
ExecStart=/usr/local/nginx/sbin/nginx
ExecReload=/usr/local/nginx/sbin/nginx -s reload
ExecStop=/usr/local/nginx/sbin/nginx -s stop
PrivateTmp=true

[Install]
WantedBy=multi-user.target
2.12.2、重新加载服务
重新加载服务的命令:
[root@localhost nginx-1.24.0]# systemctl daemon-reload
![]()
2.12.3、停止当前启动的nginx进程
查看进程ID
[root@localhost nginx-1.24.0]# ps -ef |grep nginx
我这里主进程是5858,子进程是5859。(注意有几个cpu 的核心就有几个子进程)
[root@localhost nginx-1.24.0]# kill 5858
2.12.4、使用服务的方式测试启动
启动服务
[root@localhost nginx-1.24.0]# systemctl start nginx.service
查看启动进程
[root@localhost nginx-1.24.0]# ps -ef |grep nginx
2.12.5、再次浏览器测试
2.12.6、测试停止服务
停止服务
[root@localhost nginx-1.24.0]# systemctl stop nginx.service
查看进程
[root@localhost nginx-1.24.0]# ps -ef |grep nginx
2.12.7、设置服务开机启动
服务开机启动
[root@localhost nginx-1.24.0]# systemctl enable nginx.service
2.12.8、重启操作系统
重新启动操作系统后查看启动进程
[root@localhost ~]#ps -ef |grep nginx
2.12.9、浏览器测试
三、安装MySQL
3.1、创建存放Mysql安装包的目录
我这里创建的是/date/download/
[root@localhost ~]# mkdir -p /date/download/
3.2、将文件上传至指定的目录
我这里时/date/download/
可以使用第三方工具上传。
3.3、解压安装包
[root@localhost ~]# cd /date/download/
[root@localhost download]# tar -xvf mysql-8.0.33-1.el7.x86_64.rpm-bundle.tar
3.4、安装开始前卸载系统自带的mysql库
系统自带的数据库版本较低/而且会和新版本的冲突,主要是会和mysql8要安装的lib组件冲突
[root@localhost download]# yum remove -y mysql-libs
3.5、安装(全局的依赖common,必须第一个装)
[root@localhost download]# rpm -ivh mysql-community-common-8.0.33-1.el7.x86_64.rpm
3.6、安装(安装lib的依赖)
[root@localhost download]# rpm -ivh mysql-community-icu-data-files-8.0.33-1.el7.x86_64.rpm
icu也可在安装完rpm -ivh mysql-community-client后安装
[root@localhost download]# rpm -ivh mysql-community-client-plugins-8.0.33-1.el7.x86_64.rpm
3.7、安装lib(client 和 server 都依赖它)
[root@localhost download]# rpm -ivh mysql-community-libs-8.0.33-1.el7.x86_64.rpm
3.8、安装mysql的客户端
[root@localhost download]# rpm -ivh mysql-community-client-8.0.33-1.el7.x86_64.rpm
3.9、安装服务端
必须先客户端后服务端
[root@localhost download]# rpm -ivh mysql-community-server-8.0.33-1.el7.x86_64.rpm
3.10、启动服务
启动数据库
[root@localhost download]# systemctl start mysqld.service
3.11、查看数据库是否启动
[root@localhost download]# ps -ef | grep mysql
3.12、在日志里查找root初始密码
启动MySQL服务后才能有此日志,如果从来没有启动过,是不会有这个日志的
[root@localhost download]# grep 'temporary password' /var/log/mysqld.log
2023-07-31T02:01:35.329394Z 6 [Note] [MY-010454] [Server] A temporary password is generated for root@localhost: )A5x(xuXugP=
初始密码是:)A5x(xuXugP=
密码修改过后,初始密码就失效。
3.13、使用mysql的客户端去验证一下
[root@localhost download]# mysql -u root -p

mysql 是客户端命令
-u 表示用户,
-p 表示密码,实际使用当中,一般不把密码写在这里,而是直接敲回车(如果写上密码,从历史记录中可以查看到此密码,非常不安全)

3.14、设置开机启动
[root@localhost download]# systemctl enable mysqld.service
3.15、修改密码(mysql8)
登录数据库,使用如下命令修改密码(不修改密码,数据库不能进行实际的操作)。
[root@localhost download]# mysql -u root -p
Enter password:
Welcome to the MySQL monitor.  Commands end with ; or \g.
Your MySQL connection id is 8
Server version: 8.0.34 MySQL Community Server - GPL

Copyright (c) 2000, 2023, Oracle and/or its affiliates.

Oracle is a registered trademark of Oracle Corporation and/or its
affiliates. Other names may be trademarks of their respective
owners.

Type 'help;' or '\h' for help. Type '\c' to clear the current input statement.

mysql> ALTER USER 'root'@'localhost' IDENTIFIED WITH mysql_native_password BY 'Pa55Word@#';
root:是用户名 , localhost表示本地登录,数据库的一个用户可以设置多个密码,可以在不能的环境下登录数据库。Pa55Word@#:修改后的密码。

修改密码后登录测试新密码:

四、安装PHP
这里我们使用yum安装的方式安装PHP。
4.1、 安装epel源
[root@localhost vhosts]# yum install -y epel-release
4.2、安装remi源
[root@localhost vhosts]# yum install https://mirrors.tuna.tsinghua.edu.cn/remi/enterprise/remi-release-7.rpm
4.3、安装php插件
[root@localhost vhosts]# yum --enablerepo=remi install -y php74-php php74-php-gd php74-php-xml php74-php-sockets php74-php-session php74-php-snmp php74-php-mysql
4.4、安装PHP
[root@localhost vhosts]# yum install -y php74-php-fpm
4.5、查看版本信息
[root@localhost vhosts]# php74 -v
4.6、启动php
启动服务
[root@localhost vhosts]# systemctl start php74-php-fpm
查看启动进程
[root@localhost vhosts]# ps -ef |grep php74-php-fpm
4.7、设置开机启动
[root@localhost vhosts]# systemctl enable php74-php-fpm
4.8、链接php文件
为了方便以后直接通过php命令来执行php脚本,做一个软链接。(此步可以不做)
![]()
五、安装redis
5.1、 安装gcc-c++
执行安装命令
[root@localhost ~]# yum install -y gcc-c++
安装完成后使用gcc -v查看安装及版本信息
[root@localhost ~]# gcc -v
5.2、创建存放redis安装包
创建目录
[root@localhost ~]# mkdir -p /date/download/redis
进入目录
[root@localhost ~]# cd /date/download/redis/
5.3、下载安装包
下载安装包
[root@localhost redis]# wget http://download.redis.io/releases/redis-7.0.12.tar.gz
5.4、解压安装包
解压安装包
[root@localhost redis]# tar -xzvf redis-7.0.12.tar.gz
5.5、安装redis
解压完成后,进入解压后的目录redis-7.0.12,执行命令
make PREFIX=/usr/local/redis install
[root@localhost redis]# ls
redis-7.0.12  redis-7.0.12.tar.gz
[root@localhost redis]# cd redis-7.0.12/
[root@localhost redis-7.0.12]# make PREFIX=/usr/local/redis install
5.6、拷贝配置文件到安装目录下
将解压后目录中的配置文件拷贝到安装目录下
[root@localhost redis-7.0.12]# cp redis.conf /usr/local/redis/
![]()
5.7、启动redis
redis的默认启动方式是通过执行绝对路径和配置文件来启动
[root@localhost redis-7.0.12]# /usr/local/redis/bin/redis-server /usr/local/redis/redis.conf
这种启动方式有一个弊端,是前台运行服务,运行的服务一直占用当前会话框,需要一直运行当前会话框才能保持服务的运行,如果使用ctr+c终止的话,redis服务也会停止。
为了启动方便在下面的5.9节中,制作redis服务来启动redis。

5.8、配置环境变量,使用redis-cli工具
配置环境变量,使用redis-cli工具来操作redis-server。如果不配置需要通过执行绝对路径/usr/local/redis/bin/redis-cli来使用此工具。
编辑/etc/profile文件,在末尾加入export PATH=/usr/local/redis/bin:$PATH
然后source来刷新配置文件
[root@localhost redis-7.0.12]# vim /etc/profile
[root@localhost redis-7.0.12]# source /etc/profile

配置好后可以直接用用redis-cli来连接redis-server

结束redis服务可以使用redis-cli -p 6379 shutdown 命令
[root@localhost ~]# redis-cli -p 6379 shutdown
5.9、配置redis的后台服务
将redis的启动做成后台服务的形式来实现,使用vim编辑配置文件/etc/systemd/system/redis.service,配置以下内容。
[root@localhost redis-7.0.12]# vim /etc/systemd/system/redis.service
[Unit]
Description=redis-server
After=netwrok.target

[Service]
Type=forking
ExecStart=/usr/local/redis/bin/redis-server /usr/local/redis/redis.conf
PrivateTmp=true

[Install]
WantedBy=multi-user.target
5.10、刷新服务配置并重启redis
刷新服务配置
[root@localhost redis-7.0.12]# systemctl daemon-reload
启动redis
[root@localhost redis-7.0.12]# systemctl start redis
Redis服务已启动,但是命令systemctl start redis
一直在执行状态,没有返回状态,只能ctrl+c强制返回。

停止redis服务
[root@localhost redis-7.0.12]# systemctl stopt redis
修改redis的配置文件/usr/local/redis/redis.conf,将daemonize设置成yes
[root@localhost redis-7.0.12]# vim /usr/local/redis/redis.conf
[root@localhost redis-7.0.12]# systemctl start redis
[root@localhost redis-7.0.12]# ps -ef |grep redis
六、配置nginx、mysql、以及PHP
6.1、编辑nginx的配置文件,在末尾加入include vhosts/*.conf;
[root@localhost ~]# vim /usr/local/nginx/conf/nginx.conf
    #    ssl_ciphers  HIGH:!aNULL:!MD5;
    #    ssl_prefer_server_ciphers  on;

    #    location / {
    #        root   html;
    #        index  index.html index.htm;
    #    }
    #}
        include vhosts/*.conf;

}
6.2、 在nginx的 /usr/local/nginx/conf/目录下创建vhosts目录
[root@localhost ~]# mkdir -p /usr/local/nginx/conf/vhosts/
6.3、创建discuz.conf的配置文件
用vim编辑器在目录 /usr/local/nginx/conf/vhosts/下创建discuz.conf文件,并添加以下内容:
[root@localhost ~]# vim /usr/local/nginx/conf/vhosts/discuz.conf
配置内容:
server{
     listen 80;
     server_name discuz;
     index index.html index.php;
     location ~\.php(.*)$ {
         root /data/html/discuz;
         fastcgi_pass 127.0.0.1:9000;
         fastcgi_index index.php;
         fastcgi_split_path_info  ^((?U).+\.php)(/?.+)$;
         fastcgi_param SCRIPT_FILENAME $document_root$fastcgi_script_name;
         fastcgi_param PATH_INFO $fastcgi_path_info;
         fastcgi_param PATH_TRANSLATED $document_root$fastcgi_path_info;
         include       fastcgi_params;

}
      location /
      {
               root /data/html/discuz;

}

}
6.4、测试配置文件是否正确
[root@localhost vhosts]# /usr/local/nginx/sbin/nginx -t
6.5、创建存在discuz论坛代码的目录
创建目录/data/html/discus
[root@localhost vhosts]# mkdir -p /data/html/discus/
6.6、创建phpinfo.php文件
在目录/data/html/discus中创建phpinfo.php文件,写入以下内容:
<?php
echo phpinfo();
?>
保存退出配置文件。
6.7、重启nginx
重启nginx
[root@localhost vhosts]# systemctl restart nginx
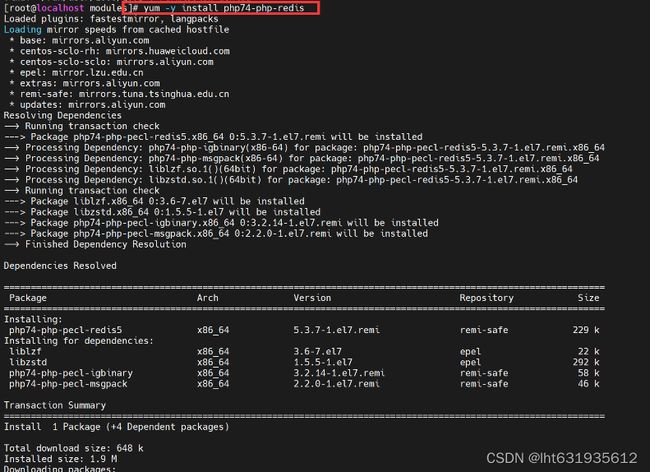
6.8、安装PHP-Redis连接驱动
只有安装好此PHP-Redis连接驱动,PHP才能支持redis扩展模块。
[root@localhost module]# yum -y install php74-php-redis
注意:我去module目录查了个文件,就留在module目录下了。大家仍然在[root@localhost vhosts]#下安装就行。
6.9、测试php中的redis扩展是否成功
重启php
[root@localhost vhosts]# systemctl restart php74-php-fpm
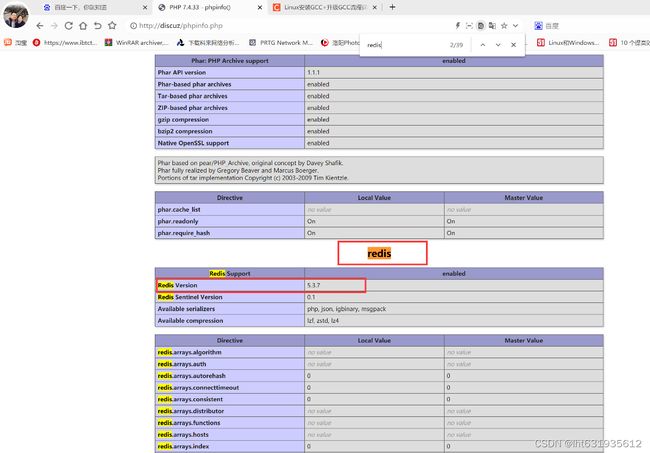
在浏览器访问http://discuz/phpinfo.php 在当前页面使用ctrl+f 搜索redis。
如果有redis 表示redis扩展成功。
6.10、修改php配置文件
[root@localhost vhosts]# vim /etc/opt/remi/php74/php-fpm.d/www.conf
6.11、配置数据库mysql
6.11.1、登录数据库
[root@localhost vhosts]# mysql -u root -p
6.11.2、创建discuz库和用户discuz,并赋予用户对数据库的权限
mysql> CREATE USER 'discuz'@'%' IDENTIFIED WITH mysql_native_password BY 'Pa55Word@#';
Query OK, 0 rows affected (0.03 sec)
mysql> GRANT ALL PRIVILEGES  ON *.* TO 'discuz'@'%' WITH GRANT OPTION;
Query OK, 0 rows affected (0.00 sec)
mysql> flush privileges;
Query OK, 0 rows affected (0.01 sec)
注意mysql数据库的命令最后都有一个英文的分号结尾。
七、下载及上传代码
7.1、下载代码
官网:https://www.discuz.vip/download.html
7.2、上传代码
将论坛discuz的代码包上传至目录 /data/html/discuz/,并删除phpinfo.php,然后解压discuz代码包。
[root@localhost date]# cd /data/html/discuz/
[root@localhost discuz]# rm phpinfo.php
[root@localhost discuz]# unzip Discuz_X3.5_SC_UTF8_20230726.zip
7.3、复制代码到目录
移除代码压缩包到其他备份目录,方便以后使用,也可以删除代码压缩包。
将解压出的upload目录内的所有内容复制到discuz目录下,删除upload目录。
注意复制时不要包含目录upload自身,只是复制目录内的所有内容。
[root@localhost discuz]# cp -r ./upload/* ./
[root@localhost discuz]# rm -rf upload/
7.4、修改目录属性
退回discuz的上一级目录,将目录discuz 的属主和属组都改成www。
[root@localhost discuz]# cd ..
[root@localhost html]#
[root@localhost html]# chown -R www:www discuz/
八、安装Discuz论坛
8.1、登录论坛地址
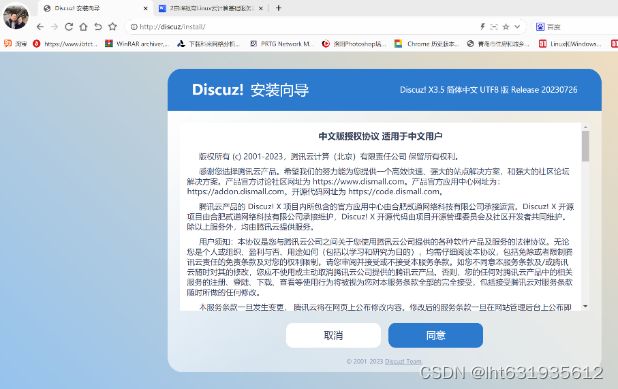
在浏览器登录http://discuz/(如果是云主机的话可以绑定自己的域名,我这里用虚拟机做实验),出现discuz安装向导页面,点击同意。
8.2、环境检测
8.3、安装模式
安装模式根据自己的需求去安装,我这里做演示选择第一个。
选择全新安装discuz(独立模式),继续下一步。
![]()
8.4、输入数据库和discuz管理员信息
数据库填写上面我们已经配置好的,管理员信息是初始填写,以后管理discuz论坛用,自己保管好。
输入数据库的信息和管理员信息后点击下一步。


