最近要完成一个功能,就是把四个视频合成左右上下分布的一个视频。尝试很多方法,最终使用opencv来实现该功能。(通过opencv实现的视频好像没有声音。)研究的步骤,首先在Ubuntu环境测试,该功能是否实现。然后再将生成的库文件放到AS中,使用jni的方法调用,或者将源码放到AS中利用jni技术。在实现过程中遇到很多问题,下面记录。
一、在ubuntu linux环境使用opencv。
1、下载opencv安装包。
下载地址:官网:https://opencv.org/releases/
git地址:https://github.com/opencv/opencv/releases
2、将下载的安装包放到虚拟机根目录(新建software目录)。
3、安装包解压缩。
unzip opencv-4.8.0.zip
4、下载相关软件。
进入 opencv-4.8.0 文件夹。
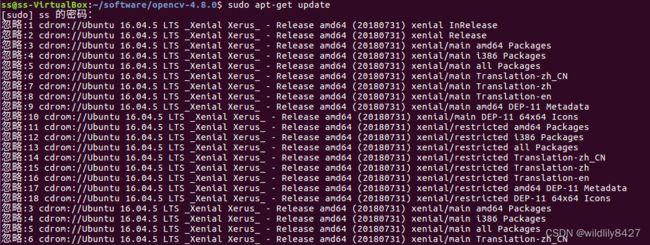
1)更新软件
sudo apt-get update
sudo apt-get install cmake
sudo apt-get install build-essential libgtk2.0-dev libavcodec-dev libavformat-dev libjpeg.dev libtiff5.dev libswscale-dev libjasper-dev
4)在 opencv-4.8.0 文件夹下新建build文件夹。
mkdir build
5)进入build文件夹,使用命令修改参数
sudo cmake -D CMAKE_BUILD_TYPE=Release -D CMAKE_INSTALL_PREFIX=/usr/local ..
6)使用make编译
sudo make
7)安装
sudo make install
sudo gedit /etc/ld.so.conf.d/opencv.conf
在新建的文档中添加:
/usr/local/lib
sudo ldconfig
sudo gedit /etc/bash.bashrc
在最末尾添加
PKG_CONFIG_PATH=$PKG_CONFIG_PATH:/usr/local/lib/pkgconfig
export PKG_CONFIG_PATH
执行该步骤时,发现/usr/local/lib/路径下没有pkgconfig文件夹。并且执行命令
pkg-config --cflags openc
报一下错误。
解决:首先创建opencv.pc文件,这里要注意它的路径信息:
cd /usr/local/lib
sudo mkdir pkgconfig
cd pkgconfig
sudo touch opencv.pc
然后在opencv.pc中添加以下信息,注意这些信息需要与自己安装opencv时的库路径对应:(一下是我自己的内容)
prefix=/usr/local
exec_prefix=${prefix}
libdir=${exec_prefix}/lib
includedir=${prefix}/include/opencv4
Name: OpenCV
Description: Open Source Computer Vision Library
Version: 4.8.0
Libs: -L${exec_prefix}/lib -lopencv_highgui -lopencv_shape -lopencv_objdetect -lopencv_ml -lopencv_superres -lopencv_dnn -lopencv_stitching -lopencv_videostab -lopencv_calib3d -lopencv_videoio -lopencv_imgcodecs -lopencv_features2d -lopencv_video -lopencv_photo -lopencv_imgproc -lopencv_flann -lopencv_core
Libs.private: -ldl -lm -lpthread -lrt
Cflags: -I${includedir}
保存退出,添加环境:
export PKG_CONFIG_PATH=/usr/local/lib/pkgconfig
执行.cpp编译命令:
g++ videotest.cpp -o videotest `pkg-config --cflags --libs opencv`
g++ videotest.cpp -o videotest `pkg-config --cflags --libs opencv` -std=gnu++11
报错:
查看/usr/local/lib/lib文件下没有libopencv_shape.so等这三个库,再次打开/usr/local/lib/pkgconfig/opencv.pc文件,将-lopencv_shape 等三个路径删除掉。保存退出。执行命令:
g++ videotest.cpp -o videotest `pkg-config --cflags --libs opencv` -std=gnu++11
# Package Information for pkg-config
prefix=/usr/local
exec_prefix=${prefix}
libdir=${exec_prefix}/lib
includedir=${prefix}/include/opencv4
Name: OpenCV
Description: Open Source Computer Vision Library
Version: 4.8.0
Libs: -L${exec_prefix}/lib -lopencv_highgui -lopencv_objdetect -lopencv_ml -lopencv_dnn -lopencv_stitching -lopencv_calib3d -lopencv_videoio -lopencv_imgcodecs -lopencv_features2d -lopencv_video -lopencv_photo -lopencv_imgproc -lopencv_flann -lopencv_core
Libs.private: -ldl -lm -lpthread -lrt
Cflags: -I${includedir}
注意:1、该opencv源码编译的对应so库文件只是linux系统平台文件(我的是x86_64),如果想将该库编译为其他平台,例如arm64需要交叉编译。(我没整明白)
注意:2、上述配置bash后,使用以下命令使得配置文件生效。若没有生效,重启电脑试试。(如果没有生效,执行 编译生成的可执行文件,报错 找不到opencv库)
source /etc/bash.bashrc
sudo updatedb
注意:3 我这里编译的是opencv4.8.0版本,编译过程中使用python3.x版本,opencv.pc需要自己创建。链接http://www.taodudu.cc/news/show-3639538.html?action=onClick#google_vignette 编译的opencv3.4.1版本,使用python2.x版本,opencv.pc自动生成。按照链接中配置,就可以成功编译安装opencv。
最后是测试代码,功能将代码中的video.mp4合成上下左右分布的一个视频。生成视频为mergevideo.avi 或mergevideo.mkv
#include
#include
#include
#include
#include
#include
#include
#include
#include
#include
#include
#include
#include
#include
#include
#include
#include
#include
#include
using namespace std;
using namespace cv;
int main(int argc, char ** argv)
{
std::string videoFile = "video.mp4";//视频的路径
std::string videoFile1 = "video.mp4";//视频的路径
std::string videoFile2 = "video.mp4";//视频的路径
std::string videoFile3 = "video.mp4";//视频的路径
/** 打开第一个视频文件 */
VideoCapture cap; //视频句柄变量
cap.open(videoFile);//打开视频
if(!cap.isOpened()) //判断是否打开了
{
printf("1cap.isOpened is error\n");
return -1;
}
/** 打开第二个视频文件 */
VideoCapture cap1; //视频句柄变量
cap1.open(videoFile1);//打开视频
if(!cap1.isOpened()) //判断是否打开了
{
printf("2cap.isOpened is error\n");
return -1;
}
/** 打开第三个视频文件 */
VideoCapture cap2; //视频句柄变量
cap2.open(videoFile2);//打开视频
if(!cap2.isOpened()) //判断是否打开了
{
printf("3cap.isOpened is error\n");
return -1;
}
/** 打开第四个视频文件 */
VideoCapture cap3; //视频句柄变量
cap3.open(videoFile3);//打开视频
if(!cap3.isOpened()) //判断是否打开了
{
printf("4cap.isOpened is error\n");
return -1;
}
/** 打开第一个视频文件的帧数 */
int frame_num = cap.get(cv::CAP_PROP_FRAME_COUNT);
std::cout << "videoFile total frame number is: " << frame_num << std::endl;
/** 打开第二个视频文件的帧数 */
int frame_num1 = cap1.get(cv::CAP_PROP_FRAME_COUNT);
std::cout << "videoFile1 total frame number is: " << frame_num1 << std::endl;
/** 打开第三个视频文件的帧数 */
int frame_num2 = cap2.get(cv::CAP_PROP_FRAME_COUNT);
std::cout << "videoFile2 total frame number is: " << frame_num2 << std::endl;
/** 打开第四个视频文件的帧数 */
int frame_num3 = cap3.get(cv::CAP_PROP_FRAME_COUNT);
std::cout << "videoFile3 total frame number is: " << frame_num3 << std::endl;
/** 打开第一个视频文件的帧率 */
int fps = cap.get(cv::CAP_PROP_FPS);
std::cout << "videoFile fps: " << fps << std::endl;
/** 打开第二个视频文件的帧率 */
int fps1 = cap1.get(cv::CAP_PROP_FPS);
std::cout << "videoFile1 fps1: " << fps1 << std::endl;
/** 打开第三个视频文件的帧率 */
int fps2 = cap2.get(cv::CAP_PROP_FPS);
std::cout << "videoFile fps2: " << fps2 << std::endl;
/** 打开第四个视频文件的帧率 */
int fps3 = cap3.get(cv::CAP_PROP_FPS);
std::cout << "videoFile1 fps3: " << fps3 << std::endl;
/** 打开第一个视频文件的宽度 */
int image_width = cap.get(cv::CAP_PROP_FRAME_WIDTH);
std::cout << "videoFile image width is: " << image_width << std::endl;
/** 打开第二个视频文件的宽度 */
int image_width1 = cap1.get(cv::CAP_PROP_FRAME_WIDTH);
std::cout << "videoFile1 image width is: " << image_width1 << std::endl;
/** 打开第三个视频文件的宽度 */
int image_width2 = cap2.get(cv::CAP_PROP_FRAME_WIDTH);
std::cout << "videoFile2 image width is: " << image_width2 << std::endl;
/** 打开第四个视频文件的宽度 */
int image_width3 = cap3.get(cv::CAP_PROP_FRAME_WIDTH);
std::cout << "videoFile3 image width is: " << image_width3 << std::endl;
/** 打开第一个视频文件的高度 */
int image_height = cap.get(cv::CAP_PROP_FRAME_HEIGHT);
std::cout << "videoFile image height: " << image_height << std::endl;
/** 打开第二个视频文件的高度 */
int image_height1 = cap1.get(cv::CAP_PROP_FRAME_HEIGHT);
std::cout << "videoFile1 image height: " << image_height1 << std::endl;
/** 打开第三个视频文件的高度 */
int image_height2 = cap2.get(cv::CAP_PROP_FRAME_HEIGHT);
std::cout << "videoFile2 image height: " << image_height2 << std::endl;
/** 打开第四个视频文件的高度 */
int image_height3 = cap3.get(cv::CAP_PROP_FRAME_HEIGHT);
std::cout << "videoFile3 image height: " << image_height3 << std::endl;
/** 打开第一个视频文件的矩阵对象的格式*/
int frame_format = cap.get(cv::CAP_PROP_FORMAT);
std::cout << "videoFile frame format: " << frame_format << std::endl;
/** 打开第二个视频文件的矩阵对象的格式 */
int frame_format1 = cap1.get(cv::CAP_PROP_FORMAT);
std::cout << "videoFile1 frame format: " << frame_format1 << std::endl;
/** 打开第三个视频文件的矩阵对象的格式*/
int frame_format2 = cap2.get(cv::CAP_PROP_FORMAT);
std::cout << "videoFile2 frame format: " << frame_format2 << std::endl;
/** 打开第四个视频文件的矩阵对象的格式 */
int frame_format3 = cap3.get(cv::CAP_PROP_FORMAT);
std::cout << "videoFile3 frame format: " << frame_format3 << std::endl;
/** 合并视频初始化 */
//std::string mergeVideoFile = "mergeVideo.avi";
std::string mergeVideoFile = "mergeVideo.mkv";
VideooHeight = 720;
int mergeVideooWidth = 1280;
float mergeVideooFps = 10.0;
int mergeVideooFpsFrameFormat = CV_8UC3; // CV_8UC3代表每个像素占8位
cv::VideoWriter track_writer;
Mat img = cv::Mat::zeros(mergeVideooWidth, mergeVideooHeight, mergeVideooFpsFrameFormat);
//track_writer.open (mergeVideoFile, cv::VideoWriter::fourcc('m', 'p', '4', '2'), mergeVideooFps, cv::Size(mergeVideooWidth, mergeVideooHeight));//.avi
track_writer.open (mergeVideoFile, cv::VideoWriter::fourcc('m', 'p', '4', 'v'), mergeVideooFps, cv::Size(mergeVideooWidth, mergeVideooHeight));//.mkv
if(!track_writer.isOpened())
{
std::cout << "!track_writer.isOpened(): " << std::endl;
assert("track writer open failed!\n");
}
Mat frame;
Mat frame1;
Mat frame2;
Mat frame3;
while(1)
{
cap.read(frame);//从第一个视频获取一帧图片
cap1.read(frame1);//从第二个视频获取一帧图片
cap2.read(frame2);//从第三个视频获取一帧图片
cap3.read(frame3);//从第四个视频获取一帧图片
if(frame.empty()) break; //是否加载成功
if(frame1.empty()) break; //是否加载成功
if(frame2.empty()) break; //是否加载成功
if(frame3.empty()) break; //是否加载成功
// 设定ROI区域:截取一部分进行合并
Mat imageROI= frame(Rect(0,0,frame.cols,frame.rows)); // Rect(左上角横坐标,左上角纵坐标,宽度,高度)
Mat imageROI1= frame1(Rect(0,0,frame1.cols,frame1.rows));
Mat imageROI2= frame2(Rect(0,0,frame2.cols,frame2.rows));
Mat imageROI3= frame3(Rect(0,0,frame3.cols,frame3.rows));
// 大小转换
Mat imageROIdst = Mat::zeros(mergeVideooHeight/2,mergeVideooWidth/2 , CV_8UC3);
resize(imageROI, imageROIdst, imageROIdst.size());
Mat imageROI1dst = Mat::zeros(mergeVideooHeight/2,mergeVideooWidth/2 , CV_8UC3);
resize(imageROI1, imageROI1dst, imageROI1dst.size());
Mat imageROI2dst = Mat::zeros(mergeVideooHeight/2,mergeVideooWidth/2 , CV_8UC3);
resize(imageROI2, imageROI2dst, imageROI2dst.size());
Mat imageROI3dst = Mat::zeros(mergeVideooHeight/2,mergeVideooWidth/2 , CV_8UC3);
resize(imageROI3, imageROI3dst, imageROI3dst.size());
// 视频写字
// putText(imageROIdst, videoFile, Point(5, 55),FONT_HERSHEY_PLAIN,2.0,(0, 255, 255),2);
//创建目标Mat
Mat des;
des.create(mergeVideooHeight,mergeVideooWidth, imageROI1dst.type()); // Mat.create(高,宽,像素编码类型这里是CV_8UC3)
// 视频帧合并
Mat r1 = des(Rect(0, 0, mergeVideooWidth/2, mergeVideooHeight/2));
imageROI1dst.copyTo(r1);
Mat r = des(Rect(mergeVideooWidth/2, 0, mergeVideooWidth/2, mergeVideooHeight/2));
imageROIdst.copyTo(r);
Mat r2 = des(Rect(0, mergeVideooHeight/2, mergeVideooWidth/2, mergeVideooHeight/2));
imageROI2dst.copyTo(r2);
Mat r3 = des(Rect(mergeVideooWidth/2, mergeVideooHeight/2, mergeVideooWidth/2, mergeVideooHeight/2));
imageROI3dst.copyTo(r3);
// 格式化要保存的视频帧
cv::resize(des, img , cv::Size(mergeVideooWidth, mergeVideooHeight));
// 保存视频
track_writer.write(img);
}
cap.release();//释放视频句柄
cap1.release();//释放视频句柄
cap2.release();//释放视频句柄
cap3.release();//释放视频句柄
track_writer.release();
return 0;
}
编译指令:
g++ videotest.cpp -o videotest `pkg-config --cflags --libs opencv` -std=gnu++11
执行指令:
./videotest
二、AS中集成opencv(jni环境)
上述已经说过,在linux编译的库文件为x86_64平台,我需要arm64平台。因此上述不满足我的需求。使用其他办法。在AS中集成opencv。
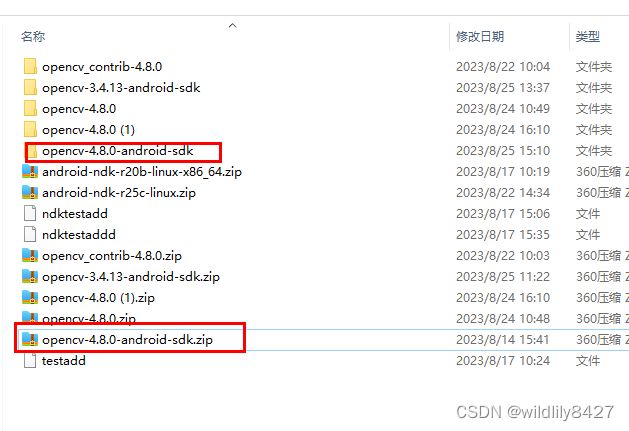
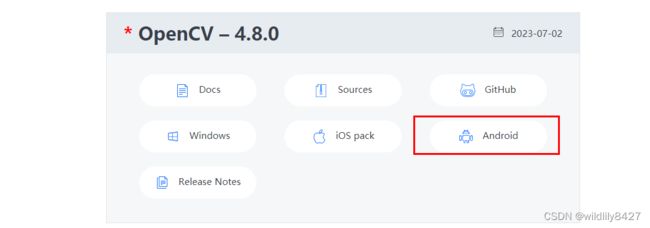
1、下载opencv 使用android平台的sdk包。
下载地址不变:下载地址:官网:https://opencv.org/releases/
2、AS中集成opencv库。查看文章"android studio 3.6.3 ndk开发-cpp文件中加载第三方.so库并生成新.so文件(二)"
链接:https://blog.csdn.net/zhuowalun8427/article/details/114294901 后半部分“AS中添加opencv环境”。
3、修改videotest.cpp。与linux环境的videotest.cpp文件相同,只是添加一些jni库文件等。在代码中详细指出。
#include
#include
#include
#include
#include
#include
#include
#include
#include
#include
#include
#include
#include
#include
#include
#include
#include
#include
#include
// 修改1:添加jni环境需要的头文件
#include
#include
// 修改2:jni 日志
#define TAG "lilitest" // 这个是自定义的LOG的标识
#define LOGI(...) __android_log_print(ANDROID_LOG_INFO,TAG ,__VA_ARGS__)
using namespace std;
using namespace cv;
// 修改3:main() 方法改成接口,方便java层调用
int mergeVideo()
{
// 修改4:路径改成android路径,我这里是外置U盘
std::string videoFile = "/storage/udisk1/assets/video.mp4";//视频的路径
std::string videoFile1 = "/storage/udisk1/assets/video.mp4";//视频的路径
std::string videoFile2 = "/storage/udisk1/assets/video.mp4";//视频的路径
std::string videoFile3 = "/storage/udisk1/assets/video.mp4";//视频的路径
/** 打开第一个视频文件 */
VideoCapture cap; //视频句柄变量
cap.open(videoFile);//打开视频
if(!cap.isOpened()) //判断是否打开了
{
// 修改5:所有打印日志改为LOGI
LOGI("1cap.isOpened is error");
return -1;
}
/** 打开第二个视频文件 */
VideoCapture cap1; //视频句柄变量
cap1.open(videoFile1);//打开视频
if(!cap1.isOpened()) //判断是否打开了
{
LOGI("2cap.isOpened is error\n");
return -1;
}
/** 打开第三个视频文件 */
VideoCapture cap2; //视频句柄变量
cap2.open(videoFile2);//打开视频
if(!cap2.isOpened()) //判断是否打开了
{
LOGI("3cap.isOpened is error\n");
return -1;
}
/** 打开第四个视频文件 */
VideoCapture cap3; //视频句柄变量
cap3.open(videoFile3);//打开视频
if(!cap3.isOpened()) //判断是否打开了
{
LOGI("4cap.isOpened is error\n");
return -1;
}
/** 打开第一个视频文件的帧数 */
int frame_num = cap.get(cv::CAP_PROP_FRAME_COUNT);
LOGI("videoFile total frame number is: %d",frame_num);
/** 打开第二个视频文件的帧数 */
int frame_num1 = cap1.get(cv::CAP_PROP_FRAME_COUNT);
LOGI("videoFile1 total frame number is: %d",frame_num1);
/** 打开第三个视频文件的帧数 */
int frame_num2 = cap2.get(cv::CAP_PROP_FRAME_COUNT);
LOGI("videoFile2 total frame number is: %d",frame_num2);
/** 打开第四个视频文件的帧数 */
int frame_num3 = cap3.get(cv::CAP_PROP_FRAME_COUNT);
LOGI("videoFile3 total frame number is: %d",frame_num3);
/** 打开第一个视频文件的帧率 */
int fps = cap.get(cv::CAP_PROP_FPS);
LOGI("videoFile fps: %d",fps);
/** 打开第二个视频文件的帧率 */
int fps1 = cap1.get(cv::CAP_PROP_FPS);
LOGI("videoFile1 fps: %d",fps1);
/** 打开第三个视频文件的帧率 */
int fps2 = cap2.get(cv::CAP_PROP_FPS);
LOGI("videoFile2 fps: %d",fps2);
/** 打开第四个视频文件的帧率 */
int fps3 = cap3.get(cv::CAP_PROP_FPS);
LOGI("videoFile3 fps: %d",fps3);
/** 打开第一个视频文件的宽度 */
int image_width = cap.get(cv::CAP_PROP_FRAME_WIDTH);
LOGI("videoFile image width is: %d ",image_width);
/** 打开第二个视频文件的宽度 */
int image_width1 = cap1.get(cv::CAP_PROP_FRAME_WIDTH);
LOGI("videoFile1 image width is: %d ",image_width1);
/** 打开第三个视频文件的宽度 */
int image_width2 = cap2.get(cv::CAP_PROP_FRAME_WIDTH);
LOGI("videoFile2 image width is: %d",image_width2);
/** 打开第四个视频文件的宽度 */
int image_width3 = cap3.get(cv::CAP_PROP_FRAME_WIDTH);
LOGI("videoFile3 image width is: %d ",image_width3);
/** 打开第一个视频文件的高度 */
int image_height = cap.get(cv::CAP_PROP_FRAME_HEIGHT);
LOGI( "videoFile image height:%d ",image_height);
/** 打开第二个视频文件的高度 */
int image_height1 = cap1.get(cv::CAP_PROP_FRAME_HEIGHT);
LOGI( "videoFile1 image height: %d",image_height1);
/** 打开第三个视频文件的高度 */
int image_height2 = cap2.get(cv::CAP_PROP_FRAME_HEIGHT);
LOGI( "videoFile2 image height:%d ",image_height2);
/** 打开第四个视频文件的高度 */
int image_height3 = cap3.get(cv::CAP_PROP_FRAME_HEIGHT);
LOGI( "videoFile3 image height: %d",image_height3);
/** 打开第一个视频文件的矩阵对象的格式*/
int frame_format = cap.get(cv::CAP_PROP_FORMAT);
LOGI("videoFile frame format = %d",frame_format);
/** 打开第二个视频文件的矩阵对象的格式 */
int frame_format1 = cap1.get(cv::CAP_PROP_FORMAT);
LOGI("videoFile1 frame format = %d",frame_format1);
/** 打开第三个视频文件的矩阵对象的格式*/
int frame_format2 = cap2.get(cv::CAP_PROP_FORMAT);
LOGI("videoFile2 frame format = %d",frame_format2);
/** 打开第四个视频文件的矩阵对象的格式 */
int frame_format3 = cap3.get(cv::CAP_PROP_FORMAT);
LOGI("videoFile3 frame format = %d",frame_format3);
// 修改6:合并视屏的路径改为android路径,后缀只能为.avi
/** 合并视频初始化 */
std::string mergeVideooFile = "/storage/udisk1/assets/mergeVideotest30_1280_720.avi";
int mergeVideooHeight = 720;
int mergeVideooWidth = 1280;
float mergeVideooFps = 30.0;
int mergeVideooFpsFrameFormat = CV_8UC3; // CV_8UC3代表每个像素占8位
cv::VideoWriter track_writer;
Mat img = cv::Mat::zeros(mergeVideooWidth, mergeVideooHeight, mergeVideooFpsFrameFormat);
// 修改7 对于android系统,fourcc只能是('M', 'J', 'P', 'G'),生成的视频格式只能是.avi否在报错“”
track_writer.open (mergeVideooFile, cv::VideoWriter::fourcc('M', 'J', 'P', 'G'), mergeVideooFps, cv::Size(mergeVideooWidth, mergeVideooHeight),true);//.avi
if(!track_writer.isOpened())
{
LOGI("!track_writer.isOpened(): ");
assert("track writer open failed!\n");
return -2;
}
Mat frame;
Mat frame1;
Mat frame2;
Mat frame3;
while(1)
{
cap.read(frame);//从第一个视频获取一帧图片
cap1.read(frame1);//从第二个视频获取一帧图片
cap2.read(frame2);//从第三个视频获取一帧图片
cap3.read(frame3);//从第四个视频获取一帧图片
if(frame.empty()) break; //是否加载成功
if(frame1.empty()) break; //是否加载成功
if(frame2.empty()) break; //是否加载成功
if(frame3.empty()) break; //是否加载成功
Mat imageROI= frame(Rect(0,0,frame.cols,frame.rows)); // Rect(左上角横坐标,左上角纵坐标,宽度,高度)
Mat imageROI1= frame1(Rect(0,0,frame1.cols,frame1.rows));
Mat imageROI2= frame2(Rect(0,0,frame2.cols,frame2.rows));
Mat imageROI3= frame3(Rect(0,0,frame3.cols,frame3.rows));
// 大小转换
Mat imageROIdst = Mat::zeros(mergeVideooHeight/2,mergeVideooWidth/2 , CV_8UC3); //我要转化为850*600大小的
resize(imageROI, imageROIdst, imageROIdst.size());
Mat imageROI1dst = Mat::zeros(mergeVideooHeight/2,mergeVideooWidth/2 , CV_8UC3); //我要转化为850*600大小的
resize(imageROI1, imageROI1dst, imageROI1dst.size());
Mat imageROI2dst = Mat::zeros(mergeVideooHeight/2,mergeVideooWidth/2 , CV_8UC3); //我要转化为850*600大小的
resize(imageROI2, imageROI2dst, imageROI2dst.size());
Mat imageROI3dst = Mat::zeros(mergeVideooHeight/2,mergeVideooWidth/2 , CV_8UC3); //我要转化为850*600大小的
resize(imageROI3, imageROI3dst, imageROI3dst.size());
// 视频写字
// putText(imageROIdst, videoFile, Point(5, 55),FONT_HERSHEY_PLAIN,2.0,(0, 255, 255),2);
//创建目标Mat
Mat des;
des.create(mergeVideooHeight,mergeVideooWidth, imageROI1dst.type()); // Mat.create(高,宽,像素编码类型这里是CV_8UC3)
// 视频帧合并
Mat r1 = des(Rect(0, 0, mergeVideooWidth/2, mergeVideooHeight/2));
imageROI1dst.copyTo(r1);
Mat r = des(Rect(mergeVideooWidth/2, 0, mergeVideooWidth/2, mergeVideooHeight/2));
imageROIdst.copyTo(r);
Mat r2 = des(Rect(0, mergeVideooHeight/2, mergeVideooWidth/2, mergeVideooHeight/2));
imageROI2dst.copyTo(r2);
Mat r3 = des(Rect(mergeVideooWidth/2, mergeVideooHeight/2, mergeVideooWidth/2, mergeVideooHeight/2));
imageROI3dst.copyTo(r3);
// 格式化要保存的视频帧
cv::resize(des, img , cv::Size(mergeVideooWidth, mergeVideooHeight));
// 保存视频
track_writer.write(img);
}
cap.release();//释放视频句柄
cap1.release();//释放视频句柄
cap2.release();//释放视频句柄
cap3.release();//释放视频句柄
track_writer.release();
return 0;
}
extern "C"
JNIEXPORT jint JNICALL
Java_com_htkj_testproject_jni_opencvActivity_myMergeVideo(JNIEnv *env, jobject thiz) {
return mergeVideo();
}
代码中,fourcc与文件后缀错误,报错如下:
java调用接口省略。
三、AS 中集成opencv(java环境)
1、下载sdk包,与上述相同。
四、AS中集成opencv(java + jni环境)