Vue3+node.js网易云音乐实战项目(三)
页面
- 一、头部导航栏布局
- 二、轮播图的实现
- 三、请求网易的banner图
- 四 链接
一、头部导航栏布局
首先我们看最上面这里的布局,大致可分为三个模块,顶部左边,顶部中间,顶部右边
那么我们在component创建一下子组件,命名为topNav.vue
为了让这个整体好看一点,我在 App.vue 这加了一点整体的样式
  *{
    margin: 0;
    padding: 0;
    box-sizing: border-box;
    font-family: "微软雅黑";
  }

  // 渐变背景色
  html{
     background:linear-gradient(top,rgb(232,235,242),rgb(255,255,255)) no-repeat ;
     background:-webkit-linear-gradient(top,rgb(232,235,242),rgb(255,255,255)) no-repeat;
  }
先把基础的东西填进去然后在调整样式
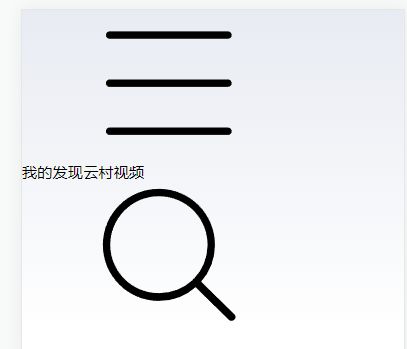
看看效果
很明显现在的图标很大,我们先调整图片的大小
.icon{
      width: 0.4rem;
      height: 0.4rem ;
}
然后我们在利用flex布局让它从两端对齐,并设置边距,让它看起来好看一点
    .topNav{
        width: 7.5rem;
        height: 0.8rem;
        display: flex;
        justify-content: space-between;
        align-items: center;
        padding: 0 0.2rem;
	}
最后调整一下中间的文字,平均分布
    .topCenter{
      width: 4.5rem;
      display: flex;
      justify-content: space-around;
    }
然后我们在修它的选中状态 active 变粗
    <div class="topCenter">
      <span class="navBtn">我的span>
      <span class="navBtn active" >发现span>
      <span class="navBtn">云村span>
      <span class="navBtn">视频span>
    div>
    .topCenter{
      width: 4.5rem;
      display: flex;
      justify-content: space-around;
      .active{
        font-weight: 900;
      }
    }
整体代码 topNav.vue
二、轮播图的实现
实现了顶部之后,我们现在来实现轮播图,轮播图这里我就偷个懒,利用vant去实现。
vue3 npm 安装
# Vue 3 项目,安装最新版 Vant
npm i vant
文档地址:https://vant-contrib.gitee.io/vant/#/zh-CN/quickstart
我们在main.js中引用vant
import { createApp } from 'vue'
import { Swipe, SwipeItem } from 'vant';
import 'vant/lib/index.css';

createApp(App).use(Swipe).use(SwipeItem).mount('#app')
我们同样在components创建一个swipe.vue子组件,然后在HomeView.vue中注册一下
在swipe.vue,我们使用vant官方的例子,利用懒加载的方式做轮播图(这里的图片我放在了assets下,需要自己创建一个img文件夹放图片)
![]()
效果
现在来调整一下样式,使图片的宽度适中


