使用Visual Studio Code 进行Python编程(一)-环境搭建、hello Python
1、下载Visual Studio Code
到微软的Visual Studio Code官方主页下载Visual Studio Code:
Visual Studio: 面向软件开发人员和 Teams 的 IDE 和代码编辑器Visual Studio 开发工具和服务让任何开发人员在任何平台和语言的应用开发都更加轻松。 随时随地免费使用代码编辑器或 IDE 进行开发。 https://visualstudio.microsoft.com/zh-hans/
2、安装Visual Studio Code
本例使用VSCodeUserSetup-x64-1.73.1。VSCodeUserSetup-x64-1.73.1是一个Visual Studio Code的用户安装程序。需要联网进行安装。
下载后双击VSCodeUserSetup-x64-1.73.1
弹出安装界面:

勾选“我同意此协议”,点击“下一步”按钮,弹出“选择目标位置”对话框。
此时你可以选择准备安装Visual Studio Code的文件夹,或者使用默认的安装位置。

在确认安装位置后,点击“下一步”按钮 ,弹出程序的快捷方式放置的文件夹位置

在确认快捷方式的安装位置后,点击“下一步"按钮,弹出附加任务对话框
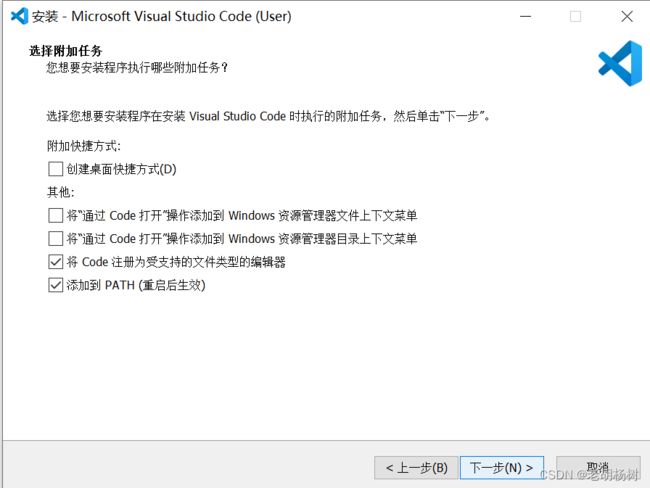
此处注意,“添加到PATH”选项前的对勾最好勾选(默认也是勾选),接下来的准备安装对话框将会对你刚刚做出的选项进行确认:

直接点击“安装”按钮 ,启动安装程序

安装完成后,弹出安装完成对话框

点击完成,开始运行Visual Studio Code
3、运行Visual Studio Code,安装中文语言包
安装完成后,点击完成,开始运行Visual Studio Code,弹出Visual Studio Code的默认界面,此时界面上会弹出几个选项,

其他选项可以在后面的实际编程过程中逐渐了解,我们先对默认的界面样式进行选择,然后点击“安装并重启”,进入Visual Studio Code主界面,选择“文件->新建文本文件”

弹出新建了一个空白文件的窗口,窗口中提示“选择语言”

在弹出的语言选择下拉框中选择“Python”

弹出安装Python扩展的对话框

点击“安装”,进入“Python安装页面”并提示“正在安装” 
安装完成后,弹出创建Python文件窗口

点击“select a python interpreter”选择Python解释器
由于本机尚未安装Python,弹出的窗口提示“Python is not installed,please”,单机这个提示,开始安装“Python”
本机准备安装最新版本的Python解释器,因此,没有使用微软提供的Microsoft Store进行下载安装。暂时推出Visual Studio Code,直接进入Python官网进行安装
4、安装Python
Python官网:Python Releases for Windows | Python.org
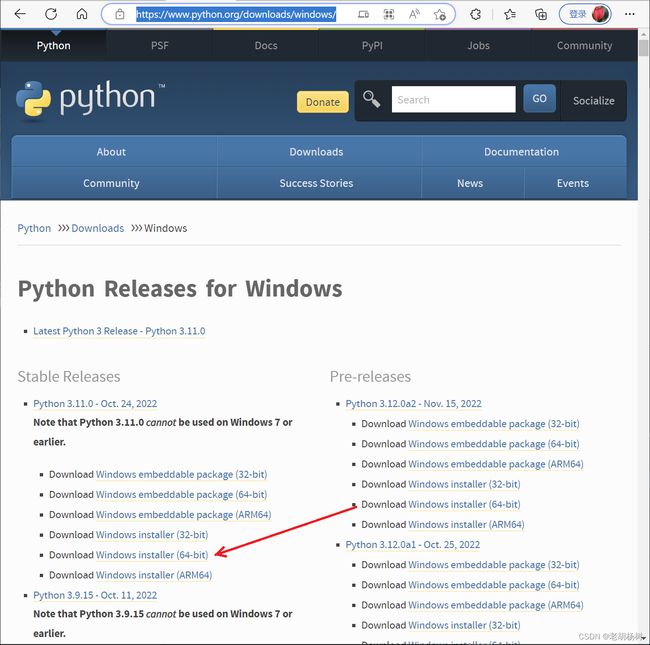
作者使用Windows10操作系统,如上图,选择Windows installer(64-bit)
单击,下载安装包:python-3.11.0-amd64.exe
下载完成后,单击安装包,进入Python安装界面
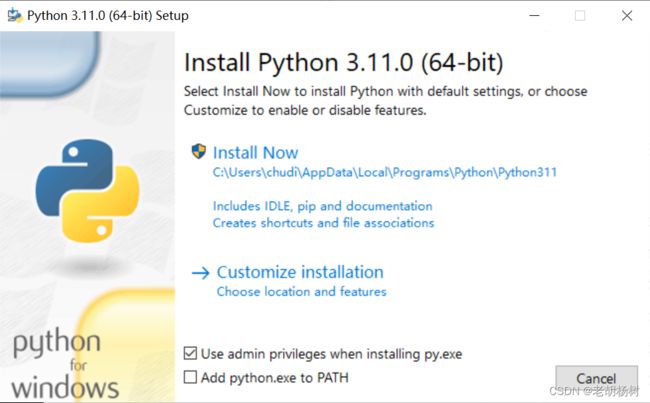
我使用了默认的安装位置:c:\Users\......
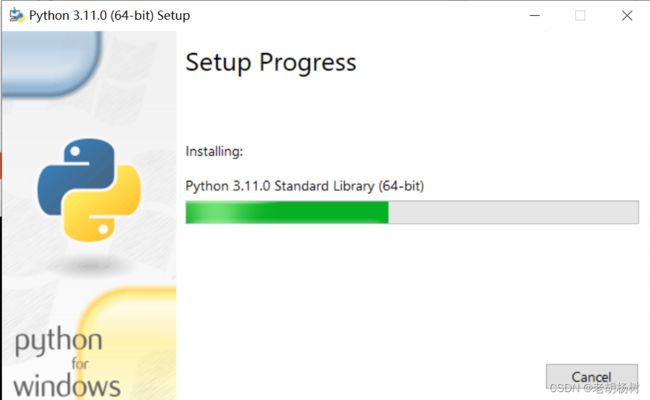
开始自动安装
安装完成后,弹出对话框

对框框提示:将Python包含到系统环境变量之中,将MAX_PATH限制值260去掉
5、重新启动Visual Studio Code
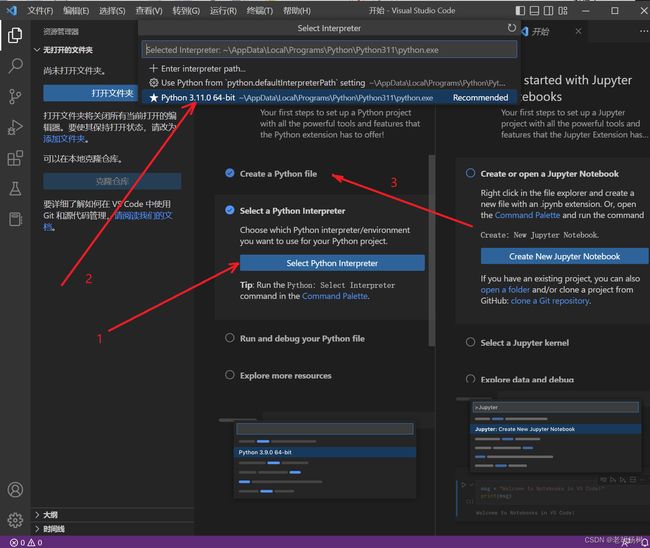
选择Python解释器,可以看到,里面出现了刚刚安装的Python3.11.0 64-bit的选项 ,选择Python3.11.0 64-bit,再单击“Create a Python file”,弹出“Create Python File”按钮,点击按钮,新建了一个Python文件:Untitled-1
6、第一个Python代码的Hello world
在新建的Untitled-1中,输入以下代码:
print('Hello Python World\nThis is a sample code!')
点击Visual Studio Code的“文件->保存”,选择一个文件夹,将代码文件保存到指定的文件夹中
点击代码窗口右上角的运行按钮,可以看到运行结果
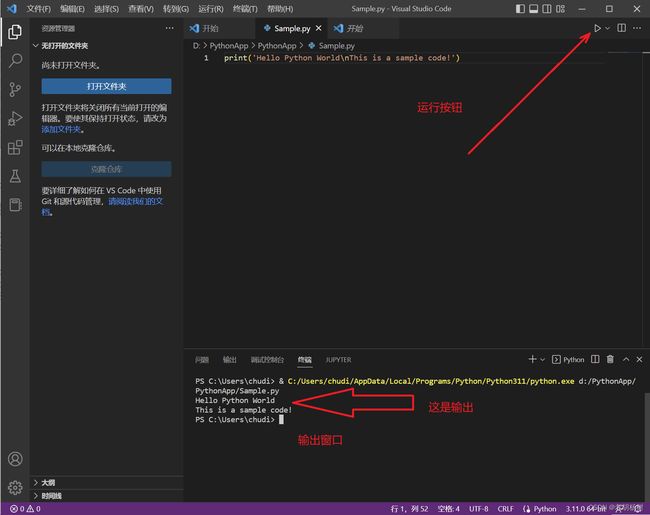
第一个Python程序顺利运行。