SpringBoot学习之自定义starter
之前熟悉了SpringBoot的自动配置原理,相关链接:SpringBoot学习之自动配置原理,今天来玩一下自定义起步依赖starter。
一、分析
以jdbc下DataSource自动配置参考为例:
1.DataSourceAutoConfiguration
@Configuration
@ConditionalOnClass({ DataSource.class, EmbeddedDatabaseType.class })
@EnableConfigurationProperties(DataSourceProperties.class)
@Import({ Registrar.class, DataSourcePoolMetadataProvidersConfiguration.class })
public class DataSourceAutoConfiguration {
...
2.DataSourceProperties
@ConfigurationProperties(prefix = "spring.datasource")
public class DataSourceProperties
		implements BeanClassLoaderAware, EnvironmentAware, InitializingBean {

	private ClassLoader classLoader;

	private Environment environment;
	...
3.spring.factories配置
4.总结
(1)自动配置的大体流程
1)@Configuration //指定一个配置类
2)@Conditionalxxx //在指定条件成立时自动配置类生效
3)@EnableConfigurationProperties //让xxxProperties文件生效并加入到容器
4)@ConfigurationProperties //注解相关xxxProperties文件来绑定相关属性
5)在META-INF 下的spring.factories中配置该自动配置类
(2)开始自定义starter
接下来分两步走:
- 第一是自定义starter并调试,在一个工程中验证;
- 第二是参照其他起步依赖配置模式打包生成自己的起步依赖starter
二、编写starter并调试
以自定义HttpClient自动配置为例:
1、创建一个Springboot工程
2、导入httpclient依赖
 	<dependency>
 		<groupId>org.apache.httpcomponentsgroupId>
 		<artifactId>httpclientartifactId>
 	dependency>
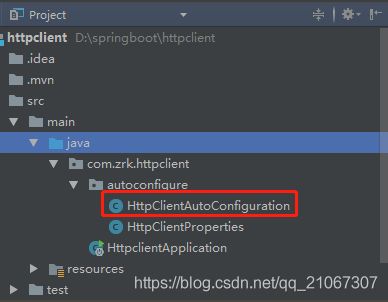
3、创建HttpClientProperties
/**
* @description: httpclient 属性配置类
*  在application.properties中进行配置,可以覆盖各属性的默认值
* @author: zrk
* @create: 2019-03-08
*/
@ConfigurationProperties(prefix = "zrk.httpclient")
public class HttpClientProperties {
 private Integer connectTimeOut = 1000;

 private Integer socketTimeOut = 10000;

 private String agent = "agent";

 private Integer maxConnPreRoute = 10;

 private Integer maxConnTotal = 50;

 public Integer getConnectTimeOut() {
     return connectTimeOut;
 }

 public void setConnectTimeOut(Integer connectTimeOut) {
     this.connectTimeOut = connectTimeOut;
 }

 public Integer getSocketTimeOut() {
     return socketTimeOut;
 }

 public void setSocketTimeOut(Integer socketTimeOut) {
     this.socketTimeOut = socketTimeOut;
 }

 public String getAgent() {
     return agent;
 }

 public void setAgent(String agent) {
     this.agent = agent;
 }

 public Integer getMaxConnPreRoute() {
     return maxConnPreRoute;
 }

 public void setMaxConnPreRoute(Integer maxConnPreRoute) {
     this.maxConnPreRoute = maxConnPreRoute;
 }

 public Integer getMaxConnTotal() {
     return maxConnTotal;
 }

 public void setMaxConnTotal(Integer maxConnTotal) {
     this.maxConnTotal = maxConnTotal;
 }
}
4、创建HttpClientAutoConfiguration
/**
 * @description: httpclient自动配置类
 * @author: zrk
 * @create: 2019-03-08
 */
@Configuration //配置类
@ConditionalOnClass({HttpClient.class}) //生效条件是HttpClient存在
@EnableConfigurationProperties(HttpClientProperties.class) //让配置文件生效并加入到容器
public class HttpClientAutoConfiguration {

    private final HttpClientProperties httpClientProperties;

    public HttpClientAutoConfiguration(HttpClientProperties httpClientProperties) {
        this.httpClientProperties = httpClientProperties;
    }

    @Bean
    @ConditionalOnMissingBean(HttpClient.class) //当容器中不存在HttpClient实力时此bean才加入容器
    public HttpClient httpClient(){
        RequestConfig requestConfig = RequestConfig.custom()
                .setConnectTimeout(httpClientProperties.getConnectTimeOut())
                .setSocketTimeout(httpClientProperties.getSocketTimeOut())
                .build();
        return HttpClientBuilder.create()
                .setDefaultRequestConfig(requestConfig)
                .setMaxConnPerRoute(httpClientProperties.getMaxConnPreRoute())
                .setMaxConnTotal(httpClientProperties.getMaxConnTotal())
                .setUserAgent(httpClientProperties.getAgent())
                .build();
    }
}
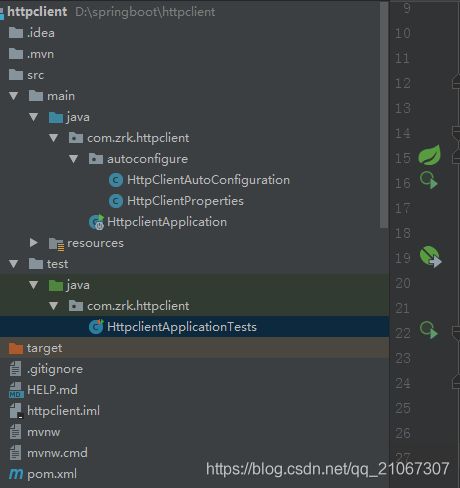
5、编写测试类并运行
@RunWith(SpringRunner.class)
@SpringBootTest
public class HttpclientApplicationTests {

	@Resource
	HttpClient httpClient;

	@Test
	public void httpclientTest() throws IOException {
		System.out.println(EntityUtils.toString(httpClient.execute(new HttpGet("http://www.baidu.com")).getEntity()));
	}
}
运行测试方法,控制台如下:

如图,可以正常访问并打印,证明自动配置已经生效。
但是现在暂未在META-INF中进行配置,自动配置生效是因为根据SpringBoot包扫描原理会扫描主启动类所在目录及以下目录的包(可以参考SpringBoot学习之包扫描),配置类在此子包中因此可以扫描到容器。
但作为起步依赖包让其他项目用是不再包扫描范围内的,接下来就用两种方式演示在扫描包之外路径如何使自动配置生效:
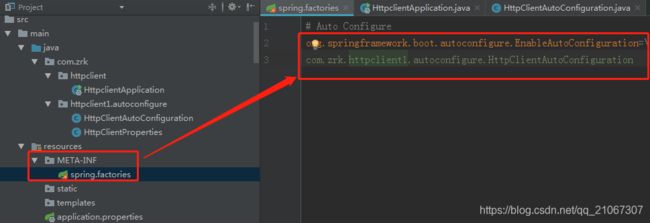
(1)在META-INF/spring.properties中配置
修改包名
移动包使其不在自动包扫描范围内

运行测试方法,报错,就是因为没有在容器中找到HttpClient的bean实例

创建META-INF/spring.properties文件并配置
org.springframework.boot.autoconfigure.EnableAutoConfiguration=\
com.zrk.httpclient1.autoconfigure.HttpClientAutoConfiguration
(2)自定义注解
参考@EnableAsync方式:
先将META-INF/spring.properties删除或改名使其不生效,再创建EnableHttpClient annotation
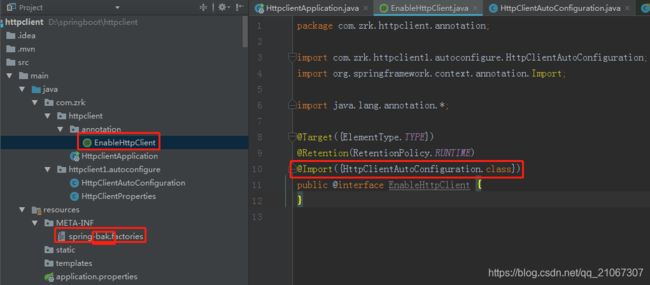
在主启动类上添加@EnableHttpClient注解

运行测试方法,成功:

三、正式编写starter并打包
参考MyBatis起步依赖模式:
- 启动器做依赖导入
- 编写自动配置模块
- 启动器依赖自动配置
这样需要依赖MyBatis时只需导入启动器starter即可,也可以直接写自动配置模块
自定义starter命名参考:
mybatis-spring-boot-starter -> 功能-spring-boot-starter
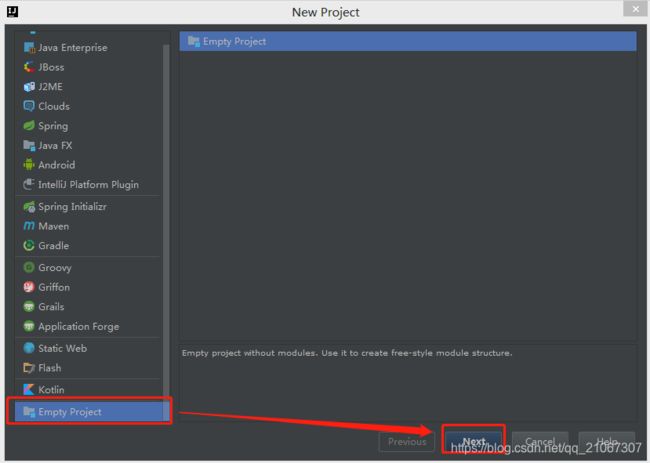
1、创建个空工程
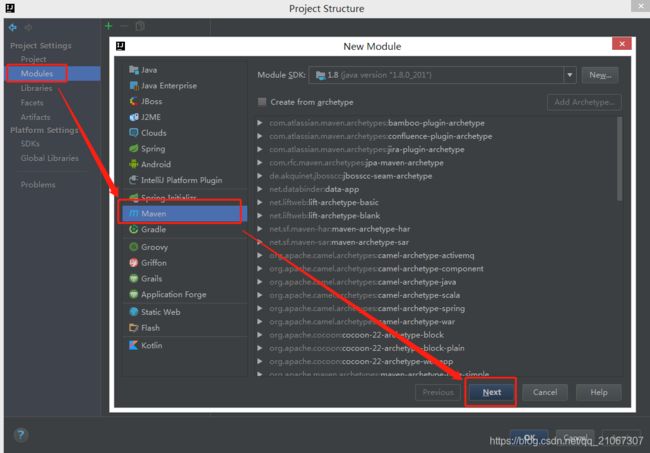
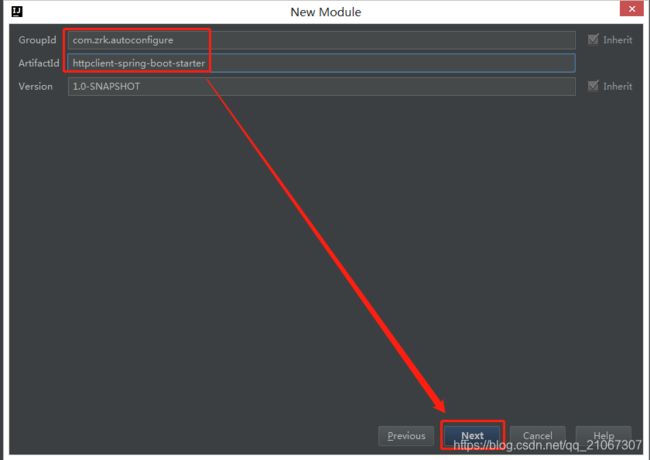
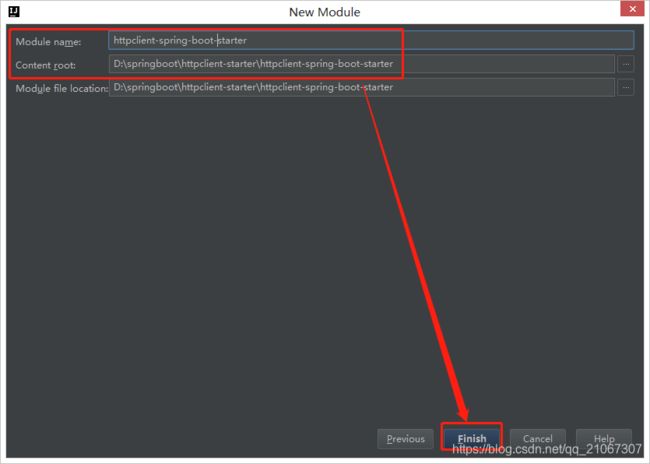
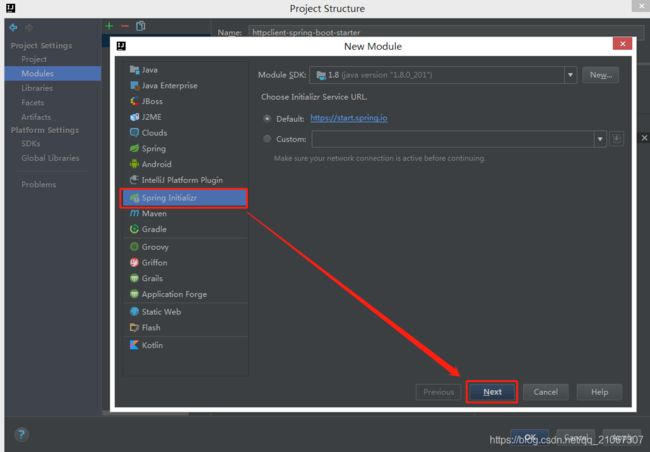
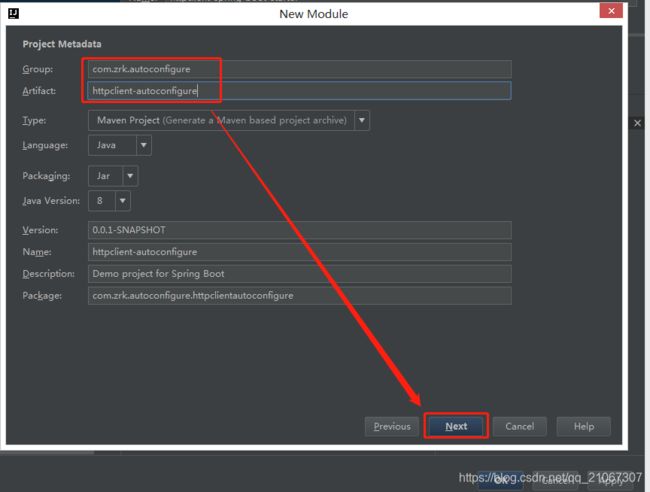
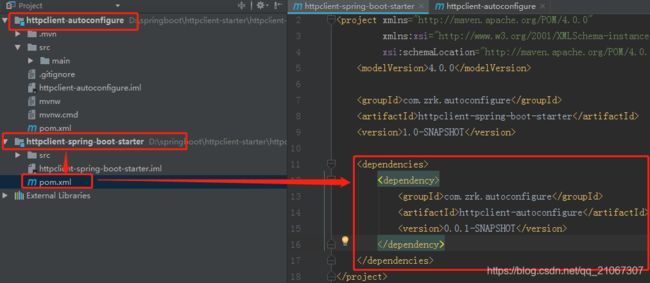
2、添加两个modules
3、在启动器pom文件中引入自动配置模块的坐标依赖
4、编写自动配置模块代码
添加自动配置类、添加属性配置类、添加META-INF/spring.factories文件,可以参考上面,这里不再赘述
因为是作为第三方依赖,所以测试依赖跟相关插件等依赖可以删除

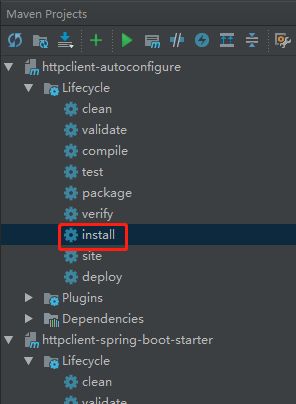
5、打包
6、创建新工程导入自定义starter进行测试
导入自定义starter:
		<dependency>
			<groupId>com.zrk.autoconfiguregroupId>
			<artifactId>httpclient-spring-boot-starterartifactId>
			<version>1.0-SNAPSHOTversion>
		dependency>
@RestController
public class HttpClientController {

    @Resource
    private HttpClient httpClient;

    @RequestMapping("goto")
    public String request(){
        try {
            return EntityUtils.toString(httpClient.execute(new HttpGet("http://www.baidu.com")).getEntity());
        } catch (IOException e) {
            e.printStackTrace();
        }
        return "";
    }
}
启动项目,访问http://localhost:8080/goto,虽有中文乱码,但是自动配置是生效了~

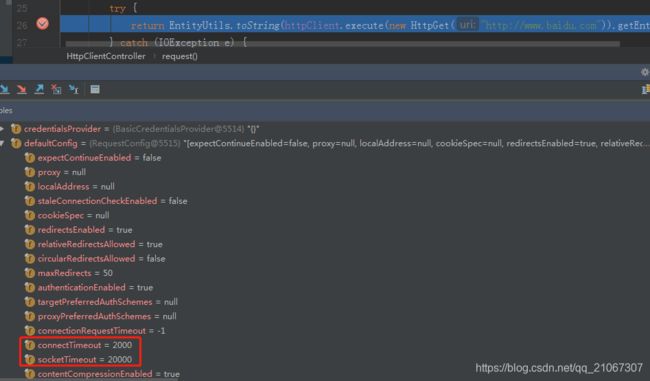
打断点,调试如下
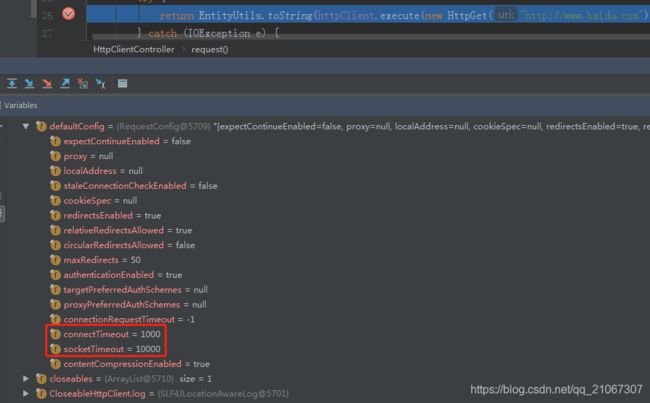
修改application.properties
zrk.httpclient.connectTimeOut=2000
zrk.httpclient.socketTimeOut=20000
四、总结
总之,参考源代码,理解框架的设计思路,并按照总结的方式一步步跟着玩,就可以学会自定义starter。

