【kubernetes】k8s部署APISIX及在KubeSphere使用APISIX
Apache APISIX
https://apisix.apache.org/
功能比nginx-ingress更强
本文采用2.5.0版本
https://apisix.apache.org/zh/docs/apisix/2.15/getting-started/
概述内容来源于官方,学习于马士兵云原生课程
概述
Apache APISIX 是什么?
Apache APISIX 是 Apache 软件基金会下的云原生 API 网关,它兼具动态、实时、高性能等特点,提供了负载均衡、动态上游、灰度发布(金丝雀发布)、服务熔断、身份认证、可观测性等丰富的流量管理功能。我们可以使用 Apache APISIX 来处理传统的南北向流量,也可以处理服务间的东西向流量。同时,它也支持作为 K8s Ingress Controller 来使用。
主要特性
- 多平台支持:APISIX 提供了多平台解决方案,它不但支持裸机运行,也支持在 Kubernetes 中使用,还支持与 AWS Lambda、Azure Function、Lua 函数和 Apache OpenWhisk 等云服务集成。
- 全动态能力:APISIX 支持热加载,这意味着你不需要重启服务就可以更新 APISIX 的配置。请访问为什么 Apache APISIX 选择 Nginx + Lua 这个技术栈?以了解实现原理。
- 精细化路由:APISIX 支持使用 NGINX 内置变量做为路由的匹配条件,你可以自定义匹配函数来过滤请求,匹配路由。
- 运维友好:APISIX 支持与以下工具和平台集成:HashiCorp Vault、Zipkin、Apache SkyWalking、Consul、Nacos、Eureka。通过 APISIX Dashboard,运维人员可以通过友好且直观的 UI 配置 APISIX。
- 多语言插件支持:APISIX 支持多种开发语言进行插件开发,开发人员可以选择擅长语言的 SDK 开发自定义插件。
主要概念
| 概念/组件 | 描述 |
|---|---|
| Route | 通过路由定义规则来匹配客户端请求,根据匹配结果加载并执行相应的插件,最后把请求转发给到指定的上游应用。 |
| Upstream | 上游的作用是按照配置规则对服务节点进行负载均衡,它的地址信息可以直接配置到路由或服务上。 |
| Admin API | 用户可以通过 Admin API 控制 APISIX 实例。 |
部署
本次采用应用仓库部署
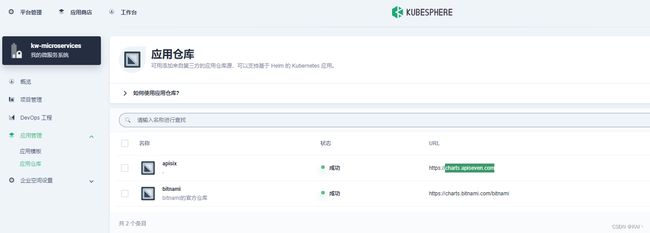
添加应用仓库
进入企业空间-应用管理-应用仓库
添加应用仓库charts.apiseven.com

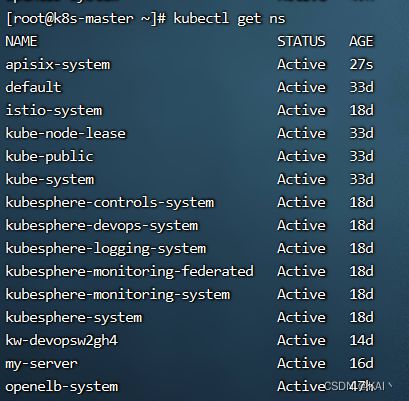
创建项目apisix-system

创建应用
进入项目控制台,应用负载-应用
部署新应用-选择应用模板,选择apisix,部署第三个

学习阶段,选择视频教程中的版本一致,0.11.2(2.5.0)
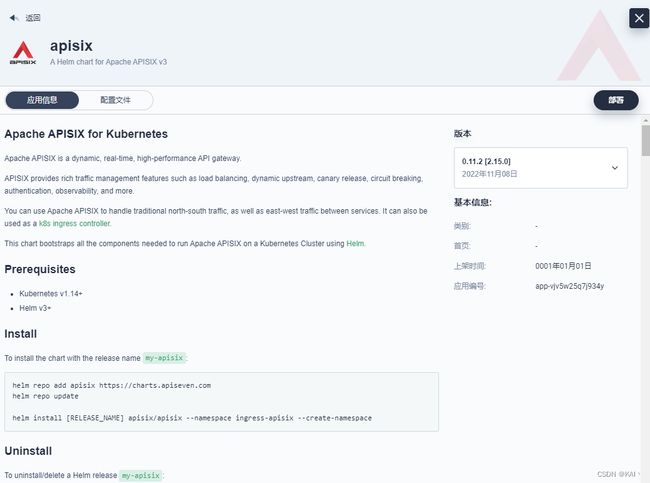
点击部署
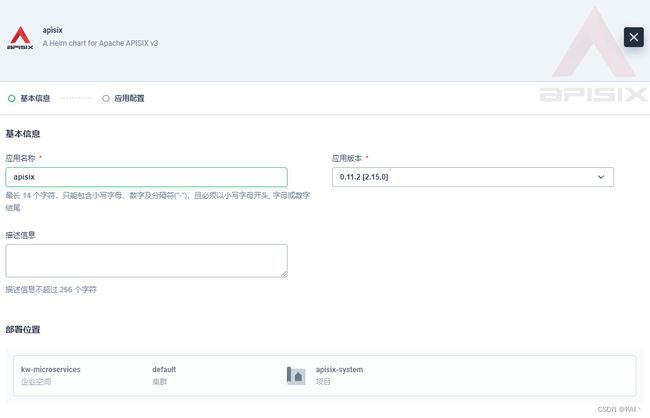
下一步

修改配置文件
改动了10处内容,标注了"改动"二字
复制下面内容,覆盖上面的配置即可
#
# Licensed to the Apache Software Foundation (ASF) under one or more
# contributor license agreements.  See the NOTICE file distributed with
# this work for additional information regarding copyright ownership.
# The ASF licenses this file to You under the Apache License, Version 2.0
# (the "License"); you may not use this file except in compliance with
# the License.  You may obtain a copy of the License at
#
#     http://www.apache.org/licenses/LICENSE-2.0
#
# Unless required by applicable law or agreed to in writing, software
# distributed under the License is distributed on an "AS IS" BASIS,
# WITHOUT WARRANTIES OR CONDITIONS OF ANY KIND, either express or implied.
# See the License for the specific language governing permissions and
# limitations under the License.

global:
  # e.g.
  # imagePullSecrets:
  #   - my-registry-secrets
  #   - other-registry-secrets
  #
  imagePullSecrets: []

apisix:
  # Enable or disable Apache APISIX itself
  # Set it to false and ingress-controller.enabled=true will deploy only ingress-controller
  enabled: true

  # Enable nginx IPv6 resolver
  enableIPv6: true

  # Whether the APISIX version number should be shown in Server header
  enableServerTokens: true

  # Use Pod metadata.uid as the APISIX id.
  setIDFromPodUID: false

  customLuaSharedDicts: []
    # - name: foo
    #   size: 10k
    # - name: bar
    #   size: 1m
  luaModuleHook:
    enabled: false
    # extend lua_package_path to load third party code
    luaPath: ""
    # the hook module which will be used to inject third party code into APISIX
    # use the lua require style like: "module.say_hello"
    hookPoint: ""
    # configmap that stores the codes
    configMapRef:
      name: ""
      # mounts decides how to mount the codes to the container.
      mounts:
        - key: ""
          path: ""

  # Defines how apisix handles routing:
  # - radixtree_uri: match route by uri(base on radixtree)
  # - radixtree_host_uri: match route by host + uri(base on radixtree)
  # - radixtree_uri_with_parameter: match route by uri with parameters
  httpRouter: radixtree_uri

  enableCustomizedConfig: false
  customizedConfig: {}

  image:
    repository: apache/apisix
    pullPolicy: IfNotPresent
    # Overrides the image tag whose default is the chart appVersion.
    tag: 2.15.0-alpine

  # Use a `DaemonSet` or `Deployment`
  kind: Deployment
  # kind is DaemonSet, replicaCount not become effective
  replicaCount: 1

  priorityClassName: ""
  podAnnotations: {}
  podSecurityContext: {}
    # fsGroup: 2000
  securityContext: {}
    # capabilities:
    #   drop:
    #   - ALL
    # readOnlyRootFilesystem: true
    # runAsNonRoot: true
    # runAsUser: 1000

  # See https://kubernetes.io/docs/tasks/run-application/configure-pdb/ for more details
  podDisruptionBudget:
    enabled: false
    minAvailable: 90%
    maxUnavailable: 1

  resources: {}
    # We usually recommend not to specify default resources and to leave this as a conscious
    # choice for the user. This also increases chances charts run on environments with little
    # resources, such as Minikube. If you do want to specify resources, uncomment the following
    # lines, adjust them as necessary, and remove the curly braces after 'resources:'.
    # limits:
    #   cpu: 100m
    #   memory: 128Mi
    # requests:
    #   cpu: 100m
    #   memory: 128Mi
  hostNetwork: false

  nodeSelector: {}
  tolerations: []
  affinity: {}

  # timezone is the timezone where apisix uses.
  # For example: "UTC" or "Asia/Shanghai"
  # This value will be set on apisix container's environment variable TZ.
  # You may need to set the timezone to be consistent with your local time zone,
  # otherwise the apisix's logs may used to retrieve event maybe in wrong timezone.
  timezone: ""

  # extraEnvVars An array to add extra env vars
  # e.g:
  # extraEnvVars:
  #   - name: FOO
  #     value: "bar"
  #   - name: FOO2
  #     valueFrom:
  #       secretKeyRef:
  #         name: SECRET_NAME
  #         key: KEY
  extraEnvVars: []

nameOverride: ""
fullnameOverride: ""

serviceAccount:
  create: false
  annotations: {}
  name: ""

rbac:
  create: false

gateway:
  type: NodePort #改动1 这里先不改,后面改为OpenELB,暴露外网访问
  # If you want to keep the client source IP, you can set this to Local.
  # ref: https://kubernetes.io/docs/tasks/access-application-cluster/create-external-load-balancer/#preserving-the-client-source-ip
  externalTrafficPolicy: Cluster
  # type: LoadBalancer
  # annotations:
  #   service.beta.kubernetes.io/aws-load-balancer-type: nlb
  externalIPs: []
  http:
    enabled: true
    servicePort: 80
    containerPort: 9080
  tls:
    enabled: false
    servicePort: 443
    containerPort: 9443
    existingCASecret: ""
    certCAFilename: ""
    http2:
      enabled: true
    sslProtocols: "TLSv1.2 TLSv1.3"
  # L4 proxy (TCP/UDP)
  stream:
    enabled: false
    only: false
    tcp: []
    udp: []
  ingress:
    enabled: false
    annotations: {}
      # kubernetes.io/ingress.class: nginx
      # kubernetes.io/tls-acme: "true"
    hosts:
      - host: apisix.local
        paths: []
    tls: []
  #  - secretName: apisix-tls
  #    hosts:
  #      - chart-example.local

admin:
  # Enable Admin API
  enabled: true
  # admin service type
  type: ClusterIP
  # loadBalancerIP: a.b.c.d
  # loadBalancerSourceRanges:
  #   - "143.231.0.0/16"
  externalIPs: []
  #
  port: 9180
  servicePort: 9180
  # Admin API support CORS response headers
  cors: true
  # Admin API credentials
  credentials:
    admin: edd1c9f034335f136f87ad84b625c8f1
    viewer: 4054f7cf07e344346cd3f287985e76a2

  allow:
    # The client IP CIDR allowed to access Apache APISIX Admin API service.
    ipList:
      - 0.0.0.0/0  #改动2 改为0.0.0.0

nginx:
  workerRlimitNofile: "20480"
  workerConnections: "10620"
  workerProcesses: auto
  enableCPUAffinity: true
  envs: []

# APISIX plugins to be enabled
plugins:
  - api-breaker
  - authz-keycloak
  - basic-auth
  - batch-requests
  - consumer-restriction
  - cors
  - echo
  - fault-injection
  - file-logger
  - grpc-transcode
  - hmac-auth
  - http-logger
  - ip-restriction
  - ua-restriction
  - jwt-auth
  - kafka-logger
  - key-auth
  - limit-conn
  - limit-count
  - limit-req
  - node-status
  - openid-connect
  - authz-casbin
  - prometheus
  - proxy-cache
  - proxy-mirror
  - proxy-rewrite
  - redirect
  - referer-restriction
  - request-id
  - request-validation
  - response-rewrite
  - serverless-post-function
  - serverless-pre-function
  - sls-logger
  - syslog
  - tcp-logger
  - udp-logger
  - uri-blocker
  - wolf-rbac
  - zipkin
  - traffic-split
  - gzip
  - real-ip
  - ext-plugin-pre-req
  - ext-plugin-post-req
  - server-info  #改动3 添加此行,以便配合dashboard展示服务信息
stream_plugins:
  - mqtt-proxy
  - ip-restriction
  - limit-conn

pluginAttrs: {}

extPlugin:
  enabled: false
  cmd: ["/path/to/apisix-plugin-runner/runner", "run"]

wasmPlugins:
  enabled: false
  plugins: []

# customPlugins allows you to mount your own HTTP plugins.
customPlugins:
  enabled: false
  # the lua_path that tells APISIX where it can find plugins,
  # note the last ';' is required.
  luaPath: "/opts/custom_plugins/?.lua"
  plugins:
    # plugin name.
    - name: "prometheus" #改动4
      # plugin attrs
      attrs:   ##改动5 添加如下内容
        export_addr:
        ip: 0.0.0.0
        port: 9091
      # plugin codes can be saved inside configmap object.
      configMap:
        # name of configmap.
        name: "prometheus" #改动6
        # since keys in configmap is flat, mountPath allows to define the mount
        # path, so that plugin codes can be mounted hierarchically.
        mounts:
          - key: ""
            path: ""
          - key: ""
            path: ""

updateStrategy: {}
  # type: RollingUpdate

extraVolumes: []
# - name: extras
#   emptyDir: {}

extraVolumeMounts: []
# - name: extras
#   mountPath: /usr/share/extras
#   readOnly: true

extraInitContainers: []
# - name: init-myservice
#   image: busybox:1.28
#   command: ['sh', '-c', "until nslookup myservice.$(cat /var/run/secrets/kubernetes.io/serviceaccount/namespace).svc.cluster.local; do echo waiting for myservice; sleep 2; done"]

discovery:
  enabled: false
  registry: {}
    # Integration service discovery registry. E.g eureka\dns\nacos\consul_kv
    # reference:
    # https://apisix.apache.org/docs/apisix/discovery/#configuration-for-eureka
    # https://apisix.apache.org/docs/apisix/discovery/dns/#service-discovery-via-dns
    # https://apisix.apache.org/docs/apisix/discovery/consul_kv/#configuration-for-consul-kv
    # https://apisix.apache.org/docs/apisix/discovery/nacos/#configuration-for-nacos
    # https://apisix.apache.org/docs/apisix/discovery/kubernetes/#configuration
    #
    # an eureka example:
    # ```
    # eureka:
    #   host:
    #     - "http://${username}:${password}@${eureka_host1}:${eureka_port1}"
    #     - "http://${username}:${password}@${eureka_host2}:${eureka_port2}"
    #   prefix: "/eureka/"
    #   fetch_interval: 30
    #   weight: 100
    #   timeout:
    #     connect: 2000
    #     send: 2000
    #     read: 5000
    # ```
    #
    # the minimal Kubernetes example:
    # ```
    # kubernetes: {}
    # ```
    #
    # The prerequisites for the above minimal Kubernetes example:
    #  1. [Optional] Set `.serviceAccount.create` to `true` to create a dedicated ServiceAccount.
    #     It is recommended to do so, otherwise the default ServiceAccount "default" will be used.
    #  2. [Required] Set `.rbac.create` to `true` to create and bind the necessary RBAC resources.
    #     This grants the ServiceAccount in use to List-Watch Kubernetes Endpoints resources.
    #  3. [Required] Include the following environment variables in `.nginx.envs` to pass them into
    #     nginx worker processes (https://nginx.org/en/docs/ngx_core_module.html#env):
    #      - KUBERNETES_SERVICE_HOST
    #      - KUBERNETES_SERVICE_PORT
    #     This is for allowing the default `host` and `port` of `.discovery.registry.kubernetes.service`.

# access log and error log configuration
logs:
  enableAccessLog: true
  accessLog: "/dev/stdout"
  accessLogFormat: '$remote_addr - $remote_user [$time_local] $http_host \"$request\" $status $body_bytes_sent $request_time \"$http_referer\" \"$http_user_agent\" $upstream_addr $upstream_status $upstream_response_time \"$upstream_scheme://$upstream_host$upstream_uri\"'
  accessLogFormatEscape: default
  errorLog: "/dev/stderr"
  errorLogLevel: "warn"

dns:
  resolvers:
    - 127.0.0.1
    - 172.20.0.10
    - 114.114.114.114
    - 223.5.5.5
    - 1.1.1.1
    - 8.8.8.8
  validity: 30
  timeout: 5

initContainer:
  image: busybox
  tag: 1.28

autoscaling:
  enabled: false
  minReplicas: 1
  maxReplicas: 100
  targetCPUUtilizationPercentage: 80
  targetMemoryUtilizationPercentage: 80

# Custom configuration snippet.
configurationSnippet:
  main: |

  httpStart: |

  httpEnd: |

  httpSrv: |

  httpAdmin: |

  stream: |

# Observability configuration.
# ref: https://apisix.apache.org/docs/apisix/plugins/prometheus/
serviceMonitor:
  enabled: true #改动7
  # namespace where the serviceMonitor is deployed, by default, it is the same as the namespace of the apisix
  namespace: "apisix-system" #改动8
  # name of the serviceMonitor, by default, it is the same as the apisix fullname
  name: ""
  # interval at which metrics should be scraped
  interval: 15s
  # path of the metrics endpoint
  path: /apisix/prometheus/metrics
  # prefix of the metrics
  metricPrefix: apisix_
  # container port where the metrics are exposed
  containerPort: 9091
  # @param serviceMonitor.labels ServiceMonitor extra labels
  labels: {}
  # @param serviceMonitor.annotations ServiceMonitor annotations
  annotations: {}

# etcd configuration
# use the FQDN address or the IP of the etcd
etcd:
  # install etcd(v3) by default, set false if do not want to install etcd(v3) together
  enabled: true
  host:
    # host or ip e.g. http://172.20.128.89:2379
    - http://etcd.host:2379
  prefix: "/apisix"
  timeout: 30

  # if etcd.enabled is true, set more values of bitnami/etcd helm chart
  auth:
    rbac:
      # No authentication by default
      create: false
      user: ""
      password: ""
    tls:
      enabled: false
      existingSecret: ""
      certFilename: ""
      certKeyFilename: ""
      verify: true
      sni: ""

  service:
    port: 2379

  replicaCount: 3

#改动9
dashboard:   #开启并添加如下内容,实现访问
  enabled: true
  service:
    type: NodePort

#改动10
ingress-controller:     #开启并添加如下内容,实现监控。
  enabled: true
  config:
    apisix:
      serviceNamespace: apisix-system
  ServiceMonitor:
    enabled: true
    namespace: 'apisix-system'
    interval: 15s

vault:
  enabled: false
  host: ""
  timeout: 10
  token: ""
  prefix: ""
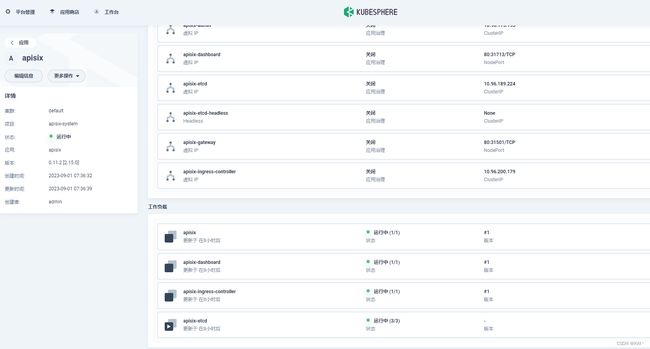
点击部署,等一会查看部署情况,网络不行可能出现镜像拉取失败的情况

部署成功
测试访问
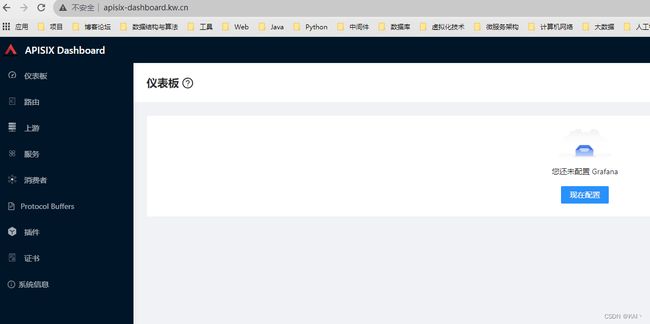
测试访问dashboard
查看服务信息

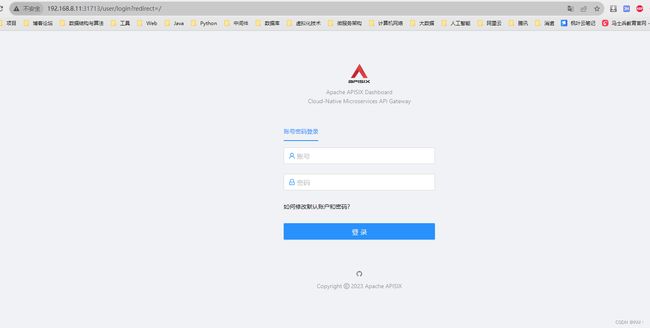
默认账户密码
admin
admin

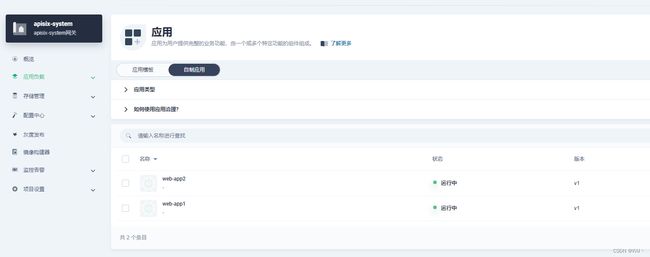
使用apisix
创建两个nginx服务,不暴露外网访问
web-app1
web-app2
#挂载一下index.html文件,或者部署好直进入容器中修改index.html
#为了测试apisix网关的效果
#修改一下Nginx中的内容
#进入上面创建的两个服务中
#进入该目录/usr/share/nginx/html
#分别修改index.html的内容为
#web-app1.kw.cn
#web-app2.kw.cn
#进入该目录
cd /usr/share/nginx/html
#清空内容
>index.html
#没有vi命令,使用追加命令
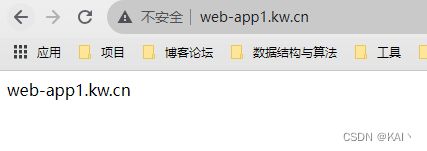
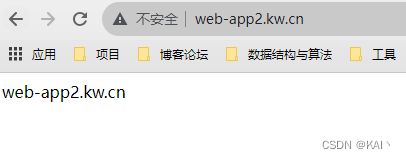
echo "web-app1.kw.cn" >> index.html
#查看是否修改成功
cat index.html
web-app1.kw.cn
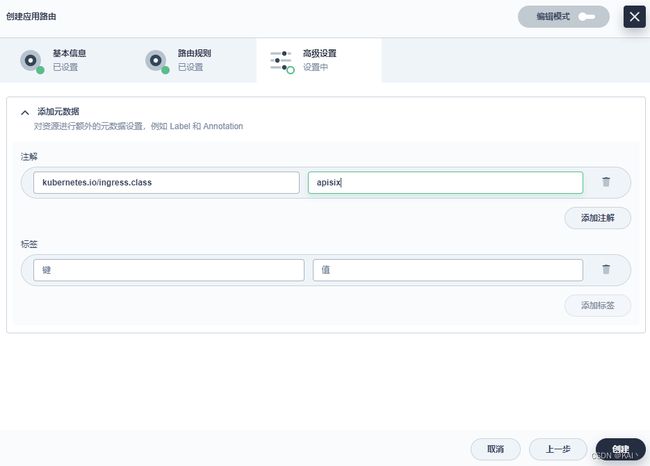
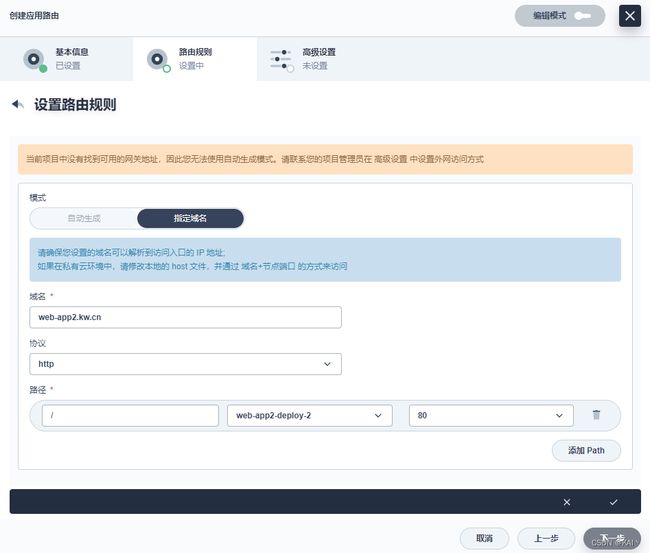
创建应用路由
上面创建的两个ng服务,这里分别增加对应的应用路由
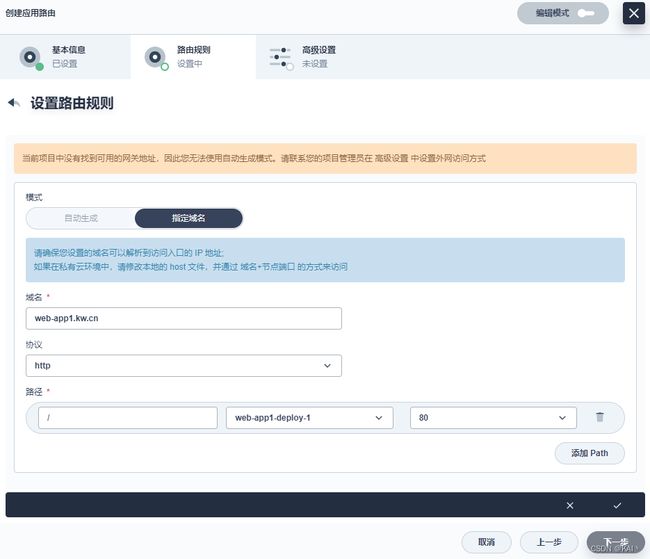
下一步添加元数据注解
#元数据,添加注解
kubernetes.io/ingress.class:apisix
第二个服务同上
查看apisix dashboard,路由菜单,
可以看到显示了刚刚创建的两个应用路由

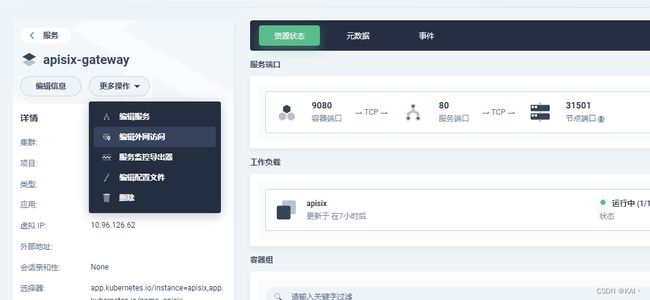
查看网关服务
查看apisix-gateway服务

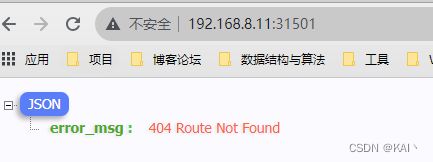
测试效果
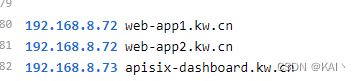
#配置域名解析
192.168.8.11 web-app1.kw.cn
192.168.8.11 web-app2.kw.cn
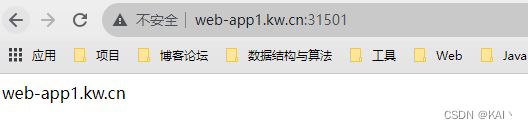
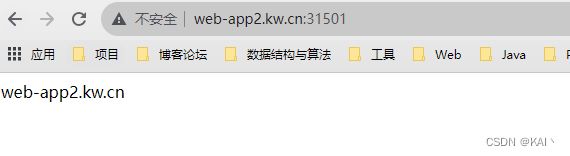
成功访问到了对应的ng服务,说明apisix配置成功。
但不应该携带端口,即应该使用默认端口80,那么就需要调整apisix-gateway的外网访问方式。
使用openelb配置apisix
需要修改这两项,不再使用NodePort方式访问apisix服务

修改apisix-gateway服务
编辑外网访问
访问方式修改为LoadBalancer
#将下面的键值对填写到注解列表中
lb.kubesphere.io/v1alpha1:openelb
protocol.openelb.kubesphere.io/v1alpha1:layer2
eip.openelb.kubesphere.io/v1alpha2:layer2-eip
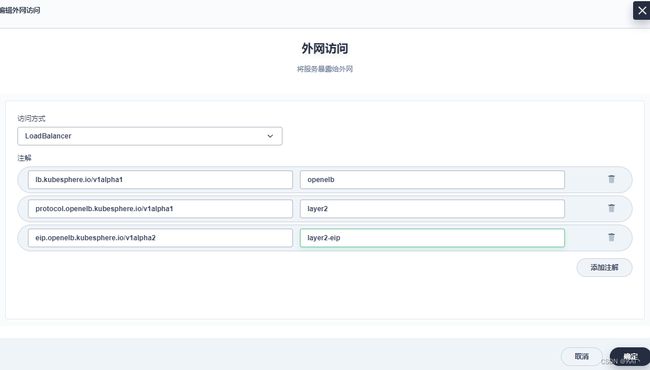
有了外网访问地址

此时,使用80端口,即可访问apisix-gateway
修改apisix-dashboard
同上操作,修改apisix-dashboard
此时,使用80端口,即可访问apisix-dashboard

给dashboard创建一个应用路由,配置域名解析
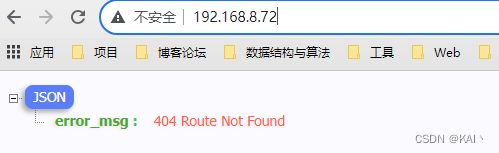
测试访问
测试访问2个ng服务
配置域名解析,72为上面使用openelb之后,给apisix-gateway分配的ip
测试访问
可以看到不需要携带显示端口就可以访问对应的服务了
对apisix监控
略,没整好。。。监控不到数据,后续正好补充。