Java 实现 Springboot 定时任务(每隔一段时间自动执行一次)
Java实现非Web项目的Springboot定时任务(每3秒自动执行一次)
- 前言
- 一、新建Java Springboot项目
- 二、示例代码
- 运行效果
- 总结
前言
运行非Web的Springboot项目时,会发现启动主类后马上就会停止,普通的Timer定时器无法达到定时自动执行Springboot项目的效果,下面我们用Springboot自带的注解(@Component、@Scheduled、@EnableScheduling)来进行定时任务。
@Component 加在类名上,代表这个类确保会被springboot扫描到
@Scheduled 加在方法名上来声明下面的方法是一个定时任务,注解的括号里包括 cron,fixDelay,fixRate 等类型
@EnableScheduling 加在启动类上,意思是 开启定时器任务
下面有各注解和参数的详解。
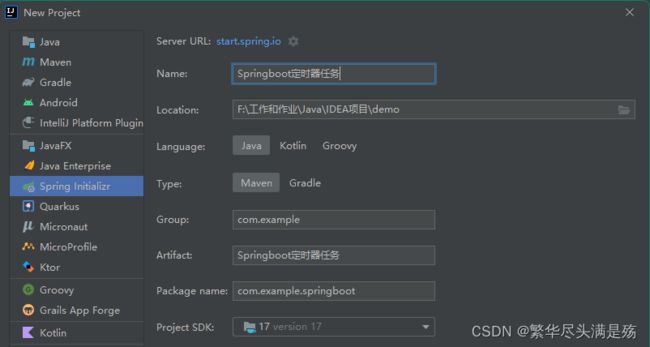
一、新建Java Springboot项目
二、示例代码
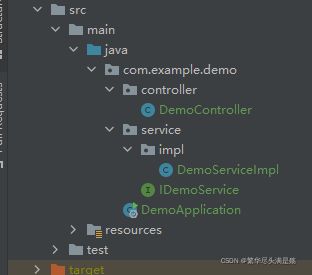
我们像往常的写法一样,把Springboot的结构随便写一写。

首先是service和impl的代码,没什么不同
IDemoService:
package com.example.demo.service;

public interface IDemoService {
    void demo();
}
DemoServiceImpl:
package com.example.demo.service.impl;

import com.example.demo.service.IDemoService;
import org.springframework.stereotype.Service;

import java.util.Date;

@Service
public class DemoServiceImpl implements IDemoService {

    @Override
    public void demo() {
        System.out.println(new Date());
    }
}
不同的是controller层和启动主类
下面是DemoController代码,注意看,我多加了@Component注解,下面的demo()方法上面多加了一个@Scheduled(fixedRate = 3000)
package com.example.demo.controller;

import com.example.demo.service.IDemoService;
import org.springframework.beans.factory.annotation.Autowired;
import org.springframework.scheduling.annotation.Scheduled;
import org.springframework.stereotype.Component;
import org.springframework.stereotype.Controller;

@Controller
@Component
public class DemoController {
    @Autowired
    private IDemoService demoService;

    @Scheduled(fixedRate = 3000)
    public void demo() {
        demoService.demo();
    }
}
@Component 代表这个类确保会被springboot扫描到
@Scheduled 来声明下面的方法是一个定时任务,注解的括号里包括 cron,fixDelay,fixRate 等类型
@Scheduled(fixedRate = 3000)里的fixedRate = 3000代表每3000毫秒执行一次,也就是3秒
也可以写@Scheduled(cron="0/3 * * * * ? ") 意思也是每3秒执行一次,cron表达式大家可以百度一下,比较复杂的执行逻辑可以用,很简单
@Scheduled注解可以控制方法定时执行,括号里参数可选
1、fixedDelay控制方法执行的间隔时间,是以上一次方法执行完开始算起,如上一次方法执行阻塞住了,那么直到上一次执行完,并间隔给定的时间后,执行下一次。
2、fixedRate是按照一定的速率执行,是从上一次方法执行开始的时间算起,如果上一次方法阻塞住了,下一次也是不会执行,但是在阻塞这段时间内累计应该执行的次数,当不再阻塞时,一下子把这些全部执行掉,而后再按照固定速率继续执行。
3、cron表达式可以定制化执行任务,但是执行的方式是与fixedDelay相近的,也是会按照上一次方法结束时间开始算起。
4、initialDelay 。如: @Scheduled(initialDelay = 10000,fixedRate = 15000
这个定时器就是在上一个的基础上加了一个initialDelay = 10000 意思就是在容器启动后,延迟10秒后再执行一次定时器,以后每15秒再执行一次该定时器。
DemoApplication启动类代码
上面新加了@EnableScheduling注解,意思是 开启定时器任务
package com.example.demo;

import org.springframework.boot.SpringApplication;
import org.springframework.boot.autoconfigure.SpringBootApplication;
import org.springframework.scheduling.annotation.EnableScheduling;

@SpringBootApplication
@EnableScheduling
public class DemoApplication {

    public static void main(String[] args) {
        SpringApplication.run(DemoApplication.class, args);
    }

}
运行效果
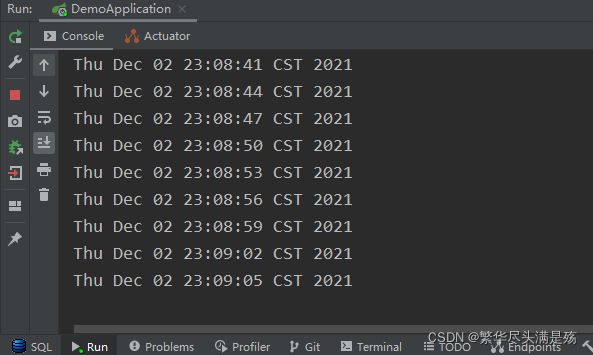
启动DemoApplication,效果如下,每3秒输出一次时间,也就是DemoController下面的demo方法被每3秒执行了一次,而且会一直运行,不会停止。
总结
定时任务可以干很多事情,可以自定义执行方法,比如每天0点自动调用一次接口更新数据库数据,等等
如果想要让Springboot项目执行1天以后或者执行100次以后自动停止定时任务,以及更复杂的执行逻辑,就要如果想要让Springboot项目执行1天以后或者执行100次以后自动停止定时任务,以及更复杂的执行逻辑,就要使用定时任务框架quartz、xxl-job-elastic-job了,后面会写。

