prometheus,grafana与JAVA操作实战记录总结
prometheus,grafana与JAVA操作实战记录总结
- 前言
- 一、软件的安装
-
- 安装命令
- 初次安装效果
-
- promethues
- pushgateway
- grafana
- 二、通过JAVA写入数据
-
- 配置prometheus拉取pushgateway数据
- 使用JAVA写入数据
-
- 导入依赖包
- 实现代码
- 数据插入效果
-
- pushgateway效果
- prometheus效果
- 配置grafana
- promQL语法学习
- 总结
前言
本篇文章主要自己记录一下prometheus,grafana,JAVA写入数据的操作日志。其中有一些操作大家各取所需。话不多说直接写操作流程。
一、软件的安装
安装命令
本次使用的是docker安装软件。
prometheus安装命令
-d 后台运行,窗口退出依然在运行
--name 指定容器名称
-p 指定端口运行
-v 将本机路径文件映射到容器中的文件 作用:修改本机文件配置 自动同步到容器中的文件配置
docker run -d --name=prometheus -p 9090:9090 -v /etc/prometheus/prometheus.yml:/etc/prometheus/prometheus.yml prom/prometheus
pushgateway安装命令
docker run -d -p 9091:9091 prom/pushgateway
grafana安装命令
docker run -d --name=grafana -p 3000:3000 grafana/grafana
可以去docker官方找容器版本。官方地址为https://hub.docker.com/search
初次安装效果
直接访问IP:端口就可以。
promethues
pushgateway
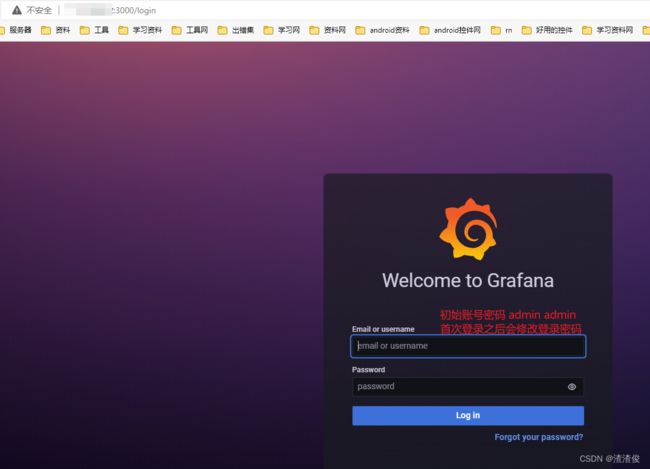
grafana
二、通过JAVA写入数据
配置prometheus拉取pushgateway数据
之前映射了配置文件,直接在服务器上修改配置文件,然后重启prometheus即可。
# my global config
global:
  scrape_interval: 15s # Set the scrape interval to every 15 seconds. Default is every 1 minute.
  evaluation_interval: 15s # Evaluate rules every 15 seconds. The default is every 1 minute.
  # scrape_timeout is set to the global default (10s).

# Alertmanager configuration
alerting:
  alertmanagers:
    - static_configs:
        - targets:
          # - alertmanager:9093

# Load rules once and periodically evaluate them according to the global 'evaluation_interval'.
rule_files:
  # - "first_rules.yml"
  # - "second_rules.yml"

# A scrape configuration containing exactly one endpoint to scrape:
# Here it's Prometheus itself.
scrape_configs:
  # The job name is added as a label `job=` to any timeseries scraped from this config.
  - job_name: "prometheus"

    # metrics_path defaults to '/metrics'
    # scheme defaults to 'http'.
    static_configs:
      - targets: ["localhost:9090"]

  - job_name: "pushgateway" #pushgateway的拉取配置就是这
    static_configs:
      - targets: ["localhost:9091"] #配置从哪个地址拉取,多个直接在数组中添加即可。例:- targets: ["localhost:9091","localhost2:9091","localhost3:9091"]
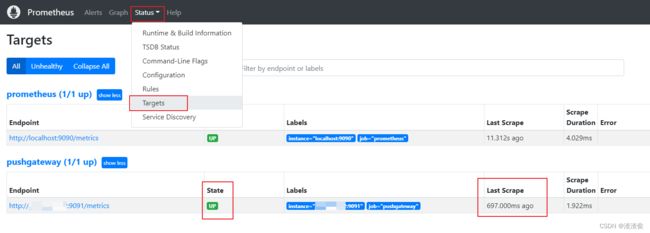
配置重启之后,可以在status=>targets中查看,如果state状态为down不要急,他是根据配置的拉取时间间隔去拉取的,等待拉取就会变成up。如下图。

使用JAVA写入数据
我这里是实现根据参入的参数,自动写入不同的metrics【可以理解为表】中,同时保存的数据label【可以理解为表字段】也不一样。
导入依赖包
pom.xml
		<dependency>
			<groupId>io.prometheusgroupId>
			<artifactId>simpleclientartifactId>
			<version>0.15.0version>
		dependency>

		<dependency>
			<groupId>io.prometheusgroupId>
			<artifactId>simpleclient_hotspotartifactId>
			<version>0.15.0version>
		dependency>

		<dependency>
			<groupId>io.prometheusgroupId>
			<artifactId>simpleclient_httpserverartifactId>
			<version>0.15.0version>
		dependency>

		<dependency>
			<groupId>io.prometheusgroupId>
			<artifactId>simpleclient_pushgatewayartifactId>
			<version>0.15.0version>
		dependency>
实现代码
传入的数据格式就是JSON字符串:
{"table_name":"all_log","action_user_id":0,"url":"xxxxx","data":[],"ip":"127.0.0.1"}
实现代码:
	public static String address = "";
    static String help = "Applied Statistics";

    public static ConcurrentHashMap<String, Gauge> gaugeMap = new ConcurrentHashMap<String, Gauge>();

    public boolean writeData(String message) {
        try{
            String gaugeName = "";//表名
            List<String> labelNames = new ArrayList<>();//字段名
            List<String> labelValues = new ArrayList<>();//字段值
            JSONObject jsonObject= JSON.parseObject(message);
            for (Map.Entry<String, Object> entry : jsonObject.entrySet()) {
                if(entry.getKey().equals("table_name")){
                    //找出表名
                    gaugeName = entry.getValue().toString();
                    continue;
                }
                labelNames.add(entry.getKey());
                labelValues.add(entry.getValue().toString());
            }
            //从map中获取已经注册的表实例,一个表在程序中只能注册一次
            Gauge gauge = gaugeMap.get(gaugeName);
            if(gauge==null){
                gauge = Gauge.build(gaugeName, help).labelNames(labelNames.toArray(new String[labelNames.size()])).register();
                gauge.labels(labelValues.toArray(new String[labelValues.size()])).set(0);
                gaugeMap.put(gaugeName,gauge);
            }
            gauge.labels(labelValues.toArray(new String[labelValues.size()])).inc();

            PushGateway pg = new PushGateway(address);
            pg.push(gauge, gaugeName);//推送到pushgateway上 让prometheus自己拉取

        }
        catch (Exception e){
            e.printStackTrace();
            return false;
        }

        return true;
    }
数据插入效果
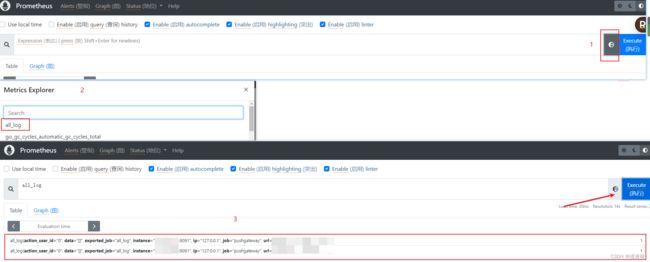
可以直接在pushgateway上查看push效果,再去prometheus上查看拉取结果。
pushgateway效果
prometheus效果
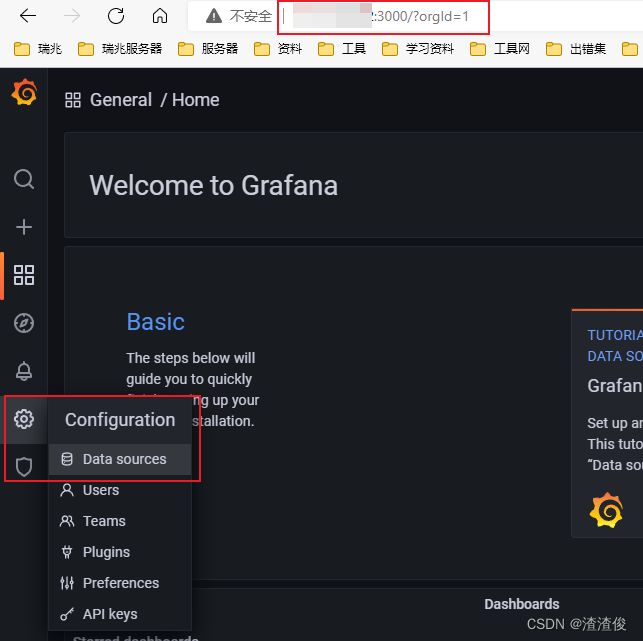
配置grafana
promQL语法学习
可以从B站上看看视频学习,也可以直接搜索,下面是我看过的资料
B站1
B站2
总结
先就写到这了。


