centos7安装zabbix服务端与客户端
先关闭防火墙
centos7默认是firewalld
systemctl stop firewalld.service
systemctl disable firewalld.service
关闭selinux
vim /etc/sysconfig/selinux
SELINUX=后面改为disabled
source /etc/sysconfig/selinux
setenforce 0
安装一些使用的工具
yum -y install bash* 在输入bash回车
yum -y install net-tools*
yum -y install vim*
yum -y install wget*
服务端---我是zabbix4.2的
yum -y install http*
如果只是做zabbix服务器,可以不改http端口(80),我是安装了nginx,已经用了80
我这里改为33333
vim /etc/httpd/conf/httpd.conf
40行左右 Listen 33333
systemctl restart httpd.service
systemctl enable httpd.service
yum -y install php* 只管执行,不要看结果
1 rpm -ivh https://mirrors.aliyun.com/zabbix/zabbix/4.2/rhel/7/x86_64/zabbix-release-4.2-1.el7.noarch.rpm
1 yum install -y zabbix-server-mysql zabbix-get zabbix-web zabbix-web-mysql zabbix-agent zabbix-sender上面的命令,如果没安装到100%断了,就在执行一次,会接着安装的
解压数据结构
1 cd /usr/share/doc/zabbix-server-mysql-4.2.0/
1 gunzip create.sql.gz把解压的复制到/sql目录(我自己创建的,导入方便)
安装数据库
我是把数据目录改为/data/mysql/mysql了(创建/data/mysql)
1 yum -y install mariadb*
2 systemctl restart mariadb.service
3 systemctl enable mariadb.service
4 systemctl stop mariadb.service
5 mkdir -p /data/mysql
6 cp -a /var/lib/mysql/ /data/mysql/
7 vim /etc/my.cnf
让数据库不区分大小写
1 vim /etc/my.cnf.d/server.cnf找到 [mysqld] 标签,在下边添加 lower_case_table_names=1
再启动
1 systemctl restart mariadb.service配置mariadb
1 mysql_secure_installation先回车----输入y---输入两次密码-----下面一直y
进数据库
mysql -uroot -p密码
进入数据库输入下面命令:可以用连接数据库的软件连接
1 grant all privileges on *.* to 'root'@'%' identified by 'yegoo@123' with grant option;这段指令容许所有用root用户输入密码登陆该mysql server,如果将'%' 换
乘'192.168.1.124' ,那么只有'192.168.1.124'的主机可以登陆。
'yegoo@123' 是用软件登录的密码,可以和数据库密码不一样
创建一个zabbix库并设置为u?8的字符编码格式
1 create database zabbix character set utf8 collate utf8_bin;创建账户并且授权设置密码
1 grant all privileges on zabbix.* to zabbix@localhost identified by 'zabbix';给来自localhost的用户zabbxi分配可对数据库zabbix所有表进行所有操作的权限,并且设定
密码为zabbix
我都是把localhost改为'%
我是
1 grant all privileges on zabbix.* to zabbix@'%' identified by 'zabbix';导入表
1 systemctl restart mariadb.service配置zabbix文件
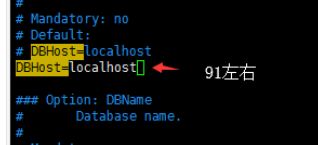
1 vim /etc/zabbix/zabbix_server.conf
1 systemctl restart zabbix-server.service
2 systemctl enable zabbix-server.service
配PHP
时间改为上海的
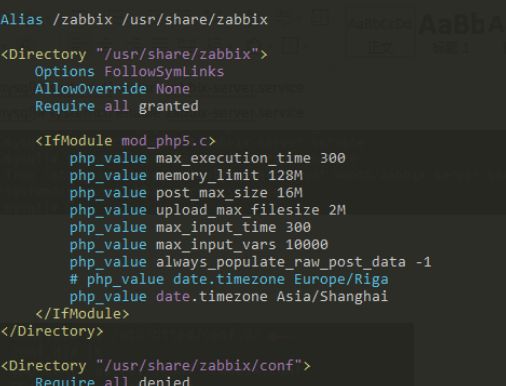
1 vim /etc/httpd/conf.d/zabbix.conf
php_value date.timezone Asia/Shanghai加入下图
重启http服务
1 systemctl restart httpd.service
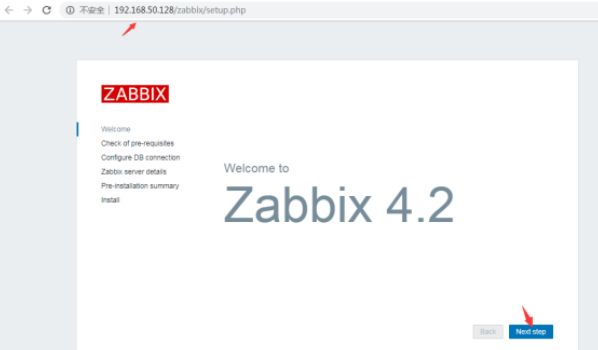
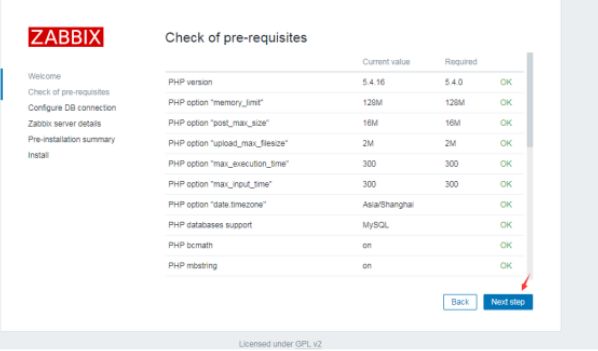
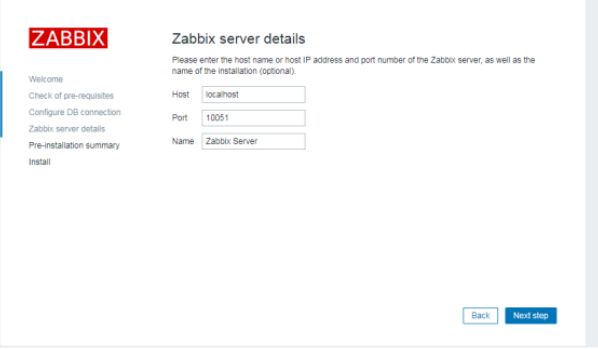
登陆zabbix网址设置(谷歌或火狐)我是用的谷歌
Ip地址/zabbix(我这是192.168.50.128/zabbix)
上面是80端口,我是33333
我这是192.168.50.128:33333/zabbix(下图是没改端口时的)
password是我们设置的数据库密码zabbix
登陆账户是Admin(大写A)
密码是zabbix
改中文
zabbix客户端
1 rpm ‐ivh https://mirrors.aliyun.com/zabbix/zabbix/4.2/rhel/7/x86_64/zabbix‐release‐4.2‐1.el7.noarch.rpm1 yum -y install zabbix-agent如果没安装完成,再次输入安装命令,会继续的
编辑文件
1 vim /etc/zabbix/zabbix_agentd.conf在里面找到下面三行
1 Server=192.168.200.4     zabbix服务端的机器IP
2 ServerActive=192.168.200.4 zabbix服务端的机器IP
3 Hostname=9          随便,我以被监控的机器的ip作为Hostname
启动
systemctl restart zabbix-agent.service
systemctl enable zabbix-agent.service
Windows安装zabbix客户端


