Zabbix监控vcenter集群
目录
- 一.部署zabbix
-
- 安装zabbix-server
- 替换阿里云Zabbix源
- 安装Zabbix server 和 agent
- 安装Zabbix frontend
- 安装 Zabbix frontend packages
- 安装Mysql数据库
- 创建初始数据库
- 为Zabbix server配置数据库
- 为Zabbix前端配置PHP
- 启动Zabbix server和agent进程
- 二.监控vcenter
-
- 修改配置文件
- 创建Vcenter主机
- 链接Template VM VMware模板
- 定义宏信息
- 结果展示
一.部署zabbix
安装zabbix-server
首先在虚拟机上把Centos7安装完毕并关闭防火墙与SElinux。
打开Zabbix官网选择Zabbix版本-OS系统-OS版本-数据库-WebServer
替换阿里云Zabbix源
编写shell脚本zabbix_aliyun.s
#!/bin/bash

echo -e "请给出要安装的zabbix版本号,建议使用4.x的版本  \033[31musage:./zabbix_aliyun.sh 4.0|4.4|4.5|5.0 \033[0m"
echo "例如要安装4.4版本,在命令行写上 ./zabbix_aliyun.sh 4.4"
if [ -z $1 ];then
    exit
fi
VERSION=$1
if [ -f /etc/yum.repos.d/zabbix.repo ];then
    rm -rf /etc/repos.d/zabbix.repo
fi
rpm -qa | grep zabbix-release && rpm -e zabbix-release
rpm -Uvh https://mirrors.aliyun.com/zabbix/zabbix/$VERSION/rhel/7/x86_64/zabbix-release-$VERSION-1.el7.noarch.rpm
sed -i "s@zabbix/.*/rhel@zabbix/$VERSION/rhel@g" /etc/yum.repos.d/zabbix.repo
sed -i '[email protected]@mirrors.aliyun.com/zabbix@g' /etc/yum.repos.d/zabbix.repo
[ $? -eq 0 ] && echo "阿里云的zabbix源替换成功" || exit 1
yum clean all
yum makecache fast
然后执行命令
chmod +x zabbix_aliyun.sh    //添加执行权限
bash zabbix_aliyun.sh 5.0
前期准备
rpm -Uvh https://repo.zabbix.com/zabbix/5.0/rhel/7/x86_64/zabbix-release-5.0-1.el7.noarch.rpm
yum clean all
安装Zabbix server 和 agent
yum install zabbix-server-mysql zabbix-agent
安装Zabbix frontend
yum install centos-release-scl
编辑配置文件 /etc/yum.repos.d/zabbix.repo
vim /etc/yum.repos.d/zabbix.repo

[zabbix-frontend]
...
enabled=1     //把enabled的值改成1
...
安装 Zabbix frontend packages
yum install zabbix-web-mysql-scl zabbix-apache-conf-scl
安装Mysql数据库
cd /usr/local/src/
wget http://repo.mysql.com/mysql57-community-release-el7-8.noarch.rpm

rpm -ivh mysql57-community-release-el7-8.noarch.rpm

yum -y install mysql-server
启动Mysql
systemctl start mysqld
获取安装时的临时密码
grep 'temporary password' /var/log/mysqld.log
,LW:N3)&hQ8h’ 临时密码 用这个密码登录并修改密码
mysql -uroot -p,LW:N3)&hQ8h

mysql> set password for root@localhost = password('VMware1!');
创建初始数据库
mysql> create database zabbix character set utf8 collate utf8_bin;

mysql> grant all privileges on zabbix.* to zabbix@localhost identified by 'VMware1!';

mysql> quit;
导入初始架构和数据,系统将提示您输入新创建的密码
zcat /usr/share/doc/zabbix-server-mysql*/create.sql.gz | mysql -uzabbix -p zabbix
:然后在弹出输入数据库设置的密码,这里设置的是VMware1!
为Zabbix server配置数据库
编辑配置文件 /etc/zabbix/zabbix_server.conf
vim /etc/zabbix/zabbix_server.conf

DBPassword=VMware1!
为Zabbix前端配置PHP
编辑配置文件 /etc/opt/rh/rh-php72/php-fpm.d/zabbix.conf
vim /etc/opt/rh/rh-php72/php-fpm.d/zabbix.conf

php_value[date.timezone] = Asia/Shanghai
启动Zabbix server和agent进程
启动Zabbix server和agent进程,并为它们设置开机自启
systemctl restart zabbix-server zabbix-agent httpd rh-php72-php-fpm

systemctl enable zabbix-server zabbix-agent httpd rh-php72-php-fpm
打开http:IP/zabbix


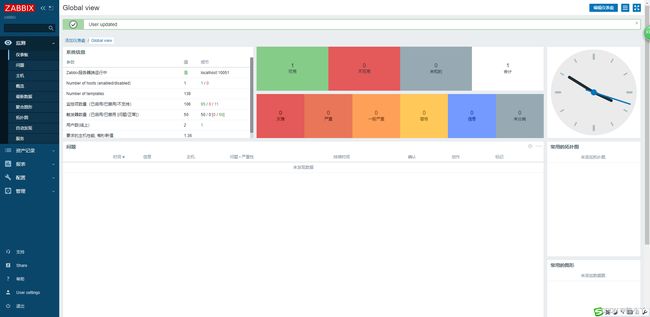
看到上述提示,说明安装成功。点"Finish"

默认 用户名:Admin,密码:zabbix

二.监控vcenter
修改配置文件
启用VMware的collectors实例
vim /etc/zabbix/zabbix_server.conf

StartVMwareCollectors=5
VMwareCacheSize=160M
VMwareFrequency=60
VMwareTimeout=20
修改之后重启zabbix-server
systemctl restart zabbix-serve
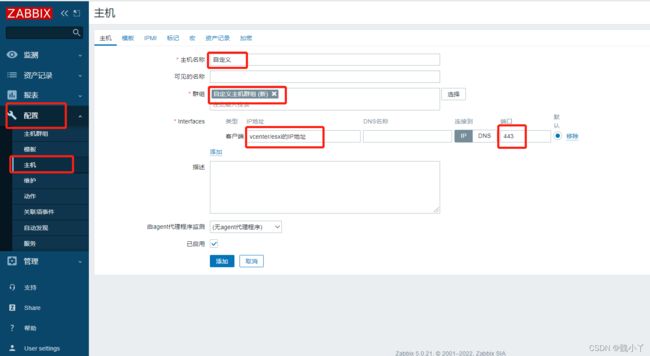
创建Vcenter主机
zabbix提供了监控vcenter集群的模板,Template VM VMware(用于监控vcenter集群的状态),Template VM VMware Guest(用于监控esxi下的虚拟机状态),Template VM VMware Hypervisor(用于监控esxi主机状态)
我们只要在vcenter主机上链接Template VM VMware模板就可以实现对整个vcenter集群的监控,Template VM VMware模板会自动关联其他两个模板,实现自动发现集群内的esxi主机和虚拟机


