4、nginx 配置实例-反向代理
文章目录
- 4、nginx 配置实例-反向代理
-
- 4.1 反向代理实例一
-
- 4.1.1 实验代码
- 4.3 反向代理实例二
-
- 4.3.1 实验代码
【尚硅谷】尚硅谷Nginx教程由浅入深
志不强者智不达;言不信者行不果。
4、nginx 配置实例-反向代理
4.1 反向代理实例一
实现效果:使用 nginx 反向代理,访问 www.123.com 直接跳转到 127.0.0.1:8080
4.1.1 实验代码
1) 启动一个 tomcat,浏览器地址栏输入 192.168.39.250:8080,出现如下界面
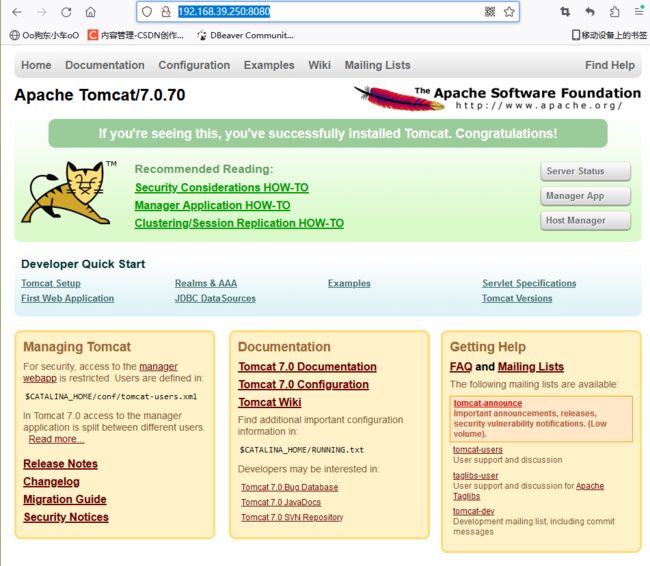
向linux系统中导入一个apache-tomcat-7.0.70.tar.gz文件,放在/usr/src/文件夹中
解压到当前文件夹
[root@centos7-101 src]# tar -xvf apache-tomcat-7.0.70.tar.gz
启动Tomcat
[root@centos7-101 src]# cd apache-tomcat-7.0.70/bin/
[root@centos7-101 bin]# ./startup.sh
Using CATALINA_BASE:   /usr/src/apache-tomcat-7.0.70
Using CATALINA_HOME:   /usr/src/apache-tomcat-7.0.70
Using CATALINA_TMPDIR: /usr/src/apache-tomcat-7.0.70/temp
Using JRE_HOME:        /usr
Using CLASSPATH:       /usr/src/apache-tomcat-7.0.70/bin/bootstrap.jar:/usr/src/apache-tomcat-7.0.70/bin/tomcat-juli.jar
Tomcat started.
进入日志文件,查看启动日志,Ctrl + Z推出日志
[root@centos7-101 bin]# cd ..
[root@centos7-101 apache-tomcat-7.0.70]# cd logs/
[root@centos7-101 logs]# tail -f catalina.out
九月 07, 2023 6:04:02 上午 org.apache.catalina.startup.HostConfig deployDirectory
信息: Deploying web application directory /usr/src/apache-tomcat-7.0.70/webapps/manager
九月 07, 2023 6:04:02 上午 org.apache.catalina.startup.HostConfig deployDirectory
信息: Deployment of web application directory /usr/src/apache-tomcat-7.0.70/webapps/manager has finished in 117 ms
九月 07, 2023 6:04:02 上午 org.apache.coyote.AbstractProtocol start
信息: Starting ProtocolHandler ["http-bio-8080"]
九月 07, 2023 6:04:02 上午 org.apache.coyote.AbstractProtocol start
信息: Starting ProtocolHandler ["ajp-bio-8009"]
九月 07, 2023 6:04:02 上午 org.apache.catalina.startup.Catalina start
信息: Server startup in 1844 ms
查看运行进程
[root@centos7-101 logs]# ps -ef | grep tomcat
防火墙中开放本地端口号8080,让外部访问到linux中的Tomcat
[root@centos7-101 logs]# firewall-cmd --add-port=8080/tcp --permanent
success
[root@centos7-101 logs]# firewall-cmd --reload
success
[root@centos7-101 logs]# firewall-cmd --list-all
public (active)
  target: default
  icmp-block-inversion: no
  interfaces: ens33
  sources:
  services: dhcpv6-client ssh
  ports: 80/tcp 8080/tcp
  protocols:
  masquerade: no
  forward-ports:
  source-ports:
  icmp-blocks:
  rich rules:
在windows中通过浏览器访问 http://192.168.39.250:8080/,linux中的ip地址写自己的

2) 通过修改本地 host 文件,将 www.123.com 映射到 127.0.0.1

在 windows 系统的host文件进行域名和ip对应关系的配置
文件地址:C:\Windows\System32\drivers\etc
修改内容:192.168.39.250 www.123.com
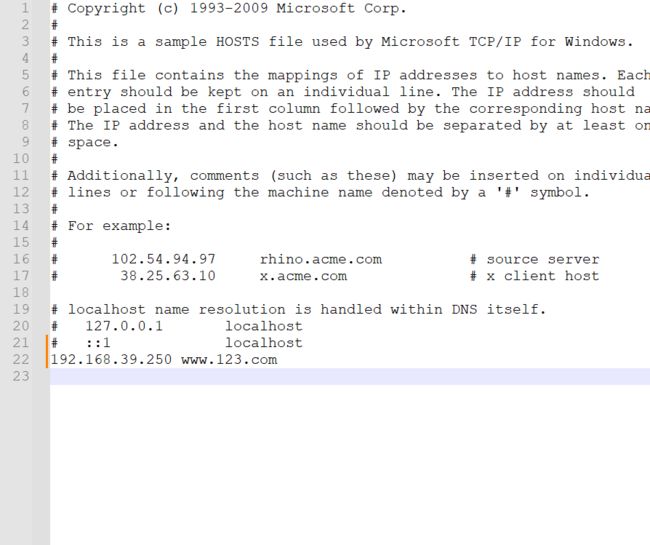
配置完成之后,我们便可以通过 www.123.com:8080 访问到第一步出现的 Tomcat 初始界面。
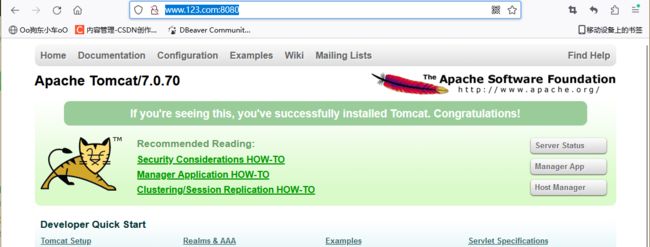
那么如何只需要输入 www.123.com 便可以跳转到 Tomcat 初始界面呢?
便用到 nginx的反向代理。
3) 在 nginx.conf 配置文件中增加如下配置
[root@centos7-101 ~]# cd /usr/local/nginx/conf/
    server {
        listen       80;
        server_name  192.168.39.250;

        #charset koi8-r;

        #access_log  logs/host.access.log  main;

        location / {
            root   html;
            proxy_pass http://127.0.0.1:8080;
            index  index.html index.htm;
        }
重新启动nginx
[root@centos7-101 sbin]# ./nginx -s reload
如上配置,我们监听 80 端口,访问域名为 www.123.com,不加端口号时默认为 80 端口,故访问该域名时会跳转到 127.0.0.1:8080 路径上。
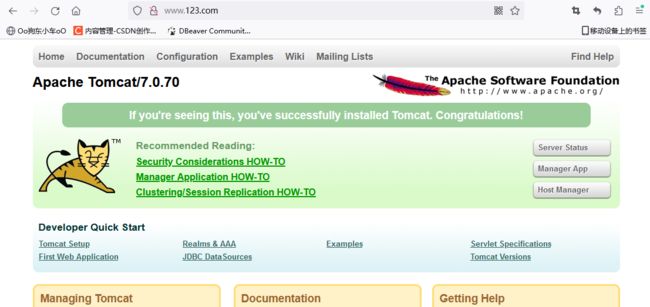
在浏览器端输入 www.123.com 结果如下:
4.3 反向代理实例二
实现效果:使用 nginx 反向代理,根据访问的路径跳转到不同端口的服务中nginx 监听端口为 9001,
访问 http://127.0.0.1:9001/edu/ 直接跳转到 127.0.0.1:8080
访问 http://127.0.0.1:9001/vod/ 直接跳转到 127.0.0.1:8081
4.3.1 实验代码
第一步,准备两个 tomcat,一个 8080 端口,一个 8081 端口,并准备好测试的页面
新建两个文件夹
[root@centos7-101 src]# mkdir tomcat8080
[root@centos7-101 src]# mkdir tomcat8081
向两个文件夹导入tomcat文件,解压文件
[root@centos7-101 src]# tar -xvf apache-tomcat-7.0.70.tar.gz
停止tomcat
[root@centos7-101 bin]# ps -ef | grep tomcat
[root@centos7-101 bin]# kill -9 22942
进入新创建的tomcat配置文件,修改端口号
[root@centos7-101 bin]# cd /usr/src/tomcat8081/apache-tomcat-7.0.70/conf/
[root@centos7-101 conf]# vim nginx.conf
<Server port="8015" shutdown="SHUTDOWN">
<Connector port="8081" protocol="HTTP/1.1"
           connectionTimeout="20000"
           redirectPort="8443" />
<Connector port="8019" protocol="AJP/1.3" redirectPort="8443" />
向两个文件夹中准备测试页面,创建新文件夹
edu:/usr/src/tomcat8080/apache-tomcat-7.0.70/webapps
vod:/usr/src/tomcat8081/apache-tomcat-7.0.70/webapps
开放防火墙端口
[root@centos7-101 bin]# sudo firewall-cmd --add-port=8081/tcp --permanent
success
[root@centos7-101 bin]# firewall-cmd --reload
success
第二步,修改 nginx 的配置文件,实现监听9001端口,根据不同路径跳转不同端口
配置文件地址:
在 http 块中添加 server{}
location 指令说明
该指令用于匹配 URL。
语法如下:
1、= :用于不含正则表达式的 uri 前,要求请求字符串与 uri 严格匹配,如果匹配
成功,就停止继续向下搜索并立即处理该请求。
2、~:用于表示 uri 包含正则表达式,并且区分大小写。
3、~:用于表示 uri 包含正则表达式,并且不区分大小写。
4、^~:用于不含正则表达式的 uri 前,要求 Nginx 服务器找到标识 uri 和请求字
符串匹配度最高的 location 后,立即使用此 location 处理请求,而不再使用 location
块中的正则 uri 和请求字符串做匹配。
注意:如果 uri 包含正则表达式,则必须要有 ~ 或者 ~ 标识。
    server {
        listen       9001;
    #    listen       somename:8080;
        server_name  192.168.39.250;

        location ~/edu/ {
    #        root   html;
    #        index  index.html index.htm;
                proxy_pass http://127.0.0.1:8080:
        }
        location ~/vod/ {
                proxy_pass http://127.0.0.1:8081:
        }
    }
重新加载nginx
[root@centos7-101 sbin]# ./nginx -s reload
开放防火墙端口
[root@centos7-101 bin]# sudo firewall-cmd --add-port=9001/tcp --permanent
success
[root@centos7-101 bin]# firewall-cmd --reload
success
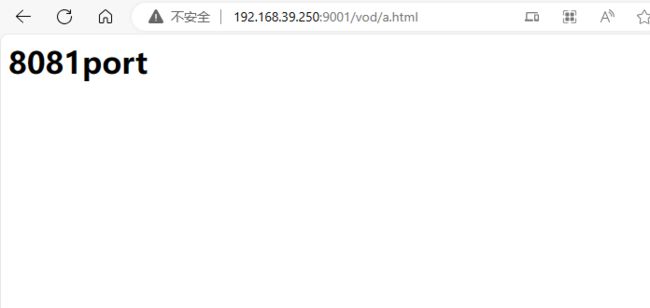
效果:http://192.168.39.250:9001/edu/a.html

http://192.168.39.250:9001/vod/a.html
