SpringBoot异常处理 之 自定义HandlerExceptionResolver类处理异常
一、前言
前面在《基于@ControllerAdvice注解实现全局异常处理用法和原理的探究》中,我们学习了使用@ControllerAdvice+@ExceptionHandler注解实现全局异常处理的方式,今天我们来学习另外一种全局异常处理的方式——自定义HandlerExceptionResolver类异常处理。
二、用法
首先,我们这里使用了thymeleaf视图组件,引入依赖如下:
<dependency>
 <groupId>org.springframework.bootgroupId>
 <artifactId>spring-boot-starter-thymeleafartifactId>
dependency>
然后,定义异常视图页面,代码如下:
这里文件的名称不一定是error.html了,我们可以自定义了,为了区分上一节的页面,我们这里定义了文件名error1.html,并把标题字体颜色改成了红色。
DOCTYPE html>
<html lang="en" xmlns:th="http://www.thymeleaf.org">
<head>
<meta charset="UTF-8">
<title>自定义异常title>
head>
<body>
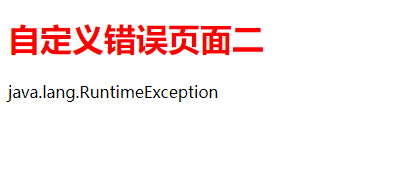
<h1 style="color: red">自定义错误页面二h1>
<span th:text="${error}" />
body>
html>
进行了前面的配置之后,就开始我们自定义HandlerExceptionResolver类的实现了,具体如下:
这里主要是为了学习用法,所以处理逻辑比较简单。
@Configuration
public class MyHandleExceptionResolver implements HandlerExceptionResolver {
    @Override
    public ModelAndView resolveException(HttpServletRequest request, HttpServletResponse response, Object handler, Exception ex) {
        ModelAndView mv = new ModelAndView();
        // 判断不同异常类型,做不同视图跳转
        if (ex instanceof Exception) {
            mv.setViewName("error1");
        }
        mv.addObject("error", ex.toString());
        return mv;
    }
}
最后,再把自定义的异常处理器配置到容器中,配置如下,即实现WebMvcConfigurer 接口,并实现其中的configureHandlerExceptionResolvers()方法。
@SpringBootApplication
public class Application extends SpringBootServletInitializer implements WebMvcConfigurer {

	public static void main(String[] args) {
		SpringApplication.run(Application.class, args);
	}

	@Override
    protected SpringApplicationBuilder configure(SpringApplicationBuilder application) {
        return application.sources(Application.class);
    }

	@Override
	public void configureHandlerExceptionResolvers(List<HandlerExceptionResolver> resolvers) {
		resolvers.add(0, new MyHandleExceptionResolver());
	}
}
这个时候,如果访问一个抛出异常的错误,就会跳转到自定义异常处理器对应的视图error1.html页面,效果如下:
注意:这里不要使用404的异常,该异常不会被全局异常处理捕获,具体原因后续再详细分析。
三、实现原理
3.1、初始化
自定义HandlerExceptionResolver异常处理类的初始化方式和《基于@ControllerAdvice注解实现全局异常处理用法和原理的探究》类似,我们这里简单屡一下:
首先是WebMvcConfigurationSupport类(EnableWebMvcConfiguration的父类)在启动的过程中,被@Bean注解的handlerExceptionResolver()方法会注入HandlerExceptionResolver对象,实现如下:
@Bean
public HandlerExceptionResolver handlerExceptionResolver(
		@Qualifier("mvcContentNegotiationManager") ContentNegotiationManager contentNegotiationManager) {
	List<HandlerExceptionResolver> exceptionResolvers = new ArrayList<>();
	configureHandlerExceptionResolvers(exceptionResolvers);
	if (exceptionResolvers.isEmpty()) {
		addDefaultHandlerExceptionResolvers(exceptionResolvers, contentNegotiationManager);
	}
	extendHandlerExceptionResolvers(exceptionResolvers);
	HandlerExceptionResolverComposite composite = new HandlerExceptionResolverComposite();
	composite.setOrder(0);
	composite.setExceptionResolvers(exceptionResolvers);
	return composite;
}
在这个方法中,通过调用configureHandlerExceptionResolvers()方法,来获取配置的异常处理器类,经过几个方法,最终会调用到我们在启动类中定义的configureHandlerExceptionResolvers()方法,这个时候就会把我们自定义的异常处理器加载到SpringBoot项目中去了。
和使用@ControllerAdvice注解实现全局异常处理相比,因为这个时候已经加载了我们自定义的异常处理器类,exceptionResolvers变量就不再为空,这个时候就不会再执行addDefaultHandlerExceptionResolvers()方法,添加默认的异常处理器类了。自此,我们自定义的异常处理器就初始化完成了,后续将继续完成其他的初始化工作。
3.2、触发时机
在启动的时候,完成了初始化工作,那么在系统运行的过程中,自定义异常处理器是如何生效的呢?其实,这个时候就和使用@ControllerAdvice注解实现方式的运行机制完全一样了,这里简单屡一下:
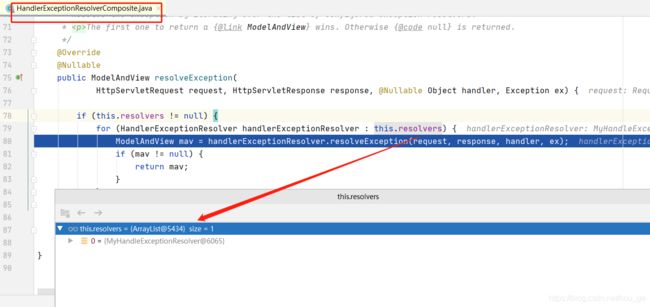
从doDispatch()方法开始,无论是否出现异常,都会进入processDispatchResult()方法,而在processDispatchResult()方法中,如果有异常就会执行processHandlerException()方法,而在processHandlerException()方法中,就会调用前面初始化的异常处理器,这里实际使用的是HandlerExceptionResolverComposite ,而HandlerExceptionResolverComposite 的resolveException()方法中,又实际上调用了自定义的MyHandleExceptionResolver 的resolveException()方法,如下所示:

执行了上述逻辑之后,我们就获得了我们预期的异常处理视图,后续就会继续通过执行DispatcherServlet类的render()方法进行视图的渲染。自此,整个异常处理过程的分析就完成了。