SpringBoot基础入门
文章目录
- 前言
- 一、SpringBoot简介
-
- 1.Spring的能力
- 2.Spring的生态
- 3.为什么使用SpringBoot
-
- SpringBoot的优点
-
- SpringBoot缺点
- 二、HelloWord项目
-
- 1.创建maven工程
- 2.创建主程序
- 3.编写Controller层
- 4.运行
- 5.设置配置
- 6.打包部署
- 三、依赖管理特性
- 四、自动配置特性
- 总结
前言
第一个HelloWord项目、打包部署、依赖管理特性、自动配置特性。
一、SpringBoot简介
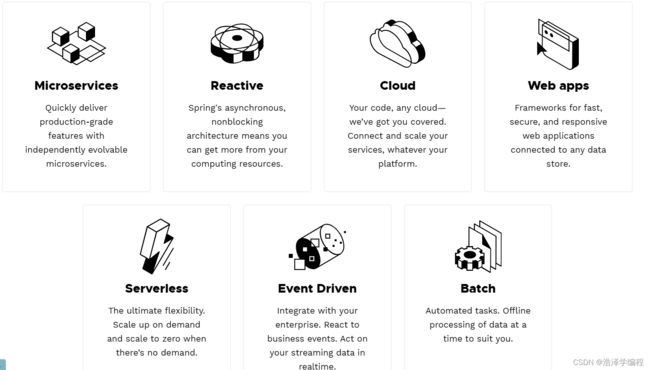
SpringBoot是一个集成Spring技术栈的大整合框架。
1.Spring的能力
2.Spring的生态
覆盖了:
- web开发
- 数据访问
- 安全控制
- 分布式
- 消息服务
- 移动开发
- 批处理
- …
3.为什么使用SpringBoot
能快速创建出生产级别的Spring应用。
SpringBoot的优点
-
Create stand-alone Spring applications
- 创建独立Spring应用
-
Embed Tomcat, Jetty or Undertow directly (no need to deploy WAR files)
- 内嵌web服务器
-
Provide opinionated ‘starter’ dependencies to simplify your build configuration
- 自动starter依赖,简化构建配置
-
Automatically configure Spring and 3rd party libraries whenever possible
- 自动配置Spring以及第三方功能
-
Provide production-ready features such as metrics, health checks, and externalized configuration
- 提供生产级别的监控、健康检查及外部化配置
-
Absolutely no code generation and no requirement for XML configuration
- 无代码生成、无需编写XML
-
SpringBoot是整合Spring技术栈的一站式框架
-
SpringBoot是简化Spring技术栈的快速开发脚手架
SpringBoot缺点
- 人称版本帝,迭代快,需要时刻关注变化
- 封装太深,内部原理复杂,不容易精通
二、HelloWord项目
需求:浏览发送/hello请求,响应 “Hello,Spring Boot 2”
1.创建maven工程
 <parent>
            <groupId>org.springframework.bootgroupId>
            <artifactId>spring-boot-starter-parentartifactId>
            <version>3.1.2version>
        parent>

    <dependencies>

        <dependency>
            <groupId>org.springframework.bootgroupId>
            <artifactId>spring-boot-starter-webartifactId>
        dependency>
    dependencies>
2.创建主程序
import org.springframework.boot.SpringApplication;
import org.springframework.boot.autoconfigure.SpringBootApplication;

@SpringBootApplication
public class MainApplication {

    public static void main(String[] args) {
        SpringApplication.run(MainApplication.class, args);
    }
}
3.编写Controller层
    @RequestMapping("/hello")
    public String handle01(){
        return "Hello,Spring Boot 2!"+"你好";
    }
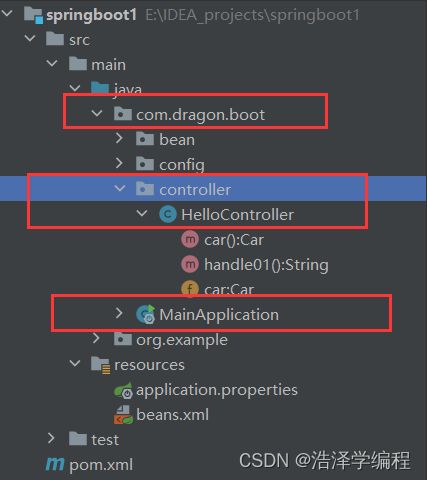
注意目录结构:MainApplication是主程序,在boot文件夹下,与controller同级。
4.运行
- 运行
MainApplication类 - 浏览器输入
http://localhost:8888/hello,将会输出Hello, Spring Boot 2!你好。
5.设置配置
maven工程的resource文件夹中创建application.properties文件。
# 设置端口号
server.port=8888
重新运行后,端口号8080就不能访问了,必须是8888。
6.打包部署
在pom.xml中添加:
    <build>
        <plugins>
            <plugin>
                <groupId>org.springframework.boot</groupId>
                <artifactId>spring-boot-maven-plugin</artifactId>
                <version>3.1.2</version>
            </plugin>
        </plugins>
    </build>
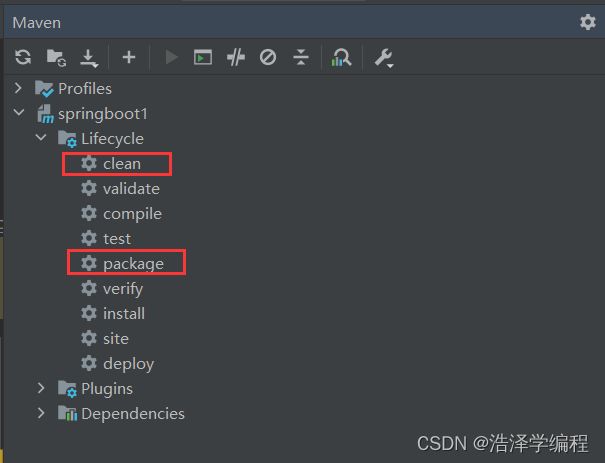
在IDEA的Maven插件上点击运行 clean 、package,把helloworld工程项目的打包成jar包,
打包好的jar包被生成在helloworld工程项目的target文件夹内。

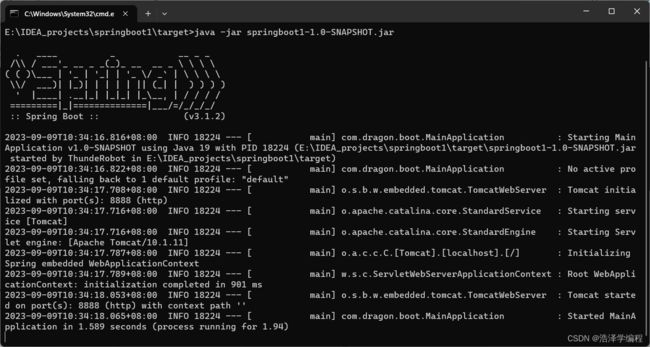
用cmd运行java -jar springboot1-1.0-SNAPSHOT.jar,既可以运行helloworld工程项目。
三、依赖管理特性
- 父项目做依赖管理
依赖管理
<parent>
	<groupId>org.springframework.bootgroupId>
	<artifactId>spring-boot-starter-parentartifactId>
	<version>2.3.4.RELEASEversion>
parent>

上面项目的父项目如下:
<parent>
	<groupId>org.springframework.bootgroupId>
	<artifactId>spring-boot-dependenciesartifactId>
	<version>2.3.4.RELEASEversion>
parent>

它几乎声明了所有开发中常用的依赖的版本号,自动版本仲裁机制
- 开发导入starter场景启动器
- 见到很多 spring-boot-starter-* : * 就某种场景
- 只要引入starter,这个场景的所有常规需要的依赖我们都自动引入
- 更多SpringBoot所有支持的场景
- 见到的 *-spring-boot-starter: 第三方为我们提供的简化开发的场景启动器。
所有场景启动器最底层的依赖
<dependency>
	<groupId>org.springframework.bootgroupId>
	<artifactId>spring-boot-starterartifactId>
	<version>3.1.2version>
	<scope>compilescope>
dependency>
-
无需关注版本号,自动版本仲裁
- 引入依赖默认都可以不写版本
- 引入非版本仲裁的jar,要写版本号。
-
可以修改默认版本号
- 查看spring-boot-dependencies里面规定当前依赖的版本 用的 key。
- 在当前项目里面重写配置,如下面的代码。
<properties>
	<mysql.version>5.1.43mysql.version>
properties>
IDEA快捷键:
ctrl + shift + alt + U:以图的方式显示项目中依赖之间的关系。alt + ins:相当于Eclipse的 Ctrl + N,创建新类,新包等。
四、自动配置特性
- 自动配好Tomcat
- 引入Tomcat依赖。
- 配置Tomcat
<dependency>
	<groupId>org.springframework.bootgroupId>
    <artifactId>spring-boot-starter-tomcatartifactId>
    <version>3.1.2version>
    <scope>compilescope>
dependency>
-
自动配好SpringMVC
- 引入SpringMVC全套组件
- 自动配好SpringMVC常用组件(功能)
-
自动配好Web常见功能,如:字符编码问题
- SpringBoot帮我们配置好了所有web开发的常见场景
public static void main(String[] args) {
    //1、返回我们IOC容器
    ConfigurableApplicationContext run = SpringApplication.run(MainApplication.class, args);

    //2、查看容器里面的组件
    String[] names = run.getBeanDefinitionNames();
    for (String name : names) {
        System.out.println(name);
    }
}
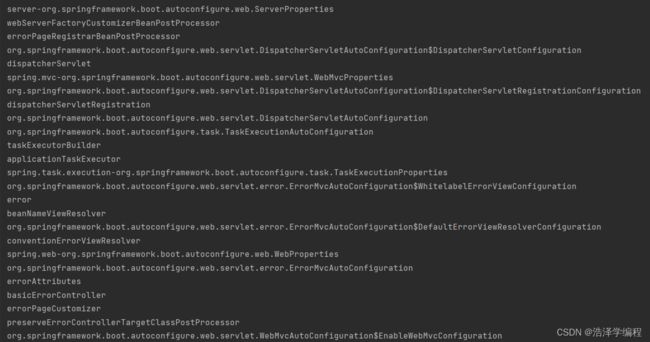
这里截取了一部分,可以看出里面SpringBoot真的很强大,不需要SSM一样导入一堆依赖。
- 默认的包结构
- 主程序所在包及其下面的所有子包里面的组件都会被默认扫描进来
- 无需以前的包扫描配置
- 想要改变扫描路径
- @SpringBootApplication(scanBasePackages=“com.lun”)
- @ComponentScan 指定扫描路径
@SpringBootApplication
等同于
@SpringBootConfiguration
@EnableAutoConfiguration
@ComponentScan("com.lun")
-
各种配置拥有默认值
- 默认配置最终都是映射到某个类上,如:
MultipartProperties - 配置文件的值最终会绑定每个类上,这个类会在容器中创建对象
- 默认配置最终都是映射到某个类上,如:
-
按需加载所有自动配置项
- 非常多的starter
- 引入了哪些场景这个场景的自动配置才会开启
- SpringBoot所有的自动配置功能都在 spring-boot-autoconfigure 包里面
总结
以上就是SpringBoot的基础入门。
