linux下nginx的使用
目录
-
-
- 前言
- 1. nginx命令行命令
- 2. nginx.conf配置文件
- 3. 反向代理
- 4. 负载均衡
- 5. 动静分离
- 6. 高可用配置
-
前言
今天来说一下nginx的具体怎么使用(nginx安装参考这里),主要包括反向代理、负载均衡、动静分离以及高可用。这些都是要通过修改nginx.conf配置文件实现的,可见掌握nginx配置文件的重要性,下面就来看看nginx的使用,这里需要启动tomat来配合使用,默认jdk环境是搭建好的(不知道怎么安装jdk的可以参考这里),下面启动了三台tomcat来验证nginx各种使用。
1. nginx命令行命令
Usage: nginx [-?hvVtTq] [-s signal] [-c filename] [-p prefix] [-g directives]

Options:
  -?,-h         : this help         #查询Nginx命令行命令

  -v            : show version and exit       #打印Nginx版本

  -V            : show version and configure options then exit   #打印Nginx版本并且打印Nginx初始安装时的配置参数

  -t            : test configuration and exit    #测试配置文件语法是否正确

  -T            : test configuration, dump it and exit   #测试配置文件语法是否正确,并且会打印这个配置文件的内容(包含注释部分)

  -q            : suppress non-error messages during configuration testing     #用于测试配置文件语法并且打印语法错误信息,方便修改配置文件

  -s signal     : send signal to a master process: stop, quit, reopen, reload      # 执行退出、优雅退出、重新加载配置文件、重  新打开日志

  -p prefix     : set prefix path (default: /etc/nginx/)      #用于Nginx安装时初始化安装路径的前缀

  -c filename   : set configuration file (default: /etc/nginx/nginx.conf)     #用于Nginx启动时指定配置文件

  -g directives : set global directives out of configuration file    #用于Nginx安装时设置全局配置文件路径
2. nginx.conf配置文件
#运行用户
#user somebody;

#启动进程,通常设置成和cpu的数量相等
worker_processes  1;

#全局错误日志
error_log  D:/Tools/nginx-1.10.1/logs/error.log;
error_log  D:/Tools/nginx-1.10.1/logs/notice.log  notice;
error_log  D:/Tools/nginx-1.10.1/logs/info.log  info;

#PID文件,记录当前启动的nginx的进程ID
pid        D:/Tools/nginx-1.10.1/logs/nginx.pid;

#工作模式及连接数上限
events {
    worker_connections 1024;    #单个后台worker process进程的最大并发链接数
}

#设定http服务器,利用它的反向代理功能提供负载均衡支持
http {
    #设定mime类型(邮件支持类型),类型由mime.types文件定义
    include       D:/Tools/nginx-1.10.1/conf/mime.types;
    default_type  application/octet-stream;

    #设定日志
	log_format  main  '[$remote_addr] - [$remote_user] [$time_local] "$request" '
                      '$status $body_bytes_sent "$http_referer" '
                      '"$http_user_agent" "$http_x_forwarded_for"';

    access_log    D:/Tools/nginx-1.10.1/logs/access.log main;
    rewrite_log     on;

    #sendfile 指令指定 nginx 是否调用 sendfile 函数(zero copy 方式)来输出文件,对于普通应用,
    #必须设为 on,如果用来进行下载等应用磁盘IO重负载应用,可设置为 off,以平衡磁盘与网络I/O处理速度,降低系统的uptime.
    sendfile        on;
    #tcp_nopush     on;

    #连接超时时间
    keepalive_timeout  120;
    tcp_nodelay        on;

	#gzip压缩开关
	#gzip  on;

    #设定实际的服务器列表
    upstream zp_server1{
        server 127.0.0.1:8089;
    }

    #HTTP服务器
    server {
        #监听80端口,80端口是知名端口号,用于HTTP协议
        listen       80;

        #定义使用www.xx.com访问
        server_name  www.helloworld.com;

		#首页
		index index.html

		#指向webapp的目录
		root D:\01_Workspace\Project\github\zp\SpringNotes\spring-security\spring-shiro\src\main\webapp;

		#编码格式
		charset utf-8;

		#代理配置参数
        proxy_connect_timeout 180;
        proxy_send_timeout 180;
        proxy_read_timeout 180;
        proxy_set_header Host $host;
        proxy_set_header X-Forwarder-For $remote_addr;

        #反向代理的路径(和upstream绑定),location 后面设置映射的路径
        location / {
            proxy_pass http://zp_server1;
        }

        #静态文件,nginx自己处理
        location ~ ^/(images|javascript|js|css|flash|media|static)/ {
            root D:\01_Workspace\Project\github\zp\SpringNotes\spring-security\spring-shiro\src\main\webapp\views;
            #过期30天,静态文件不怎么更新,过期可以设大一点,如果频繁更新,则可以设置得小一点。
            expires 30d;
        }

        #设定查看Nginx状态的地址
        location /NginxStatus {
            stub_status           on;
            access_log            on;
            auth_basic            "NginxStatus";
            auth_basic_user_file  conf/htpasswd;
        }

        #禁止访问 .htxxx 文件
        location ~ /\.ht {
            deny all;
        }

		#错误处理页面(可选择性配置)
		#error_page   404              /404.html;
		#error_page   500 502 503 504  /50x.html;
        #location = /50x.html {
        #    root   html;
        #}
    }
}
3. 反向代理
(1)下载tomcat
tomcat下载地址,这里使用的是tomcat8.0.53版本,下载到/usr/local/src目录下
(2)解压tomcat压缩文件
tar -zxvf  apache-tomcat-8.0.53.tar.gz
mv apache-tomcat-8.0.53 tomcat8080
(3)启动tomcat
进入bin目录
cd tomcat8080/bin/
启动并查看启动日志
sh startup.sh && tail -f ../logs/catalina.out
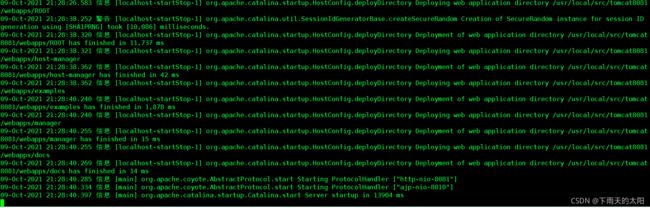
启动日志如下面所示表示tomcat启动成功

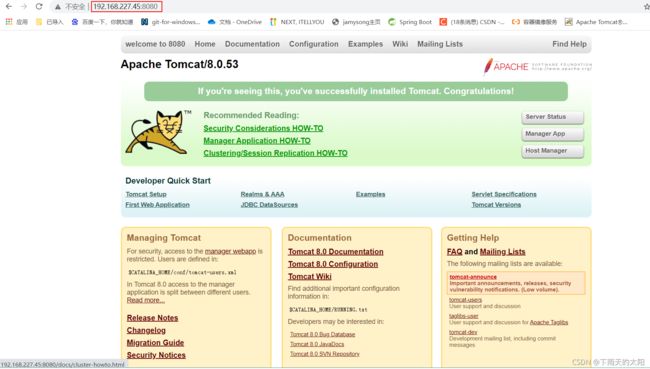
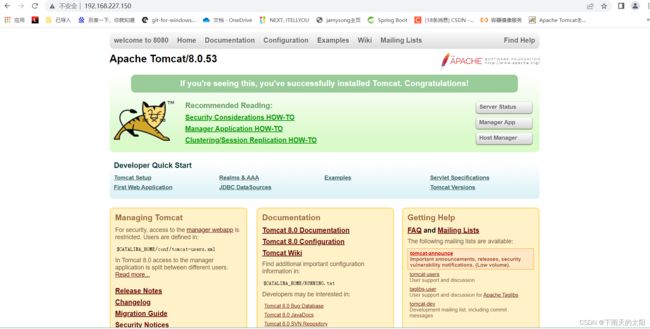
(4)访问tomcat
192.168.227.45:8080
访问如下这样表示tomcat访问也是正常的,如果启动成功,但是页面无法访问,需要看看防火墙是否没有关闭或是8080端口没有开放
(5)编辑nginx配置文件
vim /usr/local/nginx/conf/nginx.conf

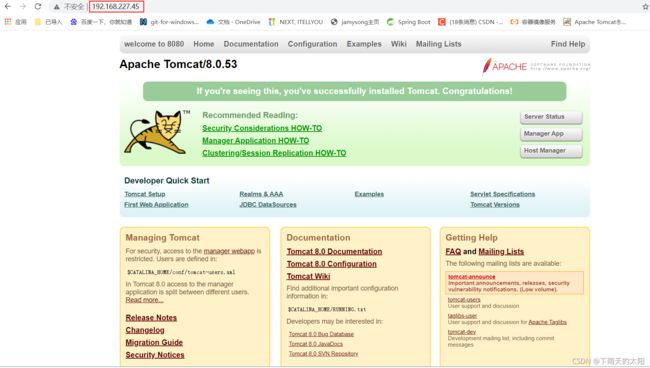
(6)访问nginx
这里先启动nginx,之前直接访问tomcat是没有问题的,现在我们通过nginx反向代理访问到tomcat
回到nginx/bin目录下
cd /usr/local/nginx/sbin/
启动nginx
./nginx
访问192.168.227.45:80(80可以不写就是这样192.168.227.45访问)
显示如下说明nginx反向代理配置成功
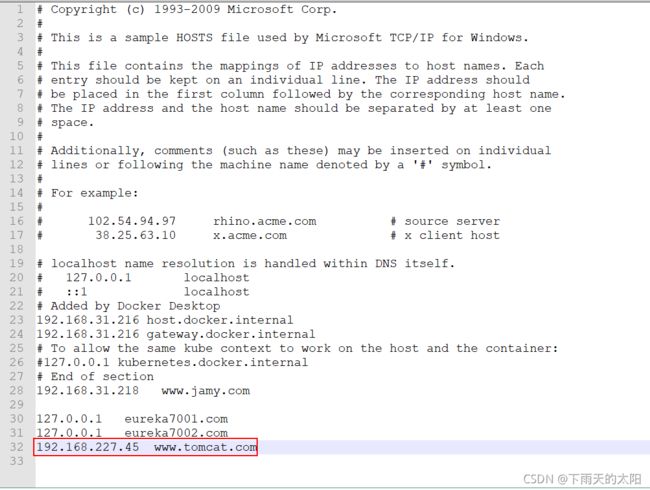
(7)编辑window系统的hosts文件
在C:/Windows/System32/drivers/etc目录下编辑hosts文件

在hosts文件中加入下面这一行保存,然后在浏览器中就可以这样访问:www.tomcat.com
192.168.227.45 www.tomcat.com

4. 负载均衡
2.1 复制tomcat8080
cd /usr/local/src/
cp -r tomcat8080  tomcat8081
cp -r tomcat8080  tomcat8082
2.2 修改sever.xml配置文件
修改tomcat8081配置文件server.xml三处:
cd /usr/local/src/tomcat8081/conf
vim sever.xml


修改tomcat8082配置文件server.xml三处:
cd /usr/local/src/tomcat8082/conf
vim sever.xml


2.3 启动tomcat8081和tomcat8082
如下tomcat8081和8082的启动日志显示tomcat启动成功
cd /usr/local/src/tomcat8081/bin
sh startup.sh && tail -f ../logs/catalina.out
cd /usr/local/src/tomcat8082/bin
sh startup.sh && tail -f ../logs/catalina.out

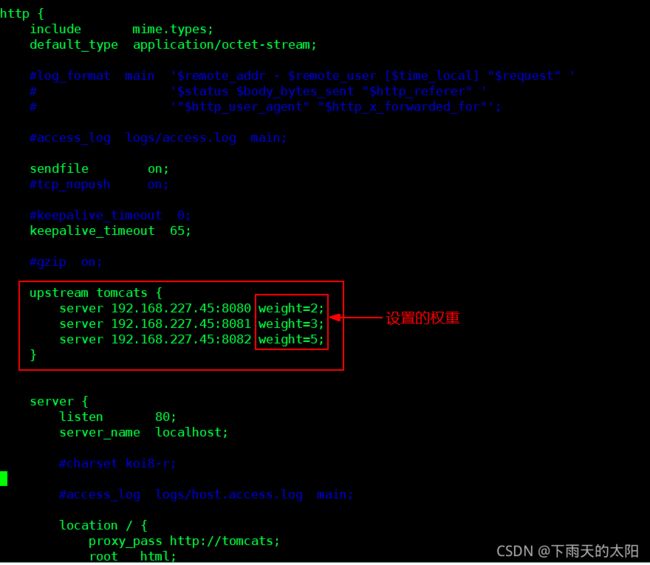
2.4 修改nginx配置文件
vim /usr/local/nginx/conf/nginx.conf
添加如图所示部分
然后重新加载nginx.conf配置文件
./nginx -s reload
2.4.1 轮询
三台tomcat会依次访问

2.4.2 权重
按照权重比列来访问三台tomcat
2.4.3 ip hash
客户端第一次访问后就确定了后面这台客户端的请求都会发到同一台tomcat上,可以解决session共享的问题

2.4.4 最少连接
哪台tomcat响应时间最短,那么后面的请求会优先分配给这台tomcat来处理,相当于我们通常所说的能者多劳

5. 动静分离
首先修改nginx.conf配置文件

然后分别创建静态资源目录
mkdir /data/www /data/image
把要访问的图片放入/data/image目录下
把要访问的页面放入/data/www目录下
访问地址:http://192.168.227.100/image/scope.png
访问效果:

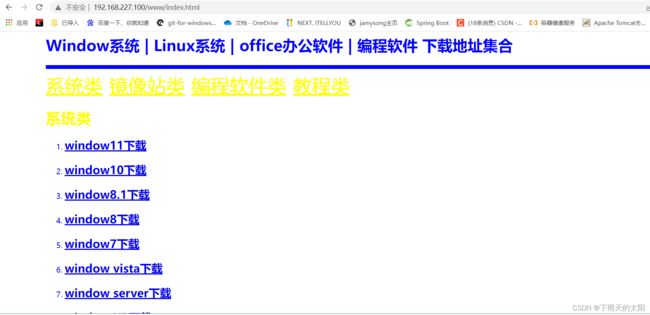
访问地址:http://192.168.227.100/www/index.html
访问效果:
6. 高可用配置
执行以下命令安装keepalived,如下图所示安装完成
yum install -y keepalived

然后执行切换到/etc/keepalived目录下修改keepalived.conf文件
global_defs {
   notification_email {
     [email protected]
     [email protected]
     [email protected]
   }
   notification_email_from [email protected]
   smtp_server 192.168.227.100
   smtp_connect_timeout 30
   router_id LVS_DEVEL
}

vrrp_script chk_http_port {
   script "/usr/local/src/nginx_chk.sh"
   interval  2   #检测执行脚本的时间间隔
   weight  2

}

vrrp_instance VI_1 {
    state MASTER      #备份服务器上将MASTER改成BACKUP
    interface ens160        #网卡名称,可以用ifconfig | grep ens查看
    virtual_router_id 51    #主、备机的virtual_router_id的值必须相同
    priority 100          #主、备机取不同的优先级,主机值大一点,备机值较小
    advert_int 1
    authentication {
        auth_type PASS
        auth_pass 1111
    }
    virtual_ipaddress {    #VRRP虚拟ip地址
        192.168.227.150
    }
}
编辑nginx_chk.sh脚本文件,并放到/usr/local/src目录下
#!/bin/bash
A=`ps -C nginx –no-header |wc -l`
if [ $A -eq 0 ];then
    /usr/local/nginx/sbin/nginx
    sleep 2
    if [ `ps -C nginx --no-header |wc -l` -eq 0 ];then
        killall keepalived
    fi
fi
这里另一台服务器我就不重新安装了,关闭100虚拟机后直接把刚才已安装好nginx和keepalived的100服务器复制一份,打开该虚拟机,直接修改下他的静态IP地址为192.168.227.101,进入到/etc/keepalived目录下修改keepalived.conf文件
global_defs {
   notification_email {
     [email protected]
     [email protected]
     [email protected]
   }
   notification_email_from [email protected]
   smtp_server 192.168.227.101
   smtp_connect_timeout 30
   router_id LVS_DEVEL
}

vrrp_script chk_http_port {
   script "/usr/local/src/nginx_chk.sh"
   interval  2   #检测执行脚本的时间间隔
   weight  2

}

vrrp_instance VI_1 {
    state BACKUP      #备份服务器上将MASTER改成BACKUP
    interface ens160        #网卡名称,可以用ifconfig | grep ens查看
    virtual_router_id 51    #主、备机的virtual_router_id的值必须相同
    priority 90          #主、备机取不同的优先级,主机值大一点,备机值较小
    advert_int 1
    authentication {
        auth_type PASS
        auth_pass 1111
    }
    virtual_ipaddress {    #VRRP虚拟ip地址
        192.168.227.150
    }
}
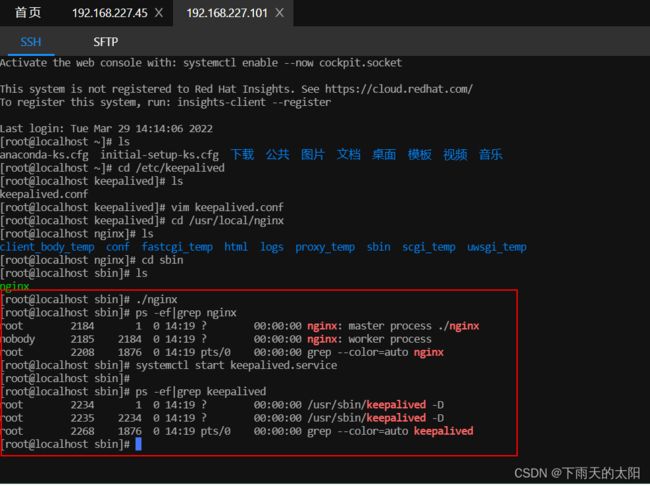
分别启动192.168.227.100和192.168.227.101两台服务器上的nginx和keepalived服务,如下图所示说明启动成功
/usr/local/nginx/sbin/nginx
systemctl start keepalived.service
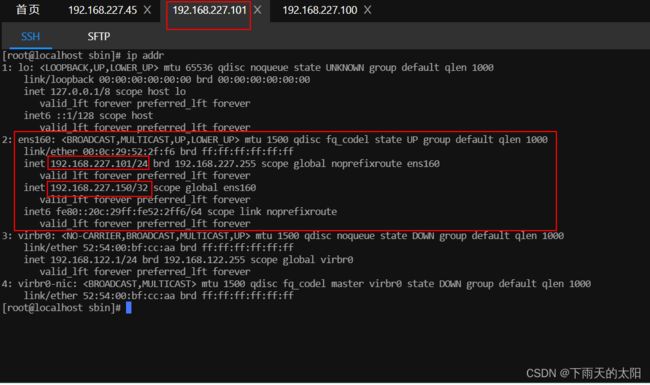
执行ip addr可以看到主机已与虚拟IP192.168.227.150绑定

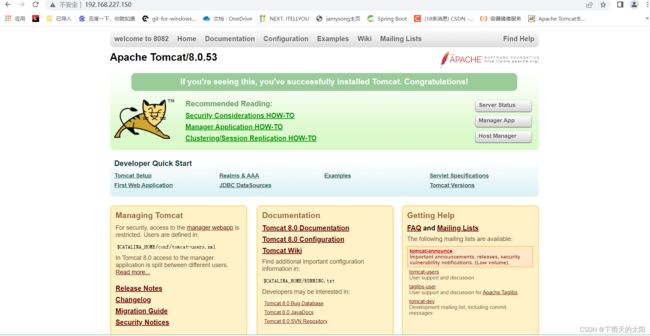
测试效果
访问地址:192.168.227.150(虚拟IP)
然后现在去主机上停掉keepalived服务和nginx服务

然后去101服务器执行ip addr看看,发现192.168.227150(虚拟IP)已绑定到101服务器上
最后测试访问效果:
访问地址还是192.168.227.150