canvas总结
文章目录
- 前言
- canvas
-
- 一、定义:
-
- canvas是什么:
- 注意:
- 路径和子路径:
- 二、vue创建一个canvas的基本步骤
- 三、绘制图形
-
- 1、绘制矩形
- 2、绘制圆弧
- 3、贝塞尔曲线
- 四、渐变色着色
-
- 1、建立渐变对象
- 2、定义渐变的颜色节点
- 3、为图形着色
- 五、描边的属性和透明度
-
- **1、lineWidth**
- **2、strokeStyle**:描边的颜色
- **3、lineCap**:描边端点样式
- **4、lineJoin**:描边拐角类型
- **5、虚线**
- 六、添加文字
- 七、添加图片
-
- 1、绘图 + 裁切 + 位移 + 缩放:
- 2、绘图 + 位移 + 缩放:
- 3、绘图 + 位移:
- 八、状态的保存和回复
- 九、位移、旋转、缩放
- 十、合成和裁剪
-
- 1、合成
- 2、裁剪
前言
因为在开发过程中需要实现一个滑动滚动条。
之前用到的echarts、uniapp的uchart组件等都是用canvas绘制的,所以就学习了canvas相关内容。
canvas
一、定义:
canvas是什么:
canvas是HTML5的一个标签。用来定义图形,提供了强大的图片处理功能。但是需要注意的是canvas并不绘制图形,只是一张画布,我们要通过脚本在上面绘制图形。
注意:
1、canvas的坐标方向。坐标的(0,0)点是画布的左上角,x轴正方向是从左往右,y轴正方向是从上向下。而绘制圆弧时x轴正方向从左到右,y轴正方向从下到上。
2、canvas 的尺寸不能过大,尽量控制在4000 以内。
路径和子路径:
路径是子路径的集合。
一个上下文对象同时只有一个路径,想要绘制新的路径,就要把当前路径置空。
beginPath() 方法当前路径置空,也就是将路径恢复到默认状态,让之后绘制的路径不受以前路径的影响。
子路径是一条只有一个起点的、连续不断开的线。
moveTo(x,y) 是设置路径起点的方法,也是创建一条新的子路径的方法。
路径里的第一条子路径可以无需设置起点,它的起点默认是子路径中的第一个点。
二、vue创建一个canvas的基本步骤
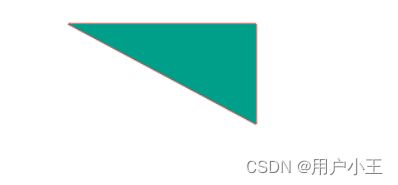
(1)创建一个canvas画布。创建一个div,创建一个唯一标识名。
<canvas ref="canvas" width="300" height="300" @mousedown="canvasDown" @mousemove="canvasMove" @mouseup="canvasUp" @mouseleave="canvasLeave">canvas>
初始化画布
this.canvas = this.$refs.canvas
(2)创建一个“画笔”
this.ctx = this.canvas.getContext('2d')
(3)设置画笔的颜色、线条粗细,或要画的图形形状
// 画笔线条宽度
this.ctx.lineWidth = 20
// 线条颜色
this.ctx.strokeStyle = '#cc0000'
// 图形填充颜色
this.ctx.fillStyle = '#009f8a'
// 开始路径绘制
this.ctx.beginPath();
// 设置路径的起点
this.ctx.moveTo(50, 20)
// 设置路径的终点
this.ctx.lineTo(200, 20)
this.ctx.lineTo(200, 40)
// 首尾相连
this.ctx.closePath()
(4)绘制图形
// 线条着色
this.ctx.stroke()
// 图形填充着色
this.ctx.fill()
三、绘制图形
1、绘制矩形
(1)填充矩形 fillRect(x,y,w,h)
 // 绘制实心矩形
 this.ctx.beginPath();
 this.ctx.fillStyle = 'yellow';
 this.ctx.fillRect(50, 50, 200, 100);
(2)清空一部分 clearRect(x,y,w,h) 和 描边矩形 strokeRect(x,y,w,h)
// 清空一部分
this.ctx.clearRect(60, 60, 50, 50);

// 绘制空心矩形
this.ctx.beginPath();
this.ctx.strokeRect(300, 50, 200, 100);
2、绘制圆弧
(1)、arc(x,y,半径,开始弧度,结束弧度,方向)
 /* 绘制圆弧 */
  this.ctx.beginPath()
  this.ctx.arc(
    200, 100, // 起始点坐标
    50, // 半径
    0, Math.PI * 0.5, // 角度
    true // 方向 true 逆时针 false 顺时针
  )
  this.ctx.stroke()
效果:

(2)、切线圆弧:arcTo(x1,y1,x2,y2,半径)
绘制起点和坐标1,坐标1和坐标2两条线相切的圆
this.ctx.beginPath();
this.ctx.moveTo(50,50);
this.ctx.arcTo(
    400,50,
    400,250,
    100
);
this.ctx.stroke();
3、贝塞尔曲线
(1)二次贝塞尔曲线:quadraticCurveTo(控制点x1,控制点y1,x,y)
有两个固定的点,一个控制点
/* 二次贝塞尔曲线 */
 ctx.beginPath();
 //起点
 ctx.moveTo(50, 50);
 ctx.quadraticCurveTo(
   //控制点
   200, 500,
   //结束点
   200, 50,
 )
 ctx.stroke();
(2)三次贝塞尔曲线:bezierCurveTo(cpx1,cpy1,cpx2,cpy2,x,y)
两个控制点,两个固定点
四、渐变色着色
1、建立渐变对象
(1)线性渐变
gradient=ctx.createLinearGradient(x1, y1, x2, y2)
(2)径向渐变
gradient=ctx.createRadialGradient(x1, y1, r1, x2, y2, r2)
2、定义渐变的颜色节点
gradient.addColorStop(position, color)
linerGradient.addColorStop(0,'red');
linerGradient.addColorStop(.5,'yellow');
linerGradient.addColorStop(1,'green');
3、为图形着色
ctx.fillStyle= gradient
ctx.strokeStyle= gradient
五、描边的属性和透明度
Transparency(透明度)
globalAlpha = transparencyValue: 这个属性影响到 canvas 里所有图形的透明度,有效的值范围是 0.0 (完全透明)到 1.0(完全不透明),默认1.0。
ctx.globalAlpha=0.5;
1、lineWidth
线宽。只能是正值。默认是 1.0。
起始点和终点的连线为中心,上下各占线宽的一半。
2、strokeStyle:描边的颜色
3、lineCap:描边端点样式
(1) butt:线段末端以方形结束
(2) round:线段末端以圆形结束
(3) square:线段末端以方形结束,但是增加了一个宽度和线段相同,高度是线段厚度一半的矩形区域

4、lineJoin:描边拐角类型
round 通过填充一个额外的,圆心在相连部分末端的扇形,绘制拐角的形状。 圆角的半径是线段的宽度。
bevel 在相连部分的末端填充一个额外的以三角形为底的区域, 每个部分都有各自独立的矩形拐角。
miter(默认) 通过延伸相连部分的外边缘,使其相交于一点,形成一个额外的菱形区域。
miterLimit:拐角最大厚度(只适用于lineJoin=‘miter’ 的情况)

5、虚线
用 setLineDash 方法和 lineDashOffset 属性来制定虚线样式。
setLineDash 方法接受一个数组,来指定线段与间隙的交替;lineDashOffset属性设置起始偏移量。
 ctx.setLineDash([20, 5]);  // [实线长度, 间隙长度]
 ctx.lineDashOffset = -0;
六、添加文字
/* 文本 */
 ctx.beginPath()
 // 设置字体
 ctx.font = "Bold 20px Arial";
 // 设置对齐方式
 ctx.textAlign = "left";
 // 设置填充颜色
 ctx.fillStyle = "#008600";
 // 设置字体内容,以及在画布上的位置
 ctx.fillText("Hello!", 10, 50);
 // 绘制空心字
 ctx.strokeText("Hello!", 10, 100);
七、添加图片
1、绘图 + 裁切 + 位移 + 缩放:
前 4 个是定义图像源的切片位置和大小,后 4 个则是定义切片的目标显示位置和大小。
drawImage(image, x1, y1,w1,h1,x2,y2,w2,h2)
   /** 绘制图片 */
   ctx.beginPath()
   const img = new Image();
   img.src="../../assets/images/1.png"
   img.onload = function(){
     const {width, height} = img
     ctx.drawImage(img, 0, 0, width, height, 200, 200, width, height)
   }
2、绘图 + 位移 + 缩放:
drawImage(image, x, y,width,height)
3、绘图 + 位移:
drawImage(image, x, y)
八、状态的保存和回复
保存当前状态:save()
恢复上一次保存的状态:restore()
 	const c = document.getElementById("myCanvas");
	const ctx = c.getContext("2d");

	ctx.fillStyle = "#999";
	ctx.fillRect(0, 0, 400, 30);
	ctx.save(); // 保存当前状态 01

	ctx.fillStyle = "#09F";
	ctx.fillRect(0, 30, 400, 30);
	ctx.save(); // 保存当前状态 02

	ctx.fillStyle = "#333";
	ctx.fillRect(0, 60, 400, 30);

	ctx.restore(); // 取出保存的状态 02 恢复
	ctx.fillRect(0, 90, 400, 30);

	ctx.restore(); // 取出保存的状态 01 恢复
	ctx.fillRect(0, 120, 400, 30);
九、位移、旋转、缩放
位移:translate(x, y)
旋转:rotate(angle) // Math.PI
缩放:scale(x, y)
十、合成和裁剪
1、合成
示例:
ctx.beginPath()
ctx.fillStyle = "blue";
ctx.fillRect(0, 0, 200, 200);

ctx.globalCompositeOperation = "source-over"; //全局合成操作
ctx.fillStyle = "red";
ctx.fillRect(100, 100, 200, 200);
2、裁剪
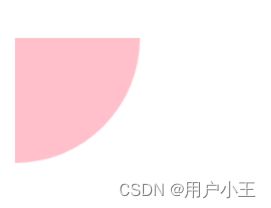
路径裁剪就是在画布上设置一个路径,让我们之后绘制的图像只显示在这个路径之中。
步骤:
1)定义路径
2)ctx.clip()
3)绘制其它图形
示例:
 // 裁剪
 ctx.beginPath();
 ctx.arc(100, 100, 100, 0, Math.PI * 2);
 ctx.clip();
 ctx.fillStyle = "pink";
 ctx.fillRect(100, 100, 100,100);
示例:
 /* 逐帧动画 */
    const length = 8
    // 宽高
    const size = 256
    // 当前帧
    let fm = 0
    // 图像源
    const img = new Image()
    img.src = 'https://blog-st.oss-cn-beijing.aliyuncs.com/165079803486731030150488981656.jpg'
    img.onload = drawPic
    function drawPic() {
      ctx.beginPath()
      ctx.drawImage(
        img,
        fm * size, 0, size, size,
        400, 200, size, size
      )
      fm++
      if (fm == length) {
        fm = 0
      }
      setTimeout(() => {
        drawPic()
      }, 160)
    }


