基于SpringbootShiro实现的CAS单点登录
概述
单点登录(Single Sign On,SSO)是一种登录管理机制,主要用于多系统集成,即在多个系统中,用户只需要到一个中央服务器登录一次即可访问这些系统中的任何一个,无须多次登录。常见的例子就是,当我们在淘宝网上登录了之后,如果再访问天猫网的话是不需要再次登录的。
详细
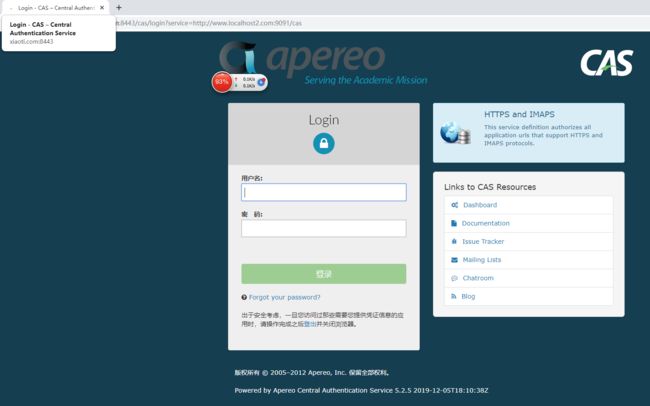
一、运行效果

二、实现过程
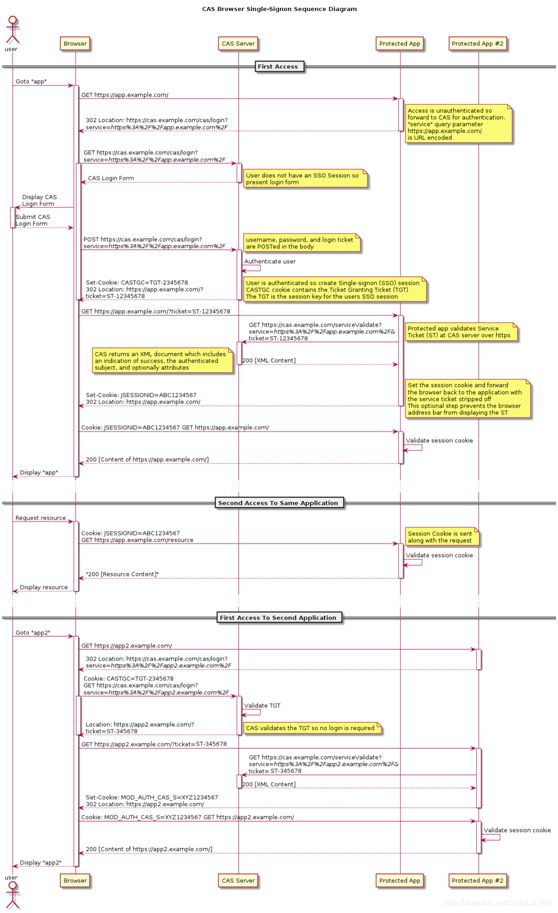
①、cas单点登录流程图
CAS是SSO的一种实现方式,CAS系统分为服务端与客户端,服务端提供登录认证的功能,客户端需要跳转到服务端进行登录认证,大体流程如下
②、cas 服务端搭建
CAS 服务端登录需要使用https,在本地我们可以使用 JDK 自带的 keytool 工具生成数字证书,具体流程和配置如下:
a 修改hosts文件,将要配置的CAS服务端域名映射到本地:
127.0.0.1 www.xiaoti.com
b 生成密钥库文件,这里设置密钥库口令,名字与姓氏处填写单点登录服务器的域名(这里是 www.xiaoti.com),其余项可随便填写。654321,设置密钥口令:654321,两者须相同:
c 查看生成的密钥库,输入密钥库密码654321:

keytool -list -keystore localhost.keystore


d 生成crt证书文件,输入密钥库密码654321:

keytool -export -alias localhost -keystore localhost.keystore -file localhost.crt


e 客户端信任证书,这里需要输入的密码是changeit:

keytool -import -keystore "D:\Program Files\Java\jdk1.8.0_66\jre\lib\security\cacerts" -file localhost.crt -alias localhost


f tomcat配置,server.xml配置:
③、 新建cas服务端项目
CAS已经提供了服务端的基本war包实现,我们只需在其基础上作修改即可,使用maven 的oerlay配置可以通过覆盖的方式来进行修改。
a 新建Maven webapp项目,这里命名为cas-server-demo,引入依赖:
         4.0.0
         gdou.laixiaoming
         cas-server-demo
         war
         0.0.1-SNAPSHOT
         cas-server-demo Maven Webapp
         http://maven.apache.org


                   5.2.5


                            org.apereo.cas
                            cas-server-webapp
                            ${cas.version}
                            war
                            runtime


                   cas


                                     org.apache.maven.plugins
                                     maven-compiler-plugin
                                     3.1

                                               1.8
                                               1.8


                                     org.apache.maven.plugins
                                     maven-war-plugin

                                               false
                                               cas


                                                                 org.apereo.cas
                                                                 cas-server-webapp
b 打包,选择上面我们配置的tomcat,启动:
浏览器打开https://www.xiaoti.com:8443/cas/login,默认登录名和密码是casuser和Mellon,输入后可成功登录
④、配置数据库认证
上面我们成功搭建了CAS Server,但是只能使用默认的用户名和密码进行登录,如果我们的用户名和密码是存储在数据库的话,需要引入 JDBC的支持并进行配置:
a 首先,pom.xml配置文件中增加依赖:
                            org.apereo.cas
                            cas-server-support-jdbc
                            ${cas.version}


                            org.apereo.cas
                            cas-server-support-jdbc-drivers
                            ${cas.version}


                            mysql
                            mysql-connector-java
                            5.1.36
b 创建用户密码表:
CREATE TABLE `user` (
`id` bigint(20) NOT NULL AUTO_INCREMENT,
`userName` varchar(15) DEFAULT NULL,
`password` char(32) DEFAULT NULL,
PRIMARY KEY (`id`)
) ENGINE=InnoDB AUTO_INCREMENT=2 DEFAULT CHARSET=utf8mb4;
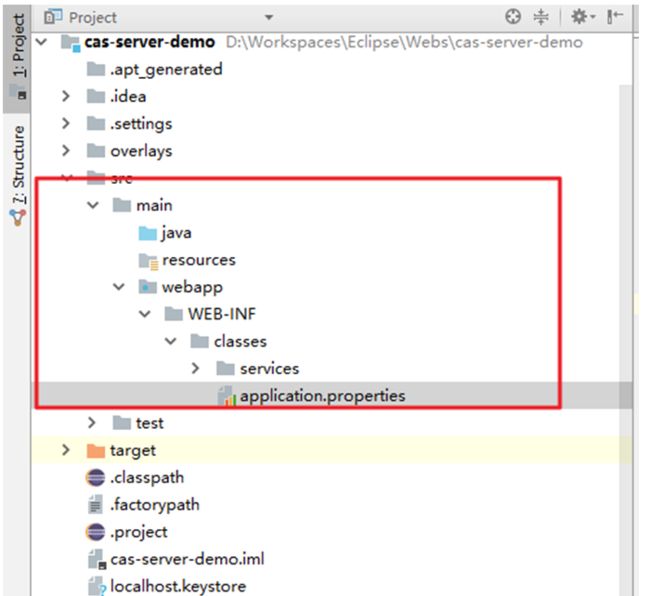
c 将war包中的的application.properties复制出来:
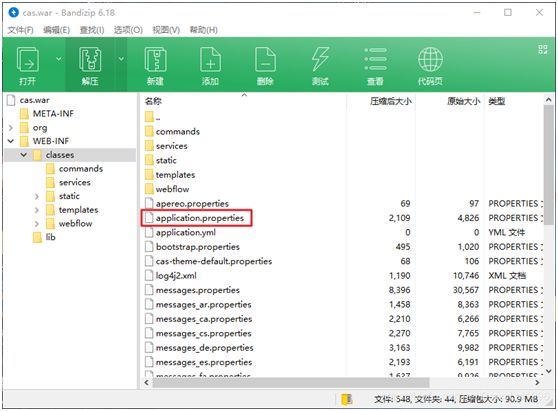
放到项目如下位置,这里的路径需要对应(确保部署后的application.properties可以对原文件进行覆盖),才能实现更新:
d 修改application.properties,关于JDBC这里的更详细的配置,可以访问官网 database-authentication部分:
#数据库连接配置
cas.authn.jdbc.query[0].user=root
cas.authn.jdbc.query[0].password=mysql
cas.authn.jdbc.query[0].driverClass=com.mysql.jdbc.Driver
cas.authn.jdbc.query[0].url=jdbc:mysql://localhost:3306/cas_auth
cas.authn.jdbc.query[0].dialect=org.hibernate.dialect.MySQLDialect
##从数据库中获取用户名和密码进行匹配登录
cas.authn.jdbc.query[0].sql=SELECT * FROM `user` WHERE userName=?
cas.authn.jdbc.query[0].fieldPassword=password
e 重新构建项目并启动,输入数据库中存在的用户名和密码,是可以成功登录的;
⑤、cas服务端搭建(整合Shiro和SpringBoot)
新建maven项目,引入相关依赖
         4.0.0

                   org.springframework.boot
                   spring-boot-starter-parent
                   2.1.3.RELEASE


         gdou.laixiaoming
         cas-client-a
         0.0.1-SNAPSHOT
         cas-client-a
         CAS Client Demo.


                   1.8
                   1.4.0


                            org.springframework.boot
                            spring-boot-starter-thymeleaf


                            org.springframework.boot
                            spring-boot-starter-web


                            org.apache.shiro
                            shiro-spring
                            ${shiro.version}


                            org.apache.shiro
                            shiro-core
                            ${shiro.version}


                            org.apache.shiro
                            shiro-cas
                            ${shiro.version}


                            org.apache.shiro
                            shiro-aspectj
                            ${shiro.version}


                            org.springframework.boot
                            spring-boot-starter-test
                            test


                                     org.springframework.boot
                                     spring-boot-maven-plugin
shiro配置
扩展CasRealm,在登录成功后,可以获取到登录的用户名,在客户端这边再把用户拥有的角色和权限查询出来并保存:
public class MyCasRealm extends CasRealm{

    @Override
    protected AuthorizationInfo doGetAuthorizationInfo(PrincipalCollection principals) {
        //获取用户名
        String username = (String)principals.getPrimaryPrincipal();

        SimpleAuthorizationInfo authorizationInfo = new SimpleAuthorizationInfo();
//        authorizationInfo.setRoles(new HashSet<>(Arrays.asList("admin")));
//        authorizationInfo.setStringPermissions(new HashSet<>(Arrays.asList("admin")));

        return authorizationInfo;
    }
}

Shiro配置:
@Configuration
public class ShiroConfig {

    @Bean
    public ShiroFilterFactoryBean shirFilter(SecurityManager securityManager) {
        ShiroFilterFactoryBean shiroFilterFactoryBean = new ShiroFilterFactoryBean();
        shiroFilterFactoryBean.setSecurityManager(securityManager);

        //配置自定义casFilter
        Map filters = new LinkedHashMap<>();
        CasFilter casFilter = new CasFilter();
        casFilter.setFailureUrl("/casFailure");
        filters.put("cas", casFilter);
        shiroFilterFactoryBean.setFilters(filters);

        //配置filter调用链
        Map filterChainDefinitionMap = new LinkedHashMap<>();
        //anon为匿名,不拦截
        filterChainDefinitionMap.put("/static/**", "anon");
        filterChainDefinitionMap.put("/casFailure", "anon");
        //拦截CAS Server返回的ticket
        filterChainDefinitionMap.put("/cas", "cas");
        //退出登录
        filterChainDefinitionMap.put("/logout", "anon");
        filterChainDefinitionMap.put("/logouttips", "anon");
        //需要登录访问的页面
        filterChainDefinitionMap.put("/**", "user");
        shiroFilterFactoryBean.setFilterChainDefinitionMap(filterChainDefinitionMap);

        //service指定了登录成功后的回调地址,回调/cas将被CasFilter拦截,获取服务端返回的Service Ticket进行登录
        shiroFilterFactoryBean.setLoginUrl("https://www.xiaoti.com:8443/cas/login?service=http://www.localhost1.com:9090/cas");
        //登录成功后要跳转的链接
        shiroFilterFactoryBean.setSuccessUrl("/");
        //未授权跳转页面
        shiroFilterFactoryBean.setUnauthorizedUrl("/403");

        return shiroFilterFactoryBean;
    }


    @Bean
    public MyCasRealm casRealm(){
        //使用自定义Realm
        MyCasRealm casRealm = new MyCasRealm();
        casRealm.setCachingEnabled(true);
        casRealm.setAuthenticationCachingEnabled(true);
        casRealm.setAuthenticationCacheName("authenticationCache");
        casRealm.setAuthorizationCachingEnabled(true);
        casRealm.setAuthorizationCacheName("authorizationCache");
        //指定CAS服务端地址
        casRealm.setCasServerUrlPrefix("https://www.xiaoti.com:8443/cas");
        //当前应用的CAS服务URL,用于接收和处理CAS服务端的Ticket
        casRealm.setCasService("http://www.localhost1.com:9090/cas");
        return casRealm;
    }

    @Bean
    public SecurityManager securityManager(){
        DefaultWebSecurityManager securityManager =  new DefaultWebSecurityManager();
        securityManager.setRealm(casRealm());
        return securityManager;
    }

    /**
     * Shiro生命周期处理器
     */
    @Bean
    public LifecycleBeanPostProcessor lifecycleBeanPostProcessor() {
        return new LifecycleBeanPostProcessor();
    }

    @Bean
    @DependsOn({"lifecycleBeanPostProcessor"})
    public DefaultAdvisorAutoProxyCreator advisorAutoProxyCreator() {
        DefaultAdvisorAutoProxyCreator advisorAutoProxyCreator = new DefaultAdvisorAutoProxyCreator();
        advisorAutoProxyCreator.setProxyTargetClass(true);
        return advisorAutoProxyCreator;
    }

    /**
     * 开启Shiro AOP的注解支持(如@RequiresRoles,@RequiresPermissions)
     */
    @Bean
    public AuthorizationAttributeSourceAdvisor authorizationAttributeSourceAdvisor(SecurityManager securityManager){
        AuthorizationAttributeSourceAdvisor authorizationAttributeSourceAdvisor = new AuthorizationAttributeSourceAdvisor();
        authorizationAttributeSourceAdvisor.setSecurityManager(securityManager);
        return authorizationAttributeSourceAdvisor;
    }

}
⑥、cas单点登出配置
退出登录时,将页面重定向到CAS的退出页面,service参数的设置指定了退出登录后的回调地址:
@GetMapping("/logout")
         public String logout(){
                   SecurityUtils.getSubject().logout();
                   return "redirect:https://www.xiaoti.com:8443/cas/logout?service=https://www.xiaoti.com:9090/logouttips";
         }
service参数名可以在CAS服务端通过修改application.properties进行配置,关于登出的更多配置,可见官网:
#单点登出
#配置允许登出后跳转到指定页面
cas.logout.followServiceRedirects=true
#跳转到指定页面需要的参数名为 service
cas.logout.redirectParameter=service
在CAS服务端退出后,会向注册的每个服务发送登出请求,该请求可以由SingleSignOutFilter进行拦截并销毁当前会话:
@Configuration
public class CasConfig {

    @Bean
    public FilterRegistrationBean singleSignOutFilterRegistration() {
        FilterRegistrationBean registration = new FilterRegistrationBean(new SingleSignOutFilter());
        registration.addUrlPatterns("/*");
        return registration;
    }

    @Bean
    public ServletListenerRegistrationBean singleSignOutListenerRegistration() {
        ServletListenerRegistrationBean registration =
                new ServletListenerRegistrationBean<>(new SingleSignOutHttpSessionListener());
        return registration;
    }
}
⑥、cas单点登出配置
退出登录时,将页面重定向到CAS的退出页面,service参数的设置指定了退出登录后的回调地址:
|
|
#单点登出
#配置允许登出后跳转到指定页面
cas.logout.followServiceRedirects=true
#跳转到指定页面需要的参数名为 service
cas.logout.redirectParameter=service
在CAS服务端退出后,会向注册的每个服务发送登出请求,该请求可以由SingleSignOutFilter进行拦截并销毁当前会话:
|
|
⑦、cas服务端配置
客户端搭建好后,需要在CAS服务端上配置哪些服务可以注册到CAS服务端上,服务的管理也有许多方式,这里使用的JSON的方式,需要先在服务端引入相关依赖(更多说明见官网):
|
|
然后,在已经生成的war包中找到文件:

将文件复制到这个位置:

修改,serviceId指定允许注册的客户端,更多配置见官网:
{
"@class" : "org.apereo.cas.services.RegexRegisteredService",
"serviceId" : "^(https|imaps|http)://(www\\.localhost1\\.com:9090|www\\.localhost2\\.com:9091)/.*",
"name" : "HTTPS and IMAPS",
"id" : 10000001,
"description" : "This service definition authorizes all application urls that support HTTPS and IMAPS protocols.",
"evaluationOrder" : 10000
}
同时在application.properties指定配置文件位置:
#客户端服务注册
cas.serviceRegistry.json.location=classpath:/services
至此,CAS客户端搭建完成了
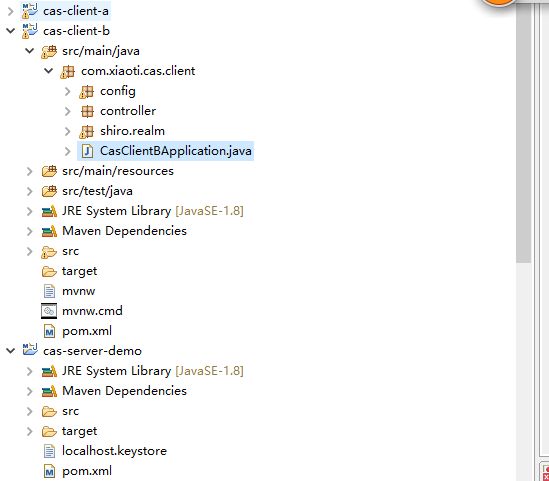
三、项目结构图
四、补充
CAS全称为Central Authentication Service即中央认证服务,是一个企业多语言单点登录的解决方案,并努力去成为一个身份验证和授权需求的综合平台。
CAS是由Yale大学发起的一个企业级的、开源的项目,旨在为Web应用系统提供一种可靠的单点登录解决方法(属于 Web SSO )。
CAS协议至少涉及三方:客户端Web浏览器,请求身份验证的Web应用程序和CAS服务器。 它也可能涉及后端服务,如数据库服务器,它没有自己的HTTP接口,但与Web应用程序进行通信。