three.js学习笔记(一)——GUI工具的使用
Dat.gui 是一个 GUI 组件,他可以为你的 demo 提供参数的设置
官方github
安装与引入
npm install --save dat.gui
import * as dat from 'dat.gui'
实例化对象
// 实例化可视化GUI工具   可以通过按 H 键隐藏GUI面板
const gui = new dat.GUI() //可传递参数{ closed:true ,width:400 }
// gui.hide()  //隐藏GUI面板,可通过按两次 H键开启显示
之后你就会看到页面右上角出现一个写着 Close Controls的面板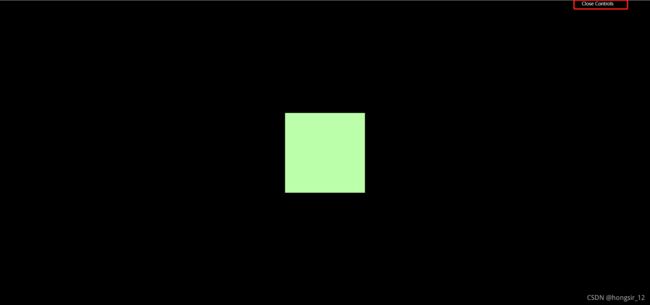
往面板添加内容
// 往GUI面板添加要显示的对象的参数
// 参数一:对象;参数二:要调整的对象属性;参数三:最小值;参数四:最大值;参数五:调整精度
gui.add(mesh.position,'y',-3,3,0.01)

//另一种写法,等价于上面
gui
.add(mesh.position, 'y')
.min(-3)
.max(3)
.step(0.01)
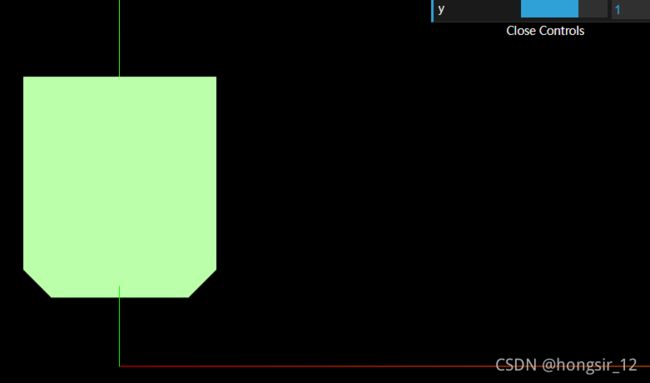
.name('立方体-Y')
之后就可以通过滑动该进度条或输入数值改变网格在y轴上的位置
如果属性为Boolean型
//控制网格显示与隐藏
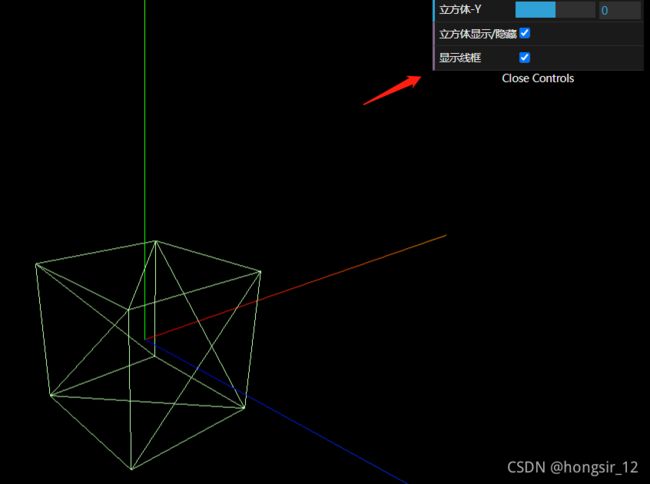
gui.add(mesh, 'visible').name('立方体显示/隐藏')
//是否渲染为线框
gui.add(material, 'wireframe').name('显示线框')
改变颜色
不能直接用 gui.add(对象,‘color’),必须使用 gui.addColor()
更改物体材质颜色
当前物体材质颜色
const material = new THREE.MeshBasicMaterial({ color: 0xbbffaa })
试着直接用gui.addColor(material,‘color’),发现没法改变颜色
gui.addColor(material,'color')

打印一下可以发现返回结果为一个对象
console.log(material.color); //Color{r:1,g:0,b:0,isColor:true}
然而这个对象并不符合gui.addColor()的参数格式要求,它只支持以下四种参数的属性格式

所以我们要重新声明一个变量然后里面用来存放各类参数,然后将材质颜色设置为该变量对象里的颜色属性值
// 用于存放各类参数
const parameters = {
  color: '#bfa', // 或者 color:0xbbffaa
}
const material = new THREE.MeshBasicMaterial({ color: parameters.color })
// 之后通过onChange()监听颜色变化事件,再通过material.color.set()将材质颜色设置为该颜色
gui.addColor(parameters, 'color').name('颜色').onChange(() => {
  material.color.set(parameters.color)
})

添加动画
GUI面板也可以给对象添加各种动作
const parameters = {
  color: '#bfa', //color:0xff0000
  spin: () => {
    //网格旋转一周
    gsap.to(mesh.rotation, { duration: 3, y: mesh.rotation.y + Math.PI * 2 })
  },
}
gui.add(parameters, 'spin').name('旋转一周')
点击后可发现物体绕着y轴旋转了一周

源代码
import * as THREE from 'three'
import { OrbitControls } from 'three/examples/jsm/controls/OrbitControls.js'
import gsap from 'gsap'
import * as dat from 'dat.gui'

// Debug
// 实例化可视化GUI工具   可以通过按 H 键隐藏GUI面板
const gui = new dat.GUI() //可传递对象参数{ closed:true ,width:400}
// gui.hide()  //隐藏GUI面板,可通过按两次 H键开启显示
const parameters = {
  color: '#bfa', //color:0xff0000
  spin: () => {
    //网格旋转一周
    gsap.to(mesh.rotation, { duration: 3, y: mesh.rotation.y + Math.PI * 2 })
  },
}
/**
 * Base
 */
// Canvas
const canvas = document.querySelector('canvas.webgl')

// Scene
const scene = new THREE.Scene()

/**
 * Object
 */
const geometry = new THREE.BoxBufferGeometry(1, 1, 1)
const material = new THREE.MeshBasicMaterial({ color: parameters.color })
const mesh = new THREE.Mesh(geometry, material)
scene.add(mesh)

const axes = new THREE.AxesHelper(5)
scene.add(axes)

//Debug
// 往GUI面板添加要显示的对象的参数
// 参数一:对象;参数二:要调整的对象属性;参数三:最小值;参数四:最大值;参数五:调整精度
// gui.add(mesh.position,'y',-3,3,0.01)
// gui.add(mesh.position,'x',-3,3,0.01)
// gui.add(mesh.position,'z',-3,3,0.01)
//另一种写法,等价于上面
gui
  .add(mesh.position, 'y')
  .min(-3)
  .max(3)
  .step(0.01)
  .name('立方体-Y')

//控制网格显示与隐藏
gui.add(mesh, 'visible').name('立方体显示/隐藏')
//是否渲染为线框
gui.add(material, 'wireframe').name('显示线框')
// 若想改变颜色则必须使用 addColor()
// 不能直接改变材质颜色,因为material.color是一个存放rgb属性的对象,而不是颜色字符串或0x进制单位
// console.log(material.color);  //Color{r:1,g:0,b:0,isColor:true}
// 所以要另外声明一个用以保存颜色的参数对象
// 之后通过onChange()监听颜色变化事件,再通过material.color.set()将材质颜色设置为该颜色
gui.addColor(parameters, 'color').name('颜色').onChange(() => {
  material.color.set(parameters.color)
})
gui.add(parameters, 'spin').name('旋转一周')
/**
 * Sizes
 */
const sizes = {
  width: window.innerWidth,
  height: window.innerHeight,
}

window.addEventListener('resize', () => {
  // Update sizes
  sizes.width = window.innerWidth
  sizes.height = window.innerHeight

  // Update camera
  camera.aspect = sizes.width / sizes.height
  camera.updateProjectionMatrix()

  // Update renderer
  renderer.setSize(sizes.width, sizes.height)
  renderer.setPixelRatio(Math.min(window.devicePixelRatio, 2))
})

/**
 * Camera
 */
// Base camera
const camera = new THREE.PerspectiveCamera(
  75,
  sizes.width / sizes.height,
  0.1,
  100
)
camera.position.z = 3
scene.add(camera)

// Controls
const controls = new OrbitControls(camera, canvas)
controls.enableDamping = true

/**
 * Renderer
 */
const renderer = new THREE.WebGLRenderer({
  canvas: canvas,
})
renderer.setSize(sizes.width, sizes.height)
renderer.setPixelRatio(Math.min(window.devicePixelRatio, 2))

/**
 * Animate
 */
const clock = new THREE.Clock()

const tick = () => {
  const elapsedTime = clock.getElapsedTime()

  // Update controls
  controls.update()

  // Render
  renderer.render(scene, camera)

  // Call tick again on the next frame
  window.requestAnimationFrame(tick)
}

tick()