数据结构——线性表之顺序表
目录
一.线性表
二.顺序表实现
2.1 概念及结构
2.2 动态顺序表
2.2.1 初始化与销毁函数
2.2.2 打印函数
2.2.3 尾插函数
2.2.4 尾删函数
2.2.5 扩容函数
2.2.6 头插函数
2.2.7 头删函数
2.2.8 任意位置插入函数
2.2.9 查找函数
2.2.10 任意位置删除函数
2.2.11 修改函数
三.完整代码
四.力扣经典例题
3.1 移除元素
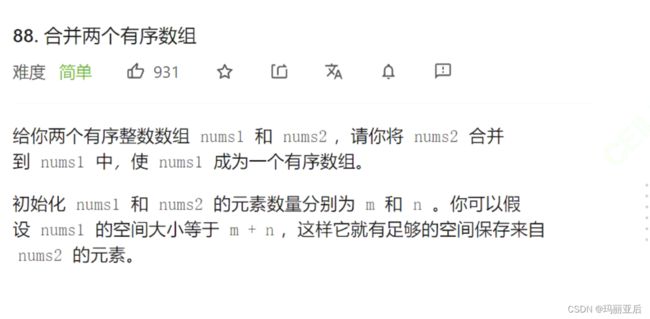
3.2 合并有序数组
五.结语
一.线性表
二.顺序表实现
2.1 概念及结构
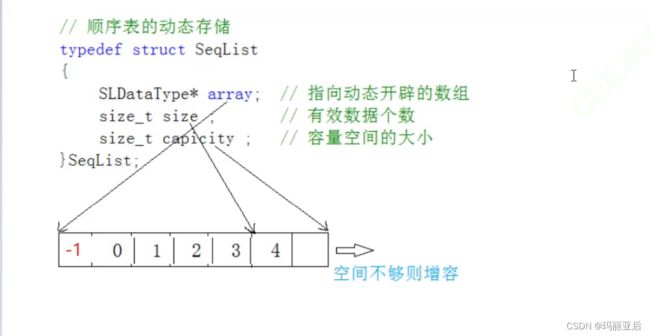
顺序表是用一段物理地址连续的存储单元依次存储数据元素的线性结构,一般情况下采用数组存储。在数组上完成数据的增删查改。
顺序表一般可以分为:
- 静态顺序表:使用定长数组存储(不好用)。
- 动态顺序表:使用动态开辟的数组存储。
2.2 动态顺序表
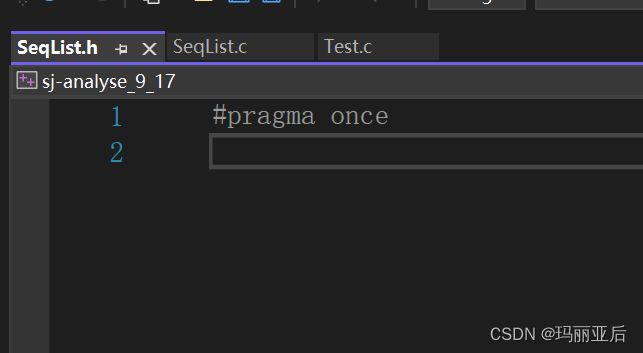
先创造一个头文件和两个源文件 。
这里为了方便修改,引入了2个typedef。
2.2.1 初始化与销毁函数
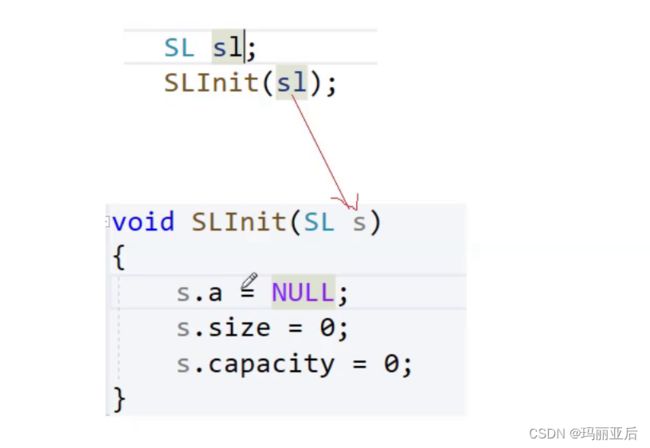
再接一个初始化函数:
//SeqList.h
#pragma once
#include
#include
typedef int SLDataType;
struct SeqList
{
SQDataType*a;
int size; //存储有效数据个数
int capacity; //空间大小
};
//如果想方便输入可以这么定义:
typedef struct SeqList SL;
//这样两个单词就可以用SL来替代了
void SLInit(SL* ps);
void SLDestr(SL* ps); //动态内存开辟时候不销毁可能会导致内存泄漏 //Test.c
#include "SeqList.h"
int main()
{
SL sl;
SLInit(&sl);
return 0;
}返回SeqList.c文件中定义初始化与销毁函数。
//SeqList.c
#define _CRT_SECURE_NO_WARNINGS 1
#include "SeqList.h"

void SLInit(SL* ps)
{
	ps->a = (SLDataType*)malloc(sizeof(SLDataType)*4);//虽然一开始可以让空间大小和malloc都置空,但这样不方便测试,所以先给空间。
	if (ps->a == 0)
	{
		perror("malloc failed");//验证malloc所创空间是否为空
		exit(-1);
	}
	ps->size = 0;
	ps->capacity = 4;

}
void SLDestr(SL* ps)
{
	free(ps->a);
	ps->a = NULL;
	ps->size = ps->capacity = 0;
}
接下来我们开始定义各种接口并实现其功能
//SeqList.h
#pragma once
#include
#include
#include
typedef int SLDataType;
struct SeqList
{
	SLDataType* a;
	int size;
	int capacity;
};
typedef struct SeqList SL;

void SLInit(SL* ps);
void SLDestr(SL* ps);
//打印函数
void SLprint(SL* ps);
//扩容函数
void SLCheckCapacity(SL* ps);
//头插尾插,头删尾删
void SLPushBack(SL* ps, SLDataType x);
void SLPopBack(SL* ps);
void SLPushFront(SL* ps, SLDataType x);
void SLPopFront(SL* ps);

//顺序表在pos位置位置插入x
void SeqListInsert(SL* ps, size_t pos, SLDataType x);

//顺序表删除pos位置的值
void SeqListErase(SL* ps, size_t pos);
//查找函数
int SLFind(SL* ps, SLDataType x);
//修改函数
void SLModify(SL* ps, int pos, SLDataType x);
2.2.2 打印函数
//打印函数
void SLprint(SL* ps)
{
	for (int i = 0; i < ps->size; i++)
	{
		printf("%d ", ps->a[i]);
	}
	printf("\n");
}
2.2.3 尾插函数
关于realloc出来的空间不用free问题:
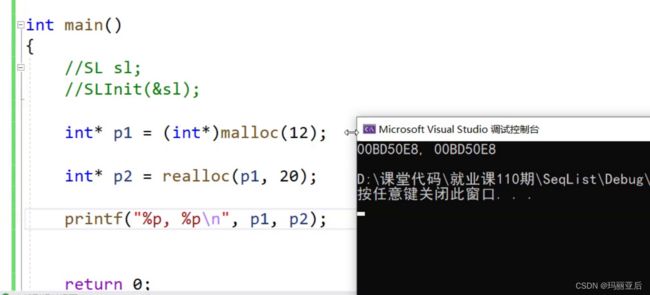
realloc分两种扩容(都有可能发生),当要扩容时会分析后面是否有足够空间来分配给你,不够就会扩容。
第一种是原地扩容:即在原数组中再开辟多余的空间,这时候开辟过后的空间地址其实与原数组a是一致的。
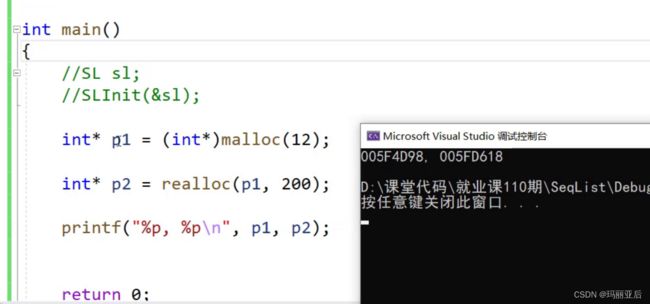
第二种是异地扩容:即不在原空间,而是重新开辟出新的空间,新空间满足了扩容需求的同时还会把原数组中的元素拷贝过来。这时候原来的空间就会销毁。
其实我们可以测试一下relloc会是哪种扩容:
当我们设置大一点时就变成异地扩容了
因此解答了不用free的问题,因为realloc会自动帮你拷贝和释放。
//尾插函数
void SLPushBack(SL* ps, SLDataType x)
{
	if (ps->size == ps->capacity)
	{
		SLDataType* tmp = (SLDataType*)realloc(ps->a, ps->capacity * 2 *(sizeof(SLDataType)));
		if (tmp == NULL)
		{
			perror("realloc failed");
			exit(-1);
		}
		ps->a = tmp;
		ps->capacity *= 2;
	}
	ps->a[ps->size] = x;
	ps->size++;


}
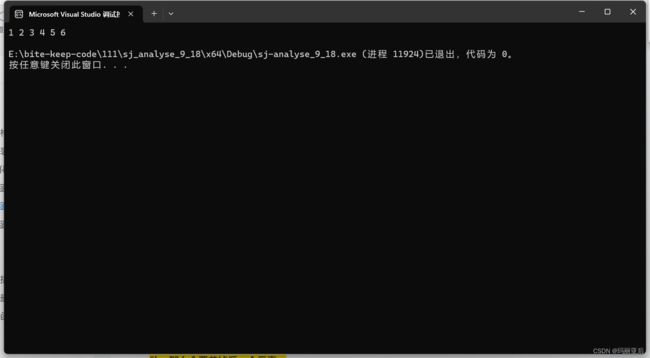
接下来我们来测试一下尾插并验证是否扩容:
//Test.c
#include
#include "SeqList.h"
int main()
{
	SL sl;
	SLInit(&sl);
	/*int* p1 = (int*)malloc(12);
	int* p2 = realloc(p1, 10);
	printf("%p, %p\n", p1, p2);*/
	SLPushBack(&sl, 1);
	SLPushBack(&sl, 2);
	SLPushBack(&sl, 3);
	SLPushBack(&sl, 4);
	SLPushBack(&sl, 5);
	SLPushBack(&sl, 6);
	SLprint(&sl);
	SLDestr(&sl);

	return 0;
}
2.2.4 尾删函数
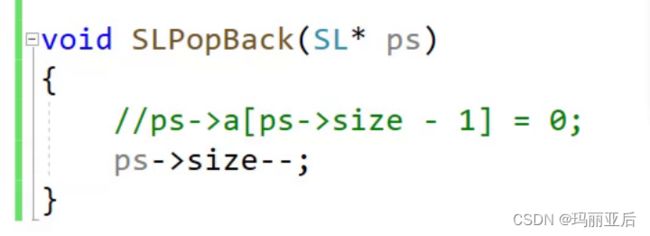
当我们让size--达到尾删时,是否需要把该处空间free掉?
答案是不行,因为malloc规定是整体创造空间并整体释放空间的,不能对整个空间中的一小处进行free,这是不被允许的。
如果尾删函数仅仅是这样写肯定是会出错的,当我们尾删多次直至让size减到了负数,那么后面就不能再进行插入了,因为size已经越界回不来了。 所以我们得规定让它不能越界。
void SLPopBack(SL* ps)
{
//只要size指向不大于0,就不给继续尾删并且提示报错
assert(ps->size > 0);
ps->size--;
}
2.2.5 扩容函数
为了避免每一次的接口函数都要写上扩容标准,我们直接定义一个扩容函数来方便我们调用。
//扩容函数
void SLCheckCapacity(SL* ps)
{
	if (ps->size == ps->capacity)
	{
		SLDataType* tmp = (SLDataType*)realloc(ps->a, ps->capacity * 2 * (sizeof(SLDataType)));
		if (tmp == NULL)
		{
			perror("realloc failed");
			exit(-1);
		}
		ps->a = tmp;
		ps->capacity *= 2;
	}
}
2.2.6 头插函数
基本思路是把空间里面原有的元素往后移动,记住是从最末尾的元素开始,如果从首元素开始移动,那么会覆盖掉后一个元素。
//头插函数
void SLPushFront(SL* ps, SLDataType x)
{
	SLCheckCapacity(ps);
	int end = ps->size - 1;
	while (end >= 0)
	{
		ps->a[end + 1] = ps->a[end];
		end--;
	}
	ps->a[0] = x;
	ps->size++;
}
我们继续来测试一下
//测试函数
void TestSeqList2()
{
	SL sl;
	SLInit(&sl);
	SLPushBack(&sl, 1);
	SLPushBack(&sl, 2);
	SLPushBack(&sl, 3);
	SLPushBack(&sl, 4);
	SLPushBack(&sl, 5);
	SLPushBack(&sl, 6);
	SLPopBack(&sl);

	SLprint(&sl);

	SLPushFront(&sl, 20);
	SLPushFront(&sl, 30);
	SLPushFront(&sl, 40);
	SLprint(&sl);
	SLDestr(&sl);

}
2.2.7 头删函数
在头删函数中我们则是要做到把后一位的元素往前一位覆盖的效果,别忘了最后再ps->size--
这段头删函数还是存在问题,如果size为0时,while不进入循环但size还是会--,这样又会造成之前的越界问题。所以要记得断言!
//头删函数
void SLPopFront(SL* ps)
{
	assert(ps->size > 0);
	int begin = 1;
	while (begin < ps->size)
	{
		ps->a[begin - 1] = ps->a[begin];
		begin++;
	}
	ps->size--;

}
进行试验:先尾删3次,再头删一次
2.2.8 任意位置插入函数
我们用断言来规定只能在数组元素范围内插入,接着再添加扩容函数。
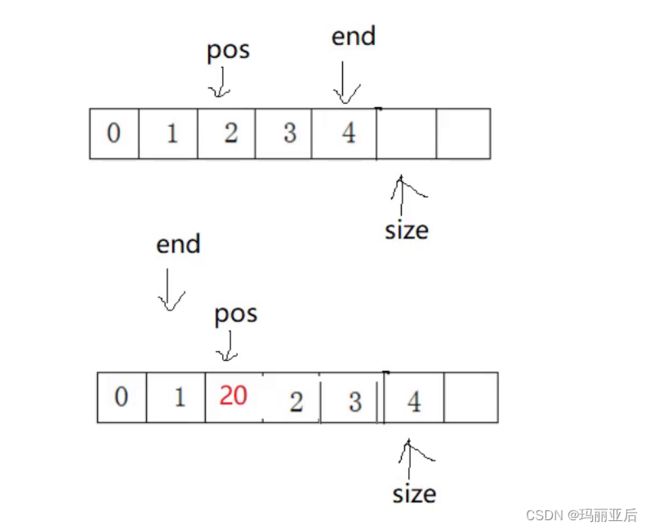
既然要在某个位置中插入元素,那么它后面的元素就要往后移动,这里同样设置一个end,pos为我们想插入的下标。
//顺序表在pos位置位置插入x
void SeqListInsert(SL* ps, size_t pos, SLDataType x)
{
	assert(pos >= 0 && pos <= ps->size);
	SLCheckCapacity(ps);
	int end = ps->size - 1;
	while (end >= pos)
	{
		ps->a[end + 1] = ps->a[end];
		end--;
	}
	ps->a[pos] = x;
	ps->size++;


}
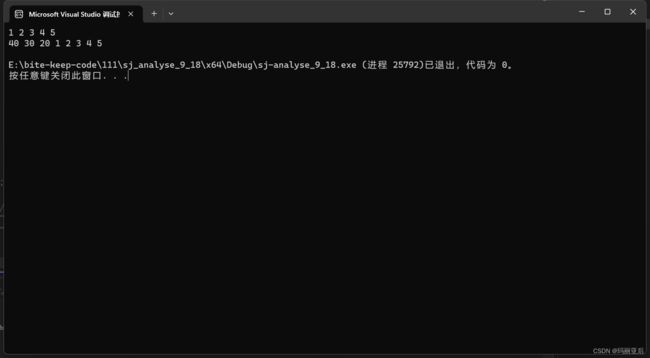
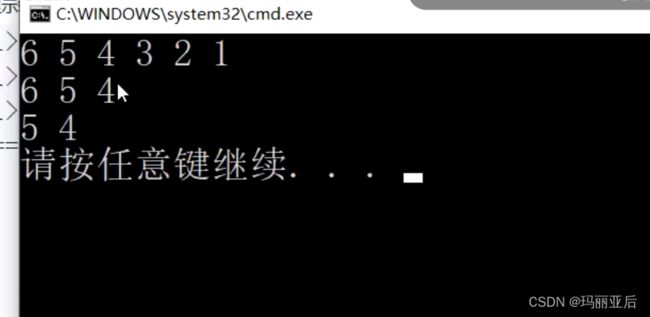
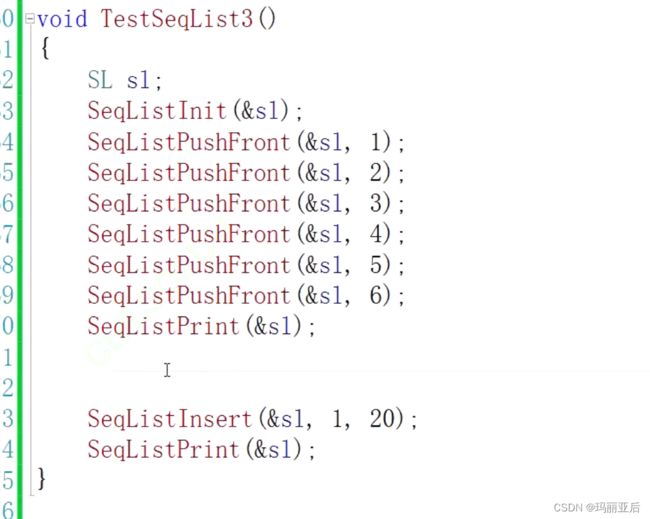
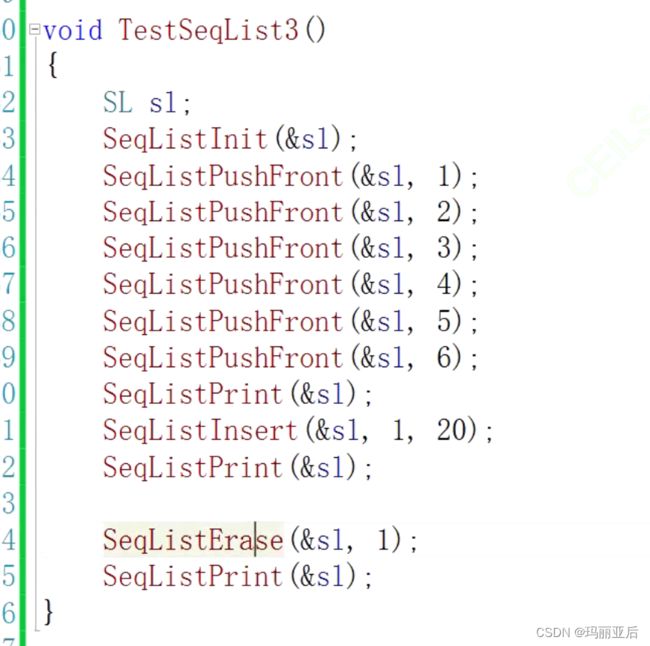
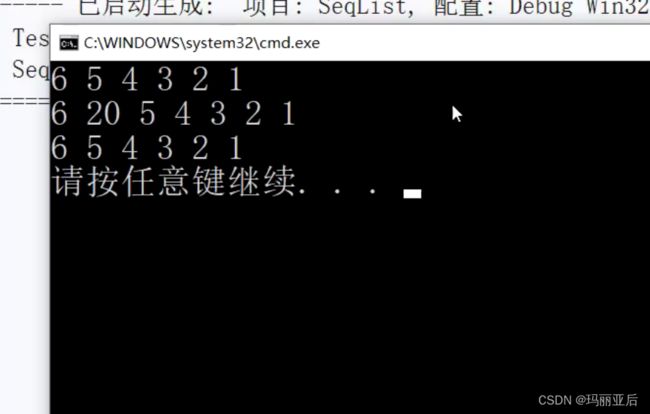
接下来进行试验:我们先头插6 5 4 3 2 1,再从下标为1的位置中插入20.
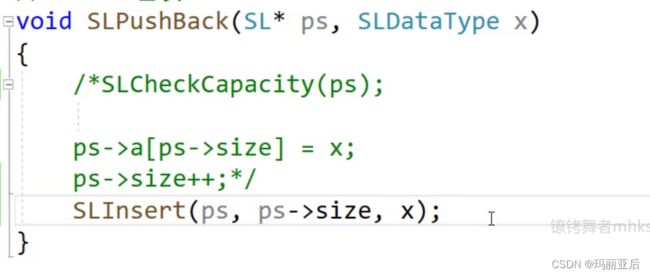
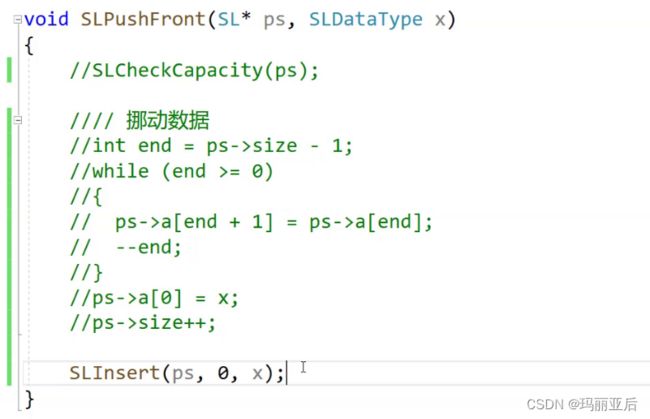
当我们完成Insert函数其实可以发现,它可以在头插和尾插函数里面进行复用。效果是一样的。
2.2.9 查找函数
//查找函数
int SLFind(SL* ps, SLDataType x)
{
	for (int i = 0; i < ps->size; i++)
	{
		if (ps->a[i] == x)
		{
			return i;
		}

	}
	return -1;
}
查找函数通常是跟其他接口函数搭配使用的,就比如与Insert搭配。
void TestSeqList3()
{
	SL sl;
	SLInit(&sl);
	SLPushBack(&sl, 1);
	SLPushBack(&sl, 2);
	SLPushBack(&sl, 3);
	SLPushBack(&sl, 4);
	SLPushBack(&sl, 5);
	SLprint(&sl);

	SeqListInsert(&sl, 3, 40);
	SLprint(&sl);
	int x;
	scanf("%d", &x);
	int pos = SLFind(&sl, x);
	if (pos != -1)
	{
		SeqListInsert(&sl, pos, x * 10);
	}
	SLprint(&sl);
	SLDestr(&sl);

}
2.2.10 任意位置删除函数
老规矩,我们先断言pos只能在ps->size的范围内进行删除,当我们选定好要删除的下标时,需要把其后面的元素依次往前覆盖,这样就可以用覆盖来删除某一位置的元素了。
//顺序表删除pos位置的值
void SeqListErase(SL* ps, size_t pos)
{
	assert(pos >= 0 && pos < ps->size);//注意范围已经改变
	int begin = pos + 1;
	while (begin < ps->size)
	{
		ps->a[begin - 1] = ps->a[begin];
		begin++;
	}
	ps->size--;

}
进行试验:在任意位置插入函数实现的结果后我们再删除下标为1的元素
与Insert同理,Erase同样是可以复用的。
2.2.11 修改函数
这里只需要注意断言使修改的位置在有效范围内就行了。
//修改函数

void SLModify(SL* ps, int pos, SLDataType x)
{
	assert(pos >= 0 && pos < ps->size);
	ps->a[pos] = x;
}
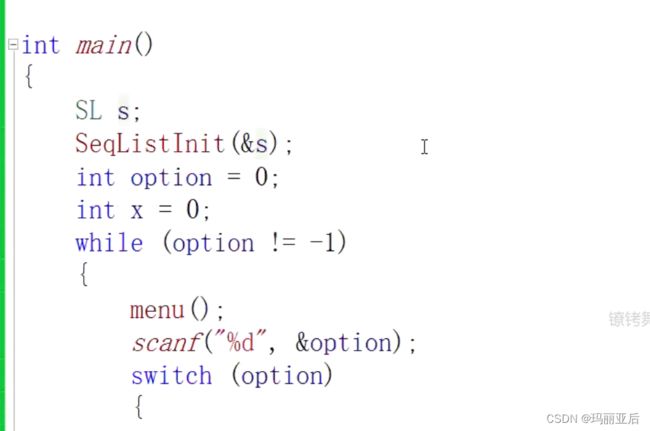
至此增删查改结束了,我们可以编辑一个菜单来总结这些功能:
后面就慢慢用stitch语句慢慢完善就好了。
三.完整代码
//SeqList.h
#pragma once
#include
#include
#include
typedef int SLDataType;
struct SeqList
{
	SLDataType* a;
	int size;
	int capacity;
};
typedef struct SeqList SL;

void SLInit(SL* ps);
void SLDestr(SL* ps);
//打印函数
void SLprint(SL* ps);
//扩容函数
void SLCheckCapacity(SL* ps);
//头插尾插,头删尾删
void SLPushBack(SL* ps, SLDataType x);
void SLPopBack(SL* ps);
void SLPushFront(SL* ps, SLDataType x);
void SLPopFront(SL* ps);

//顺序表在pos位置位置插入x
void SeqListInsert(SL* ps, size_t pos, SLDataType x);

//顺序表删除pos位置的值
void SeqListErase(SL* ps, size_t pos);
//查找函数
int SLFind(SL* ps, SLDataType x);
//修改函数
void SLModify(SL* ps, int pos, SLDataType x);
//SeqList.c
#define _CRT_SECURE_NO_WARNINGS 1
#include "SeqList.h"
void SLInit(SL* ps)
{
ps->a = (SLDataType*)malloc(sizeof(SLDataType) * 4);//虽然一开始可以让空间大小和malloc都置空,但这样不方便测试,所以先给空间。
if (ps->a == 0)
{
perror("malloc failed");//验证malloc所创空间是否为空
exit(-1);
}
ps->size = 0;
ps->capacity = 4;
}
void SLDestr(SL* ps)
{
free(ps->a);
ps->a = NULL;
ps->size = ps->capacity = 0;
}
//打印函数
void SLprint(SL* ps)
{
for (int i = 0; i < ps->size; i++)
{
printf("%d ", ps->a[i]);
}
printf("\n");
}
//扩容函数
void SLCheckCapacity(SL* ps)
{
if (ps->size == ps->capacity)
{
SLDataType* tmp = (SLDataType*)realloc(ps->a, ps->capacity * 2 * (sizeof(SLDataType)));
if (tmp == NULL)
{
perror("realloc failed");
exit(-1);
}
ps->a = tmp;
ps->capacity *= 2;
}
}
//尾插函数
void SLPushBack(SL* ps, SLDataType x)
{
SLCheckCapacity(ps);
ps->a[ps->size] = x;
ps->size++;
}
//尾删函数
void SLPopBack(SL* ps)
{
//只要size指向不大于0,就不给继续尾删并且提示报错
assert(ps->size > 0);
ps->size--;
}
//头插函数
void SLPushFront(SL* ps, SLDataType x)
{
SLCheckCapacity(ps);
int end = ps->size - 1;
while (end >= 0)
{
ps->a[end + 1] = ps->a[end];
end--;
}
ps->a[0] = x;
ps->size++;
}
//头删函数
void SLPopFront(SL* ps)
{
assert(ps->size > 0);
int begin = 1;
while (begin < ps->size)
{
ps->a[begin - 1] = ps->a[begin];
begin++;
}
ps->size--;
}
//顺序表在pos位置位置插入x
void SeqListInsert(SL* ps, size_t pos, SLDataType x)
{
assert(pos >= 0 && pos <= ps->size);
SLCheckCapacity(ps);
int end = ps->size - 1;
while (end >= pos)
{
ps->a[end + 1] = ps->a[end];
end--;
}
ps->a[pos] = x;
ps->size++;
}
//查找函数
int SLFind(SL* ps, SLDataType x)
{
for (int i = 0; i < ps->size; i++)
{
if (ps->a[i] == x)
{
return i;
}
}
return -1;
}
//顺序表删除pos位置的值
void SeqListErase(SL* ps, size_t pos)
{
assert(pos >= 0 && pos < ps->size);//注意范围已经改变
int begin = pos + 1;
while (begin < ps->size)
{
ps->a[begin - 1] = ps->a[begin];
begin++;
}
ps->size--;
}
//修改函数
void SLModify(SL* ps, int pos, SLDataType x)
{
assert(pos >= 0 && pos < ps->size);
ps->a[pos] = x;
}#define _CRT_SECURE_NO_WARNINGS 1
#include
//Test.c
#include
#include "SeqList.h"
void TestSeqList1()
{
SL sl;
SLInit(&sl);
SLPushBack(&sl, 1);
SLPushBack(&sl, 2);
SLPushBack(&sl, 3);
SLPushBack(&sl, 4);
SLPushBack(&sl, 5);
SLPushBack(&sl, 6);
SLPopBack(&sl);
SLprint(&sl);
SLDestr(&sl);
}
void TestSeqList2()
{
SL sl;
SLInit(&sl);
SLPushBack(&sl, 1);
SLPushBack(&sl, 2);
SLPushBack(&sl, 3);
SLPushBack(&sl, 4);
SLPushBack(&sl, 5);
SLPushBack(&sl, 6);
SLPopBack(&sl);
SLprint(&sl);
SLPushFront(&sl, 20);
SLPushFront(&sl, 30);
SLPushFront(&sl, 40);
SLprint(&sl);
SLDestr(&sl);
}
void TestSeqList3()
{
SL sl;
SLInit(&sl);
SLPushBack(&sl, 1);
SLPushBack(&sl, 2);
SLPushBack(&sl, 3);
SLPushBack(&sl, 4);
SLPushBack(&sl, 5);
SLprint(&sl);
SeqListInsert(&sl, 3, 40);
SLprint(&sl);
int x;
scanf("%d", &x);
int pos = SLFind(&sl, x);
if (pos != -1)
{
SeqListInsert(&sl, pos, x * 10);
}
SLprint(&sl);
SLDestr(&sl);
}
int main()
{
/*SL sl;*/
/*SLInit(&sl);*/
/*int* p1 = (int*)malloc(12);
int* p2 = realloc(p1, 10);
printf("%p, %p\n", p1, p2);*/
//TestSeqList1();
//TestSeqList2();
TestSeqList3();
return 0;
}
四.力扣经典例题
3.1 移除元素
链接:力扣——移除元素
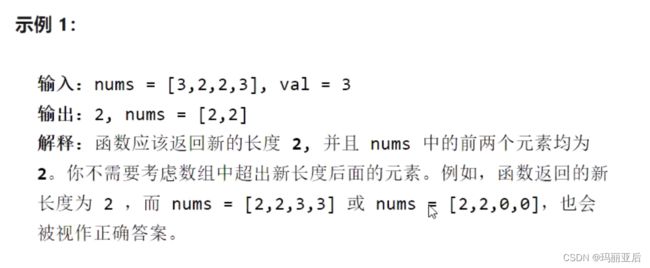
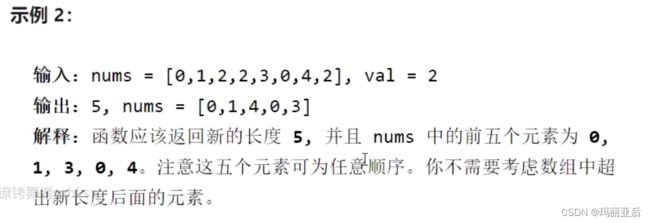
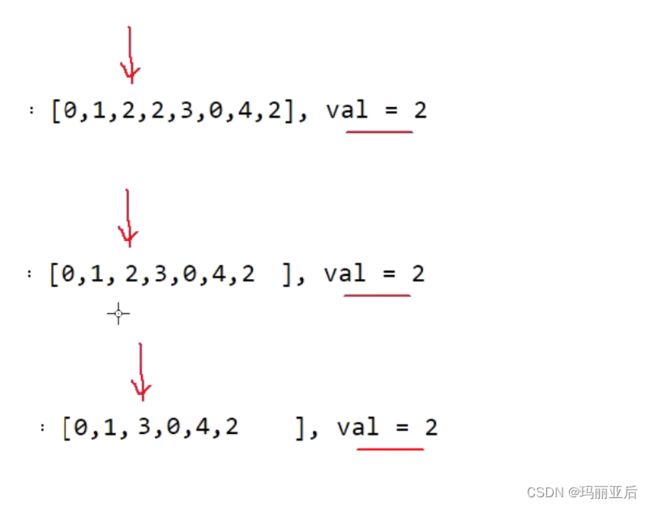
一般我们的思路就是2.2.10任意位置删除元素的思想:
挨个遍历,如果指向的下标元素与val相同,那么把后面的元素依次覆盖,依次反复做到删除
假设第一次排列移动了n次,那么第2次删除排列就是n-1次,等差数列求和一共执行了n^2次
新数组拷贝回去后因为是malloc出来的,所以再把它释放掉就行了。空间复杂度为O(N)
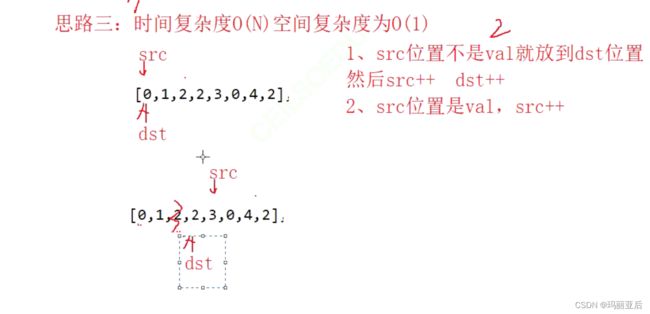
这个想法核心是两个指针:一开始先让它们指向同一位置,用src来识别该值是否是val,如果不是就把这个值传到dst那里去,在同等指向时好像没什么不同,因为dst确实与src指向同一方向,然后二者共同向下一位进发。
转折点就是当src指向了第一个2(val的值)时,dst虽然也指向了2,但是dst不动,src向下一位进发,又指向了第二个2,dst还是不动,src继续进发指向了3.
最精彩的地方,因为src指向的3不是val(2),所以src会把3传给dst,那么dst原本指向的第一个2就会被改变成3,以此类推我们会发现当src走完时,dst已经把2都给覆盖了。
另外我们也不用担心在str出去后原数组还有val要怎么办,因为问题是要求返回新数组的长度,所以dst的指向本身就可以代表新数组长度,所以不用管dst后面的元素。
int removeElement(int* nums, int numsSize, int val)
{
	int n = numsSize;
	int src = 0;
	int dst = 0;
	while (src < n)
	{
		if (nums[src] != val)
		{
			nums[dst] = nums[src];
			src++;
			dst++;

		}
		else if (nums[src] == val)
		{
			src++;
		}
	}
	return dst;
}
3.2 合并有序数组
链接:力扣——合并有序数组
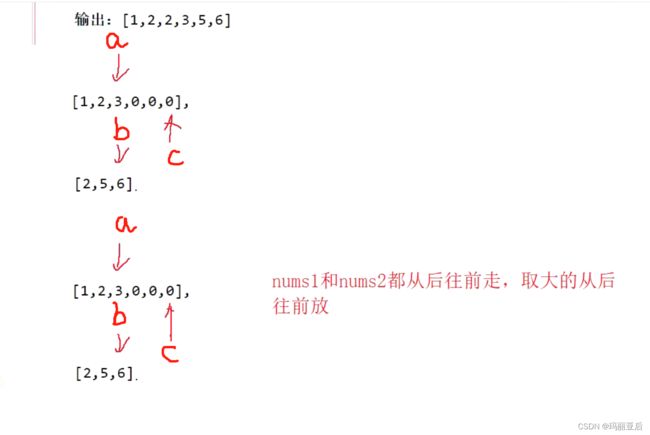
这一道题也可以通过使用双指针的方法来进行合并有序数组:
首先,我们让两个指针都分别指向数组末尾的有效元素,然后同时进行比较。一开始a指向3,b指向6,6比3大,那么把b指向的6放入c中,同时b指向前一位的5,c也指向前一位的0.
a因为3比6小,所以还是指向a。
接着我们开始第二轮比较,指向3的a与指向5的b中,b更大所以重复操作b--,c在接受b传送的5后也跟着向前一位,c--。
现在a仍指向3,而b已经指向2了,3比2大,所以换成a把3传给c,然后二者都向前一位--。
至此,a向前一位指向2,b也指向2,而c指向的数值是3,让其中一位传给c即可,把3变成2,剩下的就不用处理了。
不过有一个问题:
当有负数的情况出现时,我们重复上述操作会发现nums1a的指向已经移出下标了没办法再排序了,而-2和-5却还没有排进去。
所以就需要当nums1数组已经结束时再添加一个条件,让没结束的nums2继续拷贝。
void merge(int* nums1, int sums1Size, int m, int* nums2, int sum2Size, int n)
{
	int end1 = m - 1;//第一个数组有效元素尾部
	int end2 = n - 1;//第二个数组有效元素尾部
	int end = m + n - 1;//第一个数组尾部
	while (end1 >= 0 && end2 >= 0)
	{
		if (nums1[end1] > nums2[end2])
		{
			nums1[end] = nums1[end1];
			end1--;
			end--;
		}
		else
		{
			nums1[end] = nums2[end2];
			end2--;
			end--;
		}
	}
	while (end2 >= 0)
	{
		nums1[end] = nums2[end2];
		end2--;
		end--;
	}
}
五.结语
我们可以发现做上述两道题和分析顺序表的时候最重要的思想就是学会画图,只要画图逻辑够清晰,那么代码是很容易写出来滴~


