SpringCloudAlibaba 整合OpenFeign
目录
一、为服务消费者添加OpenFeign依赖
二、启动类开启Feign
三、编写服务提供者的调用接口
四、服务消费者调用该接口
五、注意事项
六、相关配置
1、全局配置
2、局部配置
3、契约配置
4、超时时间配置
七、自定义拦截器
一、为服务消费者添加OpenFeign依赖
            org.springframework.cloud
            spring-cloud-starter-openfeign
二、启动类开启Feign
添加@EnableFeignClients
package com.wxl;


import org.springframework.boot.SpringApplication;
import org.springframework.boot.autoconfigure.SpringBootApplication;
import org.springframework.cloud.openfeign.EnableFeignClients;

@SpringBootApplication
@EnableFeignClients
public class Service1Application {
    public static void main(String[] args) {
        SpringApplication.run(Service1Application.class, args);
    }
}
三、编写服务提供者的调用接口
服务消费者使用该接口调用服务提供者:
用@FeignClient注解该接口,name为注册中心里服务提供者的服务名,path为调用接口控制器的路径。
package com.wxl.feign;

import org.springframework.cloud.openfeign.FeignClient;
import org.springframework.web.bind.annotation.GetMapping;

@FeignClient(name = "WXL-DEV-SERVICE-2", path = "/hello")
public interface Service1HelloInterface {
    @GetMapping("/world")
    String helloWorld();
}
与服务提供者是一个映射关系,如下为服务提供者的控制器:
package com.wxl.controller;

import org.springframework.web.bind.annotation.GetMapping;
import org.springframework.web.bind.annotation.RequestMapping;
import org.springframework.web.bind.annotation.RestController;

@RestController
@RequestMapping("/hello")
public class HelloController {

    @GetMapping("/world")
    public String helloWorld() {
        return "Hello world";
    }
}
可以看到每个访问路径之间是相对h2应的。
四、服务消费者调用该接口
package com.wxl.controller;

import com.wxl.feign.Service1HelloInterface;
import org.springframework.beans.factory.annotation.Autowired;
import org.springframework.web.bind.annotation.GetMapping;
import org.springframework.web.bind.annotation.RequestMapping;
import org.springframework.web.bind.annotation.RestController;

@RestController
@RequestMapping("/hello")
public class Service1HelloController {
    @Autowired
    private Service1HelloInterface service1Interface;

    @GetMapping("/test")
    public String service2() {
        return service1Interface.helloWorld();
    }

}
通过注入来进行使用。
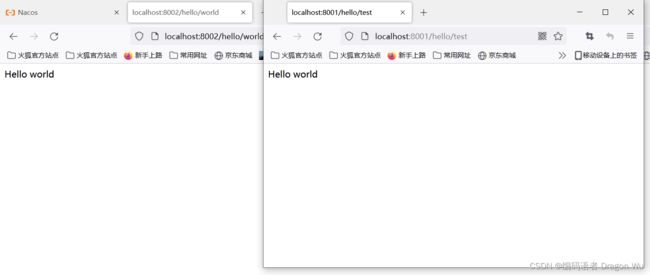
可以看到服务消费者调用了服务提供者的该服务。
五、注意事项
调用的返回值类型可以不一样,但一定得是可以互相转换的类型,不然会报错!
集群时需注意,openfeign集成的ribbon默认是轮询访问,若新添加了集群的实例,新添加的是无法同步刷新到服务发起者的名单里的,需要重启发起者或刷新发起者以起到负载均衡新添实例的效果。
六、相关配置
日志输出需要添加一下配置:
# springboot默认的日志级别是info,feign的debug日志级别就不会输入
logging:
  level:
    com.dragonwu.feign: debug  #配置该包下为debug输出
1、全局配置
使用@Configuration注解的配置类来实现,注意当不需要全局配置生效时一定要将@Configuration注解注释掉。
package com.dragonwu.config;
import feign.Logger;
import org.springframework.context.annotation.Bean;

/**
 * @author DragonWu
 * @date 2022-09-29 20:06
 **/
//还有一种配置可作用于局部: 如果只想对某个服务进行配置,就不要加@Configuration
@Configuration  //全局配置 当使用@Configuration 会将配置作用所有的服务提供方
public class FiegnConfig {

    @Bean
    public Logger.Level feignLoggerLevel(){
        return  Logger.Level.FULL;
    }

//    /**
//     * 修改契约配置,支持Feign原生的注解
//     * @return
//     */
//    @Bean
//    public Contract feignContract(){
//        return new Contract.Default();
//    }
}
2、局部配置
方法一:通过配置文件实现局部配置
#feign的日志局部配置
feign:
  client:
    config:
      test-service:
        loggerLevel: BASIC
        contract: feign.Contract.Default # 设置为默认的契约 (还原成原生注解)
方法二: 通过配置类实现局部配置,这时在之前那个全局配置类的基础上注释掉@Configuration注解,否则将为全局配置。
在@FeignClient注解里添加以下参数,配置为配置类的类名
3、契约配置
老版本的微服务项目可能会用到,添加该配置以后openFeign将通过Feign的原生注解进行,新项目优先考虑restful风格的注解,配置以后openFeignb必须采用原生注解进行。
方法一:添加Bean到配置类里
 /**
     * 修改契约配置,支持Feign原生的注解
     * @return
     */
    @Bean
    public Contract feignContract(){
        return new Contract.Default();
    }
方法二:通过配置文件实现
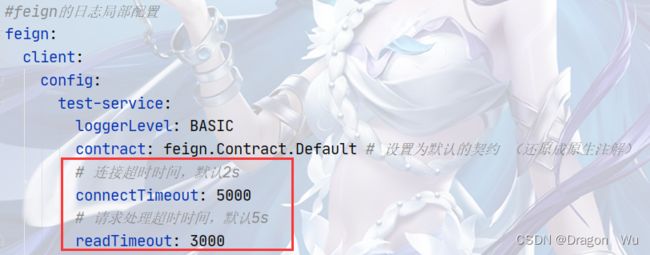
4、超时时间配置
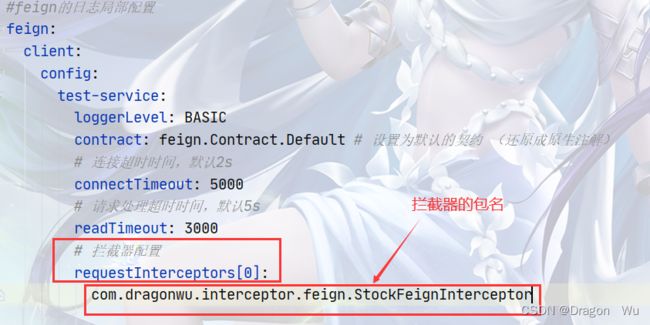
七、自定义拦截器
package com.dragonwu.interceptor.feign;

import feign.RequestInterceptor;
import feign.RequestTemplate;
import org.slf4j.Logger;
import org.slf4j.LoggerFactory;

/**
 * @author DragonWu
 * @date 2022-09-30 12:24
 **/
public class StockFeignInterceptor implements RequestInterceptor {

    Logger logger= LoggerFactory.getLogger(this.getClass());

    @Override
    public void apply(RequestTemplate requestTemplate) {
        //TODO
        requestTemplate.header("xxx","xxx");
        requestTemplate.query("id","111");
        requestTemplate.uri("/9");

        logger.info("feign拦截器!");
    }
}
配置文件:


