nodejs、web3js开发以太坊
nodejs、web3js开发以太坊
目录
-
-
- nodejs、web3js开发以太坊
- 环境
- 依赖
- 详解
-
- 安装并运行ganache
- 创建一个web服务器实例
- 创建web3erver.js文件
- 路由模块
- 路由函数处理模块
- 测试
- 完整代码
-
本案例主要利用nodejs和web3搭建一个供前端直接调用的接口,主要包含以下功能
获取地址余额 获取一个新的钱包 转账 获取gas 获取当前区块信息
环境
node18+ ganache
依赖
“cors”: “^2.8.5”,
“express”: “^4.18.2”,
“web3”: “^4.1.2”
详解
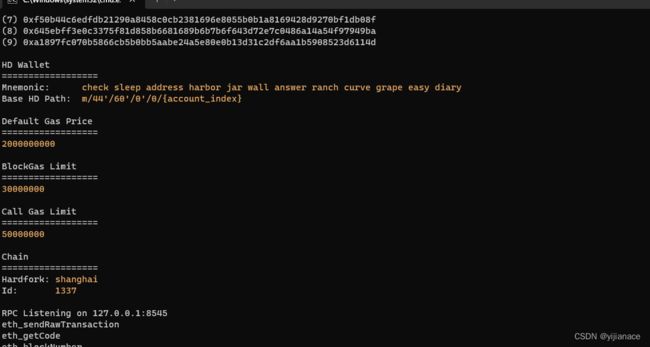
安装并运行ganache
npm install -g ganache
ganache
之后我们会看到以下的输出就证明我们已经安装成功了
我们可以通过私钥把钱包导入MetaMask
网络需要自己配置,主要参数就是ganache中提供这些
下图是我本地的网络配置,配置完成后就可以把私钥导入钱包了

创建一个web服务器实例
其中包含core处理跨域请求,解析json表单数据等
自定义JSON序列化方法,将BigInt转换为字符串这个是为了将后面获取区块数据的返回值转换为字符串配置的
const express = require("express")
const cors = require("cors")


const app = express()

app.use(express.json())		//处理json数据
app.use(cors())		//处理跨域请求

// 自定义JSON序列化方法,将BigInt转换为字符串
app.set('json replacer', (key, value) => {
    if (typeof value === 'bigint') {
        return value.toString();
    }
    return value;
});

const router = require("./router/index.js")
app.use('/api',router)

app.listen(3000,()=>{
	console.log("server is running ar http://127.0.0.1:3000")
})
创建web3erver.js文件
这个文件主要用来提供与web3交互的各种方法
导入web3d的包用require方法导入需要加上大括号
用import 方法导入需要再pachage.json中添加type:module
web3js文档地址
http://127.0.0.1:8545这个就是我们本地ganache提供的PRC服务,用于连接本地搭建的以太坊网络
const {Web3, errors} = require("web3")

const web3 = new Web3("http://127.0.0.1:8545")

//获取余额
const getBalance = async (address)=>{
    const res = await web3.eth.getBalance(address)
    const balance = parseFloat(web3.utils.fromWei(res,'ether')).toFixed(3)
    return balance
}

//获取一个新钱包
const getCount = async ()=>{
    const res = await web3.eth.accounts.create()
    return res
}

//转账
const sendEth = async(senderAddress,receiverAddress,privateKey,mount)=>{

const amountToSend = web3.utils.toWei(mount, 'ether'); // 替换为你要发送的以太数量
const gasPrice = web3.utils.toWei('500000', 'gwei'); // 替换为Gas价格
const gasLimit = 21000; // 替换为Gas限制
const chainId = 1337; // 替换为你的本地测试链的chainId

// 构建交易对象
const transactionObject = {
  from: senderAddress,
  to: receiverAddress,
  value: amountToSend,
  gasPrice: gasPrice,
  gas: gasLimit,
  nonce: await web3.eth.getTransactionCount(senderAddress),
  chainId: chainId,
};

// 签名交易
const signedTransaction = await web3.eth.accounts.signTransaction(transactionObject, privateKey);

// 发送交易
const result = await web3.eth.sendSignedTransaction(signedTransaction.rawTransaction)
  .on('transactionHash', (hash) => {

  })
  .on('receipt', (receipt) => {
  })
  .on('error', (error) => {
    console.error('交易错误:', error);
  });

return result.transactionHash
}

//获取gas
const getGasPrice = async()=>{
  const res = await web3.eth.getGasPrice()
  const price = web3.utils.fromWei(res,'ether')
  return price
}

//获取当前区块信息
const getBlock = async ()=>{
  const res = await web3.eth.getBlock()
  return res
}

module.exports = {
    getBalance,
    getCount,
    sendEth,
    getGasPrice,
    getBlock
}
路由模块
这个模块和我们平时写接口差不多没有什么区别
const express = require("express")
const routerHandler = require("../routerHandler/index.js")
const router = express.Router()

router.get('/balance',routerHandler.getBalance)

router.get('/getcount',routerHandler.getAccount)

router.post('/send',routerHandler.sendEth)

router.get('/gas',routerHandler.getGas)

router.get('/getblock',routerHandler.getBlock)


module.exports = router
路由函数处理模块
这个模块主要需要注意我们通过web3server里面各种方法得到的结果是一个promise对象,需要用async await 进一步解构才能得到结果,所以每个函数前面都加上了async
const {getBalance,getCount,sendEth,getGasPrice,getBlock} = require("../web3Server/server.js")

exports.getBalance = async (req,res)=>{
    const address = req.body.address
    const balance = await getBalance(address)
    return res.json({
        code:200,
        mag:"请求成功",
        data:balance
    })
}

exports.getAccount = async(req,res)=>{
    const data = await getCount()
    console.log(data)
    return res.json({
        code:200,
        msg:"请求成功",
        data:data
    })
}

exports.sendEth = async (req,res)=>{
    const senderAddress = req.body.senderAddress
    const receiverAddress = req.body.receiverAddress
    const privateKey = req.body.privateKey
    const count = req.body.count
    const result = await sendEth(senderAddress,receiverAddress,privateKey,count)
   if(result ==''){
    return res.json({
        code:400,
        msg:"请求失败"
    })
   }
   return res.json({
    code:200,
    msg:"请求成功",
    data:{
        "hash":result
    }
   })
}

exports.getGas = async (req,res)=>{
    const price = await getGasPrice()
    if(!price){
        return res.json({
            code:"400",
            msg:"请求失败"
        })
    }
    return res.json({
        code:"200",
        msg:"请求成功",
        data:`${price}ETH`

    })
}

//需要再router前面定义JSON序列化方法,将BigInt转换为字符串
exports.getBlock = async (req,res)=>{
    const result =await getBlock()
    if(!result){
        return res.json({
            code:400,
            msg:"请求失败"
        })
    }
    return res.json({
        code:200,
        msg:"请求成功",
        data:result
    })
}
测试
直接发起请求即可,除了转账需要参数以外,其他接口都不需要参数,直接发起请求就可以拿到结果

完整代码
https://github.com/Traderxue/node-web3