centos7安装部署gitlab详细教程-部署自己的git远程仓库
一、Gitlab介绍
1.1、gitlab信息
GitLab 是一个用于仓库管理系统的开源项目,使用Git作为代码管理工具,并在此基础上搭建起来的Web服务。
GitLab是由GitLabInc.开发,使用MIT许可证的基于网络的Git仓库管理工具,且具有wiki和issue跟踪功能。
GitLab由乌克兰程序员DmitriyZaporozhets和ValerySizov开发,它使用Ruby语言写成。后来,一些部分用Go语言重写。
1.2、gitlab与github
GitHub:
是一个面向开源及私有软件项目的托管平台,因为只支持git作为唯一的版本库格式进行托管,故名GitHub
GitLab:
GitLab拥有与GitHub类似的功能,能够浏览源代码,管理缺陷和注释,可以管理团队对仓库的访问,
GitHub如果使用私有仓库,是需要付费的,GitLab可以在上面搭建私人的免费仓库
二、Gitlab部署安装
2.1、安装环境
centos版本:centos-release-7-6.1810.2.el7.centos.x86_64
gitlab版本:gitlab-ce-11.10.0-ce.0.el7.x86_64.rpm
2.2、安装步骤
1、安装依赖
yum install curl openssh-server openssh-clients postfix policycoreutils-python
2、启动ssh
[root@VM-0-8-centos qbs]# systemctl enable sshd
[root@VM-0-8-centos qbs]# systemctl start sshd
3、添加http服务到firewalld,pemmanent表示永久生效,若不加–permanent系统下次启动后就会失效
[root@VM-0-8-centos qbs]# systemctl start firewalld

[root@VM-0-8-centos qbs]# firewall-cmd --permanent --add-service=http
success
[root@VM-0-8-centos qbs]# systemctl reload firewalld
4、启动postfix
[root@VM-0-8-centos qbs]# systemctl enable postfix
[root@VM-0-8-centos qbs]# systemctl start postfix
5、下载安装gitlab
1、下载
wget https://mirrors.tuna.tsinghua.edu.cn/gitlab-ce/yum/el7/gitlab-ce-11.10.0-ce.0.el7.x86_64.rpm --no-check-certificate

2、安装
rpm -i gitlab-ce-11.10.0-ce.0.el7.x86_64.rpm

3、修改端口号:
vim /etc/gitlab/gitlab.rb
external_url 'http://192.168.109.128:9001'

4、配置GitLab(配置完自动启动,默认账号root)
gitlab-ctl reconfigure

5、开启重启关闭
gitlab-ctl start
gitlab-ctl stop
gitlab-ctl restart
三、Gitlab邮箱配置
在安装gitlab后, 未添加邮件提供功能(比如,添加一个用户,就给他发邮件提醒),需要配置发邮件的 smtp 服务器配置。
1、修改配置
此处使用个人的qq邮箱配置 smtp。 也就是发邮件通知时,发件人邮箱地址是这个 qq邮箱。
配置如下:
vim /etc/gitlab/gitlab.rb
找到 GitLab email server settings 这部分添加:
gitlab_rails['smtp_enable'] = true
gitlab_rails['smtp_address'] = "smtp.qq.com"
gitlab_rails['smtp_port'] = 465
gitlab_rails['smtp_user_name'] = "你自己涌来发邮件的邮箱账号"
# 邮箱开启 POP3/SMTP服务 IMAP/SMTP服务后的授权码
gitlab_rails['smtp_password'] = "*******"
gitlab_rails['smtp_domain'] = "smtp.qq.com"
gitlab_rails['smtp_authentication'] = "login"
gitlab_rails['smtp_enable_starttls_auto'] = true
gitlab_rails['smtp_tls'] = true
gitlab_rails['gitlab_email_from'] = "你自己涌来发邮件的邮箱账号"
2、重启
执行以下命令
gitlab-ctl reconfigure
gitlab-ctl restart
3、测试
测试邮件发信功能
[root@VM-0-8-centos qbs]# gitlab-ctl restart
ok: run: alertmanager: (pid 598) 1s
ok: run: gitaly: (pid 608) 0s
ok: run: gitlab-monitor: (pid 633) 1s
ok: run: gitlab-workhorse: (pid 647) 0s
ok: run: logrotate: (pid 662) 0s
ok: run: nginx: (pid 672) 1s
ok: run: node-exporter: (pid 688) 0s
ok: run: postgres-exporter: (pid 695) 1s
ok: run: postgresql: (pid 781) 0s
ok: run: prometheus: (pid 790) 1s
ok: run: redis: (pid 805) 0s
ok: run: redis-exporter: (pid 948) 0s
ok: run: sidekiq: (pid 960) 0s
ok: run: unicorn: (pid 978) 0s
[root@VM-0-8-centos qbs]# gitlab-rails console
-------------------------------------------------------------------------------------
 GitLab:       11.10.0 (8a802d1c6b7)
 GitLab Shell: 9.0.0
 PostgreSQL:   9.6.11
-------------------------------------------------------------------------------------
Loading production environment (Rails 5.0.7.2)
irb(main):001:0>
进入控制台后,输入
Notify.test_email('收件人邮箱', '邮件标题', '邮件正文').deliver_now
四、界面访问
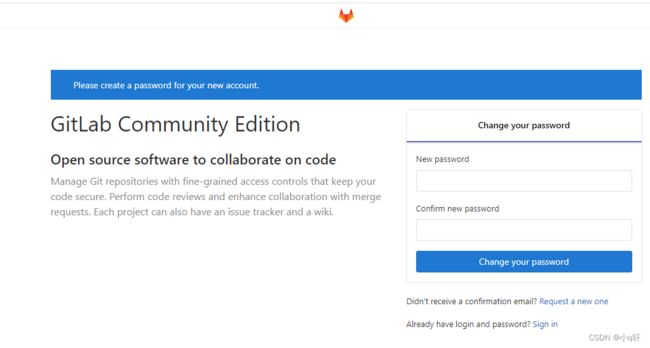
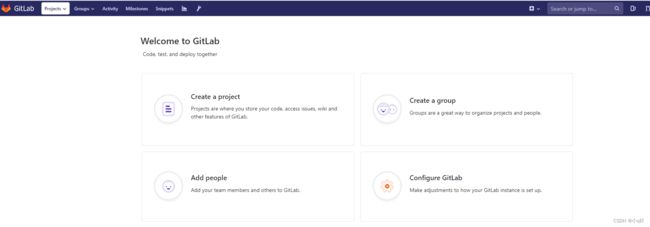
浏览器首次访问,提示修改密码,即可修改root用户密码
http://ip地址:9001
初次访问,需要修改root账户密码


五、配置ssh
1、生成ssh
ssh-keygen -t rsa -C '[email protected]'
然后一路回车(-C 参数是邮箱地址)
2、复制ssh
打开
~/.ssh/id_rsa.pub文件
(~表示用户目录,windows就是C:\Users\Administrator),
复制其中的内容
3、浏览器界面设置
打开gitlab,
找到Profile Settings–>SSH Keys—>Add SSH Key,
并把上一步中复制的内容粘贴到Key所对应的文本框,
在Title对应的文本框中给这个sshkey设置一个名字,
点击Add key按钮
六、gitlab设置中文
右上角 -> Settings -> Preferences -> Localization